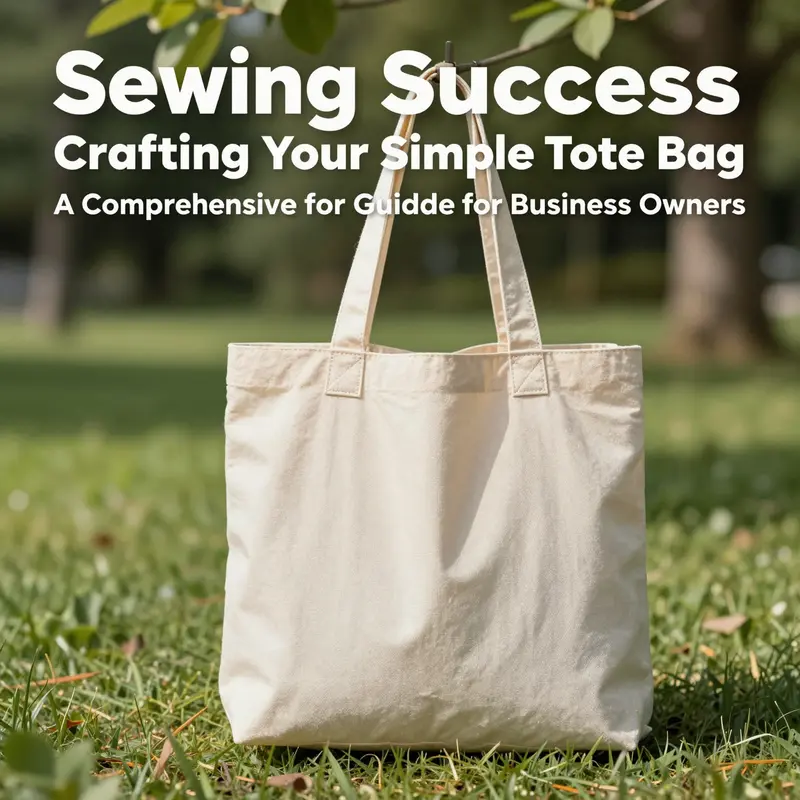
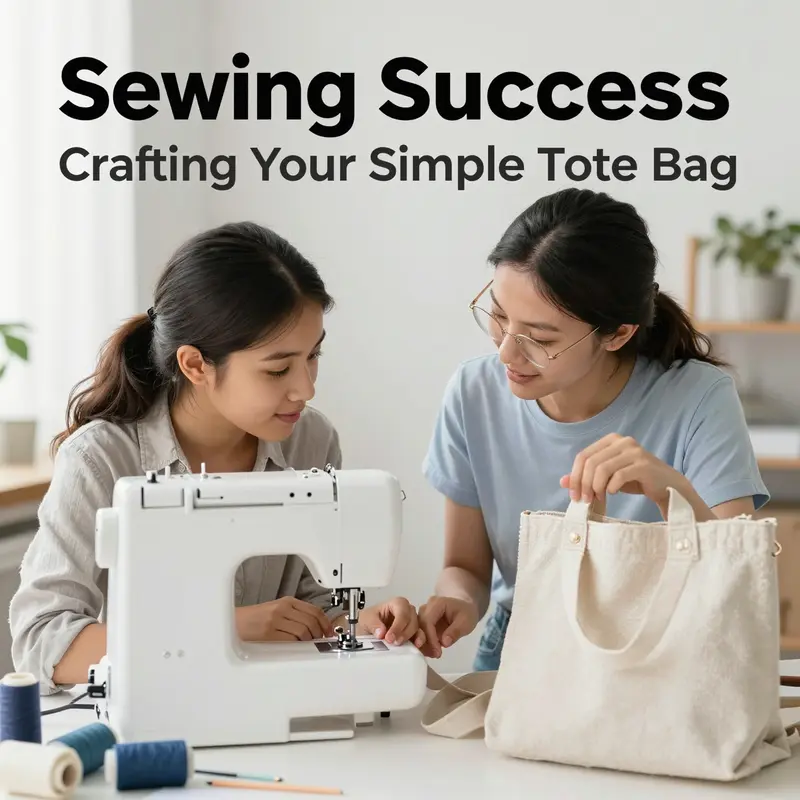
Creating a simple tote bag is not just a rewarding craft; it’s also a functional business opportunity. For business owners, particularly those in retail and artisanal sectors, offering personalized tote bags can effectively enhance brand visibility and customer loyalty. This guide outlines everything you need to know to sew your tote bag, from selecting high-quality materials to incorporating optional features like zippers and handles. Each chapter is designed to build your understanding methodically, ensuring you’re well-equipped to produce tote bags that appeal to your clientele. Let’s embark on this creative journey and turn your vision into reality.
From Fiber to Function: Mastering the Materials for a Simple Tote Bag
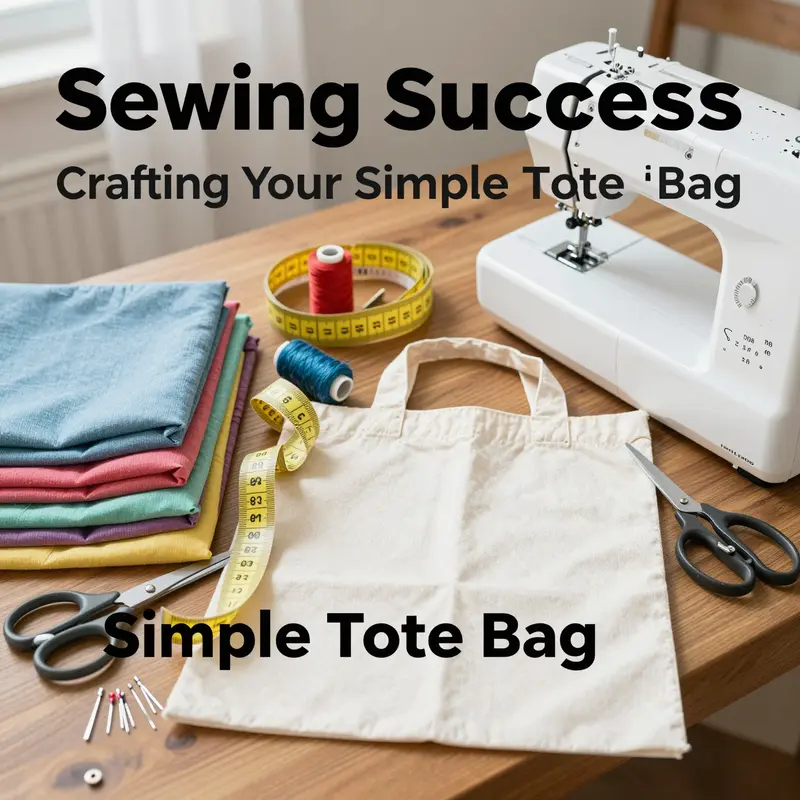
Choosing the right materials is the quiet engine behind every simple tote bag. It’s not merely a list to check off but a design decision that shapes how the bag will look, feel, and perform after every trip to the market or library. The research material you’re working from emphasizes that a sturdy tote starts with fabric chosen for durability and character, complemented by thread, tools, and thoughtful construction choices. When you begin with the right components, you set yourself up for clean lines, reliable seams, and a bag that can carry groceries, books, or essentials without a whisper of strain. The first step is to imagine the bag in use and then work backward to the materials that will deliver that outcome. This mindset—planning for function while allowing room for personal style—transforms a straightforward sewing project into a small, satisfying achievement you can repeat and customize for every season or purpose.
The fabric is the backbone of the tote. The recommended options—100% cotton canvas or other heavy-duty cotton fabrics—are chosen for their durability and forgiving nature. Canvas has a reputation for withstanding daily wear, especially where a bag flexes, grips, and jostles with content. It carries weight well, holds its shape, and isn’t prone to baggy sagging after a few uses. When you pick a fabric, consider how it will be washed and how well it will resist abrasion on the bottom corners and side seams. A heavier fabric will give you fewer worries about stray threads or thinning areas when the tote is used to haul groceries, art supplies, or a stack of textbooks. If you’re planning to personalize your tote with paint, markers, or fabric pens, a light-colored fabric offers a cleaner canvas for those decorative touches. Light tones can highlight your hand-painted designs, stenciled patterns, or cute lettering, turning a practical object into a personalized statement piece.
Fabric weight matters, too. Look for a fabric that feels substantial in your hands—one that won’t shift or stretch excessively as you sew. While the precise ounce rating isn’t a recipe you must memorize for a simple tote, a heavier weight tends to yield a bag that stands up when empty and resists collapsing when loaded. When you’re shopping, feel the fabric’s stiffness, test how it drapes, and consider whether you’ll want a lining or facing for extra structure. If you’re unsure about the exact characteristics, start with canvas or heavy-duty cotton in a mid-to-light tone. You can always add a touch of internal structure with interfacing or a simple lining later in your project—an option the materials guide explicitly mentions as optional but valuable for form and longevity.
Thread selection should echo the fabric’s strength. The guidance you’ve got suggests a strong, all-purpose thread—either polyester or cotton—that matches or coordinates with your fabric color. The right thread can make a noticeable difference in how seams behave over time. On a sturdy canvas, a robust thread helps lock in seams that won’t easily fray. Choosing a thread that closely matches your fabric reduces the chance of visible stitch lines, giving your tote a neat, professional finish. It’s worth noting that when you’re working with thicker fabrics, you may opt for a slightly heavier needle or a lengthened stitch to avoid fabric puckering. The seam allowance you choose—commonly a half inch for tote bags—will influence the strength of your side seams, the bottom seam, and the handles. A consistent seam allowance matters as much as the stitch itself, because inconsistent seams can loosen with use.
Tools create the bridge between plan and product. Scissors or a rotary cutter are essential for clean edges, while pins or clips hold pieces in alignment before you sew. A standard home sewing machine is ideal for most beginners and intermediate sewists, though you can absolutely complete the project by hand for a quieter, more deliberate process. If you sew by hand, you’ll lean on a strong needle and sturdy thread, moving slower but still achieving durable results. While a ruler or measuring tape keeps your dimensions honest, an iron and ironing board deliver professional-looking results by pressing seams flat and reducing bulk where panels meet. Pressing is not a decorative flourish; it’s a practical step that helps your bag’s edges align and your stitches lie flat, especially along the top edge and around any gussets or corners.
The design options that accompany the materials are where personal taste begins to influence the project. Handles are the most visible feature, and you have two paths here. You can use pre-made straps, which provide a polished look with minimal effort, or you can cut fabric strips—about 2 inches wide—and sew your own handles for a fully custom feel. The fabric strip method gives you the opportunity to coordinate color and texture with the bag body, even letting you add a subtle internal seam or decorative topstitching along the handles. The length of the straps is a quick design choice that can alter how the tote sits on the body. While the traditional shoulder-length strap works well for teetering grocery runs, shorter handles can transform the tote into a convenient hand-carried option for library trips. If you’re aiming to carry a laptop or other heavier items, you might also consider optional features that help protect contents, such as a simple lining or lightweight padding at the bottom or around the pocket area.
Interfacing is another optional component that deserves careful thought. Interfacing adds stiffness to the bag’s body or to the handles, helping the tote hold its shape even when the contents shift. It’s a small investment in structure that pays off when you want a crisper silhouette or a more integrated, museum-ready finish for a tote you plan to use daily. The decision to interface should balance how much structure you want with how flexible you prefer the tote to feel. A bag that’s too stiff can be less comfortable to carry, while one that’s too floppy might not support heavier items as cleanly. The trick is to select a light-to-medium interfacing weight that enhances structure without making the fabric resist sewing or pressing.
The potential for personalization is one reason many crafters begin sewing tote bags in the first place. Light fabrics invite painting and doodling, while darker fabrics can handle bold embroidery or stitched patches. If you’re exploring a design that blends practicality with personality, you’ll want to choose materials that accept your chosen decoration method. The natural texture of cotton canvas is an inviting surface for hand-painting or stamping, and it takes color well with fabric-safe paints. Whatever surface design you choose, you’ll appreciate the extra care you took with fabric choice because it becomes a direct reflection of your style and your craft process.
Beyond the core materials, a few practical habits help ensure success. Pre-washing fabric can prevent future shrinkage and reduce color bleeding, especially with dyed canvases. If you pre-wash, you may want to plan for a little extra length in your cutting to accommodate shrinkage and to maintain the tote’s overall proportions after washing. A simple top-stitch along the top edge not only looks neat but also reinforces that edge against unraveling. Tests on scrap fabric can answer questions about tension, stitch length, and how the fabric behaves when turned inside out. It’s a small ritual with big returns: a test piece tells you whether the thread choice, needle size, and tension settings are harmonious with your fabric.
As you consider the construction, envision the tote as a daily companion rather than a one-off project. The materials you select—fabrics with substance, thread with confidence, tools that perform reliably, and optional features that add both function and polish—are the quiet architects of a bag that will stand up to the test of use. The tension between durability and ease of sewing matters. You want a tote that feels sturdy without being hard to sew, that can be personalized without requiring a library of specialized equipment, and that remains approachable for the next project you plan. This balance is achievable when you respect the role of each material and how it contributes to the final form of the bag.
In this spirit of thoughtful preparation, you might find it useful to consider a specific example that mirrors common daily needs. Picture a tote cut from canvas in a light neutral, a simple two-piece design with a single bottom seam and a clean, reinforced top edge. You use a strong, matching thread and a half-inch seam allowance. You might add two sturdy handles, each about 20 to 22 inches long, either from the same fabric or from matching pre-made straps. A light interfacing on the bag body or at the handle attachment points could add the structure that helps the bag stand upright when empty. Layering these choices with a practical lining or a fabric pocket inside can further extend the bag’s usefulness, converting it into a workhorse for daily errands or a reliable carry for class notes. The result is a tote that feels intentionally made and tailored to your tastes while still being straightforward enough for a confident beginner’s project.
As you weave through the process, you’ll also encounter moments where practical decisions intersect with inspiration. For instance, if you’re contemplating a tote that accommodates more than just everyday items, you might explore a design with a small internal sleeve or laptop pocket. That addition would guide a few changes in your material selection—perhaps a slightly heavier fabric at the bottom to withstand abrasion or a sturdier interfacing in the pocket area. The beauty of this kind of problem-solving is that the materials become a language you speak with your sewing machine. Each choice—canvas weight, thread type, the presence or absence of interfacing, the handle style—speaks to how you want the bag to behave in real life, not just how it looks on the page.
If you’re curious about how a more feature-rich tote can connect to broader bag-making ideas, there’s a practical resource you can consult. For a tote that includes a computer sleeve and other organizational features, you can explore more about this concept at tote-bag-with-computer-sleeve. It’s a helpful reference that can spark ideas for pocket placement, extra stability around zipper openings, or the way handles attach to a bag with interior dividers. This internal link serves as a bridge to broader bag designs while keeping the focus on the core materials and methods you’re practicing in this chapter. It’s important to keep your project grounded in the basics—your tote’s strength comes from the materials you choose and how you care for them, not from extra features you haven’t yet practiced stitching into place.
The final step in this materials-centered approach is to acknowledge the value of an external guide that complements hands-on practice. For deeper explanations of patterns, cutting layouts, and finishing techniques, you can turn to established instructional resources. The Spruce Crafts’ Simple Tote Bag Pattern offers a detailed, pattern-based look at how a tote can be assembled, including tips on seam finishes and practical trimming. This external reference, while not required for your first bag, can expand your toolbox as you gain confidence and seek new challenges. To explore those broader patterns and ideas, see the external resource here: The Spruce Crafts – Simple Tote Bag Pattern.
In weaving together fabric, thread, tools, and optional structure, you create more than a tote—you create a small object of daily reliability. The materials you choose are a quiet promise to yourself: that the bag you carry will resist wear, that it will age gracefully, and that it will carry your everyday stories with a calm, confident presence. The chapter you’ve been constructing around materials is, at heart, a lesson in respect for the craft. It’s about honoring the fabric beneath your hands, listening to the way the thread speaks to the needle, and paying attention to the little details that elevate a simple project into something you’ll reach for again and again. As you move from the idea of a tote to the actual sewing, you’ll notice how each decision ripples through the process—how the fabric’s strength informs your seam strategy, how the choice of handles affects how you carry the bag, and how an optional lining or interfacing can turn a casual carryall into a dependable everyday tool. And the more you practice, the more those ripples become a confident current, guiding your hands and your eye toward a finish you can be proud of. A well-chosen set of materials is not merely the starting point; it is the foundation of a durable, personal, and lasting tote that travels with you week after week, season after season.
Stitch by Stitch: Crafting a Simple, Durable Tote Bag for Everyday Use
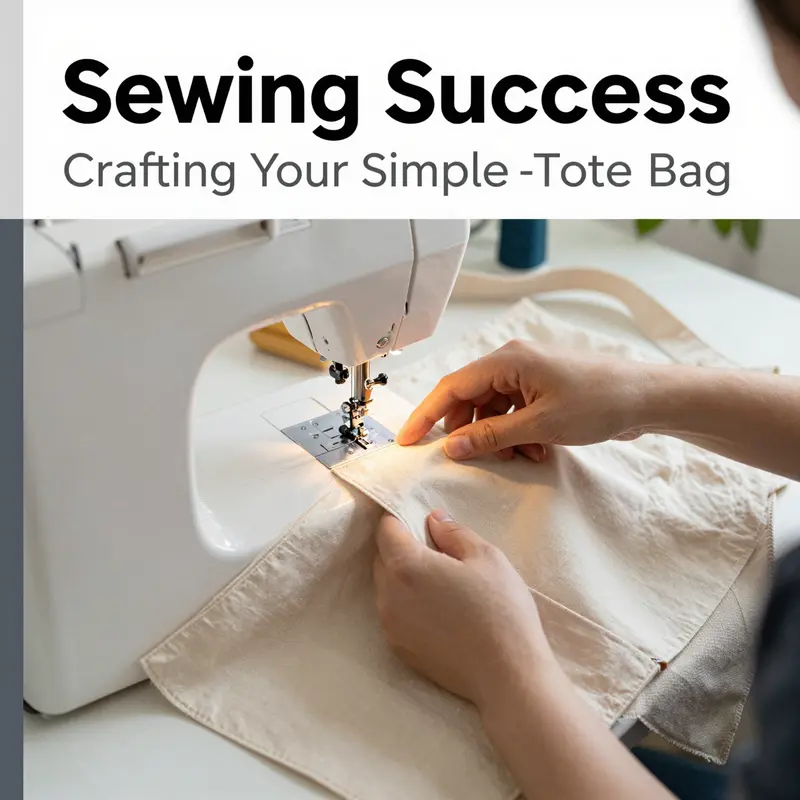
A tote bag is more than a convenient container; it is a small, personal project that teaches balance between fabric choice, structure, and finish. When you sew your own tote, you gain not only a sturdy everyday carrier but also a sense of how every seam, every press, and every choice of thread can influence how long the bag lasts and how it feels to carry it. The goal here is a simple, reliable tote that wears well, carries a lot, and looks neat enough to use from the morning commute to a weekend market. It is a project that rewards careful preparation, thoughtful material selection, and a steady, patient approach to sewing. The process rewards both beginners and more experienced sewers because it emphasizes fundamentals: straight seams, even tension, and clean finishing rather than clever tricks. By the end, you will have learned to translate a basic pattern into a bag that stands up to daily use, with the option to personalize and upgrade as you gain confidence.
Choosing the fabric is the first decision that will set the tone for sturdiness and longevity. A tote bag that will be used every day benefits from a fabric with some body. Cotton canvas and denim are popular choices because they resist wear and stay stable under stitching. A sturdy plain cotton can also work well if you reinforce it with a light interfacing. The amount of structure you want will guide whether you interface the fabric or leave it soft for a slouchier look. In the guide that follows, a larger, double-sided tote is described, using two pieces of fabric that measure about 140 centimeters in length and 38 centimeters in width. This size produces a roomy bag with a clean, modern silhouette. If you prefer a lighter tote, you can trim the dimensions accordingly. The important point is to balance fabric weight with the strength you need for frequent use. For those who want to explore variations later, a quick glance through a range of canvas and sturdy tote styles can spark ideas for embellishments, pockets, and closures. If you are curious about different takes on a tote, consider exploring a collection that highlights canvas options for everyday use, such as canvas tote ideas that show how texture and color interact in practical designs. womens canvas tote bags.
As you assemble materials, lay everything out with care. You will need two main fabric pieces, two shoulder straps that are 10 centimeters wide and about 100 centimeters long, a sewing machine or the patience to hand-sew, scissors, pins or clips, and an iron with a board for crisp, clean finishes. A small amount of iron-on interfacing is optional but highly recommended if you start with a fabric that feels too soft to hold a neat shape. Interfacing adds structure to the panels, making the tote more resilient against everyday wear. If you choose to use interfacing, cut it to the same size as the fabric pieces and fuse it to the wrong side as directed by the interfacing instructions. The result is a bag that stands up on its own when set down, with edges that stay crisp even after a lengthy day of use. The steps that follow describe a method that creates a double-sided pocketed main body, which adds a bit of clever weight and depth to the tote while keeping the construction straightforward for a beginner. The design emphasizes a clean, uncomplicated seam line and a bottom that forms a box, giving the bag three-dimensional shape without adding complexity.
The process begins with a small reinforcement step that sets the tone for durability. If the fabric is soft, press the interfacing onto the wrong side of one or both fabric pieces. This step makes the tote stronger and helps the seams stay true over time. When the fabric is ready, fold the pieces with the right sides facing each other, aligning the edges. The intention here is not to create a basic fold but to prepare for a seam that will later become a pocket edge. In this specific approach, the two fabric pieces are positioned so their top edges align, but the bottom edges have a deliberate 8 centimeter difference. This offset is not accidental; it creates the hard line needed to form a large pocket when the panel pieces are opened again after stitching. A line drawn 25 centimeters up from the bottom along the longer edge marks where a straight seam will be sewn. This seam becomes the base of the pocket that runs across the bag once the pieces are unfolded. The act of sewing along that line and then unfolding reveals a pocket formed by the seam itself, a neat trick that increases storage without adding extra layers or complicated partitions. The technique is simple, but it has a meaningful effect on how the bag carries weight and how the interior space is organized.
Next comes the creation of the shoulder straps, an essential detail that influences comfort and wearability. Each strap is folded in half lengthwise with the right sides together, then pressed to create a clean, sharp crease. A straight stitch along the folded edge seals the strap and, when turned right side out, yields a strap that is neatly finished on both sides. The straps end up being 10 centimeters wide and 100 centimeters long, a comfortable proportion for most body types when worn over the shoulder. Pressing again after turning out helps set the shape and keeps the edges straight. The stability of the straps is important because they anchor the weight of the bag when it is filled with groceries, a laptop, or a wallet and a few daily essentials. Thoughtful construction here reduces stretch and wear at the strap join, which are common points of stress on everyday totes.
With the straps ready, you return to the main body pieces, now prepared with a pocket foundation. Place the two fabric pieces together with the right sides facing, and align the edges. Position the two finished straps on the inside of the fabric, placing them about 7 centimeters from each side edge. This distance keeps the straps centered relative to the width of the bag and ensures that they lie away from the edges where the fabric will be joined at the sides and bottom. Pinning them securely is essential, because the next stitching step will sew the sides with the straps inside the seam allowance. The result is a bag whose straps are securely attached near the interior edge, distributing the load more evenly and reducing the risk of tearing at the strap attachments.
The main body is then stitched along the two side edges and the bottom edge, following a standard seam allowance of about 1 centimeter. Backstitching at the beginning and end of each seam provides extra strength at the stress points where the bag will bear weight. After the seams are sewn, trim the seam allowances down to roughly 0.3 centimeter. Reducing bulk at the corners makes the finished bag look neat and helps it lie flat when turned right side out. This trimming step might seem small, but it reduces bulk in the fabric and prevents awkward little folds at the edges that can occur when the bag is filled. The process is practical and keeps the project moving forward without getting stuck on small, stubborn bulk at the corners.
Now the bag starts to take its three-dimensional shape. Turn the entire bag right side out through the opening at the top, and locate the center point where the bottom corner and the side seam meet. Pull the corner out so that the bottom center line and the side seam line align neatly. From the top of the bag, measure down approximately 3.5 centimeters and draw a line perpendicular to the side seam. This A-line acts as a guide for stitching a triangular patch at the bottom corner. Sew along this new line to form a boxed base, which gives the bag a sturdy, flat bottom. This boxed base is the hallmark of a practical tote: it allows the bag to stand on its own and keeps contents from tipping over when placed on a surface. Repeat the same process for the opposite corner. The boxed bottom is what transforms a flat rectangle of fabric into a useful carrier with real carryability.
To finish with a more polished look, consider topstitching along the top edge and along the lines you used to create the box base. A contrasting thread can highlight the geometry of the bag, reinforcing the seam lines and providing a subtle design cue. Topstitching as a reinforcement not only looks professional but also adds durability to the edge where the fabric meets the strap area. If you wish to customize, this is a good moment to add a personal touch—perhaps a small patch, a stitched monogram, or a decorative stitch along the top edge. While embellishments are optional, they can personalize the tote and make it feel more like your own.
The final touches are practical as well as aesthetic. If you want to maximize durability, reinforce the strap attachment points by sewing a small square of fabric over the area where the strap meets the bag. This is a simple, effective reinforcement that helps distribute stress across a broader area, reducing the likelihood of tearing at the stitch line. The combination of a reinforced base, sturdy seams, and well-positioned straps makes the tote robust enough for daily use, whether you are carrying books, groceries, or a lightweight laptop. This approach yields a double-sided tote that is functional, not fussy, and adaptable to various fabrics and finishes.
The beauty of this project lies in its balance between careful planning and straightforward execution. The offset pocket technique used in the main body creates a sense of structure without adding extra pieces or complexity. The boxed bottom provides stability, while the straps, positioned away from the edges, deliver comfortable carry that holds a reasonable load. This is not a glossy, showpiece bag meant for special occasions; it is a reliable everyday carrier, designed to withstand daily routines and the occasional heavier load. It is also a project that demonstrates how thoughtful choices in fabric weight, interfacing, and seam allowances contribute to the bag’s longevity. When you sew with intention, you set a foundation for quality that extends beyond the current project. The tote becomes a practical tool and a small achievement you can carry with you as you go about your day.
If you are curious about variations or want to explore related ideas, you can find additional inspiration in online collections that feature canvas options and everyday tote designs. The knitting of more complex features, such as a zipper closure or interior pockets, can be added later as your confidence grows. The core method described here remains sound: set a sturdy base, reinforce the points of highest stress, and finish with clean edges that stay neat through repeated use. With a little care, the tote will maintain its shape, function, and appearance through many seasons of daily life.
In the broader landscape of sewing projects, a simple tote offers a perfect gateway into the craft. It teaches you to read fabric weight and behavior, to plan for durability, and to execute precise seam work that remains durable over time. The project is accessible enough to be tackled in a single session, yet flexible enough to accommodate changes and personal touches. Whether you are new to sewing or returning after a hiatus, the tote presents a rewarding challenge that reinforces technique while yielding a tangible, useful result. The rhythm of cutting, stitching, pressing, and finishing becomes familiar, and the satisfaction of drawing a completed bag from a pile of fabric is a small but meaningful moment that makes the entire process worthwhile. The tote stands as a practical reminder that sewing is not only about creating something that looks good, but about producing something that endures, with each seam carrying the careful attention you bring to the work.
In summary, the simple tote bag described here is designed to be durable, practical, and adaptable. It uses a straightforward construction that emphasizes structure and finish, rather than complexity. The two main fabric panels come together with a reinforced bottom and comfortable straps, forming a versatile carrying solution for everyday needs. The approach is well suited to beginners who wish to learn core sewing skills in a project that yields a real, usable item. At the same time, it offers pathways for more experienced sewists to experiment with fabric choices, closures, and interior organization. By embracing a steady workflow, you can develop a reliable pattern that you can return to and customize again and again, building confidence with every stitch. As you progress, you may find yourself revisiting the basics with a renewed sense of purpose, refining your technique, and discovering new ways to translate a simple rectangle of fabric into a well-constructed, everyday essential.
Stitching Security and Comfort: Zippers, Handles, and the Art of a Practical Tote
A simple tote bag is one of the most honest projects a sewist can tackle. It rewards clarity of purpose: a bag that carries your daily essentials with just enough structure to keep everything in place. When you add optional features like a zipper and reinforced handles, that plain tote becomes a reliable companion for a busy, variable day. The goal is not complexity for its own sake, but a quiet upgrade that preserves the tote s simplicity while enhancing its usefulness. In this chapter, we explore how to choose and integrate zippers and handles in a way that feels effortless, durable, and appropriate for the fabrics you have chosen. The guidance here aligns with the larger aim of sewing a simple tote bag that beginners can master and intermediate sewers can personalize, keeping the process practical and satisfying from start to finish.
To begin, consider why these two elements matter. A zipper closes the opening of the bag, guarding contents from accidental spills and misplacements when you move through crowded spaces or ride public transit. A sturdy set of handles anchors the bag to your body with comfort, even when you carry more than a light load. When you knit these features into the project with thoughtful fabric choices, the result is a tote that feels secure yet accessible, resilient yet uncomplicated. This balance is at the heart of a tote that remains appealing after months of daily use.
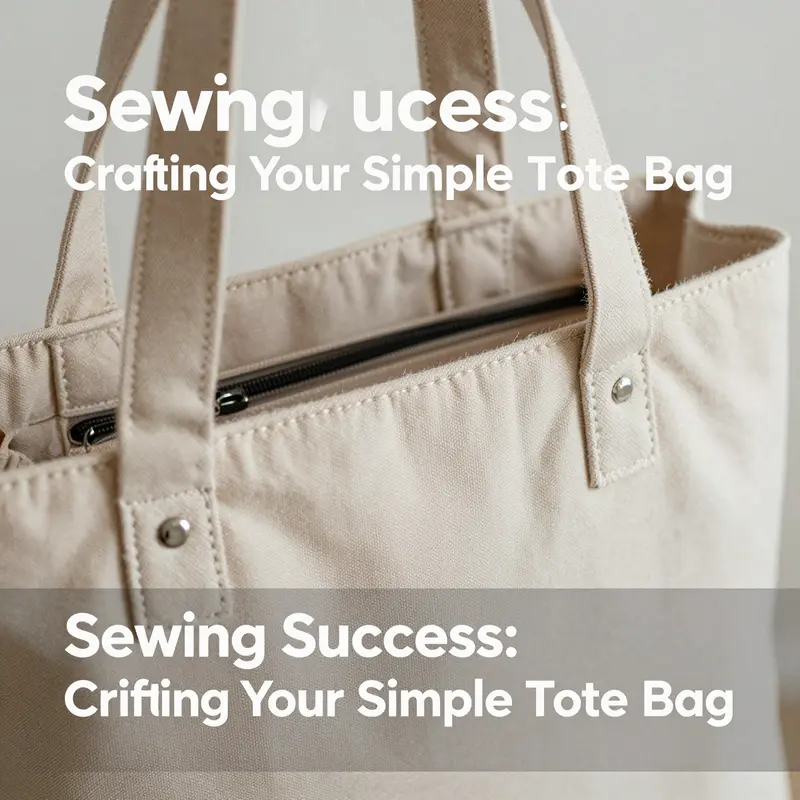
Zippers, in particular, deserve careful attention to both construction and context. The most common choice for a tote is a top zipper or a zipper pocket that runs along the bag s opening. A nylon coil zipper is a popular option because it is light, flexible, and available in a wide range of colors that can blend with or accent the fabric. Metal zippers, by contrast, bring a bit more heft and a touch of hardware texture. If your fabric is lightweight, a heavy metal zipper can feel out of place; if the fabric is heavy canvas, a lightweight zipper can disappear entirely. The decision often comes down to the look you want and the degree of security you need.
Length is another practical detail. The zipper should extend past the bag opening by a small margin on each side so it can travel smoothly without catching on seams. A full opening zipper gives you the maximum access and closure, but for a simple tote you may prefer a shorter zipper that reaches just inside the edges of the opening when the bag is unzipped. Either choice can work, but you should plan for seam allowances and lining when you decide. A well-fitted zipper stays straight and true if you reinforce the fabric around the teeth with interfacing or a zipper anchor strip. The fabric around the zipper needs to be sturdy enough to handle the repeated stress of opening and closing.
From a sewing technique perspective, installing a zipper on a tote is a matter of patience and alignment. The typical approach starts with stabilizing the top edge of the bag where the zipper will sit. This is often done with a light fusible interfacing or a narrow fabric strip that runs the length of the opening. The zipper is then basted in place before permanent stitching. A dedicated zipper foot helps you maintain an even stitch line as you sew along the tape. The choice between topstitching on the outside and finishing on the inside depends on your style and the fabric weight. A simple, neat finish is to sew along the zipper tape with a single line of topstitching on the outside, then cover the raw edge with a lining that starts just below the top edge. This method keeps the look clean and reduces bulk where the zipper sits.
If you want extra security without sacrificing the tote s silhouette, consider a hidden or covered zipper technique. In this setup, you add a facing or a narrow fabric panel behind the zipper, so the zipper teeth are not visible from the outside. The result is a tidy exterior while preserving the interior access. For a beginner, this approach can feel like a small but meaningful challenge. Take your time, pin thoroughly, and test the zipper with the bag open to ensure it clears the fabric evenly on both sides. Even without a hidden zipper, you can achieve a secure closure by reinforcing the zipper ends with a short bar tack or backstitch, making sure the ends do not loosen after repeated use.
Beyond closure, the presence of a zipper often influences how you plan the bag s interior organization. A zipped opening naturally limits the height of any interior pocket you might sew. If you expect to carry a small laptop, tablet, or planner, you might add a dedicated interior pocket with its own zipper or a snug slip pocket that keeps items from sliding around when the bag moves. The goal is harmony between the outside closure and the inside organization, so the bag remains tidy no matter what you place inside.
The handle design is the other half of the equation. Handles are not merely decorative; they determine how easy the bag is to carry and how comfortable it feels under load. For a basic tote, two fabric handles of a stable width provide simplicity and reliability. To improve comfort, you can double the width or add padding at the contact points where the bag sits on the shoulder. The material selection matters here as well. A soft cotton twill or a canvas strap can feel gentle against bare skin, while a leather or faux leather handle may lend a more refined silhouette and require careful maintenance. If the bag will hold heavier items, a reinforced attachment becomes essential. The interface around the handle anchors is a quiet, critical detail: it prevents the handle from curling, stretching, or pulling away from the bag under strain.
There are several approaches to attaching handles that maximize durability without complicating the project. A common method is to sew the handles through all layers of the bag, using a robust box or cross stitch pattern at the attachment point. The simplest variant is two parallel lines of stitching, but for heavier loads, you want multiple rows of stitching and a broader base. If you are using fabric with visible edge finishes, consider reinforcing the handle area with an extra layer of interfacing or a small patch of fabric under the attachment point to distribute the load. On heavier fabrics like canvas or denim, a line of bar tacks or rivets across the top of the handle can dramatically extend the life of the bag. The goal is to create a strap anchor that feels solid yet remains discreet and clean in appearance.
Adjustability is another welcome feature for some tote designs. A removable or adjustable strap allows you to switch from hand carry to shoulder or crossbody wear. If you choose to incorporate an adjustable strap, you can position the attachment points at a predictable distance from the bag, enabling a comfortable length for most users. Detachable straps are practical because they can be removed for washing or replaced with a different style if your needs change. The hardware you select for adjustability—slider buckles, D rings, or swivel clasps—should be matched in weight with the fabric and zipper system you ve chosen so nothing feels flimsy or loose.
Even when you keep the overall design simple, it is worth thinking about the pairing of zipper and handles in terms of balance. A bulky zipper at the top can add weight and bulk to the opening, especially if you use a padded handle. Conversely, a light zipper on a bag with thick, heavy handles can create a tugging sensation at the joint where the strap meets the bag. To avoid such mismatches, you may choose a slightly narrower zipper, a more streamlined handle, or add a thin top border interfacing around the opening to maintain a tidy alignment. The subtle dance between closure and carry is what makes a tote feel designed rather than improvised.
When planning your project, you can consult real-world examples and design discussions to see how others solve these trade-offs. For a broader view on closure choices and safety considerations in crowded spaces, you can read about how different closures perform in public settings. This external resource provides a comparative look at zipper versus drawstring options and the practical implications for security and usability. External resource: https://www.safetypoint.org/tote-bag-zipper-vs-drawstring-safety-in-crowded-places
To keep the learning loop constructive and connected to the larger sewing journey, consider one internal reference that helps shape how you think about zippers and handles in the tote you re making. The topic of zipper integration and handle reinforcement is well covered in discussions about design and durability for tote bags with zippers. For a deeper dive into how designers approach this feature set, you can explore examples and guidance that align with the idea of a balanced tote design. See also a practical overview of zipper closures in tote bags with zippers, which offers a concise comparison of methods and outcomes. You can view this concept in practice by visiting a collection of tote projects that emphasize zipper closures as a core functional element, with attention to how handles are anchored and reinforced to support daily use.
The fabric you choose plays into both how the zipper sits and how the handles perform. A sturdy, tightly woven fabric like canvas or heavy denim can hold a zipper securely without faltering after repeated openings and closings. A lining fabric also contributes to overall durability. A smoother lining can prevent the zipper from catching on rough edges and can help the top edge of the bag lie flat when closed. If your bag is destined to carry a laptop or other delicate items, you may want to include an interior padded sleeve and a zipper closure that secures the main compartment. Such details should be integrated at the planning stage, not tacked on at the end, so the finished tote reads as cohesive rather than patched together.
In practice, you will find that the simplest tote with a zipper and reinforced handles does not have to be complicated to sew. Start by preparing your fabric with appropriate interfacing at the top edge, cut your pieces carefully to ensure clean edges, and proceed with a zipper installation that respects your chosen approach. Then attach the handles with careful alignment and sturdy stitching, testing the bag by gently lifting it with a modest load before finishing. The act of testing helps you catch any uneven edges, misaligned handles, or stitch tensions that might cause problems later. If the test reveals a bulge or a gap where the zipper sits, you can adjust by trimming seam allowances or reinforcing the zipper ends. A little forethought goes a long way toward a tote that feels like it was built to last and designed with the user in mind.
As you progress, you may find that the simple tote you envisioned at the outset has taken on a robust personality of its own. The zipper offers security when you move through crowded spaces, while the handles offer comfort and ease of carrying. When both features work in harmony, they transform a straightforward sewing project into a dependable everyday item. The exact choices you make—nylon versus metal, topstitching versus hidden finishing, standard versus padded handles—will reflect your priorities for ease, durability, and aesthetics. The key is to approach these decisions with an eye for detail but without overcomplicating the process. A well-executed zipper and a well-attached handle are, in the realm of simple tote bags, the marks of thoughtful sewing rather than technical bravado.
If you want to see how different designers approach the balance between secure closures and carry comfort, consider exploring the concept further through a curated collection of tote designs that highlight zippers and handles. The linked resource focuses on the role of closures in real-world use and compares zipper configurations with other closure methods, offering practical insights you can apply to your own tote projects.
In summary, adding a zipper and upgrading the handles to a reinforced, comfortable design elevates a simple tote into a reliable daily companion. The zipper provides security without impeding access, and the handles provide comfort without sacrificing durability. By choosing appropriate fabric, reinforcing the attachment points, and following careful installation steps, you ensure these features work in concert with the bag s overall silhouette and function. The result is a tote that remains straightforward to sew, easy to use, and ready to accompany you through everyday routines with a quiet, dependable confidence.
Internal note on linking: For a concise discussion on closure varieties in tote designs, you can explore one practical example via the internal link focused on tote bags with zippers, which demonstrates how designers incorporate this feature while maintaining a clean exterior and practical interior organization.
Mastering the Basics: Practical Wisdom for Sewing a Durable, Simple Tote Bag
A simple tote bag is more than a quick project; it’s a chance to learn fabric behavior, measurement discipline, and steady sewing habits that translate into a durable everyday bag. This chapter covers the mindset and the practical steps you need to build confidence while keeping the process calm and intentional.
Choosing fabrics: start with medium-weight materials like cotton canvas or denim. They hold shape, resist wear, and pair well with topstitching. Heavier fabrics add durability, but ensure your pattern and machine are up to the task. Lint can affect cutting accuracy, so keep your workspace tidy and prepare a clean cutting layout.
Preparation: measure twice, cut once. Lay out pieces with grain aligned to the selvage when possible. Mark with chalk or a fabric pen, and add a 1/2 inch (about 1.3 cm) seam allowance. Pin or clip pieces to prevent shifting, then sew a test seam on scrap fabric to confirm stitch length and tension before stitching actual pieces.
Stitching: a sewing machine is efficient, but hand-sewing can work for small repairs. Use a sturdy thread that matches your fabric. For woven cottons, a universal or ballpoint needle is usually ideal. Test seams on scraps and adjust tension as needed.
Pressing: press seams after they’re sewn to set the fabric and keep layers aligned. A crisp, pressed seam improves topstitching accuracy and bag shape. Use a pressing cloth for delicate fabrics and a firm ironing surface to avoid warping.
Reinforcement: reinforce stress points where handles attach with extra stitches or an X pattern. Consider a small piece of interfacing inside the handle area to distribute load and prevent tearing.
Finishing: trim threads, give a final press, and test the bag with light items before full use. Check handle spacing and straight edges; re-press or re-sew if necessary for a clean, professional look.
Extras: if desired, add a simple interior pocket or a small sleeve for organization. Keep linings minimal to preserve the tote’s simple silhouette.
If you want a zipper option, plan the top edge early and choose a compatible construction method. The core lesson remains the same: deliberate preparation, accurate measuring, steady stitching, and thoughtful finishing create a tote that serves you season after season.
Final thoughts
Sewing a simple tote bag can serve as an excellent business asset, providing a practical product that promotes your brand. As you explore this craft, remember that each tote bag not only showcases your brand identity but also meets customers’ needs for functionality and style. Use the materials, step-by-step instructions, optional features, and tips laid out in this guide to create durable and appealing tote bags. By embracing this project, you can effectively enhance customer loyalty while expressing creativity through functional designs.