Sewing a basic tote bag is a valuable skill that can elevate your business’s product offerings and enhance branding. This guide serves as a comprehensive resource for business owners looking to tap into the potential of handmade items. With each chapter, you’ll explore essential materials, cutting techniques, assembly methods, strap attachment, and finishing touches necessary to create a functional and stylish tote bag. Understanding and mastering these steps can not only result in a beautiful product but also instills a sense of craftsmanship that resonates with customers, promoting a lasting impression of your brand.
From Materials to a Practical Tote: A Beginner’s Path to Sewing a Basic Tote Bag
Sewing a tote bag begins long before the first stitch and far from the last, because the shape you hold in your hands is born from careful choices about materials, readiness, and the flow of a simple, repeatable sequence. A basic tote is not a single trick but a reliable process you can repeat with different fabrics and finishes, turning a humble rectangle into a dependable everyday carrier. The essence is approachable: select sturdy fabrics, prepare with thoughtful cutting, and assemble with clear, steady seams that resist daily use. The heart of the project lies in balance—between fabric weight and lining, between a clean exterior and a practical interior, between simple construction and lasting durability. When you begin, start with fabric that behaves well under a machine and can withstand a mix of everyday errands, groceries, and a workday laptop slipping into its corner. Durable cotton canvas, sturdy denim, or crisp linen are all suitable choices. For a bag that feels more substantial, you might layer the main body with a separate lining so the exterior keeps its shape even when the tote is full. A standard size—roughly 18 inches wide by 14 inches high, not counting the handles—gives you enough space for a book, a small notebook, a sweater, or a few groceries, while remaining light enough to carry easily. The beauty of this tote lies in its versatility and its simplicity; it invites you to focus on the rhythm of cutting and stitching rather than wrestling with unfamiliar techniques. In practical terms, this means preparing a clear plan for the pieces you will cut, selecting thread that blends with your fabric, and choosing handles that fit your body and the bag’s intended use. The tools you gather should echo this straightforward approach: sharp scissors or a precise rotary cutter to produce clean edges, pins or clips to keep pieces aligned, a reliable sewing machine that you know how to control, and a ruler with a fabric marker or chalk to lay out your measurements. A zipper is optional, but if you decide to add one, it introduces a neat closure that helps keep contents secure while preserving the tote’s clean lines. Handles are another design decision with impact on how the bag feels when carried. You can use pre-made straps for speed, or cut fabric strips from the same material you used for the bag for a fully coordinated finish, typically about two inches wide, cut to the length you prefer. For added durability, reinforce stress points at the corners with extra stitching or a touch of interfacing, and always check the fabric’s care label to be sure you can wash the bag when needed. The following approach keeps the project accessible and forgiving, especially for someone just learning to sew. Begin with a clear layout that respects seam allowances, usually half an inch to a quarter inch for beginner projects, and remember that the tote’s dimensions assume extra room for the folds and the fabric’s natural drape. If you are uncertain about your cutting accuracy, lay out your pieces on a flat surface and double-check the measurement marks before you cut. This habit saves time later, when you’ll be sewing long seams and turning the bag right side out. As you sew, keep your stitches even and your seams aligned—creeping off the line is less a matter of talent and more a matter of consistent pressure and steady feed. A helpful mental model is to treat the outer bag and the lining as two parallel projects that eventually unite into one. You can prepare the outer bag pieces first, but you might also choose to complete the lining separately, then join the two components for the final assembly. If you want a bit more structure, insert lightweight interfacing along the bag’s exterior or at the corners. The extra stiffness helps the tote stand upright when it’s empty and gives it a gentle, professional-looking shape. When the time comes to cut, think in terms of two main rectangles for the body—one for the front and one for the back—and two more for the lining, all matching in width. In addition, cut two handles from the same fabric, or prepare the pre-made straps you selected. The actual cutting step is straightforward: place your pattern on the fabric with the grain running correctly, protect the edges with a rotary cutter or sharp scissors, and mark each piece clearly so nothing gets mixed up. A small tip for a neat finish: cut the lining twice as the bag’s interior, and leave a gap in the bottom seam of the lining so you can turn the bag right side out with less fuss. Once pieces are cut, the assembly begins with pinning and sewing the side seams of the outer bag and the lining separately. If you’re new to this, a simple approach is to sew outer sides first, then the bottom, turning the fabric carefully at each corner so the seams sit flat. A common technique is to box the corners to create a flat base; you measure a square off each bottom corner, sew across, and then trim away the excess. This step is optional but adds real stability and a nice footprint to the tote. After the outer bag takes shape, repeat the process with the lining. If you’ve chosen a top zipper, install it along the upper edge before joining the outer bag and lining. If you prefer a clean, open-top tote, skip the zipper and simply finish the top edge with a clean hem or a slim folded facing. Attaching the handles is a pivotal moment in both the look and the balance of the bag. Decide whether you want the handles to be attached directly to the outer bag, or to cross over to the lining for extra support. If you align the ends where the exterior and interior meet, you’ll reinforce the stress points with multiple stitches. Many makers topstitch the handles to the bag’s body after assembly to secure them visually and physically, providing a subtle but effective finish. When the two components—the outer bag and the lining—are ready, you align them wrong sides together and sew around the top edge, leaving a small gap in the lining to turn the bag. Turn the bag right side out through the gap, gently press the seams, and then slip stitch the opening closed or machine-sew it with a tight, discreet seam. A final topstitch along the upper edge not only anchors the lining to the outer fabric but also offers a polish that helps the tote hold its shape under load. At this stage, you can consider a few refinements. If your fabric is lighter weight, a light interface or even a thin fabric layer at strategic points—such as the corners or the bottom edge—can resist sagging and keep the bag looking crisp as you carry heavier items. If you plan to carry a laptop or books, you might enjoy a design that includes a dedicated pocket inside the tote or a separate sleeve for electronics. For instance, you can create a discreet interior pocket that sits on one side of the lining, or you can attach a small, padded sleeve at the interior to protect a device. If you’re shopping for ideas to extend this concept, you can explore a tote bag with computer sleeve to see how snug compartments and secure closures can be integrated without complicating a basic tote’s design. tote bag with computer sleeve. Throughout all these steps, keep the process calm and measured. Rushing leads to misaligned seams and uneven edges, which can undermine both the bag’s appearance and its durability. Take time to press after each major seam; heat and pressure help set the stitches and flatten the fabric’s natural curls. A well-pressed tote not only looks more professional but also behaves better when you fill it with everyday items. Finally, consider care and maintenance. Most tote fabrics can be machine washed on a gentle cycle or hand washed, depending on weight and fiber content. Check care labels and test a small swatch if you’re uncertain. If the bag develops a stubborn crease or the seams loosen after heavy use, resew those stress points with a longer stitch length and a bit more backstitching. This small step can dramatically extend the bag’s life. As your confidence grows, you’ll find ways to tailor this basic tote to a weekly routine: a heavier fabric for groceries, a lighter, summery canvas for daily errands, or a denim version that takes on accessories with a casual edge. You might even experiment with color-blocking or contrasting handles to give the bag a distinctive personality while preserving the clean, durable lines that make a tote so practical. The beauty of this project is its adaptability; you can learn the core method once and then apply it to countless variations. The key is to maintain patience and practice with each piece, treating the tote not as a single finished object but as a fabric-driven method you can reuse with different fabrics and small design tweaks. And when you’re ready to explore further, you’ll find that the basics you’ve learned here translate to more complex carry-alls with additional pockets, closures, and details, all while keeping the same foundational steps that start with the right materials and a steady hand. For more techniques and guidance from experienced makers, you can consult external resources that expand on how to sew a basic tote bag and adapt it to your own needs. Finally, take a moment to appreciate the quiet confidence that comes with turning simple fabric into a reliable everyday companion. The tote you’ve crafted stands as a small, tangible testament to skill, patience, and the joy of making something useful with your own hands, one stitch at a time. For further reading and inspiration, you may explore additional techniques at https://www.alltheknots.com/how-to-sew-a-basic-tote-bag/.
The First Cut with Purpose: Precision Cutting for a Simple Tote Bag

The very first step in sewing a basic tote bag is the one that sets the tone for every seam that follows: cutting the fabric with accuracy and clear intention. A successful tote begins not at the sewing machine, but at the edge of your chosen fabric. The cut determines how the bag will sit, how the straps will align, and how sturdy the finished piece will feel in the hand. With a calm workspace, stable fabric, and a clear plan, you transform a flat sheet into a bag with structure and potential. When you measure and mark intentionally, you reduce frustration later and cultivate confidence as you progress from the cutting table to the stitch line.
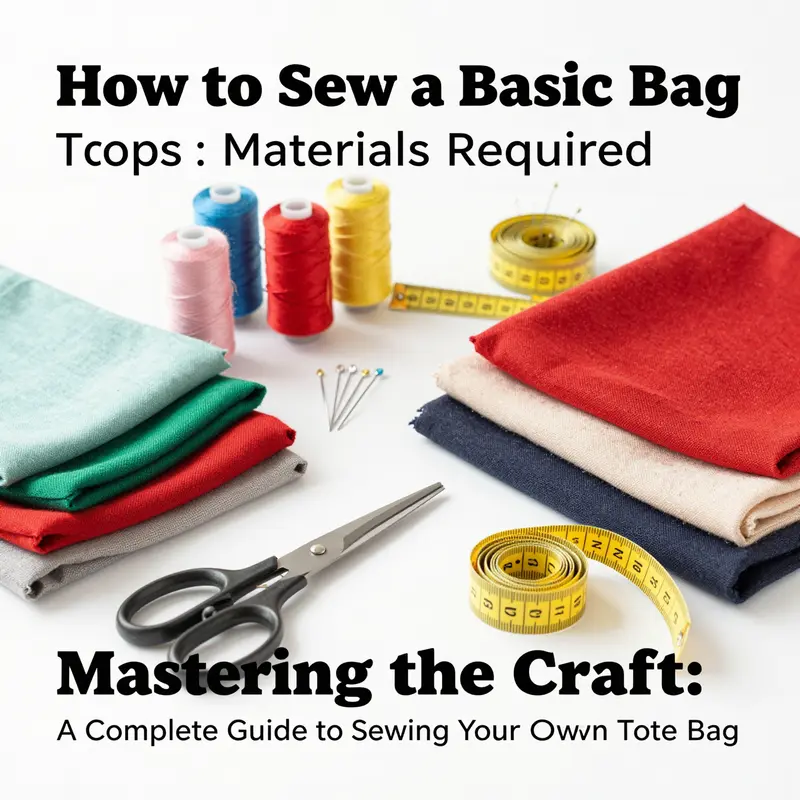
Begin by choosing fabric that will hold its shape over time. A woven cotton, canvas, or a light duck fabric often works well for a basic tote. These fabrics have a defined grain and a natural stiffness that helps the bag keep its form. Before you even lay down a pattern or a ruler, inspect the fabric edge—often called the selvage. If you pull the fabric slightly and observe how it resists stretch along the length, you’re sensing the grain. Align your cutting lines with that grain so the front and back panels hang evenly and the bag remains square as you assemble it. The example dimensions most commonly cited for a standard tote are two main panels, cut to about 14 inches wide by 16 inches tall, plus two straps measuring roughly 2 inches wide by 20 inches long. These numbers serve as a reliable baseline, though you may adjust them to suit a particular pattern or personal preference. The key is consistency: all main pieces should be cut from fabric in the same orientation and with the same seam allowances.
Once you have settled on your fabric and the intended dimensions, your next move is to prepare the workspace. A flat, clean surface with good lighting is essential. A cutting mat not only protects the surface beneath but also helps you keep straight lines when you use a rotary cutter or a straight-edge ruler. Sharp fabric scissors are equally important. Dull scissors compress the fabric fibers and create ragged edges that can skew measurements or produce uneven seams. If you decide to use a rotary cutter, pair it with a firm ruler and a smooth, firm surface, and always cut away from your body to prevent slips. Remember to keep a basket or tray for the cut pieces so nothing gets misplaced as you work. If you are new to the technique, consider placing your fabric on top of a plain sheet or a contrasting color to make the edges stand out clearly; this reduces the chance of misreading marks or cutting on the wrong line.
Marking is the quieter step that carries a lot of weight. Use a washable fabric marker or tailor’s chalk to indicate where the cuts will occur. Draw clean, continuous lines along the outer edges of your pattern or the planned dimensions. For a tote, you will typically mark the four edges of each main panel and the two strap pieces. Take a moment to double-check the marks before you cut. A small mistake at this stage can compound into misalignment that is visible once the bag is sewn. If you’re following a pattern, lay the pattern over the fabric with grain arrows aligned to the fabric grain. Pin it in a few key spots to prevent shifting, then trace along the pattern’s cutting lines with your marker. Precision here is not about speed; it is about accuracy and care.
When the pieces are laid out, think about fabric waste. If you have multiple scraps, you can sometimes arrange the layout to minimize waste by rotating the pieces to fit within the fabric’s width. This is where a quick sketch or a rough mental map helps. For a standard tote, you’ll need two identical front and back panels. Cutting these panels from the same bolt or the same fabric section ensures the texture and color match, which contributes to a cohesive, professional look when the bag comes together. It also helps ensure that the bag hangs evenly because the fabric will respond similarly to the stitching on each side. If you are using a patterned fabric, make sure the pattern alignment looks balanced from the outside. A tiny misalignment in a bold pattern can be distracting once the bag is finished.
A practical tip often overlooked by beginners is the value of labeling. After cutting, label each piece clearly with its intended position, size, and any orientation notes (for example, “front panel, face up” or “strap, right side up”). This simple habit saves time and prevents careless mistakes that can arise when you’re juggling multiple pieces in a small workspace. At this stage you may also consider transferring any notch marks or placement marks for lining or pocket features if your pattern includes them. Notches act as guides during assembly, ensuring you line up edges and seams in the correct places when you reach the sewing stage.
For those who enjoy exploring variations, the sustainable craft option offers an inviting alternative during the cutting phase. If you’re drawn to repurposing, you can explore turning old T-shirts or even jeans into tote bags. This route leans toward no-sew or low-sew approaches, which can be a creative and eco-friendly way to begin. A no-sew tote might rely on strong hems or simple knot closures at the top, while a low-sew method could incorporate minimal stitching or hand-tied seams. These options, while charming and resourceful, do not deliver the durability and customizability of a traditionally sewn tote. If your goal is a sturdy, long-lasting bag, plan to proceed with standard sewing after cutting, even as you appreciate the charm of no-sew alternatives. The decision is yours, but the cut stage remains the same: measure, mark, and cut with care to ensure each piece aligns perfectly when you stitch.
As you complete the cutting, you may encounter opportunities to tailor the project to your needs. If you want to add a padded sleeve for a laptop or a tablet, you might extend the discussion to edge finishes or extra interfacings in later chapters. For readers who anticipate such enhancements, there is practical value in understanding how a well-cut front and back panel behave once they begin to form the body of the bag. If you’re curious about assembling a tote that includes a computer sleeve, you can consult related guidance on the tote-bag-with-computer-sleeve page, which offers context on integrating additional compartments without compromising the clean silhouette you achieve through accurate cutting. This connection between cutting and later features helps you see sewing as a continuum rather than a sequence of isolated steps.
In the end, the precision of your cut determines how smoothly your bag will sew together. A straight, unwarped edge is easier to align along seams, and consistent dimensions keep the body of the bag symmetrical. The front and back panels obey the same rules, and the straps, though slimmer, benefit from the same discipline. When you place the pieces in front of you, you can visualize how the tote will take shape: a sturdy rectangle for the body and two slender strips that will become the straps. You can almost hear the fabric whispering that accuracy matters. By investing the time to measure exactly, mark cleanly, and cut deliberately, you set up the entire project for success. As you move from this stage into sewing, carry the same calm focus. The machine is merely the tool to translate your precise cuts into seams, but the integrity of those seams begins with the cut that started it all.
For those who want to see a broader reference while you cut, a well-illustrated external guide offers a complementary walkthrough that can reinforce these concepts with visuals and additional tips. The resource at All The Crafts provides a detailed, step-by-step exploration of sewing a basic tote bag that echoes the principles outlined here, especially the importance of careful cutting and preparation before stitching. External links can be a helpful way to compare approaches and reinforce best practices as you build confidence with each project.
As your fabric rests on the cutting mat and your marks fade into the fabric’s grain, you’ve laid the groundwork for a bag that not only carries your belongings but also carries the craft’s logic from start to finish. The next chapter will turn those four cut edges into a finished silhouette, guiding the pieces from fabric to form with a careful rhythm. Until then, keep your cutting lines clean, your pieces labeled, and your workspace organized—because a tote bag begins with the most deliberate cut you can make.
In sum, cutting is where patience pays off. The measurements you choose, the way you mark and line up your fabric, and the care you take when you slice through the fabric all ripple through the final product. A clean edge, a precise 14-by-16 panel, a pair of identical straps, and a clear sense of orientation are not just technical details; they are the foundation of a tote that feels solid in hand and true in silhouette. When you approach this stage with intention, you move confidently toward the stitching stage, where your cuts will finally become a bag that you designed, cut, and created with your own hands.
From Fabric to Function: Mastering the Tote Bag Body with Care
Sewing a basic tote bag starts with a vision of how the finished object will carry your daily life—from groceries to gym clothes to books and beyond. The bag body is the backbone of that vision, and it comes together from four fabric panels: two outer pieces that form the exterior and two lining pieces that give the inside a quiet, clean finish. A common and practical dimension for the main body is about 32 cm by 70 cm, though you can adjust it to suit your needs. Begin by laying out the pieces with intention. Take the two outer panels and place them right sides facing each other. Do the same with the two lining panels. This “wrong sides together” approach hides the raw edges inside the finished bag, so the exterior looks uninterrupted and neat. The moment you stitch these pieces together, you’re laying the groundwork for a sturdy, durable carryall. It is worth slowing down at this stage and checking the grain of the fabric. If you’re using woven cotton or a light canvas, align the edges carefully to prevent skewing as you sew. A small fold or misalignment at the start can translate into a bag that sits unevenly when carried, especially once it begins to hold weight.
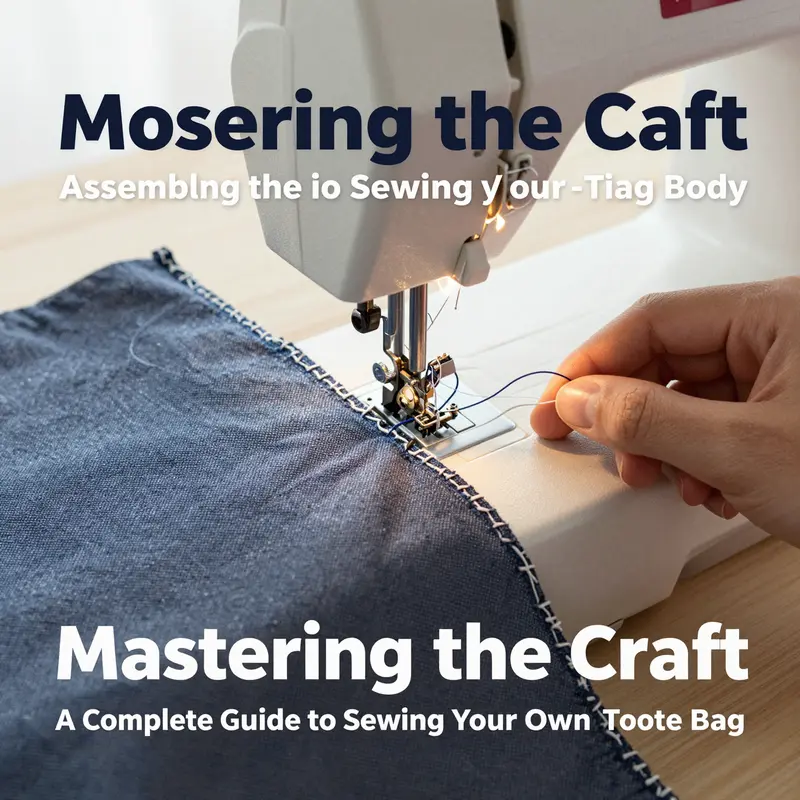
With the pieces aligned, the next move is to sew the sides and bottom of both the outer and lining panels. Set your machine or prepare your needle if you’re sewing by hand. A straight stitch is perfectly adequate for a tote bag, paired with a generous 1/2 inch (about 1.25 cm) seam allowance. This seam width is a reliable balance between strength and bulk, offering a clean line that resists fraying yet remains easy to manage. If you’re working with fabrics that fray or you simply want extra durability, consider finishing the raw edges after sewing. A zigzag stitch along the seam allowance or a light serging can help prevent unraveling, especially along the bottom corners where stress can concentrate.
When you approach the bottom corners, there’s a small but important technique to keep corners neat and flat. Stop sewing just before hitting the corner point, pivot the fabric, and then continue sewing along the next side. This pivot method creates a clean, rounded corner rather than a bulky square corner, which not only looks nicer but also reduces bulk where the bag sits on a table or in a tote stack. Once both the outer and lining bodies are sewn, you’ll notice the bag still resembles a tube with two open ends—one of those ends will be the top edge. At this stage, the instructions call for leaving the top edge completely open on both the outer and lining pieces. This opening is essential; it lets you turn the bag right side out later and gives you access to align the two layers perfectly when you eventually stitch them together at the top.
Turning the bag right side out is a small moment that feels almost magical after all the careful stitching. Gently pull the outer bag and the lining bag through the open top edge. As you coax them through, you should see the right sides of the outer fabric and the lining fabric emerging. Take a moment to smooth any twists, ensuring the outer fabric is fully on the outside while the lining sits on the inside, awaiting its role. This step is not just about appearance; it ensures the subsequent seam that joins the two layers sits flat and secure, without twists that could compromise the bag’s shape or durability.
With both pieces now effectively prepared in their correct orientations, it’s time to align and join them at the top. Place the outer bag and the lining bag together with their right sides facing each other, but this time again the outer layer should be on the exterior and the lining on the interior. Carefully match the top edges so they align edge to edge and pin or clip along the opening to hold everything in place. This top-edge alignment is critical: any mismatch here will show along the finished edge, especially since tote bags are often carried with weight that pulls at the top. A gentle pinning strategy—placing pins perpendicular to the edge every few inches—helps you keep the layers aligned without shifting as you feed them through the machine. Once pinned, sew along the top edge with a straight stitch and the same 1/2 inch seam allowance you used for the side and bottom seams. This stitch line permanently attaches the outer fabric to the lining at the top, establishing a clean, finished boundary that will later support handles and any decorative topstitching you choose to add.
Optional finishing details can elevate the look and longevity of your tote bag. Finishing the raw edges of the top seam helps prevent fraying and gives the bag a polished, professional feel. If you’re fortunate enough to own a serger, you can serge along the seam allowance; otherwise a zigzag stitch on your sewing machine serves the same purpose. Some sewists prefer to fold the raw edge under by about 1/4 inch (roughly 0.6 cm) and sew it down with a straight stitch. Either approach reduces the likelihood of unraveling and contributes to a crisp top edge that looks intentional rather than improvisational.
After the top seam is secure, it’s time to complete the transformation from a loose tube into a tangible bag. Carefully pull the bag completely through the top opening so that the entire bag emerges right side out. This turning process is what reveals the correct faces of both the outer fabric and the lining, and it’s the moment when your careful alignment during the earlier steps pays off in a neat, symmetrical form. A quick press with a hot iron along the top edge can help set the line and ensure the fabric lies flat. A crisp top edge creates a strong base for later attaching handles and guarantees the bag looks as good as it functions.
At this juncture, you’ve built a complete tote bag body ready for the next stage—the addition of handles and any finishing touches that personalize your bag. The beauty of this method is its simplicity and adaptability. The same core process can be scaled up or down to suit different purposes, from a compact everyday tote to a roomier carryall for projects and supplies. When you consider fabrics, you’ll find there are two guiding principles: choose a sturdy fabric for the outer layer and a compatible, lighter or similarly weighted fabric for the lining. The weight and texture of your chosen materials influence how the bag wears and how it folds when not in use. A denser canvas will retain shape better under load, while a lighter lining adds a smooth interior that’s gentle on items you carry. If you’re curious about how this basic framework can evolve into specific designs, you can explore related variations on other tote configurations such as the tote-bag-with-computer-sleeve.
As you reflect on the steps that brought you here, consider the logic behind each motion. Right-sides-to-right-sides stitching conceals seams while maintaining a clean exterior. A moderate seam allowance keeps edges durable without creating bulky corners. Pivoting at the corners trades a rigid square shape for a more ergonomic rounded foundation, improving both aesthetics and function. Leaving the top opening unstitched until you’re ready to join the layers ensures you can align the pieces precisely and avoid misalignment that could distort the bag’s silhouette. Turning and pressing are the quiet acts that convert a flat set of panels into a usable structure, teaching you how strategic handling can be as important as the stitches themselves.
This chapter on assembling the bag body doesn’t just teach a sequence of operations; it invites you to feel grounded in a practical approach. The mental model is simple: prepare the panels, sew the sides and bottom, open the top, turn and align, join at the top, and finally finish with a touch of care to edges and pressing. When you apply these ideas, you’ll find that the next chapter—adding handles—becomes a natural extension of the skills you’ve just practiced. You’ll be ready to choose handles that complement your fabric, whether you prefer reinforced fabric straps, webbing, or decorative options. The tote you’re building is not just a vessel for objects; it’s a portable project that carries your method, your materials, and your growing confidence as a maker.
Strength at the Shoulder: Mastering Strap Attachment for a Simple Tote Bag
Sewing a basic tote bag rewards you with a simple, sturdy workhorse of a project. The most critical moment in creating a bag that truly lasts is how you attach the straps. A well-sewn strap elevates a modest tote from a casual carryall to a reliable everyday companion. The technique is straightforward, but it deserves careful attention: strap placement, secure stitching, and a touch of reinforcement at the stress points. In this chapter, you’ll move from cutting to attachment with a mindful approach that keeps the process approachable for beginners while still delivering a professional result. As you read, picture the finished bag resting comfortably on your shoulder, straps aligned, weight evenly distributed, and the fabric undisturbed by strain or wobble. That calm, confident outcome begins with the first pin, the first stitch, and the choice of materials you’ve laid out before you.
Begin with the materials you already gathered. The tote body fabric—often canvas or a sturdy denim—will form the backbone of your bag, but the straps must be up to the task of carrying whatever you load into the tote day after day. If you choose webbing for the straps, you’ll enjoy a clean, crisp line that sews well through multiple layers. If fabric straps are your preference, plan for a slightly wider piece to distribute weight; you’ll finish the edges to prevent fraying so the straps wear as nicely as the body. A strong needle—such as a jeans or leather needle—and a thread color that blends with your fabric are essential, as is a good supply of pins or clips to hold things in place during sewing. A measuring tape keeps your measurements honest, which makes the entire process feel less improvisational and more deliberate.
First, cut and prepare the straps. Most tote designs benefit from straps that feel comfortable on the shoulder and give you a sense of proportion with the bag’s body. A typical length to aim for is about 45 to 50 centimeters—or roughly 18 to 20 inches—for comfortable shoulder carry. The exact length depends on how you intend to use the bag and your own height, but 18 to 20 inches is a practical starting point for many beginner projects. If you’re working with fabric straps, finish the raw edges to prevent fraying. A zigzag stitch along the edges or the neat seal of bias tape provides a clean, durable finish that stands up to repeated use. As you prepare the straps, check that both pieces are cut to equal lengths for balanced wear, and press any fabric straps lightly so they present a tidy surface for sewing.
With the straps cut and prepared, it’s time to position them on the bag body. Open the tote so the inside faces up, and center one strap along the top edge, aligning its end with the side seam. Position the strap so it sits about 1 to 2 centimeters beyond the seam allowance. This small extension gives room for a strong stitch line and keeps the strap from pulling directly at the seam itself. Then repeat on the opposite side for the second strap. Keeping the straps symmetrical is crucial; it’s the visual cue that the bag will hang evenly and feel balanced when carried. If your fabric is slippery or you’re working with a darker thread, consider a light pin or clip to hold position, then recheck the alignment before you begin to sew.
Pin or clip the straps firmly. The goal is to prevent any shifting as you sew, which would create uneven distances from the edge and compromise the strap’s anchor. A few well-placed pins across the top edge are usually enough—just make sure they don’t sit directly under the presser foot, where they might distort your stitching. If you’re working with thicker webbing, you may find that clips hold more securely and avoid puncturing the strap material. The act of pinning is as much about confidence as it is about precision; take a moment to recheck the alignment after you’ve pinned, then proceed to sew with a steady rhythm.
Sewing the straps to the bag requires a careful, reinforced stitch pattern. Start with a straight stitch to anchor the strap along the top opening, beginning at the outer edge of the strap and sewing through both the strap and the bag’s top layer. This initial line should be close to the inner edge of the top opening, ensuring a neat finish that won’t show through the outside. For added strength, switch to a reinforced backstitch as you approach the base of the strap, and consider a box-shaped reinforcement at the strap’s base. This rectangle or X pattern acts as a protective anchor, distributing weight across a broader area and reducing the likelihood of the strap tearing away under load. Don’t forget to backstitch at the beginning and end of each seam. Backstitching anchors the thread and prevents unraveling with repeated use.
After you’ve completed the main attachment, turn the bag right side out. A quick press along the top edge can help set the stitches and give the bag a crisp, professional look. The press is gentle—avoid scorching the fabric and use a low to medium heat with a light touch. As you work through this step, examine the top line where the straps meet the bag. If you notice any puckering or tension, a careful press and a small adjustment to the seam allowance may be all that’s needed to restore balance. Then test the straps. Pull firmly on each strap and consider how they sit on the shoulder. A well-attached strap should feel stable, with no visible wobble or gap where the strap meets the bag. If you find any movement or looseness, revisit the base stitches and reinforce as needed.
Where this step can truly elevate a simple tote is in the attention to reinforcement and optional hardware. For heavier loads or more demanding daily use, you might add a hardware system to distribute weight more evenly—D-rings or a metal grommet setup can be attached to the bag body before you sew the straps. When chosen thoughtfully, hardware should complement the fabric and not overwhelm it. The weight rating of the hardware matters; it should be proportional to the tote’s overall build. If you’re using delicate materials like raffia or a thin canvas, extra care with the hardware choice can prevent tearing and damage over time. Remember, the goal is a tote that carries comfortably, not one that looks bulky or awkward when worn.
As you contemplate the finished tote, consider variations in strap construction that stay true to the same principles of durability and clean lines. Webbing straps carry a professional, utilitarian look and often feel sturdy enough for daily errands. Fabric straps, if properly width-adjusted and finished, offer softer aesthetics and a warmer touch in hand. Either choice benefits from edge finishing and careful topstitching. You might also opt for a strap length that allows the bag to be worn crossbody, if your design intends mobility and hands-free use. In all cases, the key is to anchor the straps securely and to reinforce the base where the load concentrates. The basics—precise placement, strong stitching, and thoughtful reinforcement—translate across materials and styles, ensuring your tote remains dependable as it earns its place in daily life.
If you’d like to explore broader tote variations while keeping these core techniques in mind, you can browse related designs such as Women’s Canvas Tote Bags, which showcases how a simple tote can be adapted with different fabrics, widths, and finishes. This linked collection provides context for how your strap decisions affect the overall look and durability of the bag. Women’s Canvas Tote Bags.
Beyond the basics, you’ll find that the distribution of weight and the alignment of your straps influence everything from comfort to longevity. A small but meaningful tip is to measure the distance from each strap to the bag’s side seam and confirm that both measurements match. Consistency here prevents a bag from tipping or riding unevenly on the shoulder. If you discover a mismatch, gently reposition the strap and re-sew, paying extra attention to the base stitches. The process teaches you to anticipate how your tote behaves when loaded with books, groceries, or a weekend haul. It’s a practical, tactile reminder that sewing is as much about intention as it is about technique.
As you complete this chapter, reflect on the rhythm you developed: measure, cut, align, pin, stitch, reinforce, test, adjust. Each step builds a sense of mastery that you carry into subsequent chapters about finishing touches, interior pockets, and decorative details. The attachment moment, though technical, also embodies the core philosophy of sewing for beginners: small, deliberate actions create durable results. With your straps securely fixed and your bag ready for daily use, you’ve translated a handful of simple materials into a dependable tote that can be relied on to carry the everyday moments that matter.
External reference for further reading and reinforcement of strap techniques: https://www.alltheknots.com/how-to-sew-a-basic-tote-bag/
From Clean Edges to Lasting Handles: Finishing Touches that Turn a Basic Tote into Everyday Gear
The moment you finish stitching the main pieces of a basic tote bag, the work shifts from construction to refinement. Finishing touches are where sewing becomes a craft rather than a simple assembly. They determine how the bag feels in your hands, how it holds its shape, and how well it ages with daily use. With careful attention to pressing, edge finishing, and secure hardware placement, a basic tote becomes a resilient, attractive everyday companion. The guiding principle here is simplicity with intention: each step should reinforce the bag’s structure and keep its silhouette neat, even when you load it with books, groceries, or a laptop charger. Keeping this mindset in mind helps you approach the process as a seamless continuation of the shaping you already did, not as a series of isolated chores.
First comes the turning and pressing. After you’ve sewn the outer fabric to the lining and the bag body is stitched shut, turn the bag right side out through the top opening. This moment is more than a cosmetic flip; it’s the test of your seams’ sturdiness and the bag’s general geometry. Use a warm iron with steam and press the seams flat, paying close attention to the sides and the bottom where the most tension will occur once you begin to carry items. A crisp press resigns the fabric to its intended angles and helps the bag keep a confident, structured look rather than a soft, sagging form. If you’re using a fusible interfacing on the interior or a heavier fabric, the iron’s heat should still be comfortable for the surface; you want the fabric to settle without warping or leaving shine marks that betray heat.
The top edge deserves its own careful finishing. The hem at the opening is often the most visible part of the tote when it sits upright on a table or a shelf, so it should read clean and durable. The simplest and most reliable method is to fold the raw top seam allowance inward by about 1/4 inch (0.6 cm). Press this fold firmly so it behaves as a single, stable edge. Then topstitch along the folded edge with a straight stitch, either by hand or with a machine. The purpose of this step is twofold: it secures the raw edge to prevent fraying and creates a neat, durable boundary that won’t roll or twist when the bag is loaded. If you’re using a lightweight fabric, you might choose a matching thread for invisibility; for heavier fabrics, a slightly stronger thread color can add a touch of visual detail without overpowering the fabric’s natural texture. Either way, the goal is a straight, even line that mirrors the bag’s clean lines.
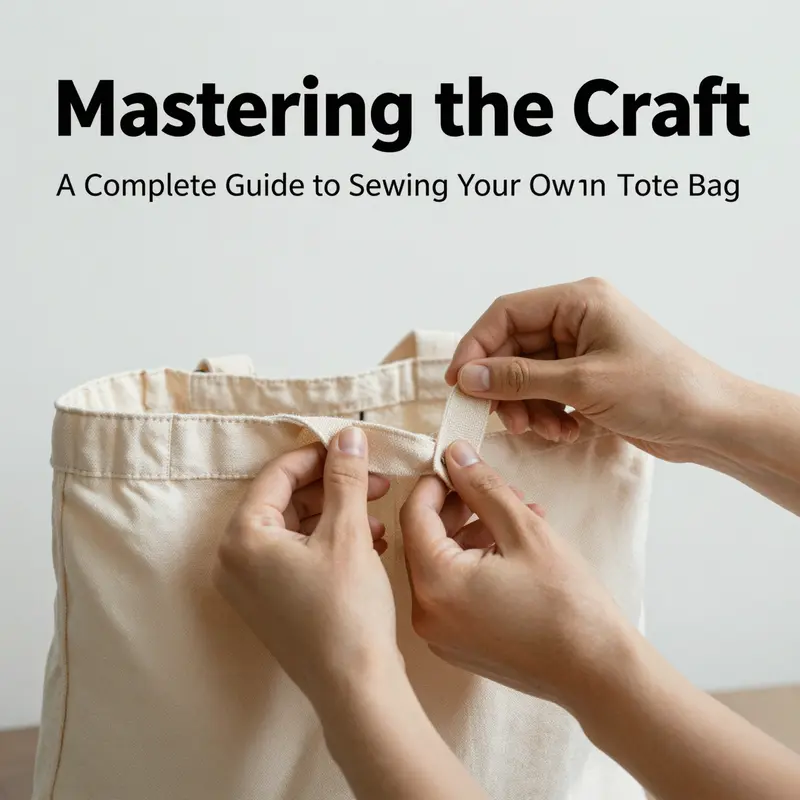
Handles carry much of the bag’s daily load, so stitching them securely is essential. Many beginners favor hand-stitching because it offers control and feedback as you work through multiple layers. The typical method involves placing the handles on the outside of the bag, with their center point aligned with the bag’s top edge center. You’ll then bring the ends down through the inside of the bag and up through the corresponding hole on the opposite side. On the inside, use a strong thread—polyester works well—with a needle, and anchor the handle end through the bag fabric using a sturdy stitch. A double backstitch or a whip stitch provides a robust anchor, especially when the bag will be carried with heavier items. Repeat for the other handle, ensuring both are symmetrically placed and tensioned so the bag sits evenly in your hands. If you prefer machine stitching, you can still secure the handles by placing the ends between the outer fabric and the lining at the top edge. Center them, and sew through all layers with a reinforced zigzag or straight stitch. The choice between hand and machine work often comes down to comfort and the fabric’s thickness; the key is securing the handle through all layers so it won’t pull away under weight.
Bottom corners are where strength is put to the test. Those points meet the worst stress when you lift a full bag. To reinforce, turn the bag right side out to reveal the bottom corners where the side seams meet the bottom seam. You can cut a small scrap square or simply use a doubled-over piece of fabric to form a triangle in each corner. Pin the folded corner in place, then sew along the diagonal fold line with a strong, straight stitch. This creates a triangular brace that reduces stress transfer from the handle and sides into the bottom seam, helping to prevent tearing at the corners. If you prefer a neater look, you can also reinforce the inside with a small piece of interfacing or a bonded patch under the corner seam. Either approach adds practical durability without adding bulk or visible hardware, preserving the tote’s simple, clean aesthetics.
As you complete these steps, a cycle of inspection should accompany the work. Look over every seam carefully and trim away any stray threads with sharp scissors. Gently tug on the handles and along the top edge to confirm there is no give that could become a failure point under load. A final pressing session brings the bag back to a uniform appearance, smoothing wrinkles and aligning stitches so the finish reads as deliberate craftsmanship. This last touch matters because the eye notices even small irregularities when the bag is worn or displayed. A bag that presents a crisp edge and symmetrical handle placement communicates care and capability, inviting everyday use rather than occasional display.
The philosophy behind these finishing touches is practical: they increase the tote’s lifespan while preserving its straightforward charm. The bag’s exterior remains free of excessive ornamentation, relying instead on precise workmanship and sturdy materials to carry it through the daily rhythms of work, school, or errands. Material choices matter at this stage as well. A sturdy fabric with a bit of weight can hold shape and resist sag, while a compatible lining adds structure to the interior. The thread you select for topstitching and for any hidden seams should complement the fabric’s weight, ensuring even stitches and avoiding puckers. If you’ve added interfacing for extra body, the finishing steps become even more critical; the pressure of pressing and the strategic stitching work in harmony to preserve a crisp silhouette. With each consideration, the tote becomes less a fleeting craft project and more a ready-to-use item that can travel through daily life with you.
For readers curious about fabric ecosystems and what materials contribute to a tote’s character, consider exploring different fabric families and their effects on durability and feel. Within the broader world of tote making, the options range from sturdy canvas to soft, drapable textiles, each offering a different balance of weight, resilience, and hand. A well-chosen fabric paired with thoughtful finishing touches turns a simple tote into a dependable companion that endures repeated use without losing its shape. If you’re seeking examples of related projects or more ideas on fabric choices, you can explore broader collections that feature similar silhouettes and construction logic, which reinforce how finishing details can unify a bag’s exterior with its interior.
As you near the end of the finishing process, you might also reflect on how these small decisions influence the bag’s life beyond the moment of completion. The neatness of the top edge, the symmetry of the handles, and the reinforced corners all echo through time as you carry groceries, books, or gym clothes. The tote’s practical verdict rests on these details: the bag should carry weight without distorting, feel comfortable in your grip, and present a neat, tidy appearance whether you’re commuting, attending classes, or running errands. In everyday practice, those finishing touches become a repeatable routine you can apply to future projects, transforming a basic tote into a reliable, beloved accessory. For those who want to extend their learning with related projects, see the broader category of canvas tote styles and patterns that share the same foundational steps, and notice how the finishing details adapt to different shapes and uses. women’s canvas tote bags. This link serves as a reference point for exploring how similar construction principles translate across multiple tote designs, not a replacement for the careful, hands-on process outlined here.
In sum, finishing touches aren’t cosmetic frills; they are the practical measures that preserve structure, extend durability, and elevate the tote’s everyday utility. The next chapter will build on this foundation by delving into creative variations—alternate pocket placements, interior organization ideas, and how to adapt the basic tote for different occasions—while still relying on the same careful attention to finishing principles that make any tote a reliable companion for daily life.
Final thoughts
Understanding how to sew a basic tote bag not only enhances your crafting skills but also opens up new avenues for customer engagement and product offerings. Incorporating custom tote bags into your business can set you apart in a competitive market, enabling personalization that attracts and retains customers. Embracing this skill elevates brand identity, showcasing craftsmanship that resonates with your audience. Moving forward, consider how these tote bags can play a role in your business strategy, whether through selling them directly, offering workshops to engage customers, or using them as promotional items. The opportunities are as vast as your creativity.