Creating tote bags with zippers offers a blend of functionality and style, making them an essential accessory for modern consumers. For business owners, understanding how to produce these items effectively can boost product offerings and enhance customer satisfaction. This article explores the material choices relevant to tote bags, outlines key sewing techniques for zipper pockets, and provides a comprehensive step-by-step assembly process. With this knowledge, you will be equipped to design tote bags that not only appeal to your clientele but also align with your business’s quality standards.
From Fiber to Fastener: Material Choices that Shape Durable, Stylish Zippered Tote Bags
Material choices are the quiet architect of a tote bag with a zipper. The color and pattern you adore only shine when paired with the right weight, weave, and stiffness of fabric, plus a zipper that behaves under daily use. When you start with a clear sense of how the fibers will live with the zipper, you set yourself up for a bag that is not only attractive but reliable. The discussion below threads together the practical realities of fabric selection, zipper types, and the small decisions that compound into a durable, elegant finished piece. It’s a narrative that invites you to think about the bag as a system, where every element supports the others, rather than as a collection of parts stitched together. As you plan your project, you’ll see how a simple zip can dictate fabric weight, pocket proportion, and even the way you finish the top edge. The intention is to illuminate how material choices influence the entire construction—from the moment the fabric is cut to the moment the bag meets the daily rhythm of wear and care.
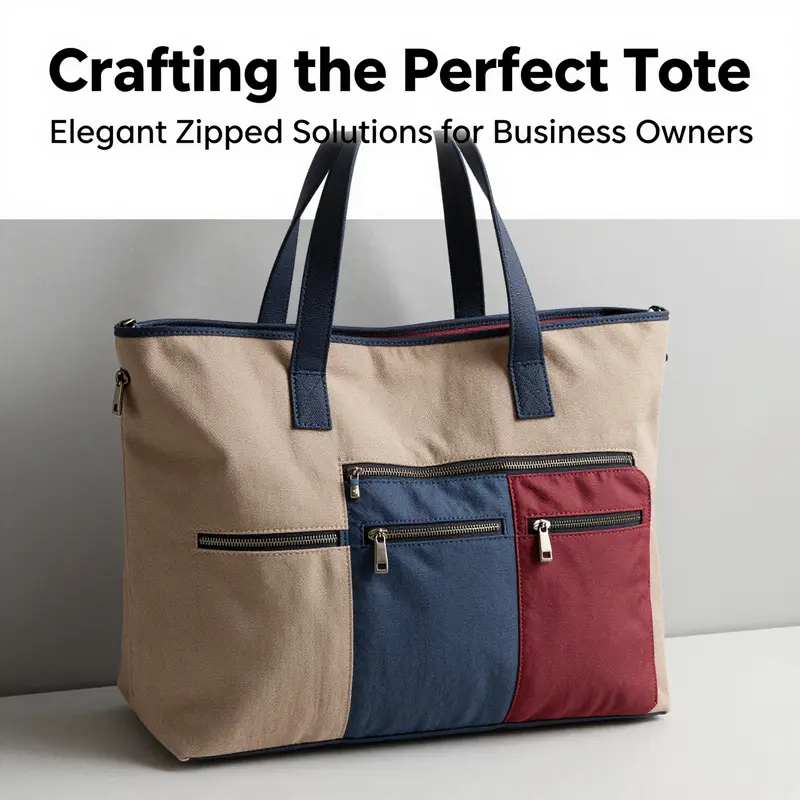
The fabric you choose for the tote body sets the tone for every other decision. A sturdy cotton canvas or a durable denim offers a sense of everyday resilience. These heavier textiles are built for daily errands, book-laden commutes, and the kind of use that involves a lot of reach-in, reach-out retrieval. They provide a crisp shape and a reliable surface that can take topstitching without puckering. When the bag is expected to carry heavier loads or endure frequent abrasion, a robust canvas or denim acts as a natural partner to a zipper that will experience repeated openings and closings. In addition, the way the fabric drapes will influence the tote’s silhouette. A more structured fabric helps the bag hold its shape when the zipper is closed, while a stiffer surface can make the zipper area feel neat and composed. This is the moment where form and function converge—the fabric’s density and the zipper’s engagement meet to form a coherent daily-use object.
But not every tote is meant for rugged duty. Light, airy fabrics—polyester blends or lightweight cottons—suit bags meant for seasonal use, gift-ready presentations, or weekend tote-outs that don’t travel with the planet’s heaviest loads. Lighter materials create a more relaxed, flexible feel that some people prefer for fashion-forward or sprint-to-market totes. The trade-off, of course, is endurance. The zipper may encounter more stress if the fabric is slack, especially where the zipper teeth meet fabric near the seam allowance. That’s why the construction plan should account for the fabric’s thickness and the zipper’s size. A thin fabric paired with a long, sturdy zipper may feel capable enough in the short term, but over time, the seam edges around the zipper can begin to soften or misalign. Conversely, a thick fabric with a slim zipper can create tension that makes the zipper stiff or the pull difficult to operate smoothly. Matching fabric weight to zipper size is a practical, often underappreciated, design consideration.
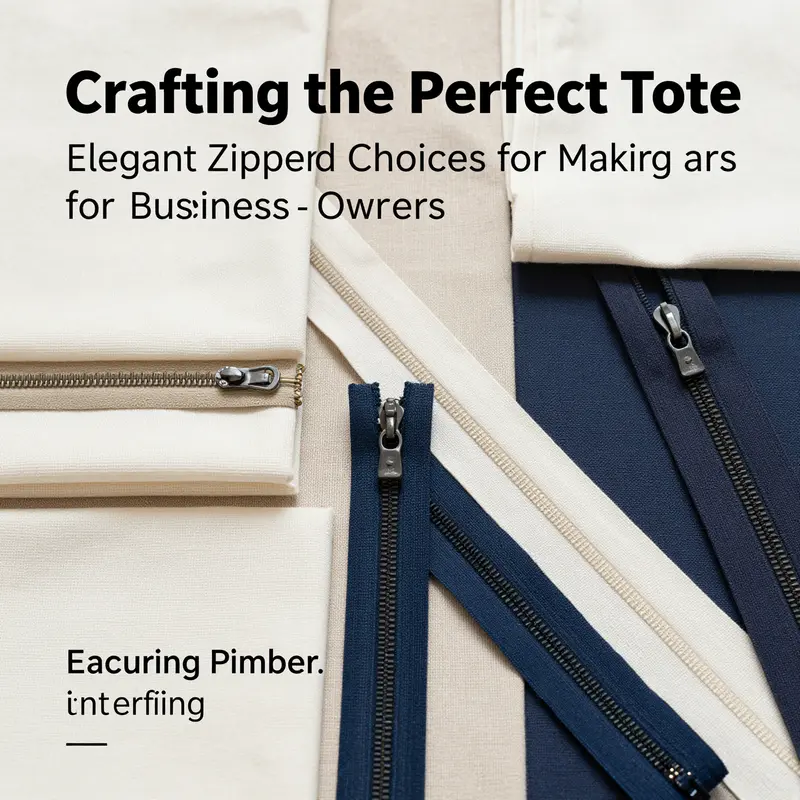
Speaking of zippers, the type and weight of the zipper you choose profoundly affect the bag’s personality and behavior. A zipper is not merely a functional closure; it is a mechanical partner that influences how you access what’s inside, how you top-stitch, and how the edges meet. There are different families of zippers to consider. Nylon coils are flexible and lightweight, making them a natural choice for casual totes where the zipper needs to move with the fabric’s drape. For a bag that aims to feel refined and substantial, a heavier, metal or metal-look zipper can add tactile luxury and a sense of durability. Plastic coil zippers strike a balance between cost, strength, and ease of use, offering weathered practicality without the heft of metal. The key is to assess how often the bag will be opened and closed and what it will carry. A tote destined for daily commuting may benefit from a smoother, more robust closure that resists snagging, while a seasonal bag might be fine with a lighter, more budget-friendly option.
Length is another practical parameter. The zipper should open enough to give easy access, but not so long that it adds bulk or creates weak points around the seam. If you’re envisioning a zippered pocket inside the tote, the zipper length should align with the pocket’s opening. In the material planning phase, it’s essential to consider how the zipper will be stitched into the lining and the bag body. A zipper that’s too long for the pocket can complicate edge finishing, while a zipper that’s too short can hinder reach and usability. The finish around the zipper matters as well. A clean finish—where the zipper ends are neatly secured and the top edge is balanced with the lining—helps the bag feel polished. A contrasting zipper color can serve as a purposeful accent, while a matching zipper can read as a seamless extension of the bag’s surface. Either choice should be guided by the overall design intent and the fabric’s character.
Interfacing is a subtle but influential factor, especially when your fabric is light or mid-weight. A fusible interfacing adds structure and helps the seams stay crisp after repeated use. It also helps the zipper sit flat along the seam, reducing the risk of ripple or fabric creep near the zipper tape. The recommended weight—often around 60 grams per square meter for lighter fabrics—offers a gentle boost to stiffness without creating a stiff, cardboard-like feel. If you prefer a soft, drapey bag, you can omit interfacing or use a lighter weight alternative. The decision hinges on how the fabric responds to topstitching and how much body you want the bag to maintain when it’s empty. If you’re using a coarse canvas, you might choose to forego interfacing or to selectively apply it only in the zipper region to reinforce the stress points without overburdening the fabric’s texture.
The lining and pocket fabric deserve equal attention, because the inner pocket is where the zipper’s performance is most intensely felt. A lining with enough body helps the zipper glide smoothly and keeps the pocket’s interior tidy. A slightly heavier lining can resist snagging and keep any contents from pressing against the zipper teeth, which is especially important for smaller zippered compartments. The inner pocket fabric should complement the tote body’s weight and the zipper’s thickness. A lining that’s too delicate may wear quickly around the zipper and seam allowances; a lining that’s too stiff can create bulk and make the assembly feel clunky. The goal is a balanced combination where the lining supports the zipper’s movement while preserving a clean interior footprint.
Construction details also shape the final feel and longevity of the bag. Threads and stitches matter as much as fabric and zipper. A heavier-weight thread, matched to the fabric’s density, anchors the seams that bear the most stress—especially at the top edge and around the zipper opening. This is not a place for thin, quick-stitch approaches; consistent, evenly spaced stitches help the bag endure daily cycles of zip and unzip. Similarly, the backstitch at the zipper ends and the final finishing around the seam allowances contribute to durability. If you’re working with lighter fabrics, slightly longer stitch lengths can mitigate puckering; with heavier fabrics, shorter stitches provide more control and prevent bulky seams.
Color coordination and finish bring the entire look together. The zipper’s finish, color, and sheen interact with the fabric’s tone and texture. A metallic zipper end can pair with a denim body for a casual, rugged vibe, while a matte, hidden-closure zipper can preserve a minimalist aesthetic on a light cotton or linen tote. The top edge finishing is where the eye notices quality. If you lay the lining against the main fabric and sew around the top with a careful pivot, you’ll see a neat, uninterrupted line that reinforces the sense of craftsmanship. A small detail—like a tiny topstitch along the top edge—can greatly enhance the bag’s presence, especially when the zipper sits just below that line.
As you plan, imagine the bag’s life: where will you place your daily items, how heavy will the contents be, and how often will you access the zippered pocket? The material choices should align with that life. A practical tote that carries notebooks, a water bottle, and a few personal items benefits from a sturdy fabric and a zipper that glides easily when the bag is half-full. A bag designed for light, seasonal use can lean into lighter fabrics, with a zipper that delivers a smooth close without adding bulk. The aim is harmony—every material choice supporting the zipper’s performance and the bag’s intended rhythms.
When you look at the broader landscape of tote bags with zippers, you’ll notice that the best projects foreground material decisions as a first principle. While the zipper is the mechanism that makes the pocket secure, the fabric, lining, and interfacing are the scaffolding that keeps the pocket true and the bag’s shape consistent. The interplay of thickness, weight, and stiffness across textile choices will determine whether your zip stays aligned or whether the bag invites a minor edge curl after repeated use. This is why the planning stage matters. It’s not simply about choosing your favorite fabric or a preferred zipper type in isolation—it’s about envisioning how they will work together, under the daily demands of life.
For readers who want a practical frame of reference that translates theory into hands-on steps, consider visiting a concise guide that walks through the process of making a zippered tote bag. It offers a tangible example of how material choices influence each seam and interaction with the zipper. You can find a concise, action-focused overview here: tote bags with zippers.
The materials conversation also invites a broader look at durability. Reinforcement around the zipper is a common but critical enhancement. A little extra stitching at the base of the zipper and a small patch of interfacing behind the zipper tape can prevent stress points that develop where fabric and teeth meet. This is especially true if the bag will carry heavier items or will be opened and closed many times each week. The idea is to shield the seam with a small buffer—enough to distribute forces more evenly, so the zipper operates smoothly and the fabric does not creep or stretch over time. In effect, durability is a consequence of thoughtful material layering and careful seam work. It’s in these details that a tote transitions from a craft project into a reliable everyday companion.
Care and maintenance also fit into the material conversation. Heavier fabrics tolerate more aggressive wear and can handle a longer life with less frequent care. Lighter fabrics, by contrast, may benefit from more mindful handling, especially around the zipper, where snagging or fabric fatigue can occur. A gentle wash cycle, appropriate detergent, and air drying help preserve both the fabric’s color and the zipper’s integrity. If you’ve added interfacing, follow the interfacing manufacturer’s guidance for care, as some options may not respond well to vigorous washing or high heat. Keeping the zipper free of lint and debris is a small habit that pays off in smoother operation and longer life. In everyday practice, a simple wipe-down after use and a careful check of the zipper pull’s alignment can prevent small issues from turning into larger maintenance headaches.
Ultimately, the art of material choice is about balancing aesthetics, function, and longevity. The conversation begins with the fabric’s weight and weave, continues through the zipper’s type and length, and culminates in how the lining and interfacing support the overall structure. When these elements speak to one another clearly, the result is a tote bag that isn’t just attractive but confident in its daily life. A strong fabric helps the seams hold their shape; a well-chosen zipper glides with ease; a thoughtful lining keeps the interior tidy. The result is a bag that can travel, carry, and endure with a quiet dignity that only comes from material harmony.
If you’d like to dive into more practical guidance on the exact steps and assembly flow, you can consult a detailed, experience-tested guide that walks through the zippered-tote process in a straightforward way. This resource provides step-by-step alignment of fabrics, zippers, and linings, helping you translate the material decisions described here into a concrete, reproducible project. To explore this hands-on approach, you’ll find a helpful overview here: [tote bags with zippers].
For further reading on material choices and practical tips, you can also consult an external resource that offers a concise, real-world perspective on zipper-tote construction. This guide covers essential considerations for fabric weight, zipper strength, and finishing techniques that protect against wear and tear, helping you refine your technique and make smarter material decisions as you design future projects. External guide: https://www.sheknows.com/lifestyle/2025/12/3-simple-steps-to-make-a-zippered-tote-bag/
Mastering the Zip Pocket for Functional Tote Bags
A tote bag can be more than a simple carrier; when you add a zippered pocket, it becomes a thoughtful, organized feature for daily essentials. The secret is in careful preparation, precise seam allowances, and a tidy turning gap that hides the zipper inside the lining. Start with the basics: two outer fabric pieces about 28 cm by 14 cm, a lining piece around 16 cm by 14 cm, and a 14 cm zipper. A light interfacing around 60 g can help the pocket hold its shape, but you can omit it for a softer drape. Attach the zipper to the lining with the teeth facing inward, using a zipper foot for close alignment. Then sew the second half of the zipper to the bag’s main seam allowance, sandwiching the zipper between the lining and outer fabric. Turn the pocket unit right side out and press for crisp edges. Tuck the pocket into the tote, aligning top edges, then stitch the pocket to the interior along its top edge and finish the bag by attaching the lining. The result is a secure, accessible interior pocket that stays neat and balanced in everyday use. To extend the concept, consider another interior pocket or a small external zip on the side, while keeping the core principles intact: secure zipper attachment, precise alignment, and reinforced stress points. Visual guides can help you see how the layers come together; for example, many sewing resources show pocket insertion steps with close-up images. You can explore galleries and tutorials to see variations on pocket size and placement and to practice with different fabrics and zipper types.
Stitch by Stitch: Crafting a Zipper-Enhanced Tote That Holds Its Shape
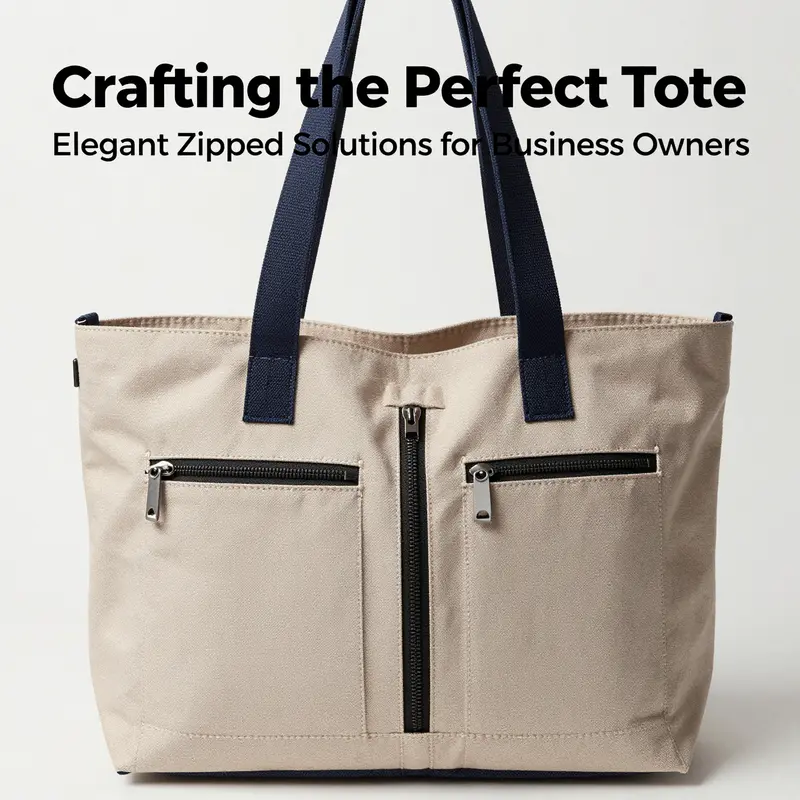
A zippered tote pocket isn’t an afterthought; it is a deliberate design choice that pairs practicality with durable style. When you weave a zipper into the pocket of a tote, you create a small secure nook for keys, cards, or a compact notebook—an ally in crowded markets, buses, or campus halls. The aim is to elevate utility without changing the bag’s silhouette. The approach invites careful material selection, precise cutting, and thoughtful assembly, while remaining accessible to beginners. The core idea: shape the main body, add a zippered pocket, and attach it inside the bag so items stay organized. The steps from planning to a finished piece flow with a calm rhythm as you stitch, press, and turn.
Begin with a clear plan and the right materials. For a compact tote that still feels generous, cut outer pieces about 28 cm by 14 cm, and a lining piece around 16 by 14 cm. Choose a zipper around 14 cm for a neat balance; if you prefer extra room, a slightly longer zipper makes turning easier. If you want more structure, fuse a light interfacing (around 60 g) to the wrong side of the outer pieces before assembly to boost stiffness. Have reliable thread, sharp scissors, a pressing surface, pins, and a steady iron ready. The process is modular by design, but the magic lies in small details that make the tote feel cohesive rather than stitched together.
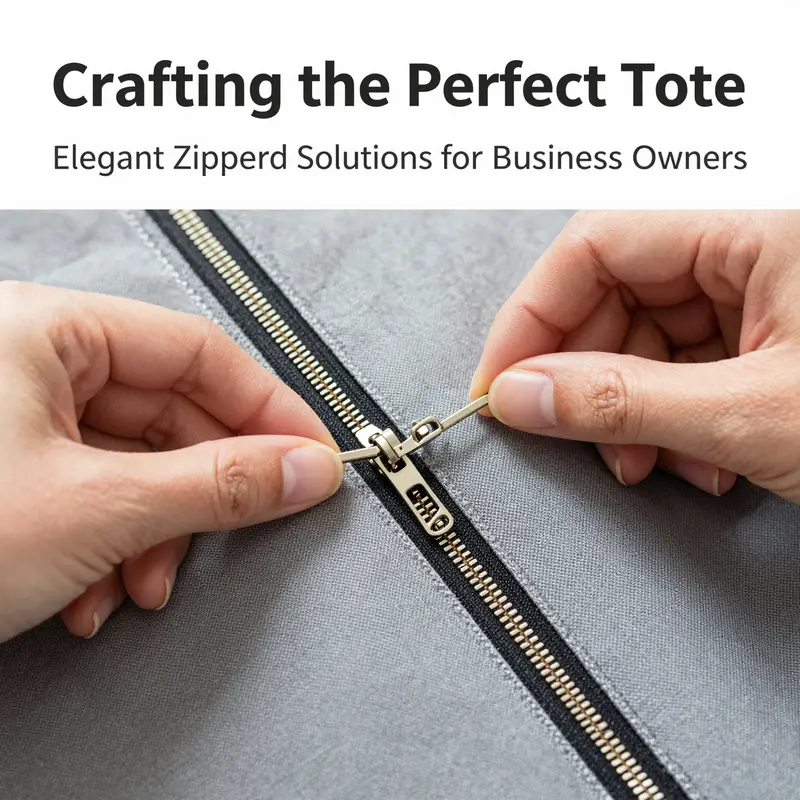
The heart of the project is the zippered pocket. Lay the lining piece flat, place the first half of the zipper onto its center with teeth facing inward. Sew along one side with a straight stitch, keeping stitches neat. The zipper head should stay smooth and easy to use; beginner-friendly spool zippers can be cut to size and attached with simple adjustments. Next, lay the two outer fabric pieces right sides together, insert the second half of the zipper into the seam allowance so the zipper sits between outer layers, and sew along both sides to secure. After sewing, turn the pocket unit right side out through a small opening in the lining. Press to set edges, then close by adding a small snap at the top edge of the lining if desired.
With the zipper pocket complete, assemble the tote’s main body. Sew the two outer pieces together along the sides, leaving one side open for the interior. If using interfacing, fuse it to the wrong sides before assembly. Position the finished pocket inside the bag, aligning the top edges so the pocket opening sits at the bag’s interior mouth, then stitch the pocket to the bag to fix its place.
Sew the lining in a similar cadence to the exterior. Join the lining pieces along the long edges, then slide the lining inside the outer bag so their right sides face each other. Align the top edges and pin; sew around with a 1/2 inch seam allowance, leaving a turning opening. Turn the bag right side out, press the top edge, and close the turning opening.
Finishing touches: create handles by folding fabric strips lengthwise, pressing, and sewing along the edges. Attach handles to the tote by sandwiching between outer and lining layers at the top corners. For extra durability, reinforce bottom corners before joining lining. The result is a sturdy tote with a securely integrated zippered pocket that remains easy to access and just right in silhouette.
The design invites small variations, such as adding a second interior pocket or a dedicated card pocket. Zipper type can influence ease of use, so choose a coil, molded, or spool zipper based on your preference. For more ideas, explore external guides and tutorials that complement this chapter, keeping the emphasis on careful plan, precise stitching, and mindful pressing to achieve a clean, professional finish.
Final thoughts
Incorporating zippers into your tote bag designs not only enhances their functionality but also provides a unique selling point for your business. Understanding the right materials, mastering sewing techniques for zipper pockets, and following a structured assembly process are essential for success in this creative endeavor. By implementing these insights, you can create high-quality tote bags that resonate with customers and reflect your brand’s commitment to quality and style.