A basic tote bag can be a powerful tool for branding and functionality in a business setting. By crafting your own tote, you can offer personalized solutions to your customers while reinforcing your brand identity. This guide will walk you through the essential materials needed, detailed step-by-step instructions, and creative finishing touches to elevate your tote bag-making experience. Each chapter is designed to provide you with the insight necessary to attractively present your products or artwork in an eco-friendly way, aligning with modern consumer values.
Sturdy Simplicity: Building a Basic Tote Bag That Lasts and Looks At Home Anywhere

A tote bag is more than a simple container; it is a portable everyday companion that carries the details of your day— groceries, books, a sweater, a laptop in transit, a market run, or a quick weekend trip. The charm of a well-made basic tote lies in its quiet practicality: clean lines, sturdy seams, and fabric that ages gracefully with use. When you know the core materials and the core steps, the process becomes a satisfying rhythm rather than a chore. The goal is a bag that stands up to daily movement while remaining easy to sew, easy to repair, and easy to customize. To begin, you’ll want a main fabric that can withstand a little weight and a bit of friction. Canvas, denim, or a heavy cotton works well because these fabrics hold color and wear in a way that looks better with time. The typical outer body is created from two pieces cut to a size like 32 centimeters by 70 centimeters, though you can adjust the dimensions to suit your needs or fabric width. A companion lining fabric of the same size keeps the interior neat and secure, creating a bag that feels finished rather than provisional. The handles are long fabric strips that will carry the bag when you wear it or sling it over a shoulder, and their length should balance comfort with practicality. The classic recommendation is two handle pieces, cut to about 6 centimeters by 150 centimeters each, though you can adapt these to leather, pre-made straps, or other textiles if you prefer. In addition to fabric, you’ll gather standard sewing tools: a machine, a spool of strong thread in a matching or deliberately contrasting color, sharp scissors, pins or clips, a ruler, and an iron. With these basics in hand, the rest unfolds in a flow that feels almost meditational as you translate flat fabric into a functional, everyday bag.
The beauty of this project is that it remains approachable regardless of your sewing experience. There is a rhythm to it that you can lean into, especially when you think of the bag as two main pieces—the outer body and the lining—that will come together in a shared moment at the top edge. The outer body begins as two rectangles of the same size, joined along their long sides and bottom to form a pouch. The right sides face each other during this initial seam, so the finished exterior of the bag remains pristine and clean. Because you sew with a 1-centimeter seam allowance in this basic construction, the process rewards accuracy without demanding advanced technique. After sewing the sides and bottom, you turn the outer body right side out through the top opening. The lining is built in the same way, and although it starts as a separate bag, it will be tucked inside the outer shell once the top edge is secured. The act of attaching the handles happens at the very end of the main assembly, binding the outer bag to the lining in a single top seam that is both decorative and secure. When you work with fabric choices and seams that align, the tote’s construction becomes a clean, almost elegant exercise in geometry and patience, rather than a series of technical hurdles. If you’re exploring fabric options, you might find it helpful to browse a wider selection of canvas and tote inspirations, such as the broader family of tote fabrics and styles available online, which can offer ideas about weight, texture, and color that suit your needs. For example, you can check out resources that showcase a range of canvas tote possibilities to glean how different textures take dye, how stitching sits on heavier fabrics, and how colors wear with time. If you’re curious about more varieties of tote fabrics and how they influence form and durability, you can explore Women’s Canvas Tote Bags.
When you move from planning to cutting, a calm, measured approach makes a real difference. Start with the outer fabric and cut two pieces to your chosen size. Do the same with the lining. If you’re considering pockets or interior organization, you might cut an extra piece for a small inner pocket or two pieces for exterior pockets on the front or back of the tote. A common choice is two outer pockets sized roughly 32 by 24 centimeters each. An inner pocket, perhaps 20 by 13 centimeters, adds a discrete space for small items such as keys or a transit pass. These pocket pieces give you something to sew into the lining or onto the outer body before assembling, so you don’t have to add them after the bag is already formed. The handle material is equally flexible. You can cut your straps from the same main fabric or from the lining fabric if you want a lighter strap, or you can substitute leather or a ready-made strap for variation. The length you choose will depend on how you want the bag to sit when worn—long enough to loop over the shoulder is a practical baseline.
As the fabric is prepared, consider thread choice and color. A thread that matches the fabric color tends to disappear into the seam, creating a calm, uniform look that highlights the bag’s silhouette rather than its stitching. If you’re aiming for a more graphic effect, a contrasting thread can serve as a subtle design feature that makes the seams a visible, intentional detail rather than a mere construction line. The tools you bring to the project aren’t glamorous, but they are essential. A sturdy sewing machine helps you achieve even stitches on heavier fabrics, and sharp scissors yield clean cuts that won’t fray. Pins or clips keep the pieces aligned while you sew, a ruler ensures your lines stay straight, and an iron helps your fabric lie flat and move under the needle with ease. The initial cut may feel like a quiet chore, but the precision you apply now pays off when you start to assemble the bag. A well-cut piece slides under the presser foot with minimal resistance, and the seam allowance remains consistent along each edge, preventing ripples that could make the top edge look uneven after turning.
Once you’ve cut the pieces, the process of constructing the outer body becomes almost ceremonial. Place the two outer fabric pieces together with their right sides facing each other. Pin or clip along the top and bottom edges to hold them firmly in place. Sew along the two long sides and the bottom edge with a 1-centimeter seam allowance. It’s important to keep the fabric aligned as you sew so the corners are neat and square; a corner that slips or skews will translate into a bag that looks imperfect once turned right side out. When you reach the top edge, leave it open as directed, because you’ll later turn the whole bag inside out through that opening. Turning the outer body right side out after this seam is complete reveals the clean exterior surface and prepares the bag for the next stage of assembly. The tension of the machine should be set so the stitches don’t pucker the fabric, especially along the bottom seam where the fabric can be a little stiff. If your fabric is particularly thick, you may opt for a slightly longer stitch length to prevent the fabric from gathering. The turning process itself requires a gentle hand—use a blunt tool or the eraser end of a pencil to push out corners and edges so the shape remains crisp and the seams sit nicely inside the bag.
The lining is created with equal care, forming a second bag that functions as a concealed inner space. Repeat the same sewing steps used for the outer body to produce the lining. This dual-bag approach—outer and lining—gives you a sturdy shell and a neat interior, with the lining kept safely inside the outer shell when the bag is complete. The performance of the lining becomes evident when the bag is turned right side out after sewing the top edge. The lining will be tucked inside, and the outer fabric will present the exterior you intended. At this stage you can decide whether to place pockets in the lining or on the outside. The choice depends on how you want to distribute weight and how easily you want to access a phone, keys, or a notebook. Pockets, when added, should be sewn to the lining before you attach the top seam. The outer pockets, if used, can be placed directly onto the outer shell before the top edge is joined or added to the lining itself, whichever approach suits your design and your comfort with handling multiple layers. The top edge seam then becomes a single, continuous line that binds both outer and lining together, with the handles secured in this vital junction. The resulting seam is visibly clean and structurally sound, reinforcing the area where stress is most likely to occur—where the bag is carried.
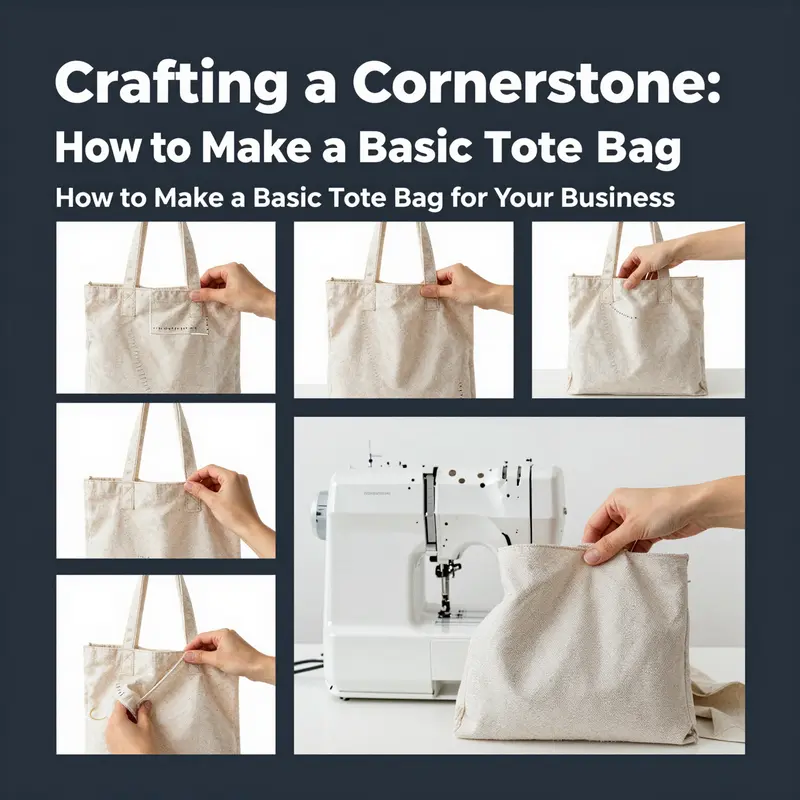
Attaching the handles is the moment when the bag transforms from a simple shell into a usable everyday object. With the lining bag opened so its right side faces outward, place the outer body on top of the lining with their top edges aligned. The outer body should be on the outside, and the lining on the inside, so when you sew around the top edge, you are effectively stitching through both layers and the handles in a single motion. Pin or clip all raw edges together and sew around the entire top edge with a 1-centimeter seam allowance. This single seam anchors the handles to both the outer body and the lining, creating a durable connection that can bear daily wear. If you’ve added pockets or interior dividers, this top seam also helps hold those features in place, ensuring they stay aligned as the bag fills with goods. As you sew, you’ll notice the exterior fabric becoming one continuous surface, while the interior is secured and enclosed. When you reach the end of the seam, trim any stray threads and ensure there are no folds or twists in the lining that could interrupt the bag’s silhouette once turned right side out.
Finishing the bag is a quiet ceremony of flipping the pieces into their final orientation. Turn the entire bag right side out through the top opening. A blunt tool helps you push the corners into sharp, neat points so the bag holds its shape. The lining remains tucked inside the outer shell, with the top seam creating a clean, finished edge. The handles, now securely attached, present a balanced look: the width of the strap and the height of the bag pair well to offer comfortable carrying options. The first test is a simple load: you might start with a light, everyday assortment of items to check the bag’s balance and the strength of the handles. If the bag holds its shape well and the seam remains flat, you have achieved a durable, practical tote that can accompany you from morning coffee runs to weekend errands. If you’d like to personalize your tote, you can add decorative touches such as contrasting topstitching, a pocket accent, or a small label. The basic method remains the same, but your tote can begin to reflect your style as you incorporate pockets, embellishments, or a bit of color coordination.
To broaden the conversation around how a basic tote can fit different needs, think about variations that align with your daily routine. If you frequently carry a laptop or a tablet, a dedicated sleeve or a laptop pocket can be integrated into the lining or along the interior with a simple rectangular panel and elastic to secure devices. For a market tote that will hold more weight, consider a firmer main fabric or an additional reinforcement along the bottom seam. If you want pockets but still prefer a clean exterior, place small pockets on the inside of the lining and keep the exterior free from extra seams. The top edge seam remains the visual boundary, while the interior pockets become functional features you can reach without digging through the entire bag. When you finish, you might recall the initial materials: a sturdy outer fabric, a matching or complementary lining, two handle pieces, thread, and the common sewing tools. The practical steps you followed—cutting, stitching, turning, attaching, and finishing—are the backbone of a reliable tote. The design choices that follow—the number and size of pockets, the type of handles, the color palette, and even the edge finishing—offer a wide range of expression without sacrificing the core durability that makes a tote truly usable day after day. If you want to explore more about fabric choices and how different textures influence the feel and drape of a tote, revisit the idea of canvas versus denim, or lightweight cotton versus a heavier twill, and compare the way each fabric wears over time. The path you take is less about a single finished piece and more about a mindset: you’re crafting a dependable companion that will age with you and your habits, not against them.
As you continue to refine your tote-building skills, you may find yourself revisiting the basics with a slightly different lens. A tote is a canvas for your daily life, and the beauty lies in its simplicity and reliability. The materials you choose and the care you give to each seam determine how long your bag will serve you and how well it will wear in. The fundamental steps—the careful cutting, the methodical sewing along the edges, the mindful turning, and the deliberate attachment of handles—are universal. They translate whether you’re making a minimalist tote for quick trips or a more structured version designed to hold heavier loads. In any case, the balance between outer shell and interior lining remains the same, a reminder that form and function can walk hand in hand in even the most unassuming of projects. If you’re curious to see how others adapt this basic framework, you can explore a wider range of tote designs that emphasize different features, such as reinforced bottoms, zipper closures, or tailored corners. These variations don’t replace the core method; they build atop it, much as a well-cut fabric panel supports a sturdy seam. The chapter on materials and the method described here connect to a broader conversation about practical sewing: how a simple bag can become a trusted workhorse in your wardrobe, how the choice of fabric communicates your style, and how the tiny, almost invisible details—the alignment of edges, the consistency of the seam allowance, the crispness of the corners—collectively determine the bag’s everyday resilience. For readers who want a quick reference to fabric choices and practical tips for beginner projects, consider extending your reading to related tote guides that explore fabric weight, seam finishes, and pocket placements. The journey from flat fabric to finished tote is a small, rewarding adventure that invites you to pause, measure, and admire the results as you go. The next steps in your sewing journey may involve experimenting with pocket configurations, exploring different handle styles, or even testing new finishes to protect your bag from wear and weather. Whatever direction you choose, your basic tote stands ready as proof that thoughtful craft, methodical planning, and straightforward techniques can produce a durable, attractive object that serves you well and grows with your daily life.
External resource you may find useful for broader context on tote construction and finishing techniques: https://www.threadsmagazine.com
null
null
Finishing Touches and Variations for Your Basic Tote Bag

When you finish the construction of a basic tote bag, the real conversation begins. The bag has moved from a simple rectangle cut and sewn into a practical, durable object that carries more than its weight in items; it carries your daily rituals, your color choices, and your personal sense of design. This chapter is about the small, considered changes that transform a plain tote into a canvas for everyday expression. It explores subtle upgrades that improve grip and comfort, introduces decorative touches that echo your style, and offers practical variations that keep the bag useful across seasons and needs. The ideas are intentionally grounded in materials you already chose for the project, so they fit naturally into your workflow without demanding a new toolkit or costly supplies. Think of these finishing touches as a dialogue between function and flair, where the same sturdy tote you made to carry groceries and books becomes a lighter, brighter companion for work, travel, or weekend adventures.
A first improvement that many makers overlook sits right at the handgrip level. A refined hand rope or reinforced handle wrap can dramatically increase comfort while adding a quiet, artisanal touch. You can experiment with a cotton rope, a soft leather cord, or a slim metal cable, depending on the look you want and the weight you expect to carry. The key is to anchor the rope or wrap securely so it won’t loosen after a few carries. One practical approach is to thread the rope through a simple loop stitched onto the outer fabric near the handle base, then wrap along the handle itself with a snug, cross-stitched or whip-stitched finish. If the wrap feels too bulky for you, try binding the upper edge of the handle with a narrow fabric tube that matches or contrasts with the main bag. This creates a tactile, comfortable grip without noticeably increasing the bag’s overall dimensions. For a more tailored effect, you can insert a small, removable cord stopper or adjustable buckle at the midpoint of each handle. That allows you to shorten or lengthen how the bag sits on your shoulder, accommodating different outfits or seasonal clothing while preserving the bag’s clean lines.
Decorative yet purposeful accents can elevate the tote without overwhelming its clean silhouette. Pendant accessories, for instance, offer a focal point that’s both functional and aesthetic. A lightweight charm or keychain tethered to a discreet D-ring or a sewn-on loop near the top edge can serve as a personal signature. Below the surface, consider using a small, secure ring to attach a pendant that’s meaningful to you—perhaps a tiny charm made from brass, wood, or resin. The trick is to keep the hardware modest in size and to ensure it’s anchored with a robust stitch or a reinforced seam so it won’t snag or tear the fabric with use. Seasonally, switch pendants to reflect moods or occasions: a small pinecone charm in autumn, a flowery motif in spring, or a metallic bead that catches the light for evening outings. The versatility of a tote bag lies in these small changes that don’t redefine the bag but continually reintroduce it with fresh personality.
Equally compelling is the idea of reimagining the tote by giving it a new life through upcycling. The eco-conscious urge to repurpose old garments aligns perfectly with the tote’s practical DNA. Old denim jeans, for example, can be repurposed into patches, reinforcing panels, or even the entire bag body if the fabric weight suits the project. You might cut the thighs or legs into wide strips to create a color-block panel, preserving distressed edges for a retro, worn-in look. If you have a few mismatched fabrics—perhaps a denim leg paired with a cotton chambray or a sturdy twill—you can assemble a patchwork tote that narrates a story of your wardrobe’s past. When using upcycled textiles, choose fabric with comparable warmth and weight to your original main fabric. You’ll want the outer body to feel cohesive, not as if it’s several different projects stitched together midstream. Interior linings can also benefit from repurposed textiles, such as a laminated tablecloth for water resistance or an old, well-preserved cotton shirt that provides a soft handle and a refined interior. The result is a bag that carries not only your items but also a narrative of sustainable choices.
For those who enjoy handcraft as a form of art, hand drawing and embroidery open a direct line from heart to fabric. A simple motif drawn with a water-soluble marker onto a scrap piece of fabric can be used as a guide on the bag itself. Use a contrasting thread to outline floral or geometric designs, then fill in with embroidery stitches of varying lengths to create texture. If you’re new to embroidery, begin with straight stitches or backstitch outlines, then gradually introduce satin stitch for filled shapes and French knots for accents. Test your colors on a scrap of the same fabric before committing, especially since the outer tote will be visible in daylight and the embroidery will catch attention. A light hand is essential; you want the design to enrich the bag without making the surface stiff or puffy. The finished embroidery can be placed along a side panel, near the top edge, or circling the base to anchor the visual weight. The aesthetic payoff is immediate: the tote feels handmade, intimate, and distinctly yours. If freehand drawing isn’t your thing, you can still explore personalization through a carefully chosen iron-on patch or a delicate embroidery motif pinned in place, then sewn around its edges to ensure longevity.
Practical inserts also play a central role in transforming a basic tote into a reliable daily carrier. A small, removable pocket inside the bag can secure a phone, keys, or cards, while an exterior zip pocket offers quick access for essentials. The best version of this tweak is one that remains unobtrusive: a slim pocket sewn into the lining or a tiny exterior pouch attached with snap fasteners. If you prefer a dedicated space for electronics, consider adding a soft, padded sleeve that sits inside the tote. The sleeve need not be heavy or thick; a thin layer of foam between two fabric layers can cushion a tablet or a small laptop, while still preserving the bag’s overall flexibility. When attaching these additions, ensure that the inner seams are finished neatly and that any stitching lines complement the existing top edge. Seam allowances should be preserved to maintain the bag’s structure, and closures should be dependable, so items don’t shift around during transit.
The world of color, texture, and functional customization invites you to balance economy with expression. Color-blocking is a straightforward yet striking option. If you keep the outer body in a neutral base like natural canvas or denim, you can introduce a bold panel or two in a contrasting shade. Patchwork, using small scraps, can be a showcase of your fabric stash and creativity. The stitching for these features can be as visible or as subtle as you prefer: a bold topstitch in a contrasting color will celebrate the construction, while a tonal topstitch keeps the tote’s line clean and professional. The key to successful variation is to maintain a rhythm across your design. If you’ve inserted a hand rope at the handles or a pendant near the top, consider echoing those elements in the bag’s interior with a small lining accent or a stitched motif that repeats the pendant’s shape. A cohesive design language makes the finishing touches feel purposeful rather than random.
If you’re curious about expanding your tote beyond its basic form, consider a direction that feels both practical and stylish: the understanding that your bag can perform multiple roles. A tote that comfortably carries a laptop may also serve as a lightweight weekender bag when you swap to a softer lining and a slightly larger pocket configuration. The idea is simple: design around your needs and adapt. A bag made to be dependable for daily commutes will benefit from reinforced seams at stress points, reinforced bottom corners, and a little extra padding at the base. If you anticipate heavier loads, use a thicker lining fabric or add an extra reinforcement strip along the bottom edge. These adjustments don’t negate the original process; they extend it, letting your tote grow with your life’s changes without requiring a completely new bag.
As you weave these finishing touches into the tote, you may wish to explore related ideas that sit just beyond the scope of the basic pattern. For instance, if you’re curious about how a tote can integrate more advanced carrying options, a broader look at different tote styles can be enlightening. You can explore a broader range of tote variations, such as a tote with a built-in sleeve for a laptop, by visiting a resource that catalogs different designs. This link is provided for readers who want to compare features and find the form that says yes to their daily routine: tote bag with computer sleeve. It’s a gentle nudge toward recognizing how a small structural tweak—adding a sleeve—can influence usability while staying true to the original sewing steps you followed.
No matter which finishing touch you choose, the goal remains the same: to keep the tote’s core attributes—durability, simplicity, and ease of use—while inviting a personal narrative into its fabric. The process is iterative. Start with one or two subtle adjustments, test how they wear, and then decide if you want to scale up. If you find the hand rope too secure or the pendant a touch heavy, revert to a more minimalist approach and experiment again with a different material or placement. The beauty of a handmade tote is precisely that its details are under your control. Each tweak teaches you something new about how fabric behaves, how stitches wear, and how small design choices alter the tote’s relationship with its owner. Over time, even a basic bag becomes a trusted companion that acts as a daily interface with your life—carrying what you need, carrying a bit of your style, and carrying the story of how you chose to finish it.
For readers who want further inspiration beyond the visual outcomes, it’s worth noting that embroidery and personalization can also be explored through additional resources that discuss patches and decorative stitching. These concepts complement the practical steps you’ve already completed and provide a pathway to deeper customization if you wish to keep evolving your tote. External guidance can help you refine technique, select durable threads, and plan patterns that stand up to repeated use and washing. In the spirit of hands-on creativity, the options are broad but approachable. The important thing is to begin with what you have and to let the tote’s growth mirror your growing confidence as a maker.
As you move forward, let the tote speak in your voice. If you enjoy a quiet, rustic finish, lean into natural fibers, muted tones, and simple knots. If you crave a contemporary, urban vibe, experiment with metal hardware, high-contrast stitching, and modular pockets. If you want a sentimental touch, let upcycled denim tell its story through visible seams and familiar fade lines. Each path is valid, each choice a step toward a bag that feels less like a manufactured item and more like a well-loved companion. The basic tote you started with is the foundation, and your finishing touches are the brushstrokes that reveal the painting beneath the plain canvas. By embracing both the tactile pleasure of fabric and the personal resonance of function, you’ll not only complete a tote bag—you’ll craft a small, portable piece of everyday art that travels with you, quietly exemplifying the craft of making.
External resource: Personalize tote bag with iron-on patches and embroidery
Final thoughts
Creating a basic tote bag not only empowers business owners to add a practical product to their offerings but also serves as a canvas for branding and artistic expression. By understanding the materials and process involved, you can make a bag that resonates with your audience and reflects your brand values. Moreover, experimenting with variations and finishes can lead to unique products that stand out in a competitive market. Use this guide as a launching pad to explore your creativity and drive your business forward.