
Sewing a lining into a tote bag not only enhances its aesthetic appeal but also elevates its functionality. As a business owner, the quality of your products directly influences customer satisfaction and brand reputation. A well-lined tote bag can provide durability, structure, and an organized interior, making your product stand out in a competitive market. The following chapters will guide you through the critical steps of measuring and cutting the lining, preparing it for attachment, and ensuring a professional finish that can attract and retain customers.
Measuring, Cutting, and Making the Lining Speak: Crafting the Inner Shell of a Tote Bag
Measuring, Cutting, and Making the Lining Speak: Crafting the Inner Shell of a Tote Bag
A tote bag gains its quiet confidence from the way its lining supports and hides what lies beneath. The lining is more than a simple pocket; it is the structure that keeps the bag’s shape, protects its contents, and lends a polished, professional finish. The measurements you take and the cuts you make set the stage for all the other steps that follow. If the lining fits well, the outer fabric can shine, and if the lining is bulky or misaligned, the bag will sag, bulk at the top will gather, and seams inside will bruise the eye. The process begins with careful measurement of the bag’s external form and ends with a lining that kisses the top edge neatly, like a well-tailored interior lining of a coat. The path is straightforward, but attention to detail matters. Small choices—how much seam allowance to add, whether to prewash fabric, how to finish the top edge—shape the bag’s final look and its daily practicality.
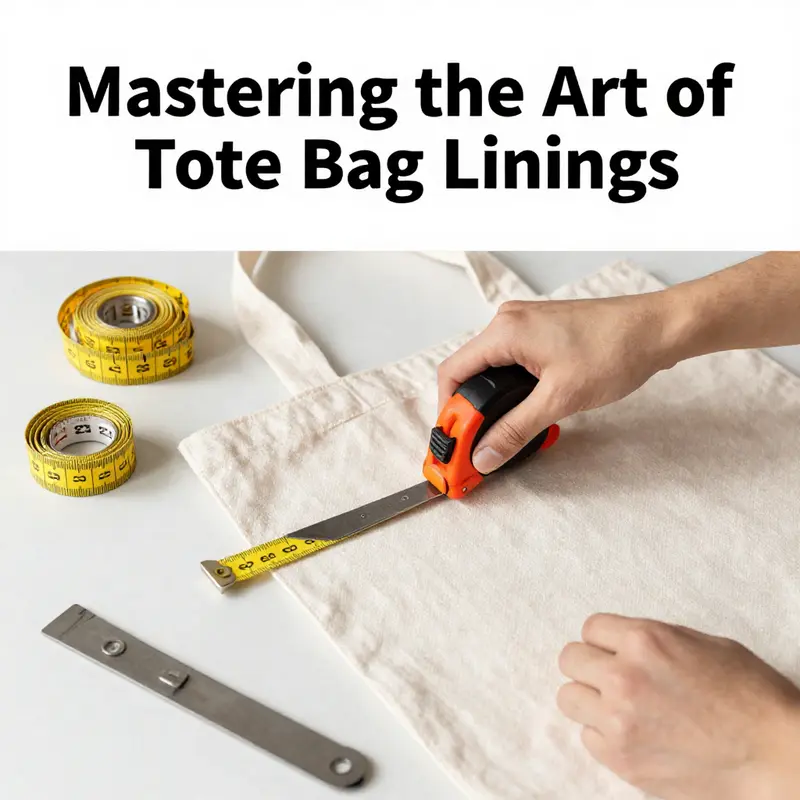
Begin with a clear sense of the outer tote—the very piece you have or are shaping. The outer pattern determines the lining’s size, so the first move is to measure height, width, and, when a gusset or a structured bottom is involved, the depth at the bottom seam. A flexible tape becomes a trusted ally here, mapping each dimension with a calm exactness. For a standard rectangular tote, focus on height and width. If your bag has a gusset, you will need to account for the extra depth created by the sides that angle outward toward the bottom. This is not just about numbers; it’s about imagining how the lining will tuck inside and still leave enough room to turn the bag right side out without wrinkling the edges.
Once you have the outer dimensions, you add seam allowance to the pattern. The typical choice is a half-inch, or 1.3 centimeters, on each side and at the bottom. This extra allowance ensures the lining can be slipped inside with ease and then anchored to the top edge without becoming too tight. The precise value can depend on your fabric choice and the desired bulk inside the tote; however, half an inch remains a reliable default for many fabrics, balancing ease of assembly with a neat finish. If your bag uses a gusset that adds depth, include the extra depth in your lining pattern. The goal is to create two lining pieces that mirror the outer shape closely, so sewn together they form a smooth, fully contained inner shell.
With measurements in hand, cut two identical pieces from your lining fabric. The lining acts as a mirror image of the bag’s front and back, joined along the sides and bottom. You might choose a cotton canvas, a polyester twill, or another sturdy fabric that breathes well and offers a touch of body without adding unnecessary weight. The fabric choice matters, not just for aesthetics but for wear over time. A lining that’s too rigid can fight the bag’s shape, while one that’s too flimsy can collapse, making contents feel unsecured. If you’re working with a fabric that tends to shrink, such as cotton, consider a quick prewash and dry to preempt post-sewing distortion. When you cut, transfer any notches or markings from the outer pattern onto the lining so you can align edges and corners precisely during assembly.
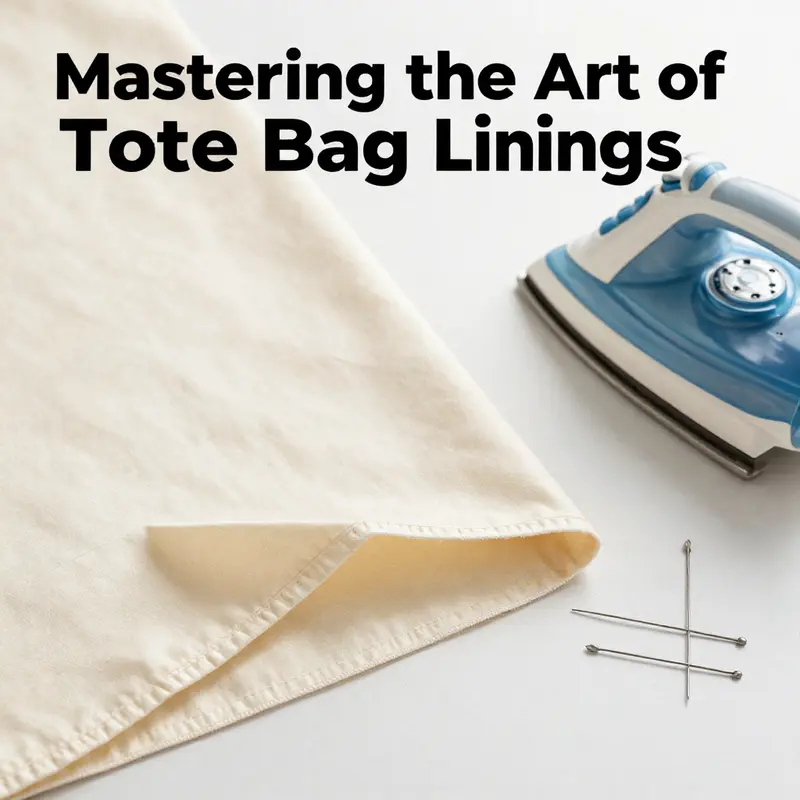
As you prepare the lining, take a moment to consider the top edge. The lining is typically kept within the outer bag’s top edge to avoid bulk. Some makers finish the top edge of the lining with a simple 1/2-inch hem, while others leave it raw to fold under later when the lining is attached. A neat hem on the lining’s top edge offers a cleaner silhouette if you want a very polished finish, particularly for light-colored linings that reveal every seam. Pressing the top edge of the lining before sewing helps create an even, crisp line. A light press along the top edge also makes it easier to manage when you sew the lining and outer bag together at the top.
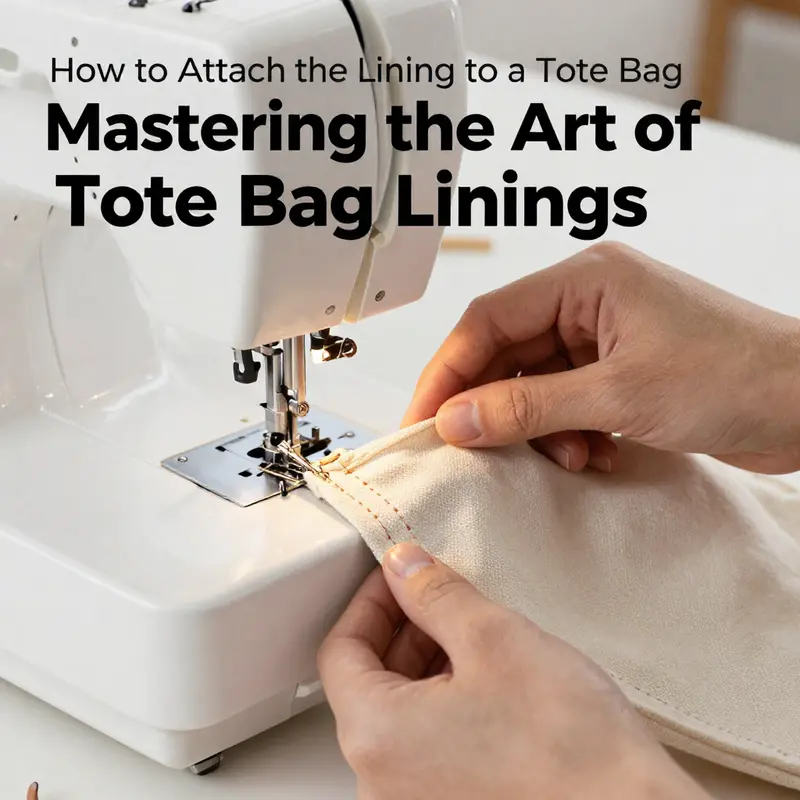
Now comes the step that unlocks the internal structure: assembling the lining into a formed chamber that will sit inside the outer bag. Place the lining inside the outer bag, with right sides together. This is a moment of alignment rather than acceleration. You’ll want to match the top edges where the handles attach, ensuring the corners and sides align cleanly. Pin or clip these edges so the fabric doesn’t shift as you sew. The essential move here is to sew along the top edge, about ¼ inch from the edge, to secure the lining to the outer bag. This creates a bond that holds both fabrics together at the boundary, letting the lining be contained without sliding out of place. At this stage the bottom and the sides of the lining do not need to be joined to the outer bag yet. Leaving the lower seams loose reduces bulk and gives you flexibility as you work the bag into its final form. A small reminder: do not sew through both layers all the way down. The objective is a clean top seam that anchors the lining while allowing the remainder of the interior to be manipulated freely during later steps.
Turning to finishing touches, you have choices that affect the look and feel of the finished tote. After sewing the top edge, turn the entire bag right side out through the opening you used to insert the lining, or by guiding the top edge through if the opening is closed. Once right side out, press the top edge flat so the lining sits neatly inside. If you want a crisp, professional finish, you can insert a narrow strip of bias tape or a binding along the raw top edge to encase the seam. This binding creates a small but meaningful visual cue of care and craftsmanship, especially when the tote is carried with a light, pliant lining that glides smoothly against skin and fabric alike. The combination of a neat top edge and the hidden stitching at the top can make a world of difference in the overall impression of the bag.
At this point you may choose to hem the lining’s bottom and sides for a more refined silhouette. A simple inward fold of ½ inch along the edges, followed by a straight stitch, can create a tidy, uniform hem that keeps the lining from curling inward or peeking through the bag’s bottom seam. This step is not mandatory; it depends on your desired finish and the bag’s overall construction. If you prefer to hide the raw edges entirely, you can opt for turning the outer edges under and securing them with a line of stitching. The goal is to prevent fraying, reduce bulk, and present a clean interior that wears well with daily use.
Optionally, reinforce the handles at their attachment points. Handles are anchors of daily use, and their durability often determines how long a bag remains beloved. A double row of stitching or an extra patch of fabric beneath the handle anchor can distribute stress more evenly, reducing wear at stress points and offering peace of mind during heavy use. While not required for light duty, reinforcement can extend the life of a bag that is frequently filled with heavy items or carried over the shoulder for long periods.
Throughout this process, there are practical decisions that influence the final fit and finish. Matching thread to the lining helps the construction disappear from view, allowing the eye to perceive the bag’s exterior as the primary design element. A lighter-weight lining fabric reduces bulk, particularly at the top and corners where the seam allowances converge. Consider a lining that breathes and flexes with the bag, so the interior remains accessible and comfortable to the touch. If you’re adding interior pockets, a slightly lighter color or a plain, smooth surface can help the pockets stand out as organized spaces rather than as cluttered additions. A pocket, be it zippered or slip, can drastically improve function, turning a tote into a more complete daily companion.
The philosophy behind lining a tote bag blends practicality with a quiet elegance. A well-measured lining does more than conceal seams; it helps preserve the bag’s shape, keeps contents protected from wear and tear, and supports the outer fabric in daily use. When the lining fits properly, you experience fewer misalignments around corners and top edges, and you gain a smoother, more confident glide of your items in and out of the bag. The lining should not overpower the outer fabric; rather, it should complement it, offering a calm, supportive internal ecosystem that makes the bag feel sturdy yet adaptable.
If you want to explore a related approach to interior construction that expands on the idea of internal organization, you can look at additional methods for integrating compartments and sleeves inside a tote. For example, a resource focusing on a tote bag with a dedicated computer sleeve demonstrates how interior design choices can influence the cutting and assembly of the lining. This approach illustrates how internal features can influence the overall height and top-edge management of the lining, while still maintaining a clean exterior appearance. tote bag with computer sleeve
Beyond the mechanics of measurement and stitching, fabric behavior deserves attention. Prewashing cotton-based linings reduces post-sewing distortion, while synthetic linings often tolerate little change after washing. Shrinkage considerations are not mere steps to check off; they shape how the lining sits within the bag after repeated use and laundering. Even if you intend not to machine wash the bag, knowing how your chosen fabric behaves when cleaned informs your initial cut. If you plan to wash the tote, consider a lining that tolerates mild agitation and retains its color and shape after exposure to water and detergent. Lightweight linings such as cotton or polyester blends strike a balance between comfort and resilience, reducing bulk while retaining structure. The goal remains a lining that works in harmony with the outer fabric without creating a hinge of stiffness or a drag of extra fabric at the top.
The elegance of the final piece emerges from the quiet decisions you make long before the sewing machine hums. Accurate measurements, careful seam allowances, and mindful finishing options come together to produce a tote bag that feels professional from the inside out. The process rewards patience; rushing through the measuring and cutting stage often results in a lining that doesn’t sit correctly within the bag, creating a ripple near the top edge or a misfit at the corners. On the other hand, taking the time to map out the lining’s two main panels, confirming their dimensions against the outer bag, and aligning edges before stitching, yields a lining that behaves as a natural extension of the bag’s outer shell. The result is a tote that not only holds its contents securely but presents a unified aesthetic when opened and used day after day.
As you finalize your lining, consider the practical details that transform a well-made bag into a trusted companion. A stitched-in pocket or a small zippered compartment can become a daily helper, catching keys, pens, or receipts in one neat place. A tiny fabric loop near the top edge, used to attach a small clip or a carabiner, can keep frequently accessed items within reach without crowding the main interior. The lining’s color or texture can help highlight these features, guiding the user’s eye toward organized zones inside the bag. Ultimately, the inner shell should feel like a calm, integrated space that supports your life as you move through the day. It should be sturdy enough to stand up to use, smooth enough to wipe clean, and flexible enough to accommodate a variety of contents without becoming a study in bulk.
In closing this chapter, remember that the precision of measurement underpins the success of the entire project. The act of measuring and cutting the lining is not merely a technical step; it is the moment when a concept—the outer bag’s silhouette, its color, its personality—begins to translate into a tangible, everyday object. Your lining is the quiet partner to the bag’s character, providing structure, durability, and polish without shouting. The better the lining fits, the more the bag itself can shine. When you step back to admire the finished tote, the interior is not just hidden; it is the backbone that lends the exterior its confidence.
For broader context on how interior design affects tote durability and daily use, you can explore additional guidance on durable, lightweight materials and tote design considerations via the external resource linked earlier. This broader perspective helps frame the lining within the larger craft of tote-making, reminding us that every seam and cut contributes to a bag that feels thoughtfully engineered and built to last. https://www.urbancarryco.com/tote-bag-design-tips
Lining for Strength and Finish: A Practical Guide
Choosing the right lining sets the foundation for a tote that wears well. The lining should support the exterior fabric, add structure where needed, and still move with the bag as it carries daily items.
Begin with selection: weight, texture, and care requirements. A canvas tote pairs well with a cotton twill lining for breathability and subtle structure. For wet conditions, consider nylon or water resistant lining; for a lightweight daily bag, a smooth satin or polished polyester can reduce bulk. Pre washing the lining fabric helps prevent future shrinkage; a cold wash and low dry gentle cycle leaves the fabric ready for sewing. Iron the fabric smooth to mark clean cutting lines and pocket placements.
Cut accurately: measure the interior dimensions from the outer shell, add seam allowances, and consider gussets. If the bag has a deep interior or unusual shape you may cut two lining pieces to tailor the curvature. Mark cutting lines with fabric chalk and keep pieces flat with pins as you cut.
Sewing and joining: sew pockets to the lining before assembling if you plan pockets. Finish pocket openings and top edges to prevent fraying. With right sides together, stitch the lining pieces along sides and bottom with a half inch seam, clip corners to reduce bulk, then turn right side out. Attach the lining to the outer bag at the top edge, typically 1/4 inch from the edge, while leaving bottom and side seams of the outer bag untouched until after the lining is secured.
Finishing touches: press the top edge of the lining to lie flush with the exterior edge. A narrow binding, top stitch, or clean hiding of raw edges can create a professional transition. Reinforce handle attachments and consider an interior zipper pocket or slip pockets for organization. Finally, turn the bag right side out through the opening, press, and assess the interior for evenness and comfort.
Lining with Purpose: Attaching a Tote Bag’s Inner Layer for Structure, Secrecy, and Lasting Durability
The moment you decide to line a tote bag is the moment you decide to add quiet strength to a piece that will travel with you. A lining isn’t just a pretty interior; it is the backbone that gives your bag its shape, hides the stitches you’d rather keep out of sight, and protects the contents you carry every day. When you attach a lining with care, the exterior fabric and the inner layer fuse into a single, balanced unit. The bag becomes not only durable but polished, reassuring to the touch and visually clean from the outside. As you read this, picture the lining stepping in as a careful, almost sous-chef partner to the outer fabric, holding everything together with a few well-placed seams and a tidy top edge. The method that follows honors that partnership, guiding your hands to work with intention rather than guesswork.
Begin with a quiet, practical rhythm. Measure the tote you already have or the bag you are sewing, then translate those measurements into the lining pieces. The simplest approach is to cut the lining so the exterior and lining pieces nestle neatly together, with just enough seam allowance to prevent any rough edges from peeking through. A reliable rule of thumb is to subtract a full inch from each outside dimension before you cut the lining, so that the lining sits just a touch smaller than the bag’s exterior. If your outer bag measures 14 inches in width and 16 inches in height, you’d cut the lining at 13 by 15 inches. Some makers prefer lining pieces identical in size to the outer bag and then add seam allowances, but the subtract-one-inch approach is a straightforward way to ensure the lining doesn’t bulk up the bag or pull at the seams. Whichever method you choose, the end goal is a lining that sits comfortably inside the tote, leaving a clean, unrolled top edge visible only to the eye and never to the touch of the bag’s exterior when it’s finished.
Once the fabric for the lining is cut, the next moment is about preparation. Press the lining fabric to remove wrinkles and smooth out any creases. A crisp fabric clip or pin can hold the top edge in place as you prepare it to become the bag’s inner hem. You will fold the top edge of the lining toward the inside by about half an inch and then fold again by another half inch to form a clean and sturdy hem. This double fold holds the raw edge in safety, so when the lining sits inside the bag, the top edge looks neat and seamless from the outside. The act of pressing is not mere ceremony; it reduces bulk where the lining meets the top of the bag and makes the final stitching feel precise and controlled. As you press, imagine you are guiding the lining to be a quiet, invisible support system rather than a loaded, obvious seam.
With the lining prepared, you turn your attention to the moment of joinery: attaching the lining to the bag’s exterior. Slip the lining inside the outer bag so that right sides are together—the finished surface of the lining should be facing the inside of the bag and the outer fabric’s right side should be facing inwards toward the lining’s wrong side. Align the top edges where the handles will attach and pin or clip them in place. This alignment is the keystone of a clean finish: if the top edges don’t line up, the bag will wear unevenly and the lining will feel loose, almost rebellious, at the top when the bag is carried. Once you feel confident in the alignment, sew along the top edge with a generous seam allowance—an inch or so is not excessive here. In many well-loved patterns, a seam allowance of about half an inch through both layers does the job, stitching the lining and the exterior together so the raw edges are sealed and concealed. The exact measurement can vary depending on your fabric thickness and your machine’s feed, but the principle remains the same: the stitch line should secure both layers without pulling the lining inward or leaving a visible ridge at the top.
After that top-edge stitching, turn the bag right-side-out through the top opening so you can see how the lining sits against the exterior. This is where the benefits of the previous steps reveal themselves. If you press the top edge flat now, the transition from exterior to interior becomes invisible to the eye. The lining’s folded hem sits softly at the top; it looks deliberately finished rather than improvised. At this point you have a choice: finish the raw top edge with a bias tape or a clean facing, or leave the edge as is and rely on the fold and the top-stitch to carry the finish. A bias tape or a narrow strip of binding elevates the bag’s look, giving a professional gloss that’s especially noticeable if you’ve used contrasting fabrics. If you aim for the subtle, let the folded hem speak for itself and add a light hand-stitch to secure the fold to the bag’s top edge, either by hand or with a sewing machine.
The bottom and sides of the lining pose a different kind of conversation with gravity. You may prefer a fully enclosed, garment-like inner lining, in which case you would sew the sides and bottom of the lining to create a pocket that sits inside the bag and then finish the top edge as described. Or you may adopt a more minimalist approach: leave the bottom and sides unfinished or hemmed only if you want a particularly neat internal profile when the bag sits empty. The method chosen affects how the bag wears over time. If you want a clean finish that behaves like a sturdy, ready-to-use container, you can fold the bottom edges of the lining inward by half an inch and stitch. This creates a simple hem that helps the fabric keep its shape and prevents the lining from sagging at the base when the bag is loaded. For those who prefer a crisper, more tailored silhouette, a bottom reinforcement—sewing the lining to the bottom corners of the bag before the top edge is attached—can lock the lining in place and prevent shifting as you tote heavier items. Either way, this step is about instilling confidence that the interior won’t cave in or twist as you move.
Handles deserve a moment of extra attention, too. The strength of a tote is often the promise it makes to carry weight without giving way. The top stitching that joins the lining to the bag helps, but you can go further to ensure durability by reinforcing the handles’ attachment points. A simple, effective method is to stitch over them twice or to add a small patch of fabric beneath the handle attachment lines. This isn’t merely functional; it also prevents fabric wear from becoming an eyesore as you carry heavier loads day after day. The goal is quiet resilience: a tote that continues to look as good after a few dozen uses as it did the first day you sewed it.
As you weave through the practicalities, the chapter’s larger purpose emerges: the lining is where technique meets intent. The lining hides messy seams and stray threads, yes, but it also creates a barrier that protects the interior’s contents from wear and tear. It contributes to the bag’s structure, helping it stand up to its daily life, and it makes the bag easier to clean—no raw fabric or stray fibers to complicate the inside. The lining also makes the tote feel more refined and finished. These reasons aren’t merely aesthetic; they are part of the bag’s daily function, the small but meaningful way a handmade item respects its user.
There is room for personal flair within this framework, too. Inside the lining you can slip a pocket, either zippered or slip-style, to corral your keys, lipstick, or a notebook. A pocket can be as simple as a single slip zone stitched to the interior surface, or you can go a step further by dividing the pocket into compartments with a stitched divider. The addition of a pocket is a small design gesture that can make the tote far more practical in everyday life. If you choose to include such an interior feature, it is wise to plan its placement before you sew the top edge. Pin the pocket in place along the interior lining before you attach the lining to the exterior so that the stitch lines are uniform and the pocket’s edges remain crisp when the bag is finished.
The decision to link to a broader design can help you think about how this technique applies across different bag styles. For example, if you are imagining a tote that travels with a laptop or other delicate equipment, you might explore a design concept that includes a padded internal sleeve. To get a sense of how such a feature can be integrated without compromising the lining’s clean look, you can refer to a practical example that demonstrates how an inner sleeve and a lined interior can work together within a tote. See the example titled tote-bag-with-computer-sleeve for a sense of how interior partitions and protective layers can coexist with a polished exterior. The link below provides a concrete model you can study as you sketch or finalize your own pattern. tote-bag-with-computer-sleeve.
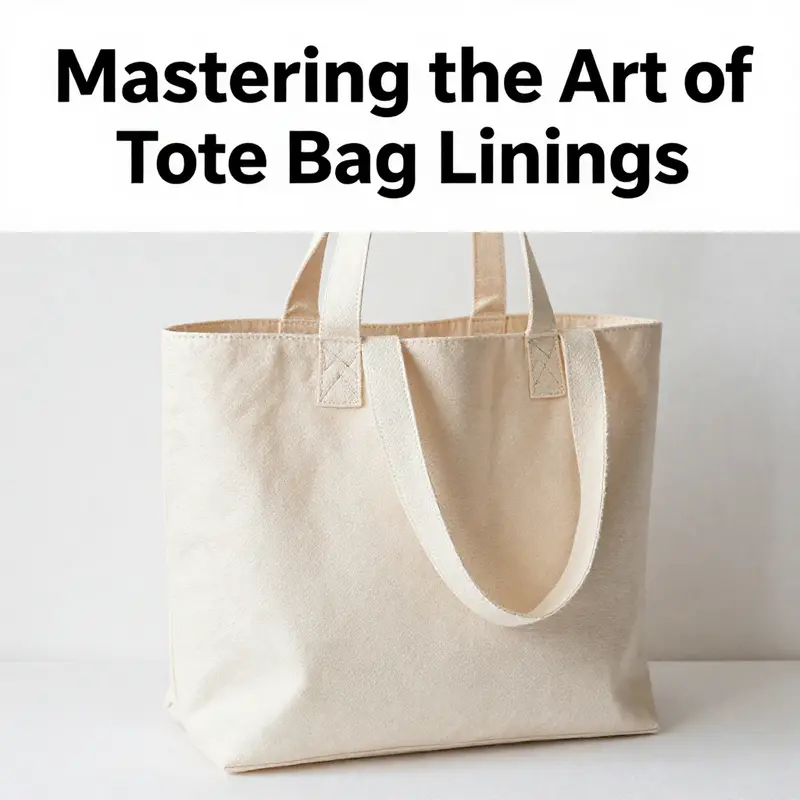
As the final thread is stitched and the final press finished, the tote becomes more than a bag. It becomes a thoughtful combination of fabric, craft, and daily utility. The lining’s presence is quiet; it doesn’t force attention, but it supports everything you place inside. Your hands have moved with intention, aligning edges, coaxing seams to sit flat, and choosing when to add a binding for a refined edge. In the end, the tote’s inner layer speaks softly of durability and care—an unspoken promise that the bag will endure sun, rain, and countless outings without surrendering its shape or its charm.
If you relish the tactile aspects of sewing, you may want to explore further a handful of thoughtful practices that can elevate your lining project. Use a matching thread so that any imperfect stitches vanish into the fabric’s texture. Choose a lighter-weight lining if your exterior is densely woven or stiff; extra bulk can make the top edge feel crowded and less precise. On the other hand, a slightly stiffer lining can contribute to the bag maintaining its form when you load it with books or groceries. And don’t shy away from personalization: a subtle contrast stitching or a tiny interior label can turn a humble lining into a signature detail. The beauty of this approach lies in its adaptability: you can tailor the level of finish to your pattern, your fabric choices, and your own sense of how a tote should carry the story of its maker.
In reflecting on this method, remember that the lining is a bridge between the bag’s exterior and its daily use. It hides the interior work, yes, but it also safeguards what you carry and supports the bag’s overall silhouette. The process isn’t merely technical; it’s a chance to embed thoughtfulness into the very fabric of your creation. When you sew thoughtfully, the lining stops being a background feature and becomes the quiet architect of the tote’s daily life. It is the part that makes a handmade bag reliable, approachable, and enduring—the kind of item you reach for with confidence, knowing that the interior has been finished with care as carefully as the exterior harvest of your design.
For readers who prefer a visual guide to the concepts described, you may explore additional demonstrations available in external resources that outline lining options and finishing techniques beyond the scope of this chapter. The connection between technique and result becomes more tangible when a diagram or step-by-step photo accompanies the text. While the patterns and measurements may differ, the underlying principles endure: measure with intention, cut with care, align with precision, and finish with a finished edge that both hides and protects. The most satisfying outcomes emerge when the interior is as considered as the exterior, when the bag holds its shape as you fill it, and when the seam lines vanish into the overall design, letting the tote do what it was made to do—carry your world with quiet confidence.
External resource: https://www.thesprucecrafts.com/linings-for-tote-bags-4120897
In practice, the tote you finish will reflect a balance between your chosen materials, your patience, and the design decisions you made along the way. The inner lining is the unspoken partner that makes your bag feel complete. When you choose to attach it with care, you set the stage for a durable, elegant, and practical tote that you’ll reach for again and again. This is the subtle art of lining—where care, precision, and personal touch converge to produce a bag that looks as good on day one as it does after months of daily use.
null
null
Final thoughts
Creating a well-lined tote bag is a skill that can greatly enhance the quality of your products and ensure customer satisfaction. By following the steps to measure, prepare, attach, and finish the lining, not only do you improve the durability and aesthetic of your items, but you also create a product that reflects your commitment to quality craftsmanship. Remember, the better your bags look and wear, the more likely customers will trust your brand and return for more.