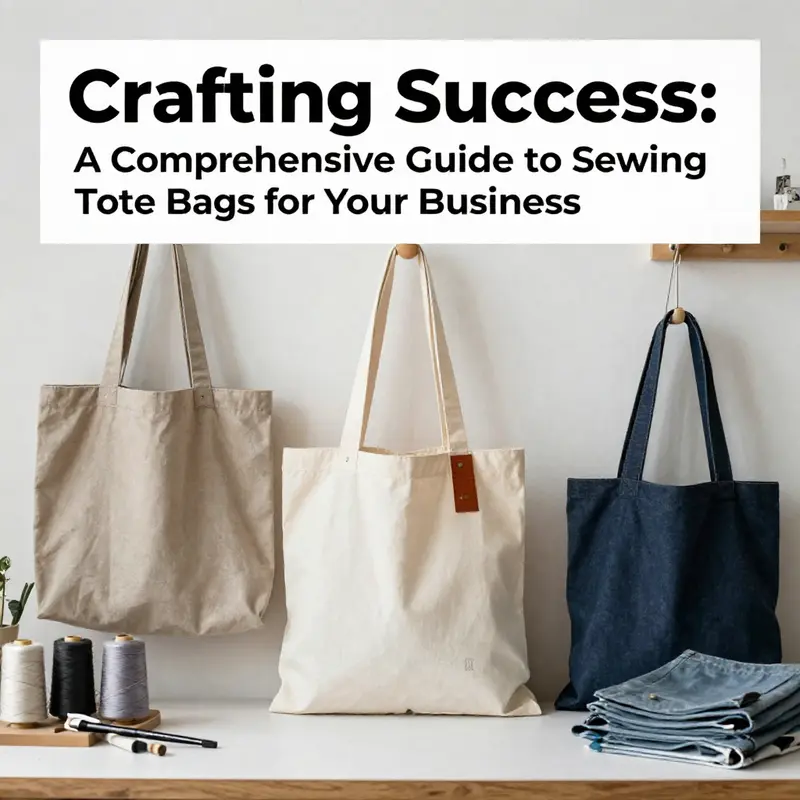
Tote bags have transcended mere utility to become an essential branding tool for businesses. They offer endless customization options, promoting a brand’s identity while serving practical purposes. This guide provides business owners with everything needed to create custom tote bags—from essential supplies to creative ideas, effective techniques, and solutions for common challenges. Each chapter will equip you with the knowledge to incorporate tote bags into your business strategy effectively.
Gathering the Essentials: The Tools, Fabrics, and Details That Shape a Tote Bag
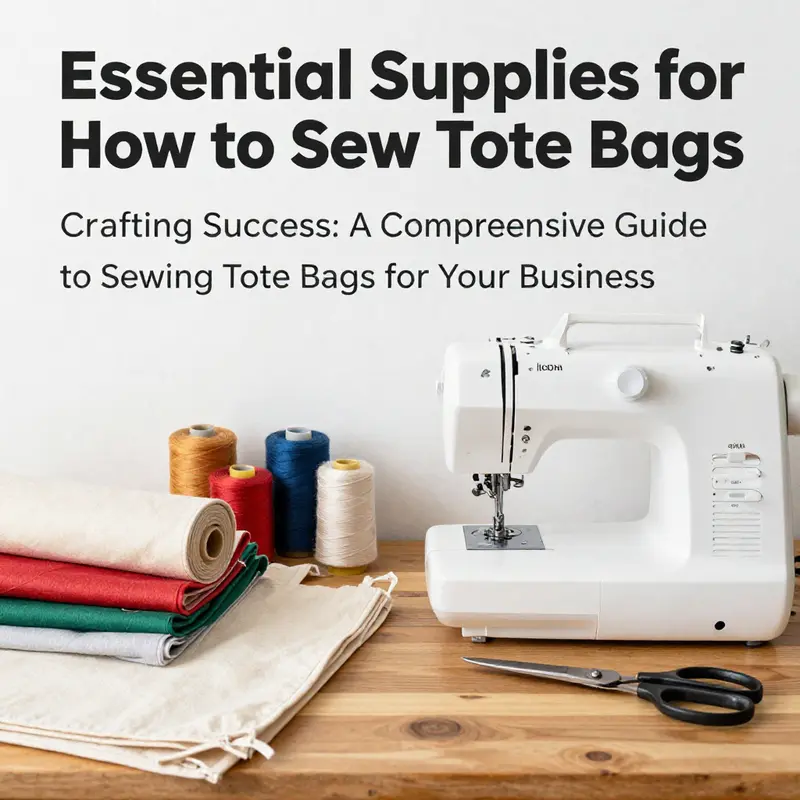
Choosing the right supplies is the quiet heartbeat of any tote bag project. It’s not glamorous, but it sets the tone for how well the bag will perform, how long it will last, and how much you will enjoy the process. Start with materials that feel right in your hands—the weight of the fabric, the bite of the scissors, the smooth glide of a spool of thread. The goal is a practical, sturdy bag that carries daily life without asking for compromise. The good news is that you don’t need a vast craft room or a treasure chest of specialized tools. Most of the essentials are affordable, easy to source, and adaptable to a wide range of styles, from minimalist city totes to upcycled weekend carry-alls. Durability, comfort, and a touch of personality come from thoughtful material choices and reliable construction, not from complicated gadgets or high-end trims. That’s where understanding both the basics and the options becomes empowering, because it lets you tailor a tote that fits your habits, your wardrobe, and your ethic of reuse as much as your budget.
Begin with fabric selection. Durable options like canvas, cotton duck, or sturdy denim form the backbone of a tote that can hold groceries, books, or a laptop with confidence. These fabrics resist fraying, stand up to repeated opening and closing, and behave well under heavy seam allowances. If eco-friendliness matters, consider upcycling old clothes or linens; a well-chosen thrifted textile can yield a bag with character and a smaller footprint. Linen, with its natural texture and breathable weave, offers a premium feel, though it can be stiffer and less forgiving for beginners. For lighter uses or a more casual look, a sturdy polyester blend or a cotton-polyester mix can strike a good balance between price, weight, and washability. When choosing outer fabric, think about weight in ounces per square yard or meter. Heavier fabrics give you a bag that breathes confidence during daily errands, while lighter fabrics invite creative design, color blocking, or playful prints. If you lean toward an eclectic vibe, mix fabrics—bold prints on the outside with a solid, coordinating lining to reveal a touch of interior surprise when the bag is opened. The power of a tote begins with the fabric’s character; the resilience comes from the construction that follows.
Lining fabric is often an afterthought but plays a crucial role in the bag’s interior life. A simple cotton or a cotton-polyester blend keeps the interior easy to wipe clean and makes seams easier to manage. A lining can also add a dash of color or a quiet contrast that enhances the overall harmony of the piece. An optional lining gives you a neat, finished interior if you plan to add pockets or dividers. Speaking of pockets, they are where fabric choice and pattern decisions intersect. A small interior pocket, a zippered compartment, or a simple slip pocket can dramatically improve usability. If you’re new to sewing, start with a single pocket on the lining and expand later as you gain confidence.
Threads are the invisible drivers of a tote’s durability. Choose all-purpose polyester thread for most projects, or cotton-wrapped polyester for a slightly softer finish with good strength. The color choice matters more than you might think: matching the fabric color minimizes visible stitching, while a contrasting thread can highlight the construction as a design accent. Whatever color you pick, ensure the thread weight equals the fabric’s weight. A heavy canvas, for instance, benefits from a thicker, stronger thread that won’t snap under stress. A light lining may pair better with a finer thread to prevent bulk at seams. The thread you select should glide through the fabric without snagging; test a short seam on scrap to confirm smooth feeding, especially if you’re working with a dense weave.
No tote is complete without a reliable set of tools. A sewing machine is the most efficient ally for straight seams and consistent topstitching, especially when you’re assembling a bag with multiple panels and potential interior pockets. If a machine isn’t available, hand-sewing remains a valuable practice ground for beginners, helping you learn how fabrics behave and how stitches pull under load. Scissors or fabric shears should feel sharp and comfortable in your hand; a clean cut reduces fabric fraying and helps seams sit properly. A sturdy ruler or straight edge, plus chalk or a fabric marking pen, keeps your lines legible and your seam allowances accurate. Pins or clips secure layers as you stitch, while an iron and ironing board or a dependable heat press smooths out wrinkles and sets creases—critical for professional-looking topstitching and crisp corners. The humble iron earns its keep any time you must press seams flat or shape handles where edges meet panels. It isn’t glamorous, but proper pressing makes the difference between a bag that looks handmade and one that looks like a ready-to-carry accessory.
Patterns and preparation are practical but essential. Even a simple tote benefits from a clear pattern with seam allowances, typically around 1 centimeter for home-sewn projects. Before you cut, wash your fabric to remove sizing and pre-shrink the material, especially if you’re using new textiles. This small step prevents fabric distortion after construction. Create or print a pattern that matches your desired dimensions—an outer body panel, a lining panel, and space for handles. Keeping a tidy pattern also helps you visualize the bag’s final silhouette and ensures your fabric is laid out efficiently, minimizing waste. Cutting the fabric correctly is a skill that comes with practice; take the time to align edges, check grain lines, and mark notch points for easier matching during assembly. Cutting two outer pieces and two lining pieces gives you a basic structure that you can expand with pockets, zippers, or decorative elements as you gain confidence.
Handling the handles is a small, telling exercise in planning and control. The handles anchor the bag’s practicality and comfort, so they deserve careful preparation. Cut two straight pieces of fabric for the handles, then fold lengthwise with right sides facing, sew along the long edge with a 1-centimeter seam allowance, turn right side out, and press flat. A crisp, neatly finished handle distributes weight evenly and reduces the risk of twisting or curling. Space the handles evenly at the top edge of the bag and secure them with secure, multiple rows of stitching. The finishing touch—the top edge—often benefits from a double row of stitches to reinforce where stress is greatest. If you want a more refined look, you can finish the handle ends with edge stitching or a subtle decorative stitch before attaching them to the bag body.
As you move from components to construction, the practical logic becomes clear. You’ll place the outer bag panels with their right sides facing, sew the side and bottom seams, and trim the corners to reduce bulk when turning. The same sequence then repeats for the lining. The moment you attach the handles costs the bag its personality, and the way you align and secure those handles will echo in the bag’s daily performance. When you join the outer bag to the lining, you’re stitching together the visible exterior with the hidden interior, creating a single, sturdy form with a clean finish. A careful topstitch along the opening not only closes the gap but also seals the fabric against wear and tear as you carry heavier loads. This integration—outer fabric, lining, pockets, handles, and finish—becomes the signature of a bag that feels like a companion rather than a project. For design-minded readers who want additional inspiration on how to diversify hardware and closure choices, consider exploring options for higher-functioning designs, such as tote bags with zippers.
Beyond the basics, a few well-chosen additions can elevate a tote without complicating the build. Optional closures, such as buttons, snaps, or Velcro, add security for personal items. A small zippered interior pocket or a phone pouch can transform a simple tote into a well-organized daily carrier. If you’re drawn to a more utilitarian aesthetic, consider a removable interior pouch or a split pocket to separate damp items from dry ones. Even decorative elements—embroidery, applique, or fabric paint—can personalize your bag and make it a meaningful handmade gift. When you step into these enhancements, remember that every extra feature adds weight and seam complexity. Balance is key: choose one or two purposeful features that align with how you intend to use the bag.
Finally, treat your tote as a project of learning as much as a finished product. Prewash and test stitch on scraps to confirm your chosen fabric and thread will behave as expected. Check your needle type—woven fabrics like canvas usually pair well with a sharp needle to prevent snags, while leather accents might demand a heavier needle and specialized hardware. Revisit your pattern alignment after you’ve cut, and adjust seam allowances if your fabric blooms with or shrinks away from the expected dimensions. The aim is a bag that feels like it was built with intention, not luck. If you want to broaden your technique with a beginner-friendly, quick study, you can consult external guidance on building a simple drawstring bag to learn basics of turning, casing, and edge finishing before tackling the more structured tote. External resource: https://www.fabric.com/how-to-sew-a-simple-drawstring-bag-for-travel-essentials
As you move from fabric and pattern to practical assembly, the essentials you gathered—durable textiles, a reliable thread, thoughtful pockets, robust handles, and a clean finish—become the backbone of your tote’s daily life. The chapter on supplies isn’t a shopping list; it’s a framework for deliberate choices that influence how your bag performs and ages. With that foundation, you’re ready to move into the next phase: translating your plan into a finished, personalized tote that not only carries your things but carries your story as well.
From Fabric to Everyday Workhorse: A Cohesive Path to Sewing Your Own Tote Bag
A tote bag is more than a simple container; it’s a portable workshop, a canvas for personal style, and a small triumph of hands-on making. When approached with clear steps and thoughtful material choices, sewing a tote becomes a rhythmic flow rather than a series of disjointed tasks. The backbone of a sturdy tote rests on choosing durable fabrics, reliable thread, and a plan that respects every seam and corner. You don’t need a full craft room to begin. A handful of practical materials—canvas, denim, or a sturdy polyester—plus an iron, a ruler, scissors, and a sewing machine will set you up for success. If you’re drawn to eco-friendly options, upcycling old clothes or linens can yield unique textures while reducing waste. The process blends function and creativity, and with the right approach, your tote will carry more than items—it will carry your craft heritage into daily life. For those exploring design variations and fabric options, a quick browse of the broader category of bags offers inspiration and practical ideas that can be folded back into this project: women’s canvas tote bags. This link, while simple, points to a broader spectrum of shapes and treatments you can later adapt for future bags.
Begin by gathering the essential tools and materials. A standard tote benefits from medium to heavy-weight cotton canvas or denim, which provide enough body to hold its shape. Interfacing is optional but can add stiffness, helping the bag stand up when empty. Choose thread that matches your fabric color, and keep a sewing machine handy for efficient assembly. Scissors or a rotary cutter, pins or clips, a ruler, and a fabric marker will keep your cuts precise. The basic hardware is straightforward: a dependable needle for your machine, a few rolls of matching or contrasting thread, and an iron to set everything smoothly. With these elements in place, you’re ready to plan the fabric layout and pattern.
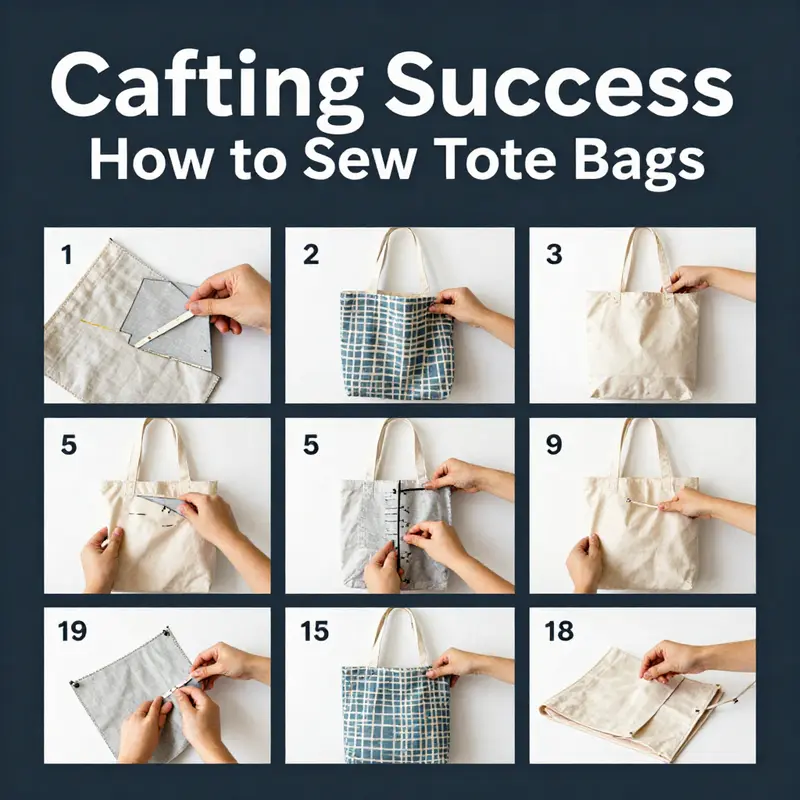
Step one in this gentle, methodical process is to prepare your fabric and pattern. Washing the fabric beforehand minimizes future shrinkage and removes sizing that could affect dye uptake. A simple pattern typically includes two outer body panels and two lining pieces, plus openings for any pockets and a couple of handles. A common dimension for the main panels is around 32 cm in width and 70 cm in height, with a seam allowance of about 1 cm. This size yields a classic tote silhouette—neither skimpy nor overwhelming—so you can tuck in books, groceries, or a day’s worth of personal essentials. Before you cut, take a moment to decide whether you want a fully lined bag or a simple raw-edge lining that you’ll finish inconspicuously. Either route works well, but a lining adds structure and a polished finish, especially if you’re new to the craft.
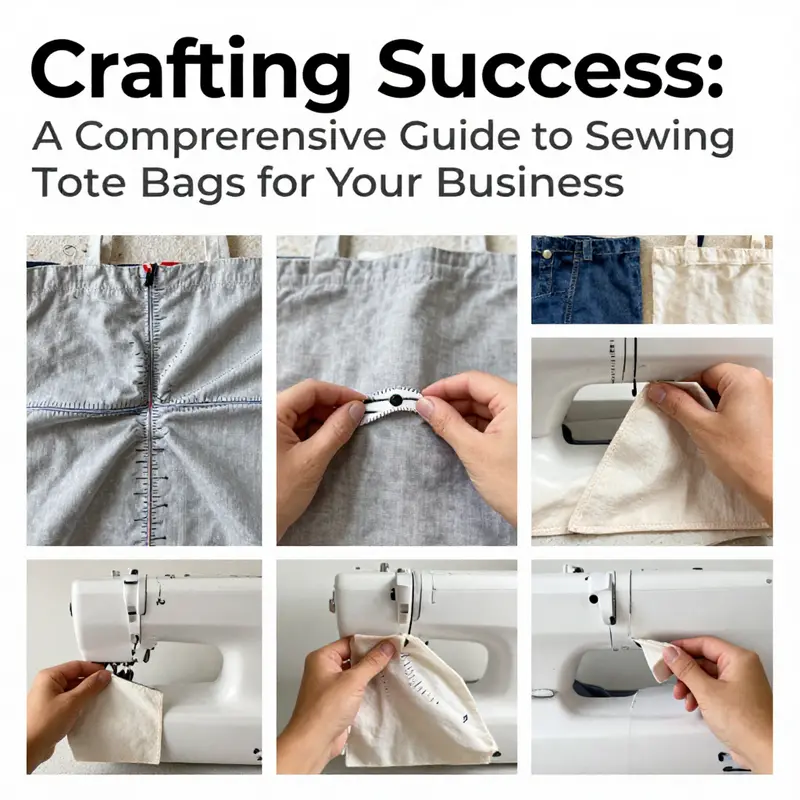
Once the pattern is drawn or printed, cut out two main outer pieces and two inner lining pieces. If you plan to add pockets, cut those as well—two pieces will suffice for a single pocket, or you can fold in an extra panel for a second pocket. The handles deserve careful attention. Cut two long strips, typically around 15–20 cm wide and 8–10 cm tall when flat. These dimensions produce sturdy, comfortable straps that won’t bite into your shoulders when the bag is loaded. The next move is to craft the handles. Fold each handle piece in half lengthwise with the right sides facing each other, sew along the long edge with a 1 cm seam allowance, turn right side out, and press flat. A neatly pressed, slender strap is essential for the bag’s balance and comfort, so don’t rush the turning and pressing step. A double line of stitching along the edges of the handles reinforces them, a small but meaningful boost to durability.
With the pieces prepared, you can begin assembling the bag’s structural framework. Start by placing the two outer bag pieces together with their right sides facing each other. Sew along the side edges and bottom edge, using a 1 cm seam allowance. This creates the basic pouch shape. It’s wise to clip the corners to reduce bulk after turning; the small triangle cuts at each bottom corner make the turning process cleaner and the final shape crisper. If you’re adding a pocket on the outer bag, position the pocket piece on top of one outer bag piece and sew around the pocket opening to secure it. A pocket can be a delightful practical feature that keeps keys or a phone within easy reach, and it’s a simple addition that doesn’t complicate the overall silhouette.
Likewise, assemble the lining with the same cuts and seam allowances. The lining provides a quiet interior that supports the outer fabric and helps the bag hold its form. Whether you choose to line the bag or finish with a minimal interior, the next stage is to bring the outer and lining sections together. Turn the outer bag right side out and position the handles at the top corners so that the raw edges align with the top edge. The handles can be sewn across the top with a robust, double row of stitching to ensure they stay secure under load. Space them evenly to maintain a balanced appearance and even weight distribution when you carry the bag. The amount and placement of these stitches matter, especially if the bag will be used for heavier items, so take a moment to anchor them firmly.
It’s time to integrate the bag’s outer and lining structures. Place the outer bag and the lining bag together with their right sides facing each other. Align the top edges, then pin or clip around the perimeter. Sew around the entire edge, again with about a 1 cm seam allowance. Leave a turning opening of roughly 10–15 cm at the bottom so you can turn the bag right side out after sewing. This gap is essential; it allows you to achieve a neat finish and conceal the raw edges inside the lining. When you’ve closed the outer shell around the bag’s interior, turn the bag through the opening, pushing out corners with a turning tool or a blunt chopstick to keep lines sharp. A thorough press with the iron will set the crisp shape—this is when the bag begins to feel like a finished object rather than a collection of flat pieces.
Finishing the opening is as important as the major seams. Fold the raw edges of the opening inward by about 1 cm and press. Then, topstitch along this folded edge to close the gap and reinforce the top edge. This simple extra step creates a clean, durable finish and prevents the interior liner from peeking out when you carry the bag. If you prefer, you can hand-stitch the opening closed with a neat slip stitch or employ a blind stitch for a nearly invisible finish. Either method yields a tidy result that preserves the interior’s clean lines.
The beauty of a tote lies not only in its construction but in the small personalization that breathes life into it. Consider adding pockets inside for a phone, keys, or pens, or a small zippered compartment for valuables. You can also enhance the exterior with simple embellishments—fabric paint, embroidery, or appliqué—that reflect your taste. Upcycling offers a wealth of possibilities: transform an old pair of jeans into a reinforced denim tote or mix unexpected fabrics for a bold, contrasting look. The versatility never stops; you can adjust the pattern to create a larger or smaller bag, add a magnetic snap, or tailor the straps for a shoulder-friendly carry. The path from a plain bag to a signature piece rests on your choices about fabric weight, stitching density, and the careful handling of the edges.
This approach to tote construction, while rooted in a practical, repetitive process, rewards patience and attention to detail. The fabric choice—canvas for a dependable silhouette, denim for a rugged grace, or a composite of textures for a modern aesthetic—frames the bag’s personality. The seam allowances stay steady at 1 cm, a reliable standard that keeps edges tidy and seams even. The technique of clipping corners and turning with a blunt tool remains a quiet ritual of the craft, one that yields visible results: a tote that holds its shape and feels substantial in the hand. The finishing pass—pressing and topstitching—transforms raw pieces into a refined object you’re proud to carry, a tangible reminder that a thoughtful process yields capable, long-lasting results.
In the broader landscape of tote-making, this chapter maps a straightforward, repeatable route—from fabric selection to the final topstitching kiss at the opening. It’s a path that welcomes experimentation while offering a solid foundation. If you’re ready for future iterations, the door is open to richer fabric combinations, additional pockets, or even a liner with a contrasting color to accent the tote’s interior. In time, you’ll gather more patterns, more fabrics, and more confidence. The tote you sew becomes not just a bag but a small, portable archive of your skills, ready to travel with you wherever you go.
Sewing Tote Bags with Personality: Upcycling, Embroidery, and AI-Inspired Art
A tote bag is more than a simple carrier; it’s a canvas for personal expression and practical ingenuity. When you sew tote bags with imagination, every stitch becomes a small statement about how you live, the materials you value, and the ways you imagine reuse. The ideas that follow spring from the same well of practicality you learned in the basics: sturdy fabric, reliable thread, and careful finishing. But they push beyond the ordinary by inviting upcycling, hand embellishment, and even digital creativity into the mix. The result is a collection of bags that are not only useful but alive with character, capable of carrying everyday life and the stories you choose to tell through them. In this chapter we explore four pathways that resonate with the broader goal of sewing tote bags—crafting pieces that are durable, personal, and adaptable to different needs and styles. Each path is rooted in accessible materials and straightforward techniques, yet they invite experimentation and a playful edge that can be scaled up or toned down to suit beginners and seasoned makers alike.
First comes the upcycled tote, a doorway into sustainable creativity that proves you don’t need a fancy studio to make something remarkable. Start with a well-loved T-shirt or a pair of sturdy jeans, pieces that already carry personality. The magic lies in selecting the right combination of fabrics: a canvas or denim body panel paired with the T-shirt’s knit for structure or for contrast. The graphic on a shirt can be preserved as part of the design, or you can mute it with a solid panel so the bag reads as a new object rather than a souvenir. The sleeves, often generous in length, can become the handles or trim, saving you from buying extra materials. Cut cleanly, the panels are sewn with a dependable seam allowance and reinforced at stress points. When the bag is assembled, the upcycled elements stand shoulder to shoulder with modern stitching, a quiet rebellion against single-use fashion. The process teaches thoughtful fabric selection, the importance of pre-washing to prevent shrinkage, and how to honor the shirt’s original print by letting it contribute to the bag’s story without overwhelming the overall silhouette. This approach aligns with the fundamentals of the project you already know—wash, pattern, cut, sew—but invites you to reimagine every scrap as a component of something new and useful.
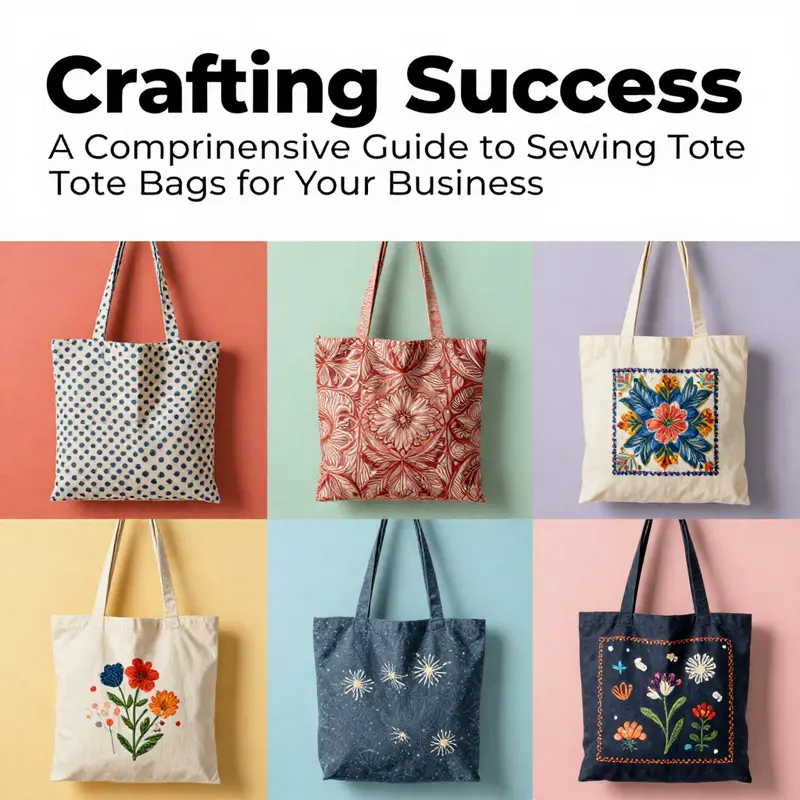
A second direction invites embroidery and painting to elevate a simple canvas tote into a wearable work of art. Canvas is resilient and forgiving, a perfect playground for hand embellishment. Imagine a plain cotton canvas tote transformed with a few careful stitches or brush strokes. You don’t need a sewing machine for this path; fabric markers and embroidery floss can do the heavy lifting. Start by tracing a simple motif or a geometric design in pencil, then fill it with color or scale up a pattern with bold stitching. If you’re more inclined toward painting, fabric-safe markers or textile paints can create a crisp, graphic look or a blended watercolor effect. Iron-on transfers can add precise imagery or text with minimal effort. The key is to prepare the fabric by washing and drying to remove sizing and to set the design with heat when using markers or transfers. The result is a tote that speaks with the owner’s voice—handmade, durable, and distinctly theirs. The beauty of this method is that it welcomes beginners who want to experiment with color and line, while offering seasoned crafters a flexible framework for more elaborate motifs and layered textures. The canvas bag itself provides a sturdy stage for the art, ensuring that embellishments withstand daily wear and wash cycles.
A third avenue blends functionality with whimsy through a multi-functional pouch design integrated into the tote. This concept borrows from simple paper craft ideas—multipurpose, compact, and thoughtfully organized—then translates them into fabric form. Picture a tote with a dedicated interior pocket for a file, a separate zipper compartment for valuables, and a small phone pouch lined with a soft fabric to prevent scratches. The beauty of this approach lies in planning the interior layout before you sew the outer panels, so each pocket serves a practical purpose without complicating construction. You can create the pocket placements as part of the lining piece or as detachable dividers that sit within the bag, depending on your preferences for structure and accessibility. When executed with care, the result is a tote that serves multiple roles: daily carryall, commuter organizer, or even a light travel companion. The project remains approachable because it centers on simple additions—pockets, dividers, and a snug top edge—rather than more complex hardware. The satisfaction comes from seeing a bag that not only carries items but also helps you stay organized, a tangible expression of how design thinking can translate into everyday utility.
The fourth path takes a step into contemporary creativity by inviting AI-generated art onto fabric. In educational settings, artists and students alike are experimenters—collaging ideas, testing color, and letting algorithms propose new compositions. The tote becomes a wearable gallery, a one-of-a-kind piece that carries a unique image generated by a digital tool. Transferring AI-generated art to fabric can be achieved through a print-on-fabric process or by using heat-transfer methods that bond the image to the material with durability suitable for daily use. This route raises thoughtful questions about originality, colorfastness, and how technology and handwork intersect in modern craft. It’s not about replacing traditional sewing but about expanding what a tote can express. The result is a bag that holds not only items but ideas—an object that invites observation and conversation. In practice, you choose a size that suits your pattern and test the transfer on a small swatch before committing to the whole bag. The emphasis is on planning, calibration, and a willingness to experiment with method and medium. As you work, you’ll discover the balance between the crisp detail of the digital print and the tactile presence of sewn fabric, a dialogue between machine precision and human touch.
Across these paths, there is a throughline: tote bags are robust, adaptable objects that reward curiosity and care. The practical foundations—quality fabric, sturdy thread, thoughtful seam allowances, and secure finishes—remain the backbone of any approach. When you choose upcycling, you honor resourcefulness and story; when you embellish by hand, you cultivate texture and personality; when you design for multi-functionality, you sharpen focus on organization and usability; when you explore AI art, you widen the conversation about what craft can be in the digital age. The results aren’t simply different looks; they are different ways of thinking about what a tote bag can be. If you’re drawn to a practical, single-purpose bag, you can start with a straightforward panel layout and build toward pockets and a simple topstitch finish. If, however, you want a bag that carries a message or a mood, the upcycled or AI-infused routes offer a path to expressive, conversation-starting pieces. In every scenario, you’re stitching together more than fabric—you’re weaving continuity between sustainability, personal flair, and the daily rituals that tote bags quietly support.
To bring these ideas from concept to reality, consider how a single project can become a family of bags. A tote that begins as an upcycled T-shirt front can be reimagined with hand-embroidered motifs on a separate panel, creating a small collection of related designs that share a common lineage. The canvas-and-paint approach can evolve into a seasonal set with different color themes, each one reflecting a mood or a wardrobe shift. The multi-functional pouch concept can be adapted into a larger organizer insert that can be detached and used inside other bags, broadening the utility of your makes. And the AI art tote, while already bold, can inspire a series of digital-to-fabric experiments in which colorways and compositions are tuned for different bag sizes and fabrics. As you push into these variations, remember to document your process: note fabric choices, seam types, pen pressures, and transfer settings. The joy of sewing—and the reason these paths are compelling—is that even the simplest tote can become a springboard for creative growth.
For a practical touchpoint that aligns with the everyday realities of sewing totes, consider how hardware choices contribute to the overall feel. If you want a cleaner finish with easy accessibility, you can explore zipper options or pocket closures that suit your style. See a practical guide on tote bags with zippers for concrete training on incorporating secure closures without sacrificing aesthetics. tote bags with zippers
In closing, these creative routes don’t replace the fundamentals; they extend them. They invite you to repurpose, decorate, organize, or collaborate with technology, all while staying true to the essential craft of sewing a sturdy tote. The next chapter will carry the momentum forward, translating these concepts into project-ready patterns and a quick-start workflow that keeps your hands busy and your imagination engaged. Until then, let each bag you make be a doorway—into your own history, your resourcefulness, and the evolving language of what sewing tote bags can mean in daily life.
External resource: https://www.thesprucecrafts.com
Stitching Substance and Style: A Seamless Guide to Crafting Durable Tote Bags

A tote bag is more than a container for daily essentials; it’s a portable canvas for function, durability, and a touch of personal craft. Sewing one from sturdy materials lets you tailor size, strength, and style to your needs. The beauty of tote bags lies in their simplicity: a few well-chosen fabrics, solid seams, and a clean finish can yield a bag that carries groceries, books, or a weekend stash with equal ease. To start, imagine the bag not as a single piece of fabric but as a small, scalable system. The outer shell, the lining that houses your valuables, the handles that bear the weight, and even a pocket or two for small items—each part must work in harmony. Material choices matter most here. Durable fabrics like canvas or cotton duck, denim from old jeans, or other sturdy options hold their shape, resist puckering, and accept topstitching with confidence. If you lean toward eco-friendly projects, upcycling old clothes or linens can yield a one-of-a-kind tote with a distinct texture and history. The thread you choose should echo the fabric’s heft; a strong all-purpose polyester or a cotton-wrapped polyester thread provides the bite you need for repeated use. Tools humble but essential—a sewing machine for speed and uniformity, sharp scissors, pins or clips, a ruler, and a good iron—round out the kit. The goal is to move with purpose, not haste, and to let the fabric tell you where the strong lines belong.
Preparation lays the foundation for every successful tote. Wash your fabric first to prevent future shrinkage and to remove sizing or chemicals that can affect dye or paint. A simple pattern is enough for a classic main body: two main panels that become the sides and front and back, plus a lining panel cut to the same shape. The standard width and height you’ll often see—around 32 centimeters by 70 centimeters for the main body—works well for a practical daily tote, and you should always include seam allowances, typically about 1 centimeter. When you cut, keep everything precise: two matching outer pieces, two lining pieces, optional pockets, and a pair of handles. Handles are more than decorative. They distribute weight and comfort, so plan for a sturdy width and length. In many patterns, handles are 15 to 20 centimeters long and 8 to 10 centimeters wide when flat; folding the fabric and reinforcing the edges with a neat seam gives you durable loops that won’t roll or stretch.
As you prepare, the making of the handles deserves its own careful routine. Take a handle piece, fold it lengthwise with right sides facing, and sew along the long edge with a 1-centimeter seam allowance. Turn the strip right side out and press it flat. A second handle is prepared in the same way. This simple process creates a clean, sturdy strip that won’t unravel or twist under load. If you’re stitching on a machine, a single long seam can be your friend, but don’t rush the flip to the right side; a gentle press helps maintain the shape. Optional fabric finishing, like folding the raw edges inward at the ends of the pocket or top edge, can add a touch of refinement that pays dividends when you topstitch.
Pockets, while optional, are a welcome feature, especially if you’re organizing items within a larger bag. A pocket can be placed on the outer bag piece or on the lining, or both for added versatility. Position the pocket edges to align with the pattern’s edges, then sew around the pocket opening to secure it. A simple rectangle pocket with three sides sewn and the top edge left open works well for beginners, while a zippered interior pocket introduces a level of security for keys or cards. The romance of a tote often lies in its hidden compartments, where small items can reside without slipping to the bottom.
With the components ready, you move to assembling the outer bag. Place the two outer pieces together with right sides facing each other and sew along both side edges and the bottom, using a 1-centimeter seam allowance. Clipping the corners reduces bulk when turning the bag right side out and helps the final shape feel crisp rather than bulky. The lining follows the same logic: two pieces sewn to create an inner bag that mirrors the outer shell. The two layers should align so the final bag feels balanced from every angle.
Attaching the handles is a moment that tests both precision and planning. Turn the outer bag right side out, then position the handles at the top corners. They should be placed inside the bag so the raw edges align with the top edge. Sew a strong top line across the bag, ideally with a double row of stitching to anchor the handles firmly. Equal spacing of the handles matters for balance; a little pre-measuring helps, but the key is to keep them parallel and even under load. A reinforced seam where the handles meet the body prevents tearing and gives you confidence during daily use.
Now you bring the outer bag and the lining together. With right sides facing each other, align the top edges and pin or clip them in place. Sew around the entire perimeter, leaving a gap at the bottom for turning. A turning gap of around 10 to 15 centimeters gives enough room to maneuver the bag without risking fabric distortion at the corners. When you’re done, turn the bag right side out through the opening. A turning tool or a blunt object, like a chopstick, helps push the corners into sharp points, which adds to the bag’s overall clean aesthetic. Pressing with a hot iron then helps set the shape and gives a crisp appearance that lasts through repeats of everyday use. Finally, fold the raw edges of the opening inward by about 1 centimeter and topstitch to close the gap. This subtle reinforcement creates a tidy, professional edge that you’ll notice in the bag’s lasting durability.
Structure matters, and several small choices can elevate a tote from simple to refined. Some sewers reinforce the base with a separate base panel or by stitching a shallow box pleat at the bottom. This creates a flat bottom that helps the bag stand and prevents light bulging when the bag is full. A second line of stitching, placed a short distance from the first along the top edge, offers a polished finish and helps keep the seam from curling. If you’re new to sewing, the no-sew options are appealing—iron-on adhesives or fabric glues can attach patches or reinforcing pieces, and embroidery can personalize without a machine. Yet the heart of a durable tote remains the coordinated effort of outer fabric, lining, handles, and careful finishing.
The creative life of a tote bag begins where practicality ends. Personalizing a plain canvas or denim bag with fabric paint, embroidery, or appliqué lets you make it unique, whether it’s for everyday use or a thoughtful gift. Upcycling larger pieces of fabric such as old jeans can yield a bold, textured look that’s also wonderfully sturdy. You can add features that increase function without compromising shape: a zippered interior pocket for valuables, a small external pocket for quick access, or an internal phone pouch that keeps devices dry and within reach. Mixing fabrics—perhaps a bold outer with a solid lining—creates a contrasting, fashionable silhouette. The key is to balance style with strength: choose a fabric that holds its form, plan your seams, and finish with clean topstitching.
A practical mindset helps every step. Proportion and test guidance matter as soon as you pick a fabric. Test your chosen fabric’s behavior on scrap pieces to confirm how it handles seams, topstitching, and turning. If you’re unsure about a material, practice on scrap first. For a concrete, step-by-step reference to a classic canvas tote with lining and pockets, you can see a detailed visual guide here: How to Make a DIY Canvas Tote Bag – Step by Step Guide.
If you’re curious about how a specific tote design fits into broader shopping needs, a nearby example you might explore is a dedicated laptop tote that accommodates a computer sleeve and keeps electronic devices protected during transit. For a focused look at that option, consider this resource: tote bag with computer sleeve, which illustrates how the interior setup can be optimized without sacrificing exterior style. This kind of exploration helps you translate the core sewing steps into real-world plans for the exact tote you want to own.
The craft of sewing tote bags rewards patience, planning, and a willingness to experiment. It’s a practical discipline that invites personal expression while delivering durable results. The techniques—careful measuring, consistent seam allowances, thoughtful fabric choices, and clean finishing—form a reliable template you can adapt to countless projects. With each bag you sew, you’ll refine your eye for balance, your hand for precise stitching, and your toolkit for efficient, satisfying work. The moments of choice—whether to add a base panel, whether to topstitch along the opening, whether to line or simply finish the edges—become part of the bag’s story. And when you finally press that last seam and slip your hand into a bag that sits squarely, you’ll feel the quiet confidence of a maker who respects both the material and the craft.
From Rough Edges to Ready-to-Carry: Mastering Common Tote Bag Sewing Challenges
Sewing a tote bag is a satisfying blend of function and creativity, yet the journey from fabric to finish is lined with small, recurring hurdles. When you understand the challenges, you can anticipate them, plan ahead, and sew with confidence. This chapter doesn’t merely list problems; it threads practical fixes into the fabric of your sewing process, helping you move smoothly from a tentative first tote to a sturdy, personal carryall you’ll be proud to use or gift. A common starting point is fabric selection. The right material sets the tone for durability, workability, and aesthetics. Lightweight fabrics, if chosen without care, can fray and lack structural integrity, while stiffer options like some canvases can resist feed through the machine and resist accurate seams. The sweet spot is a medium-weight fabric that holds its shape but stays forgiving in handling. Quilting cotton with a stabilizer, or a canvas designed for sewing projects, often offers that balance of strength and ease. Stabilizers, in particular, can help prevent sagging at the handles and keep the bag’s silhouette crisp after heavy use. Treat fabric planning as a quiet act of forethought, washing and pre-shrinking at the outset to avoid post-assembly surprises. This is a small step that saves hours of adjustment later. Alongside fabric choice, consider how you’ll finish raw edges. Fraying is not merely a cosmetic issue; unchecked edges can weaken seams and ruin the bag’s clean lines. Finishes range from serging and bias binding to French seams or fusible hemming tapes. Each method has its place depending on fabric, lining, and desired look. The idea is to pair durability with a clean, professional edge. As you select hardware or features such as pockets or zippers, you begin to see how design decisions interact with construction. If you want to explore options like a zipper pocket or other zipper features, you can check out tote-bags-with-zippers for inspiration and ideas. The sewing itself hinges on keeping layers aligned and feed evenly through the machine, especially when multiple panels form the outer bag. Misalignment can produce a lopsided silhouette or edges that don’t match when you sew the final seam. The fix is straightforward but powerful: pin or clip generously, mark guide lines, and slow down around corners. A walking foot can help feed layers consistently, and a light touch with steam or a crisp press after each seam helps lock in accuracy. Think of seams as the skeleton of your bag. When seams lie flat and straight, the bag gains both strength and a neat appearance. Pressing matters more than most beginners expect. Rather than bending to the needle as you sew, pause to press each seam after it’s sewn. A flat seam makes the difference between a tote that looks handmade and one that looks purpose-built. The most common stress point in tote construction is where the handles meet the body. Handles carry weight, and if the attachment isn’t robust, the bag can fail under modest loads. The time to address this is during the initial attachment. Use a square or box stitch at each end of the handle junction with the bag body. That rectangle of reinforced stitching spreads the load and reduces raveling at the stress point. If you’re using heavier fabrics or a thicker lining, consider sewing with heavier-duty thread and ensuring the stitch length is appropriate for the fabric weight. It’s easy to fall into the trap of using a thread that looks fine on the spool but isn’t up to the task of repeated loading. A quick test seam on scrap fabric can reveal whether your thread choice will hold under real use. Even with perfect seams and sturdy handles, unfinished edges along seams and pockets can catch on clothing or snag during handling. The practical defense against fraying is thoughtful finishing. A narrow zigzag along raw edges, a serged edge, or binding with bias tape all work well. If you’re aiming for a very polished look, consider French seams on lighter fabrics or a fusible hem tape for a clean finishing touch on the lining and outer edges. Pocket placement is another subtle source of trouble. A pocket that’s misaligned or not secured well can swing around or tear out. The cure is precise alignment, then secure stitching along the pocket’s top edge and sides. For added durability, baste the pocket in place first, then sew with a consistent seam allowance. When adding pockets to the lining, treat the lining as a separate, smaller bag before pairing it with the outer bag. This helps you catch any misalignment that would otherwise show when the two pieces are closed around the opening. The layering of outer fabric and lining also calls for careful corner handling. Corners tend to bulk when you sew and turn the bag right side out. To mitigate this, clip or notch the seam allowances at the corners, then sew using a 1 cm seam allowance, and gently push the corners out with a blunt tool so they form neat points rather than bulky squares. Turning and finishing the bag is where practice meets patience. Leave a turning gap at the bottom between the outer and lining pieces. This gap is your doorway to turning the bag right side out and revealing clean edges. After turning, push out corners with a turning tool to sharpen them, then press the bag flat. Topstitching along the opening is the final flourish that both closes the seam and reinforces the top edge against wear. The top edge should be clean and even, with raw edges tucked inward by about 1 cm before you stitch. This single pass of topstitching can dramatically improve the bag’s professional look and resistance to fraying at the opening. The practical outcomes of these techniques extend beyond a single tote. With mindful fabric selection, careful seam work, reinforced stress points, and thoughtful finishing, you’ll produce a bag that stands up to daily use and still carries your personal touch. The creative potential remains high—mixing fabrics for contrast, or adding features such as an interior zip pocket, phone pouch, or a small external pocket can transform a simple tote into a practical personal assistant. Upcycling offers a particularly satisfying route. Old jeans can yield durable denim totes, while sturdy linens or canvas remnants can become unique, eco-friendly carryalls. The goal is to marry durability with design—each tote reflecting personal taste while remaining a reliable vessel for daily errands. Practice remains the best teacher. Start with a simple outer bag and lining, then gradually introduce features, such as a pocket or a zippered top, to push your skills. As your confidence grows, you’ll begin to recognize the subtle cues that indicate a project is ready for a more ambitious attempt rather than a safe, straightforward replica of a basic tote. For readers seeking a structured, visual guide to the process, visual demonstrations and step-by-step sequences are invaluable. And while you won’t rely on a single technique for every tote, you’ll find that core strategies—careful fabric selection, precise seam alignment, reinforced handle attachments, thoughtful edge finishing, and deliberate turning and topstitching—are consistently effective. The result is not just a bag but a reliable partner for daily life, a canvas for creativity, and a reminder that thoughtful preparation can turn a routine sewing project into a lasting craft. External resources can widen your toolbox; for a broad, image-rich reference to tote construction and finishing, see a reputable, hands-on guide such as The Spruce Crafts tote bag guide. The Spruce Crafts tote bag guide
Final thoughts
Sewing tote bags is not just a skill but a strategic opportunity for business owners to enhance their brand visibility and customer engagement. By mastering the essential supplies, following a step-by-step guide, being creative, and overcoming challenges, you can successfully produce high-quality products that resonate with your customers. Tote bags serve as a practical, sustainable choice that can elevate your branding and attract attention. Start sewing and witness the transformation of ordinary fabric into powerful marketing tools.