
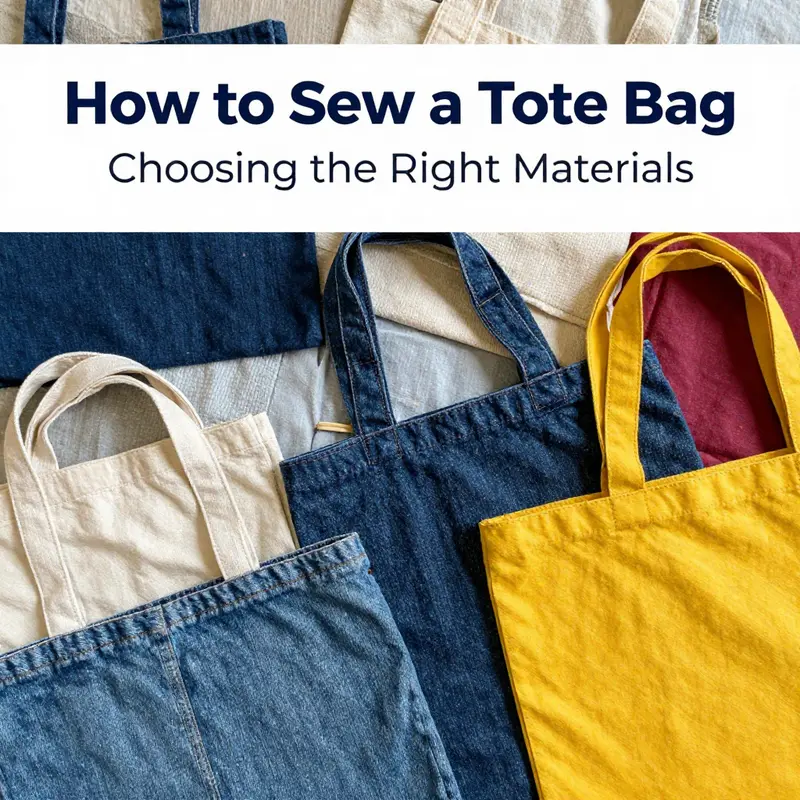
Sewing tote bags is not just a practical skill but a powerful tool for business owners looking to expand their brand identity and engage customers. In today’s eco-conscious market, reusable bags have become indispensable, making them an attractive product for businesses to offer. This guide breaks down the entire process of sewing a tote bag, from selecting the right materials tailored for your brand’s needs, to step-by-step sewing instructions, enhancing functionality with pockets and linings, and perfecting those final finishing touches. Get ready to explore the creative potential of tote bag crafting and how it can elevate your business.
null
null
Stitch by Stitch: A Seam-Centered Journey to Sewing a Durable, Everyday Tote

A tote bag is less a finished object than a small, portable philosophy about how fabric, thread, and careful thinking can come together to carry the ordinary cargo of daily life. The project rewards calm, deliberate work more than flashy speed. It begins with intent: choosing materials that balance weight, drape, and durability, then moving through a sequence of steps that shapes those materials into a bag you can rely on for groceries, books, or a quick weekend trip. The most satisfying totes start with clean preparation. If you pre-wash your fabrics, any shrinkage will happen before the seams are set, not after the bag has found its first load. Cotton canvas, denim, or twill make sturdy exteriors, while a lighter cotton or quilting-weight fabric makes a dependable lining. You will also need thread that matches or complements your outer fabric, a sewing machine, scissors or a rotary cutter, pins or clips, and an iron with a steady heat. Those basics set the stage for the work that follows, and they invite you to treat this as a mindful craft rather than a rushed assembly line task.
Cutting is the quiet beginning. Two outer panels, each measuring about fourteen inches wide by twelve inches high, form the main body. Two lining panels of the same size wait for their turn to be joined, and an optional bottom panel—if you choose to add one—helps the bag hold its shape when loaded. If you decide to make handles as part of this project, cut two strips of fabric about two inches wide and around twenty inches long. The exact dimensions can be adjusted to suit your height and preferred carry style, but keeping the proportions steady is what keeps the finished bag looking balanced. As you prepare, think about how you want the bag to feel when carried: a little weight should not cause sag, and the top edge should look neat from the outside.
With the pieces cut, the work shifts to construction. Start with the exterior. Place the two exterior pieces right sides together, align them carefully along the long edges, and sew with a modest seam allowance—about half an inch, or roughly a centimeter. This yields a neat, compact seam that won’t bulk up the edges when you turn the bag later. Do the same for the lining pieces. The goal is parallel construction: the exterior and lining should mirror each other so that, when they are joined, they meet smoothly at every edge. It helps to press the seams open or toward one side as you go; the flatness this creates reduces bulk and makes the final turning easier to manage.
The bottom panel is optional, but many sewists find it worth including. If you’re adding it, align the bottom with the exterior pieces and sew around the three exposed edges—left, right, and bottom—creating a boxed appearance that will give the bag more structure and prevent it from collapsing when you fill it. Press the resulting seams flat and breathe a little life into the corners with a firm press so the bag sits evenly.
Handles are the first real test of durability. If you’re making them, fold each handle lengthwise with the right sides together, then press a crisp crease along the fold. Sew along the open edge about an inch from the edge to seal that crease. Turn the handle right side out through the opening you left, push out the corners with a turning tool or a blunt stick, then press flat again. A final topstitch along both edges—just inside the edge by a couple of millimeters—locks the shape and adds a clean finish. Repeat for the second handle. The process makes handles strong enough to carry a full load while staying comfortable in the hand.
Assemble the bag’s backbone: the outer body and the lining should move through the same steps in tandem, so the finished bag reads as a unified piece. Place the exterior pieces right sides together and sew around the two side edges with a consistent seam allowance. Leave the bottom edge open for now. Do the same with the lining. When both halves are complete, you can combine them in a way that preserves the integrity of the interior. The interior seams should align with the exterior seams, and both pieces should lie flat with the right sides facing each other.
Attaching pockets is a subtle, practical touch that elevates everyday use. If you want an interior pocket, cut a rectangle of fabric and fold it in half lengthwise, stitching along the side to create a tidy pocket that will sit inside the lining. Press, then pin the pocket to the inside of one lining piece, aligning its top edge with the top of the lining. Sew around three sides to secure it. This keeps small items organized and prevents them from slipping to the bottom of the bag.
Joining exterior and lining is where the bag begins to take a recognizable shape. Place the exterior and lining with their right sides facing each other and pin or clip along all four sides. Sew around the entire perimeter with a consistent seam allowance, leaving a turning gap along the bottom edge—large enough to maneuver the bag through once it is inside out. A final topstitch along the top edge not only lends a finished look but also reinforces the bag’s form, ensuring the opening remains neat and sturdy when loaded.
Turning the bag to reveal its finished exterior is a moment of quiet transformation. Reach through the turning gap and pull the bag right side out, then use a blunt tool to coax out the corners so they stay crisp. A firm press along the entire upper edge helps the bag rest neatly when it’s set down. The turning gap is then closed, either with a row of invisible hand stitches or a visible topstitch that mimics the other lines of stitching on the bag. Each method has its virtue: topstitching is quicker and gives a bold, durable finish, while slip stitching provides a nearly seamless interior.
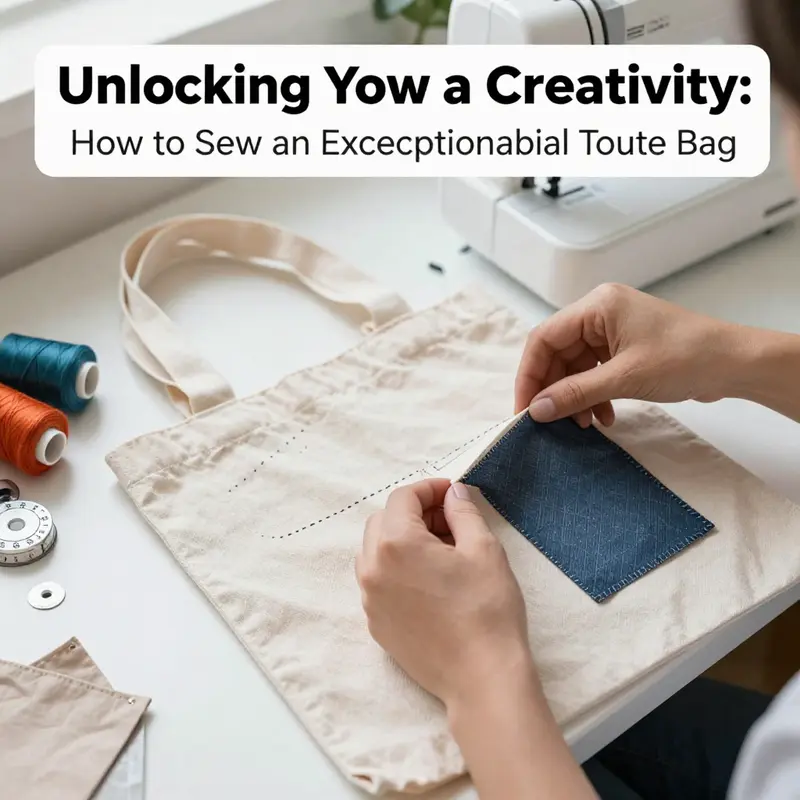
The final touches breathe life into the tote. A thorough press smooths away wrinkles, and a careful inspection ensures every seam is secure and every corner holds its shape. If you’d like to personalize the bag, a little embroidery, a patch, or even a simple fabric paint can transform a practical object into a true personal accessory. The beauty of this project lies not in complexity but in the balance of precise craft and everyday utility.
In this flow of fabric, stitch, and pressing, the tote becomes a reliable companion rather than a fleeting craft. The steps, though they require care, reward patience with a bag that can bear weight, hold together under daily use, and stand up to the occasional rough treatment of grocery runs or bustling commutes. The process naturally adapts to your chosen materials and measurements, so longer or shorter handles, a deeper body, or a lighter lining can be integrated with the same core approach. This is where practice pays off: the more you sew, the cleaner your edges become, the more comfortable your handles feel, and the more confident you’ll be in pressing and sewing with consistent accuracy.
For readers who want a practical reference that complements this approach, there are guides that walk through lining integration and detailed visual steps. A helpful resource demonstrates a similar method with a lining, reminding us that the essence of tote construction is preserving clean edges and a thoughtful turning sequence. If you’re curious to compare a slightly different method or see a visual walkthrough, you can explore a detailed guide that focuses on sewing a tote bag with lining. For an example of related tote features, you may also encounter internal discussions about bags designed to accommodate devices, such as a tote with a computer sleeve, which reinforces the value of careful seam placement and reinforced handles in a bag meant for everyday use. You can learn more from a focused guide on that topic here: tote bag with computer sleeve.
As you close the project, reflect on the thoughtful choices you made: the weight of the exterior fabric paired with a compatible lining, the decision to add a bottom panel for structure, the careful handling of seams and corners, and the confidence built by completing a hands-on sewing task that yields a durable, reusable bag. This tote was not assembled in haste; it was crafted with attention to detail and a steady rhythm of cutting, stitching, pressing, and turning. The result is more than a bag. It is a small testament to how simple materials, when treated with care, can become something useful and personal that travels through daily life with you. For a broader sense of technique, see additional visual guides that illustrate the lining approach in detail and provide an opportunity to compare different fabric choices and construction options. External resources offer complementary perspectives on turning openings, topstitching consistency, and pocket placement, enriching your understanding of the sewing process and helping you plan future projects with confidence. If you’d like to explore similar construction methods in a structured, step-by-step format, a detailed visual guide to sewing a tote bag with lining can be a convenient reference. The materials and approach described here align with those broader methods, fostering a confident, capable sewing practice that extends to other bags and fabric projects. For more visual guidance, you can consult a detailed tutorial that presents the lining-focused method to complement this chapter.
External resource: https://www.allthecrafts.com/sewing-tote-bag-with-lining/
Sturdy Handles, Lasting Bags: Mastering Tote Bag Handles and the Art of Attachment

Crafting sturdy tote handles is where practicality begins. Handles must be cut, joined, and anchored to support weight. They are the primary interface between wearer and bag. A well-made tote can carry groceries, books, or a laptop and still feel balanced because every stitch at the attachment points is reinforced. This section covers selecting materials, handle dimensions, cutting, turning, and topstitching, plus attaching the handles securely to the bag. Start by choosing exterior fabrics like medium-weight cotton canvas, denim, or twill that hold their shape. For comfort, a strap width of 1.5 to 2 inches and a length around 18 to 20 inches works well; wider straps up to 2.5 inches distribute weight more evenly but change the silhouette. Pre-wash fabrics to prevent later shrinkage, so the handles keep their intended size. Cut two handle strips roughly twice the final length, plus seam allowances. Fold lengthwise, press, stitch along the folded edge, turn right side out, and press again. Topstitch along both edges to secure and crisp the shape. Attach handles by placing exterior and lining right sides together, align top edges, and position handles so ends tuck inside the seam allowance. Center handles between the sides and space evenly from each edge; pin or clip and sew around the top through all layers. Reinforce the starts and ends with backstitching or a second line of stitching. If you use hardware, follow the manufacturer’s guidance and reinforce corners accordingly. The goal is a clean, durable junction whose strength comes from a thoughtful sequence of steps, not a single trick. Finish with a thorough press and minor touch-ups for a professional look. For readers seeking more, a guide on tote construction that includes lining and finishing complements this chapter. External resource: How to Sew a Tote Bag with Lining – A Step-by-Step Guide for Beginners (https://www.madebymany.com/blog/how-to-sew-a-tote-bag-with-lining)
Layered Craft: Sewing a Tote Bag with Pockets and a Lined Interior
Adding pockets and a lining is the natural next step after mastering a simple tote. The lining hides the bag’s raw edges and adds structure, while pockets increase daily practicality. When you plan this upgrade, choose fabrics that balance durability with softness. A sturdy outer fabric such as canvas, denim, or heavy cotton works well, and a smooth lining fabric helps items glide in and out. Decide how many pockets you want and where they should sit—inside near the side seams is most common, but a small exterior slip pocket can be a pretty touch if you want to show a bit of personality. As you move from cutting to sewing, keep your workspace organized and press between steps. Beginners often underestimate the impact of a crisp crease; proper pressing makes seams align neatly, reduces bulk, and makes final assembly feel almost effortless.
Start with the lining pieces cut to the same dimensions as the outer bag pieces. Turn the inner fabric right side up, then nest it inside the outer fabric so that the right sides are touching. This inside out configuration keeps the seams hidden and creates a neat interior. Pin along the side edges and bottom, matching raw edges carefully. Sew with a 1 cm seam allowance, then open the bag and press the seams flat. You will now have a bag with the outer shell and the lining joined at the sides and bottom, but still separate from each other at the turning edge. The turning edge is where the final exterior and interior will connect when the bag is finished, so take time to align it perfectly and to keep the bottom edges smooth.
Introduce pockets by cutting a piece of fabric for the interior pocket slightly smaller than the planned pocket size. Fold the top edge down about half an inch and press it; fold again to create a clean hem, then stitch close to the fold. Turn the pocket right side out and press. Position the pocket on the inside lining, aligning its top with the lining top edge. Pin securely, then stitch along three sides of the pocket, leaving the top open for easy access. This interior pocket keeps valuables safe and adds a simple, professional finish. If you prefer, you can also sew in a small exterior pocket on the outer fabric, but a lining pocket is less exposed to wear and more likely to stay neat over time.
With the pocket secured, check the overall alignment of the bag panels. The lining should sit inside the outer bag with both right sides facing each other along the top edge. It helps to gently finger press the top seam so it lies flat, then baste or pin the top edges in place. If you choose to add more structure at the top, you might reinforce the upper edge where the handles will attach later by adding a line of topstitching along the outer edge. This not only looks tidy but also reinforces where stress tends to accumulate when you carry weight. A clean interior is the key to a durable tote that holds its shape and feels comfortable to use every day.
Now set the outer bag and lining aside again and prepare to join them for the final construction. Place the outer bag inside the lining so that their right sides touch and the top edges line up. Carefully align all edges and pin around the entire perimeter, leaving a turning gap of about 15 to 20 cm along the bottom or a side seam. Sew around the entire edge with a single line, using a 1 cm seam allowance. Leave the turning gap unstitched so you can turn the bag right side out later. For a professional look, add a final topstitch along the top edge after the turning gap is closed. This stitches the two layers together neatly and creates a crisp, finished mouth to the bag.
Turn the bag through the turning opening so the right sides appear on the outside. Use a blunt tool to push corners until they look sharp. Smooth the bag with your fingers and press with a hot iron to set the shape. The turning opening is then closed either with a careful slip stitch invisible from the outside or with a neat topstitch that catches the opening from the outside. If you choose topstitch, you will see a continuous stitch line along the edge; if you choose slip stitch, the closure remains discreet and nearly invisible. Either method yields a clean, durable finish that keeps the interior neat and protects the lining from shifting out of place during use. Take a moment to ensure the pocket openings and seams sit correctly after turning.
With the main body assembled, attach the handles where you prefer. If you cut your own handles earlier, you will attach them along the top edge of the outer bag; otherwise, you may thread pre made handles through the top edges or through reinforced channels in the lining for security. When sewing handles, align the ends with the top edge and place them evenly across the bag. Sew the handles with a couple of lines of stitching across the short width to anchor them firmly. If you want extra durability, consider stitching a second row of stitches parallel to the first, about 0.3 cm apart. Finally, give the exterior a last press and check that the interior pocket sits correctly, edges are smooth, and the overall silhouette is evenly balanced. For readers who like to explore extra features, you can browse examples of tote bags with zippers for more ideas tote-bags-with-zippers.
After the basic construction, you can add small decorative touches such as a stitched monogram, a fabric patch, or a line of contrasting topstitching along the outside seam. Press again and inspect every corner, nodding to the work that press and trim deliver. The result is a durable, reusable tote that handles groceries, books, and everyday items with ease. Practically speaking, the key to a lasting tote is consistent seam allowances, accurate cutting, careful alignment, and generous pressing between steps. As you gain confidence, you can experiment with different fabrics, handle lengths, or pocket configurations to tailor the bag to your routine. For further guidance and a detailed step by step visual guide, consult the external resource linked here: https://www.allthecrafts.com/sewing-tote-bag-with-lining-step-by-step-guide/.
Polished Perimeter, Sturdy Straps: Finishing Touches That Make a Tote Bag Ready for Daily Use

As the last stitch cools and the fabric settles from a crisp press, a tote bag begins to promise more than a simple carryall. Finishing touches aren’t merely decorative; they are the deliberate steps that translate a pattern into a reliable everyday companion. A well finished tote holds its shape, handles its load gracefully, and wears its life with quiet confidence. The flow from rough-cut panels to a complete, ready-for-action tote hinges on a few key decisions about edges, structure, and attachment points, choices that reinforce the bag’s durability without sacrificing ease of use. Start with the edges. Raw seams can self-destruct under strain, especially where the bag meets the world: a heavy grocery, a pile of books, or a bundle of damp weather gear. The path to a durable finish is simple but meaningful. If you’ve stitched with a conventional 1 cm seam allowance, press those seam allowances open or to one side, then consider adding a touch of topstitching along the outer edges. A single line of stitching about 0.2 cm from the edge does more than look neat; it locks the seam in place and reduces the chance of fraying at the most visible junctions. When choosing fabric, a heavier weave like canvas or denim rewards this light topstitching with a crisp, professional edge. Yet even with lighter fabrics, the same principle applies: a precise press and a restrained line of topstitching raise the overall finish without overwhelming the bag’s character. Structure is the other pillar of a lasting tote. Without a little reinforcement, the bag can collapse when loaded, losing its shape and offering a flimsy feel. Here, interfacing becomes a quiet workhorse. A fusible interfacing applied to the outer panels adds body, helping the bag stand up when placed on a table or when resting on a crowded bus seat. If you anticipate carrying items that press into the bag’s sides, consider a lighter interfacing on the lining to prevent bulk but still preserve a neat silhouette. Structuring the handles follows the same logic: they must be strong enough to bear weight without stretching or tearing away from the bag. The standard approach—folding the handle fabric in half, sewing along the open edge, turning right side out, and then topstitching along both edges—already creates a sturdy core. What elevates this step is where the straps meet the bag. Reinforce the attachment points with rectangular or square patches of fabric or interfacing that overlap the top edge of the bag and the handle seam. A few extra stitches in both directions, or a small box-and-cross pattern, distributes pulling forces and guards against raveling and edge wear. The journey from outer body to finished tote is seamless when you treat the lining as a counterpart that shares the same attention to detail. The lining pieces can be finished with the same 1 cm seam allowance, then pressed open or to one side. Pockets inside the lining add practical organization, and a simple interior pocket can be a small but significant touch. Attach the pocket by aligning its top edge with the top edge of the lining and sewing along three sides. This keeps the pocket anchored without creating bulk at the top, where the bag will fold. The finishing sequence wouldn’t be complete without a thoughtful approach to the bag’s opening and closure. The basic method provided—turning the bag right side out through a bottom opening and then closing that opening with a slip stitch or a topstitch—delivers a clean, nearly invisible finish. A stronger alternative, especially for heavier loads, is to treat the turning gap as a temporary seam and close it with a tight blind stitch, or to topstitch along the edge for a reinforced, durable finish. If you prefer a cleaner, more modern look, a visible topstitch along the upper edge completes the bag’s frame and helps it hold its shape when set down. It’s also worth considering a closure option that suits your daily routine. A zipper or magnetic snap can be added for style and security, and you’ll find a range of methods for installing these elements depending on your fabric and lining. If you’re curious about zipper-equipped totes, you can explore a dedicated resource that demonstrates how to incorporate zippers into tote designs. The tension between a clean interior and a secure top edge benefits from a deliberate approach: before turning the bag right side out, consider placing or sewing in a lightweight stabilizer or soft interfacing along the top edge to keep the opening flat and easy to access. The interior finish should feel as tidy as the exterior. Once the bag is turned, a final pass of pressing with the iron helps to set the shape and flatten any stubborn bulges at corners or along seam lines. The corners deserve a quiet bit of attention; sharp, well-pressed corners contribute to a professional silhouette and make the bag easier to slide over a shoulder or under a seat. If you’ve left a turning opening, close it with either a careful slip stitch or a short, neat blind stitch. The choice between these methods is a matter of balance: slip stitching leaves a near-invisible seam, which suits a minimal, undisturbed exterior; a blind stitch, while more visible, can offer a stronger, more lasting closure at the seam line. When you review the finished edges, step back and consider the bag’s daily life. Will it ride in a rainstorm or get knocked against a library shelf? The finishing touches should anticipate real use. Edge finishing, reinforced handles, and a thoughtful interior organization system create a tote that remains functional after many trips to the market, the office, or the gym. If you want to expand the bag’s utility, you can incorporate a small inner divider or pocket that keeps items separated—laptop, notebook, wallet, and shopping list—without compromising the bag’s overall size. Even modest additions, when executed with consistent seam lines and aligned edges, can transform an everyday tote into a reliable companion that handles weight and movement with composure. As you consider aesthetics alongside durability, remember that the materials you chose initially carry through every finishing choice. A heavier fabric with a matte finish might respond well to slightly bolder topstitching, while a lighter cotton or a linen blend may call for restrained lines of stitching and subtler interfacing to preserve a soft, pliable feel. The balance between look and function is not a compromise but a dialogue between fabric and technique, with finishing touches acting as the translator that makes that dialogue legible. For readers who want to explore a broader range of closure options, a resource focused on zippers and related features offers practical guidance that complements the step-by-step method described here. This approach, combined with the finishing touches outlined above, helps ensure your tote remains a sturdy, attractive everyday tool rather than a fragile project. If you’d like a visual walkthrough alongside these tips, a detailed guide with photographs can be an excellent companion to your practice. The Modern Mrs. Minute provides a well-structured tutorial that blends technique with accessible images, serving as a useful reference as you refine your own finishing methods. In practice, finishing touches are less about a single flourish and more about a consistent rhythm of care—pressing, reinforcing, aligning, and sealing edges—so that the tote you sew becomes something you trust to carry life’s everyday loads. By treating seams, attachments, and edges as active parts of the design, you turn a simple pattern into a durable, dependable tote. For hands-on readers seeking a concise visual reference on finishing techniques, the combination of careful seam work, thoughtful interfacing, and purposeful topstitching creates a bag that stands up to daily use, time after time. And as you close the turning opening, you’ll see a clear result: a tote that feels and performs as well as one bought from a shop, but with the character of a handmade object you created with your own hands.
Final thoughts
Creating tote bags through sewing not only empowers your business to provide eco-friendly alternatives but also showcases your brand’s commitment to sustainability and creativity. With the steps outlined in this guide, business owners can confidently design and produce custom tote bags that resonate with their audience. The culmination of selecting the right materials, enhancing them with thoughtful design features, and perfecting the final touches will ensure your tote bags are not just functional, but also a statement piece that reflects your business ethos. Dive into your creative journey and let your business shine with unique, handmade tote bags.