Sewing a tote bag with a lining is more than a craft — it’s an opportunity for businesses to offer customers a quality, functional product. A well-made tote bag isn’t just stylish; it showcases your brand’s commitment to quality, functionality, and customer service. This guide is designed for business owners looking to create unique tote bags for retail or promotional use. In the first chapter, we will delve into the best materials for sewing a tote bag, which is crucial for ensuring durability and appeal. The second chapter will provide a methodical, step-by-step guide on how to sew the tote bag, focusing on professional finishes and user-friendly techniques. Finally, the concluding chapter will highlight the finishing touches that will elevate your tote bag from ordinary to extraordinary, ensuring your business stands out in a competitive market.
Material Matters: Selecting Outer Fabrics and Linings to Build a Durable Tote Bag with Lining

Material choices sit at the core of any tote bag that will endure daily use and still look refined after months of wear. The outer fabric must resist abrasion, hold its shape, and carry the sign of careful craft, while the lining should provide structure, protect the interior, and offer a forgiving surface for easy cleaning. When you sew a tote, you are not just choosing color or texture; you are coordinating weight, weave, moisture handling, and the way a bag behaves when full. The steps that follow will feel almost mechanical, but the decisions about material are what determine how smooth the sewing process will be and how robust the finished bag will feel in real life. Start with the outer fabric. High-density cotton canvas, at 16 ounces or heavier, has long been a standard for sturdy bags because it holds its shape and resists tearing without becoming so stiff that it resists sewing. It is forgiving for beginners, yet capable of aging gracefully with use. If you prefer something lighter yet still tough, consider a durable coated or laminated fabric that offers water resistance without adding bulk. A 1000D recycled nylon or a similar high-denier synthetic can be ideal for daily carry or travel totes. Such fabrics are lightweight, abrasion resistant, and often weather resistant, which makes them excellent for bags that encounter rain, sun, or crowding on public transit. The choice between natural fibers and synthetics often comes down to context. A canvas tote might be favored for a casual, matte finish and a bag that can be repaired easily with basic tools. A recycled nylon exterior, on the other hand, lends a sleeker, more modern silhouette and can be easier to wipe clean when busy days spill coffee or groceries across your bag’s surface. Whichever outer you choose, check the fabric for heft and weave density. A loosely woven fabric might look appealing in a swatch, but it can stretch, snap threads, or wear thin after repeated use. Look for terms that signal durability: high-density canvas, full-grain options, or recycled nylon with a heavy weight. Don’t neglect the underside of the fabric; the back side should not feel flimsy or translucent, especially where the bag will bear weight. For those who appreciate sustainable fashion, recycled fibers are not just a trend but a practical decision. A high-quality recycled nylon, for instance, can offer excellent abrasion resistance while trimming the overall weight of the tote. If your choice leans toward denim or a sturdy cotton, think about the color and how it will show wear. A dark, tightly woven denim can hide scuffs and dirt better than a light canvas, but it will also show stitches and topstitching traces with a different rhythm. In parallel with the outer fabric, the lining contributes as much to daily practicality as to the bag’s finish. The lining should complement the outer by providing a smooth, relatively wrinkle-free interior that resists staining and dries quickly. Polyester is a common lining choice for its durability, resistance to wrinkling, and relative ease of cleaning. A polyester lining with a tight weave can stand up to busy hands, tote contents, and occasional spills. Nylon linings share many of the same advantages, with a slightly different texture that can feel smoother to the touch. If your tote is expected to encounter dampness or rain, consider a coated or laminated lining for enhanced water resistance. This doesn’t necessarily mean a waterproof layer; it can be a subtle treatment that protects the bag’s interior from moisture while still allowing the fabric to breathe to a degree. The weight of the lining is another critical factor. A lining that is too heavy can bulk up the top edge, create bulk at seams, and complicate turning the bag right side out after assembly. A lighter lining tailored to the outer fabric helps maintain a clean silhouette and easier topstitching. When pairing outer fabrics with linings, aim for compatibility in weight and drape. A very heavy outer fabric paired with a thin, flimsy lining can create a stiff, unbalanced bag that strains seams along the top edge. Conversely, a super light outer fabric with a heavy lining can result in a pouchy exterior with a bulky interior that never settles cleanly. The most durable configuration is one where the outer fabric and lining share a similar character in terms of weight and stability. If you lean toward a rugged exterior like canvas or denim, a polyester or nylon lining with a bit of structure is a sensible match. If you imagine a tote that travels in a backpack, carries books, or holds a laptop sleeve, you may offset the weight with a reinforced lining that includes a touch of interfacing on the inner layer of the outer panels. Interfacing is not universally necessary, but it can be a quiet ally for structure. Fusible interfacing applied to the outer fabric or to the inner side of the panels can prevent sagging at the top edge and preserve the bag’s overall frame. The decision to use interfacing should consider how the bag will be used and how you expect it to wear. A tote that carries heavy items frequently benefits from a light interface that keeps the outer shell from collapsing inward at the top, while a more everyday carry bag might function perfectly with no additional structure. If you plan to add features like pockets or a zipper closure, your fabric choices take on new dimensions. Pockets inside the lining benefit from a slightly stiffer fabric to avoid sagging and distortion when the pocket is loaded. A lining fabric with a little sheen or a tight weave can help these features hold their shape over time. The inclusion of a zipper, whether concealed within the top edge or attached as a separate closure, influences your material selection as well. A zipper tends to add bulk along the top edge, so your outer fabric and lining should be able to accommodate that without creating a bulky seam that puckers. When you arrive at the decision point about material selection, balance is the core. You want a fabric that remains stable enough to punch through multiple machine passes, yet forgiving enough to be sewn with a standard sewing machine or with a sharp hand needle if you’re choosing to hand stitch. Think about the thread you will use as the thread itself acts as a bridge between the two fabrics. If you choose a heavy outer fabric, pair it with a thread that has the strength to hold through repeated stress. A light lining can be sewn with a medium-weight polyester or cotton-wrapped polyester thread that resists shredding. The color of the thread should harmonize with both the outer and lining fabrics for a cohesive finish, or you can use a slightly contrasting thread for visible topstitching that doubles as a design element. In practice, you will often encounter a dilemma: a fabric you love may be irresistibly soft but less durable, or a tough fabric may demand more effort to work with due to its stiffness. You can navigate this by selecting a fabric combination that intentionally leverages the strengths of each material. For instance, a dense canvas outer paired with a moderately stiff lining creates a bag with crisp edges and a tidy interior. If you lean toward a reflective or water-repellent outer, you might choose a lining with similar moisture resistance to keep the interior dry and easy to wipe clean. It’s also wise to consider care. A tote that will be washed or wiped frequently benefits from materials that tolerate dampness and drying cycles. Polyester commonly handles washing well, and nylon linings are usually quick to air-dry. A laminated lining might resist spills better but can be stiffer and require careful pressing to avoid a glossy finish. As you read these options, imagine the bag you want to carry and the environments it will face. Are you commuting by bike or bus, or carrying groceries and books home from the library? Will you be in a rain-prone region, or do you simply want a bag that resists the daily drizzle and the inevitable coffee splash? Your answers will guide the material mix that will give you the best return on your investment of time and money. The practical path is to translate your vision into sound fabric choices before you cut. Start by selecting your outer fabric with an eye to weight and weave. Check the yardage and cut allowance with the grain in mind, ensuring you cut panels that are symmetrical. Then pick a lining that complements the outer fabric’s weight without adding unnecessary bulk. If you are uncertain, a standard approach is to choose a lining that is slightly lighter than the outer, so the top edge remains clean and the bag closes neatly without a tendency to flare or sag at the corners. When you decide, you’ll find that the rest of the project proceeds with greater ease. The assembly steps that follow in this guide assume you have a clear material plan and the confidence to work with it. If you foresee adding a zipper or a pocket, you can plan for those features by selecting lining materials that can support extra stitching and extra hardware without compromising the bag’s silhouette. For readers who want a practical shorthand, consider this mental checklist as you shop for fabrics: durability and wear resistance for the outer shell; a lining that resists stains, dries quickly, and stays neat after frequent use; a fabric weight that aligns with the bag’s intended load; a coating or laminate only where you truly need water resistance; and a thread color that harmonizes with both fabrics or provides intentional contrast for visible topstitching. If you later decide to explore more about zipper and pocket options and how they affect material choices, you can follow the internal link to a resource that focuses on tote configurations, including zippers and pockets: totes-bags-with-zippers. This resource provides practical examples of how different fabrics interact with hardware, helping you visualize how a zipper might influence your fabric selection and topstitching approach. As a culminating note on materials, don’t overlook the value of testing. Before you commit to cutting your final tote, practice on swatches or scrap fabrics that resemble the weights you intend to use. A short trial run can reveal unexpected issues with seam allowance, topstitch length, bulk at the top edge, or how the lining behaves when turned inside-out. Testing also gives you a chance to refine your seam allowances and needle choice, so the actual bag comes together with fewer surprises. In addition to practical testing, consider documenting your fabric choices as notes in your pattern or project journal. Write down the fabric weights, the weave type, the care recommendations, and any interfacing you decide to apply. This record becomes a valuable reference for future bags and helps you reproduce a result that aligns with your original intention. The materials you select have a lasting impact on the bag’s silhouette, drape, and daily resilience. They shape how the bag handles weight, how it wears at stress points like the corners and handles, and how easily it cleans and maintains its appearance. With that in mind, the next steps in this chapter move from theory to hands-on practice, guiding you through the actual cutting, assembly, and finishing processes that will bring your material choices to life. Reading the material guidance with an eye on the construction steps helps you anticipate where bulk might occur and where additional reinforcement will improve performance without sacrificing the bag’s clean lines. If you are new to sewing, you will find that the right combination of fabric weight and structure makes the learning curve gentler, because the bag behaves predictably at each stage—from cutting through sewing to turning and final topstitching. If you are more experienced, the same principles empower you to push the envelope: you can experiment with more technical fabrics or combinations, confident that you know how the pieces will work together and how the finish will look once the lining is sewn in place. As a closing reflection, remember that the goal of choosing materials is not simply function but also a sense of lasting satisfaction. A tote with a thoughtful mix of outer and lining fabrics feels like a well-considered object, one that carries purpose as well as belongings. The interior fabric should not be an afterthought; it is the quiet partner that supports every item you place inside, from notebooks and chargers to tiny cosmetics and keys. The overall effect should be a bag that looks polished, wears well, and ages with grace. For visual guidance that aligns with these principles, you can consult resources that offer broader insights into durable tote fabrics and design considerations, including guidance on weight, durability, and fashion compatibility. This external link provides a wider perspective on material choices for durable tote bags: https://www.britishstyle.com/guides/durable-tote-bag-shopping-guide. In the end, your tote will become a faithful daily companion, not merely a container but a crafted object that reflects your taste, your care, and your willingness to choose quality materials with intention.
The Hidden Finish: A Seamstress’s Immersive Guide to Sewing a Tote Bag with Lining
When you first open a pile of fabric and thread for a tote bag, the project can feel like a blank canvas with endless possibilities. Yet the real magic happens when the bag is finished and the lining hides the stitching, offering a clean, professional appearance that invites daily use. A tote with a proper lining is not merely decorative; it adds durability, structure, and a polished finish that makes a handmade piece feel store-bought in the best sense. This chapter invites you to move through the process as a single, cohesive arc, where every cut, seam, and turn serves a purpose. It’s about more than following steps; it’s about understanding how the lining and the outer fabric work together to protect contents, shape the bag, and present a neat, refined edge at the top. By staying mindful of grain, seam allowances, and the order of assembly, you’ll gain confidence that your tote will hold up to daily wear and still look crisp after a season of use.
Begin with a calm, patient approach. Gather sturdy outer fabric such as canvas, denim, or a sturdy cotton, paired with a lighter lining fabric like lightweight cotton or a poly-cotton blend. Having a clear idea of the final size—whether you want a roomy 15 inches wide by 13 inches tall or a more compact silhouette—helps you cut pieces with precision. The inner lining, while softer to the touch, serves a fundamental role: it protects the outer fabric from friction and wear, conceals raw edges, and contains any interior pockets or features you choose to add. A step like attaching the lining to the top edge may seem small, but it determines the bag’s interior cleanliness and how the bag finally sits when carried. The goal is to achieve a clean, enclosed top edge that makes the bag feel and behave like a single unit rather than two fabrics stitched together.
To begin, consider the journey of your tote from concept to finish. The outer panels form the visible face of the bag; they are the fabric you select for texture, pattern, and color. The lining panels live inside, hidden from sight, yet they do the heavy lifting of protection and structure. When you assemble the two and sew them together at the top, you create a pocket of space that holds its shape even when the bag is lightly loaded. The handles, whether a simple fabric strip or a more decorative option, become a symbolic bridge between the wearer and the bag’s interior. How you place and stitch these handles matters because stress points at the top are the most likely places for wear to begin. Reinforce those areas with sturdy stitching, especially where the handle ends meet the outer fabric. The result of this careful construction is a tote that stands up on its own, resists sagging, and continues to look neat as you maneuver through your day.
A guiding philosophy through the process is alignment. Cut with grain in mind, align edges symmetrically, and keep pieces flat and square as you sew. This attention pays off later when you turn the bag right side out and see a smooth exterior with a perfect top edge. In practice, you’ll often pause at key moments to check alignment and measure seam allowances. A standard ½-inch seam allowance provides enough room for the fabric to bear weight while maintaining a slim profile that reads as neat and controlled. If you prefer a bit more body, you can add interfacing to the outer fabric; just ensure you fuse it evenly so the surface remains smooth. The same logic applies to the lining—cut it precisely to the same dimensions as the outer panels, but remember that the lining generally ends up being slightly smaller than the outer bag to avoid bulk at the top. This small disparity makes the final join look crisp and prevents the lining from peeking beyond the top edge when the bag is loaded.
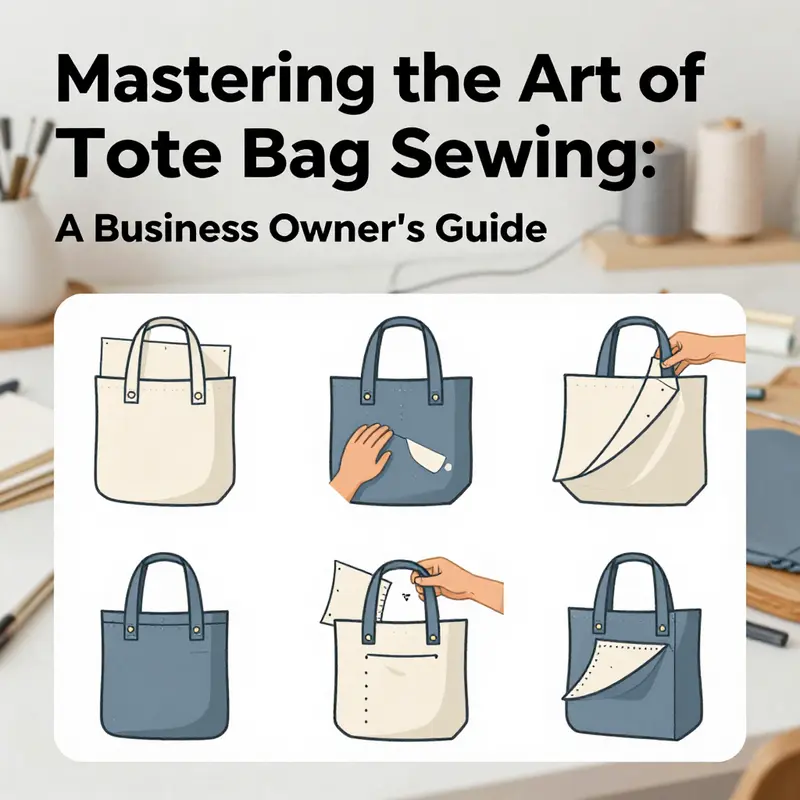
When you’re ready to assemble, begin with the outer body. Place the two outer panels right sides together and sew along the bottom and side seams, using a ½-inch seam allowance. This is the shell of your bag—its shape and durability will ride on these lines. Press the seams open or to one side for a neat finish, and resist the urge to rush; the crispness of your final bag depends on those pressed seams. Do not sew the top edge yet; leave it open for the moment. The same care applies to the lining: sew its bottom and side seams in the same way, and press those seams as well. The lining behaves a little differently because its purpose is to tuck inside the outer bag and remain largely unseen, so maintaining accurate sizing helps you avoid bulk and misalignment where the two fabrics meet.
With both shells ready, the moment comes to bring the outer and lining together. Turn the outer bag right side out, as if you were presenting the fabric to the world. Slide the lining inside so that the right sides of the lining and outer bag meet at the top edges. You’ll see the contrast between the exterior texture and the inner smoothness; let this visual cue remind you that both layers meet to create a finished edge. Align the top edges carefully around the entire circumference, then pin or clip to secure. Sew around the top edge using a ½-inch seam allowance. This seam is more than a joining line; it is the hinge that allows the lining to be tucked neatly inside and the two layers to be held together in a single, stable edge. After sewing, clip the corners to reduce bulk where the layers converge, particularly at the sides and bottom corners. The clipping step may seem small, but it pays dividends when you turn the bag right side out and the corners tuck neatly into place rather than bunching.
Turning from the inside view to the outward-facing finish requires a little finesse. Carefully turn the entire bag right side out through the opening you left at the top. Use a blunt tool—a point turner, a wooden chopstick, or the end of a pencil—to push the corners into shape. A well-turned corner is a quiet victory; it signals that the internal construction supports a clean silhouette. Once the bag is fully right side out, press the top edge flat with a hot iron. The crisp line you create here not only looks polished but also helps the outer and lining layers stay aligned when the bag carries weight. To secure this alignment and to offer a touch of professional flash, topstitch around the top edge, about ¼ inch from the edge. This subtle reinforcement keeps the lining and outer fabric together and helps prevent inner fibers from creeping into view. If you wish, you can add a zipper or button closure at the top for extra security or style, but remember that adding hardware introduces new handling considerations, such as ensuring the top edge remains smooth where the hardware sits and that the stitching is strong enough to bear the extra stress.
As you translate this plan into a finished tote, think about adding small but meaningful details that elevate the project. A pocket on the inside lining is a small but powerful feature. It makes the bag feel purposeful and helps you organize your belongings. If you’re making the pocket, sew it onto the lining before you assemble the two layers. A pocket gives you a dedicated space for keys, cards, or a phone, and it prevents loose items from shifting around inside the tote. Another enhancement is the thin, internal interfacing you’d fuse to the outer fabric for extra stiffness. Interfacing can transform a floppy bag into a structure that holds its shape when carried empty and when loaded. When you choose a pattern or color that speaks to you, consider how the interior might benefit from a hint of contrast; a lighter lining can brighten the interior space, making it easier to locate items inside the bag. The overall effect is not merely aesthetic; it’s about a refined, durable product that respects the wear it will inevitably endure.
If you enjoy exploring variations, you can adapt the same foundational method to create a tote with specialized features, such as a built-in laptop sleeve or a dedicated interior pocket for a tablet. For those curious about specific designs, there is a widely used reference that demonstrates a similar approach to constructing a tote with a built-in sleeve; you can explore a related concept through this example tote bag with computer sleeve. The core technique—cutting symmetrical outer and lining panels, attaching a top seam to enclose the interior, and finishing with a neat topstitch—remains the same even as you add compartments or adapt the dimensions to suit electronics or daily essentials. The underlying craft is consistent: precision cuts, thoughtful interfacing, and careful topstitching that makes a difference in how the bag looks and how long it lasts. The habit of pressing between steps cannot be overstated; it is the quiet force that prevents the bag from looking like a rushed project and instead yields a crisp, professional appearance.
This method is not merely about getting from point A to point B; it’s about cultivating a mindful cadence to sewing that respects both fabric behavior and the wearer’s needs. The lining’s role goes beyond hiding seams; it also influences how the bag behaves when filled. A well-fitted lining helps prevent the outer fabric from distorting or stretching in response to load, and it reduces friction against the user’s clothing. This friction awareness—how fabrics slide past one another and how seams respond to stress—becomes a practical habit. It informs decisions about whether to interface, whether to add pockets, and how to finish top edges to maintain a neat line from edge to edge. It also frames the choice between a no-fuss, minimalist tote and a more robust, multi-pocket design. Either path rests on the same foundational principle: a lining that complements, supports, and quietly elevates the outer shell.
In embracing this approach, you are also embracing a philosophy of reuse and practicality. Tote bags with lining are durable enough for everyday errands, school, or work trips, and they offer a durable alternative to disposable bags. The act of sewing your own tote means you can customize its size, weight capacity, and interior organization to match your daily routine. It’s a project that rewards patience and a careful eye for detail. The materials you choose will influence the tote’s lifespan as well as its appearance. The outer fabric should be sturdy enough to withstand repeated use, while the lining should be smooth enough to glide against itself as you reach into and from the bag. The stitching should be robust—double stitching at stress points, especially where handles attach, can significantly extend the bag’s life. If you ever feel unsure, remember that practice on scrap fabric can help you perfect your seam alignment and topstitching before you commit to your final fabric. A few minutes of practice will save hours of fiddling later and keep your final bag looking clean and well-structured.
The dance of construction culminates in a tote that feels balanced, sturdy, and ready to embrace daily life. When you next carry your bag, you will notice how the lining quietly supports the outer fabric, how the top edge presents a clean, uninterrupted line, and how the handles sit comfortably without pulling or warping the bag’s shape. That sense of quiet competence—the result of proper seam allowances, careful clipping, and a thoughtful turn-and-finish—embodies the essence of a well-made tote. The finishing touches matter as much as the initial cuts because they determine how the bag ages. A well-executed topstitch around the opening becomes the visual anchor of the piece, a sign that every stage of the project was treated with care. The final result is a bag that not only carries items but also carries the effort and intention you invested in its creation.
For readers who value visual guidance, the technique aligns with a widely shared tutorial style that emphasizes clear diagrams and practical steps. While this chapter stands on its own, it sits within a broader ecosystem of learning resources that celebrate accessible sewing for beginners and seasoned stitchers alike. If you seek an additional perspective, a reliable, hands-on tutorial can provide diagrams and video support to complement this description. The key is to engage with the process in a way that makes sense to you—reading the steps, watching a demonstration, and then applying what you learn to your own fabric choice and measurements. The result is a tote that feels personal and durable, a reflection of your pattern choices and your careful workmanship.
As you finish the project and prepare to test the tote in daily life, pause to admire the integrated layers—the outer shell and the interior, quietly stitched, working in harmony. The lining will have performed its essential function: to protect, conceal, and stabilize. The edges will be crisp, the top seam solid, and the handles secure. In a world where mass-produced bags often compromise on one or more of these aspects, your handmade tote stands out as a thoughtful, practical alternative. It is the kind of item you keep returning to because it feels reliable, comfortable to carry, and forgiving of a busy lifestyle. If you decide to revisit this project, you can experiment with fabrics that reflect changing seasons, or add small interior pockets or a divider to keep items organized. The same sequence will guide you, and the same respect for precision will reward you with a bag that wears well and ages gracefully.
External resource: Brother Tote Bag Tutorial with Lining provides a visual companion for those who benefit from seeing the steps in motion. You can access the detailed diagrams and guidance here: https://www.brother.cn/Content/Download/Manuals/ManualsToteBagWith_Lining.pdf
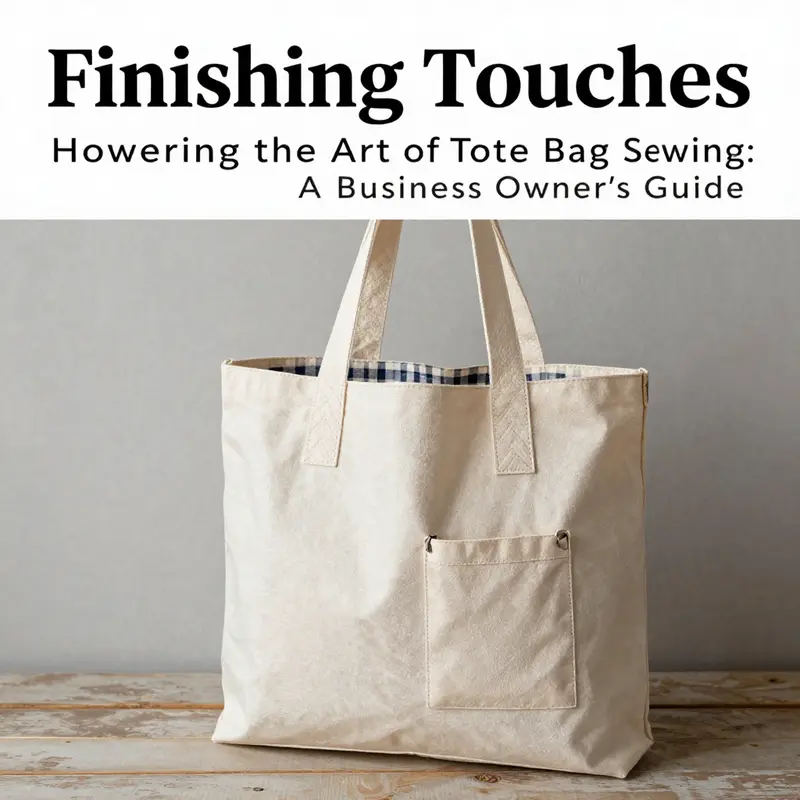
Finishing Touches on a Lined Tote: From Assembly to Everyday Use
Turning the bag right side out through the lining opening feels almost ceremonial after the tucked layers and careful machine work. It reveals where the upper edge will sit and how the outer fabric and lining align along the top. If you notice corners with a little extra fullness where the seam allowances meet this is expected and the moment to assess balance. A neat turn suggests grain lines are accurate and seam allowances consistent. If you find a snag or twist, correct it with a gentle tug and careful repositioning. A well executed turn signals the finishing phase will go smoothly.
Pressing follows turning with a quiet authority. The iron sets the shape you have built. Align the side and bottom seams so they lie flat against the bag. Press seams open or to one side depending on finish and fabric type. For sturdy canvases or denims pressing seams open often yields a flat line. For lighter cottons pressing to one side can save bulk. Use even pressure and avoid dragging the iron across the fabric. Move methodically line by line so the bag’s body receives a steady, even set of creases that become the foundation for a polished finish. Check the top edge as you go; a straight, well pressed top is the prelude to successful topstitching and a clean interior reveal when turned again.
Finishing raw edges is the quiet workhorse of the project. The lining opening and inner edges of the bag and any pocket edges all carry raw fabric that could fray with use. If you used a serger you are already ahead; a clean serged edge around the lining seam or pocket edge provides durability. If you do not own a serger, a zigzag stitch along the raw edge or a satin stitch works fine. The main goal is to prevent each edge from unraveling while remaining unobtrusive from the exterior. In many tote designs the lining opening is left unbound at the moment of assembly to allow later finishing when the bag is turned right side out; for others a clean edge on the lining is achieved as part of the sewing sequence. Either approach benefits from a quick trim of loose threads and a careful press to flatten the edge just enough to keep it from catching on hands keys or fabric folds.
Topstitching is the visible promise of durability. It reinforces the top edge while offering a tailored, professional look. A consistent distance from the top edge about a quarter of an inch creates rhythm along the bag’s perimeter. Topstitching can be done with a strong straight stitch or a double stitch for extra security especially along the top edge where the lining and outer fabric meet. If the fabric weighs heavily or tends to distort, a longer stitch length can help prevent puckering; conversely a shorter stitch length gives a crisper line that reads well on smoother fabrics. Use the same stitch along the edges of pockets or decorative panels added inside for a cohesive finish. When you reach the corners slow down and pivot carefully to maintain line and spacing. The goal is a continuous unbroken line that traces the bag’s silhouette with confident even pressure.
Handles if included demand particular attention in finishing touches. They deserve secure support because they bear weight and movement. If you stitched the handles to the top edge during assembly consider reinforcing the area with a box or cross stitch pattern that distributes stress across a wider area. This reduces the chance that a single seam line will fail under load. If you created a separate handle attachment method such as looping handles through the top and securing through the outer fabric double check the bar stitching to ensure it lies flat and isn’t twisting. The goal is both strength and comfort; the handles should feel smooth in the hand and align with the bag’s center when laid flat. A slight outward bow at each handle end can be intentional if you like a roomy opening but the attachment itself should be firm and neat with no shifting.
The final check is a composite look at the bag’s overall appearance and function. Run a visual pass along the top edge to detect misaligned points uneven topstitching or slight puckers along the lining seam. Do a tactile check by running your fingers along exterior seam lines and interior edges where the lining meets the outer fabric. Any rough spots can be smoothed with a quick press or a revisit to the stitching line with a fine careful hand. This is where the bag earns its confidence where every stitch feels purposeful every edge feels clean and every corner holds its shape without soft spots. A neat finish is not vanity it is resilience. When a bag is used daily it must hold its form through repeated opening closing and loading of items.
Optional but meaningful steps include turning under and topstitching the lining opening to hide raw edges and create a neat interior finish. You can add a simple interior pocket before final assembly for storing keys or a phone. Consider a zipper or magnetic closure at the upper edge after main stitching if needed. If you prefer a zippered closure you can align the zipper with the top edge and secure the tape evenly along both sides. Practicing on scraps can help refine alignment and stitch tension before final stitching.
In practice finishing touches should feel like a natural extension of the earlier steps. The act of turning the bag right side out becomes rehearsed as you perfect alignment of top edges and the way the lining nests within the outer fabric. Pressing becomes a ritual a way to coax fabric into a consistent shape rather than a single moment of heat. Finishing edges relocates fray risk to a bound seam that breathes durability. Topstitching becomes a quiet signature that communicates care and intention. Handling the handles with care during these final passes ensures they endure daily rhythms of carry and release without loosening or twisting.
With growing confidence you may experiment with small variations such as a light line of topstitching along the bottom seam or an extra pass along the interior seam line to keep the lining in place and reduce curling. Choosing a thread color that matches the outer fabric for a seamless look or a controlled contrast can highlight the construction. The key is balance small deliberate choices that enhance durability and aesthetics without dominating the design.
The overall effect is a bag that looks feels and behaves like a premium product even when handmade. The outer fabric presents clean lines the lining slides smoothly the handles are secure and the top edge holds firm under pressure. A finished tote invites daily use and thoughtful handling rather than frequent repair. It should sit neatly on a shelf or in a car seat and offer easy access to contents when opened. If you want to explore more about closures and their integration you can reference a guide on zipper equipped totes for practical steps and visuals. The finishing sequence remains the same yet you gain added security for daily life.
If you have time to extend your learning consider a dry run on a smaller mock up using the same weight fabric and stitch settings. Practice turning pressing topstitching and the handling of the lining and outer fabric. This rehearsal reduces anxiety about the final project and helps you identify any issues with fit bulk or edge finishing before working on the full bag. Remember that constant practice builds confidence and steady hands improve results over time.
Final thoughts
Creating a tote bag with a lining is a fulfilling project that can enhance your business offerings significantly. By carefully selecting materials, following detailed sewing steps, and applying thoughtful finishing touches, you can create an attractive and durable product that aligns with your brand values. These bags not only serve as practical tools for your customers but also as excellent canvases for showcasing your brand’s identity. Remember, the end product reflects your commitment to quality and design, making each tote bag a potential ambassador for your business.