
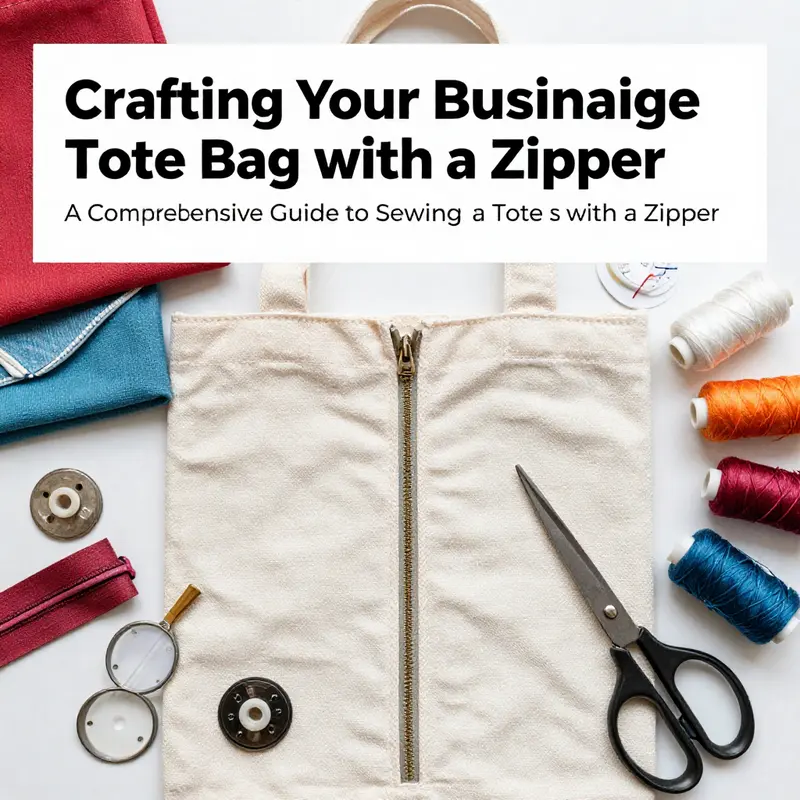
Entering the arena of custom tote bags can be a lucrative avenue for your business, especially when you consider the value of functionality paired with style. Sewing tote bags with zippers not only meets customer demands for quality and usability but also allows you to infuse your brand’s creativity into your products. This article is designed to guide you through every step of the process, ensuring your business not only meets but surpasses customer expectations. We will explore the necessary materials and tools, cover a comprehensive step-by-step sewing process, discuss zipper attachment techniques, finish with important details to perfect the look, and address potential common sewing issues that might arise during production.
Laying the Groundwork: Materials and Tools for a Durable Zippered Tote
Choosing the right materials and sharpening your toolkit are the quiet acts that determine how well a zipper tote will serve you after its first few trips to the market or the office. The tote bag is a workhorse by design, and its longevity hinges on a few simple, deliberate choices. Start with the outer shell. Look for fabrics that can take a little hustle and bustle without showing wear or losing their shape. Durable cotton canvas is a classic choice, praised for its resilience and approachable hand. Denim offers a rugged texture and structure that can stand up to daily use. Heavy-duty polyester blends provide a water-repellent surface while keeping weight in check. Each option has its own mood, but the common thread is strength. The material should resist stretching along the top edge where the zipper sits and hold its form when the bag is carried full of books, groceries, or workout gear. If you are sewing on a budget, a sturdy canvas or denim with a simple, clean print can hide minor misalignments while maintaining a professional look. For a lighter, more drapey tote, consider a heavier twill or a coated fabric that still breathes well enough for everyday wear. The goal is a fabric you would trust with your daily essentials, not one that will sag or pill after a few uses. The lining is the second layer of the story. It can be the same weight or lighter than the exterior, depending on how structured you want the bag to feel. A smooth cotton or polyester lining adds a tidy interior, makes zippers easier to slide, and protects the outer fabric from fray and abrasion where the bag’s contents meet the fabric. The lining doesn’t need to be as heavy as the shell, but it should be sturdy enough to withstand regular contact with zippers and hardware. Where the outer fabric endures wear, the lining carries the load of daily rummaging. The zipper itself is the hinge around which the whole project rotates. A continuous, heavy-duty zipper that runs the length of the bag’s opening is essential for security and durability. The zipper should glide smoothly with one hand and move freely without snagging or partial closures. The length can vary with your bag width, but a common medium-size tote looks good with a zipper in the 18–20 inch range, giving you a generous opening while maintaining a clean, contained silhouette. The zipper needs careful handling during construction, so choosing a sturdy zipper with strong teeth and a durable pull tab matters. Consider the zipper’s color in relation to your fabric; a subtly contrasting color can look sharp, while a close match reinforces a quieter, more unified aesthetic. The finishing touches often rely on fusible interfacing. This stabilizing layer helps keep the shell from warping, especially around the zipper where the fabric is repeatedly pressed and sewn. Interfacing is especially useful on fabrics that tend to stretch or fray, like lighter canvas blends or certain denims. When you apply interfacing, it makes the top edge firmer, which in turn helps the zipper sit neatly and prevents ripples along the seam line. A little goes a long way: a light fusible interfacing on the top edges before you attach the zipper can reduce puckering and give you crisper lines. The thread you choose ties everything together. Opt for a thread that matches or purposefully contrast with your fabric. A strong polyester or cotton-polyester blend is reliable for tote seams, providing elasticity without excessive give. Make sure your thread color runs consistently through the entire bag—this helps with invisible results on the exterior and a clean interior finish. The selection of tools is equally practical. A sharp pair of scissors is indispensable for clean, precise cuts, and a rotary cutter with a mat offers speed and straight edges when you are cutting multiple layers. Pins or clips are your quiet allies to hold layers in alignment as you sew, especially when you are guiding the zipper along the top edge. An iron and ironing board are essential for crisp seams and for setting interfacing. A tailor’s chalk or fabric pencil lets you mark seam lines and placement guides with confidence, reducing guesswork as you move through the pattern. Your sewing machine will be the steady workhorse of the project. A machine with a good feed system, a walking foot if you have layers that slip, and a reliable tension range will make this process smoother. Practice a test run on scrap fabric to confirm stitch length, nervy zippers, and how the fabric behaves when you approach the zipper area. The cutting plan also matters. Cut two main shell pieces, two lining pieces, two handle strips, and, if you decide on a flat bottom, a bottom piece. The dimensions can be tailored to your preferred bag size, but the principle remains the same: generous fabric around the zipper and robust construction along the sides. The exact numbers matter less than the relationship between the pieces. The outer material should be paired with a suitable lining so that both parts perform well as a single unit. If you want a broader view of pattern options and how different fabrics impact the tote’s silhouette, explore this guide on tote bags with zippers. The anchor text links to a curated collection of designs, offering a sense of how fabric choices translate into the final look and feel of a zipped tote. For a quick reference, keep a small swatch book of your chosen materials. A swatch for the outer fabric, a swatch for the lining, a swatch for the zipper, and a swatch for interfacing help you visualize how seams will behave across days of use. It’s not merely about making a bag that stands up to a single project; it’s about building something that will travel with you, endure misplacement, and still look purposeful when you reach for it in the kitchen, the gym, or the library. The practical rhythm of sewing a tote with a zipper emerges from this thoughtful pairing of materials and tools. The zipper’s longevity depends not on a single perfect seam, but on consistent technique and smart preparation. Take the time to align patterns, press thoroughly, and test your zipper’s glide before you sew the final top edge. The result is a sturdy, well-formed tote that carries your daily life with quiet confidence. If you want to explore more about how the zipper choice affects usability and convenience, a well-regarded external resource offers broader context on the trade-offs between zippered and open totes. You’ll find thoughtful comparisons and practical considerations that complement the hands-on guidance in this chapter. In the end, the materials you select and the tools you assemble become more than a checklist; they are the foundation for a tote that you can rely on daily, season after season. For those curious about broader product ideas and design variations, a broader catalog of tote options provides inspiration without naming specific brands, reinforcing the idea that this is a versatile, skill-building endeavor. The journey from fabric bolt to finished zipper tote is a disciplined art, and the groundwork laid here sets the stage for a seamless build that follows in the pages that come next. To deepen the understanding of how fabric behavior and zipper performance interact, consult the external resource linked at the end of this chapter. This resource offers a concise, practical comparison that echoes the day-to-day decisions you make at your sewing table and helps you appreciate why certain materials and tools are better suited to a durable, well-functioning zippered tote.
Stitching Confidence: A Cohesive Guide to Sewing a Zippered Tote Bag

A tote bag with a zipper combines everyday practicality with a tidy, security-minded closure. The aim here is not just to assemble fabric and thread, but to weave a process that feels clear, reliable, and repeatable. When you approach the project as a single, flowing sequence, each step supports the next, and the result is a bag you can rely on from morning commute to weekend errands. Start with a calm workspace, good lighting, and a clean table, because the rhythm of sewing happens best when you can move smoothly from one stage to the next without clutter interrupting your flow. The beauty of a zipper lies in the precision of its attachment and the neatness of the top edge; so treat the zipper as a guiding line that keeps everything aligned rather than a hurdle to overcome late in the process.\n\nChoose durable yet manageable fabrics for the outer shell and the lining. A sturdy cotton canvas, a crisp linen, or a soft, midweight denim works well for the main body. The lining should be coordinating or contrasting—whichever suits your style—yet it remains balanced so the bag feels cohesive rather than busy. The zipper length should match the bag’s width; a 12 to 18 inch zipper is a common, versatile choice that works for many tote designs. Pick thread that either blends with the fabric or provides a deliberate contrast for a small design twist. If you’re new to zippers, a zipper foot is your ally, helping you stay close to the teeth and keep things neat. A generous seam allowance is your friend too, especially when you’re still discovering how the pieces will behave as they come together.\n\nThe planning stage lays the foundation for the rest of the build. Decide on a basic pattern size that fits your intended use—whether it’s a day bag for a laptop or a compact tote for everyday carry. Cut two outer panels that form the front and back, two side panels, and two lining panels identical to the outer pieces. You may add a bottom insert if you want a flatter base and sturdier silhouette, but keep in mind that extra piece will influence clearance along the zipper line. For handles, two strips of fabric, folded and pressed, provide a neat, comfortable grip. A simple 2.5-inch wide strip, cut to about 20 inches long, yields handles that feel substantial without becoming bulky. If you like a structured look, another option is to incorporate a small bottom gusset using a rectangle folded into the base; this adds stability but requires a bit more planning and stitching.\n\nWith the pieces cut, the zipper sits at the heart of the construction. Place the zipper face down along the top edge of one outer panel, centering the zipper teeth with the raw edge. Pin or clip securely so nothing shifts as you stitch. Using a zipper foot, sew close to the teeth on both sides to anchor the zipper to the fabric. This hidden-zipper approach yields a clean exterior line while ensuring the closure operates smoothly. After you finish the outer panel, repeat the same process on the lining panel so both layers carry a compatible zipper edge. When you finish, open the zipper and press the seam flat, which helps the subsequent steps flow more easily and makes the top edge sit evenly. If you’re new to this, practice on scrap fabric first. The essential goal is to have the zipper lie flat and function without snagging later.\n\nNow you stitch the main body and the lining separately. Place the two outer fabric pieces right sides together and sew along the sides and bottom with a 1 cm seam allowance, leaving a small gap at the bottom for turning later. Do the same for the lining pieces. If you’ve added a bottom insert, position it now and stitch it into place before finishing the side seams. The turning gap is critical; it’s the portal through which your bag will emerge right side out, so keep it clear of threads and avoid cutting too close to the seam.\n\nTurn the outer bag and the lining bag right side out individually, using a turning tool or a blunt pencil to nudge out corners. Press both pieces cleanly to set the edges and create a crisp shape. This press is not cosmetic; it’s an essential step that anchors the final look and reduces bulk when you join the two layers at the top.\n\nAssemble the bag by nesting the outer inside the lining, with right sides facing each other. Align the top edges, including the zipper, and pin or clip them together. Sew around the entire top edge with a 1 cm seam allowance, taking care not to catch the zipper teeth in the stitching. This can be the trickiest moment, so go slowly and keep the fabric taut, especially near the zipper stops. If the corner bulks feel stubborn, trim the excess fabric carefully and clip notches to reduce bulk. Then turn the bag right side out through the opening and close that opening by hand or with a blind hem stitch. The moment you turn it gives you a sense of how solid the construction will feel when the bag is in daily use.\n\nTurn the bag fully right side out and press the top edge again. The zipper should sit evenly along the top with a smooth glide. This final press before attaching the handles sets a professional tone for the finished piece. For the handles, fold each strip lengthwise with wrong sides together, press, and sew along the open edge with a 1/4 inch seam allowance. Turn the handles right side out, press flat, and then topstitch them down onto the top edge, about a quarter of an inch from the edge. The topstitching not only secures the handles but also adds a subtle, durable finish that resists wear with daily use.\n\nAt this point, the bag takes on its final form. A thorough press of the entire bag, especially around the top edge and the handle attachments, reveals the crisp lines that distinguish a well-made tote from a merely functional one. You can add a few personal touches—debossed initials, a patch, or a light embroidery motif—to reflect your style without sacrificing the bag’s clean silhouette. If you’d like a visual reference to related zipper projects, you can explore similar tote designs that emphasize zipper stability and flat, clean finishes through a quick browse of nearby examples. tote bags with zippers.\n\nA few practical considerations can make a big difference. Always use a dedicated zipper foot for the most precise placement along the teeth, and routinely press after each major step to lock in the shape. Recheck measurements before cutting, especially if you’ve altered the pattern or fabric width. Start small if you’re new to zippers; a simple zippered tote is a perfect practice piece that builds skill and confidence without overwhelming you. Keep the zipper pull free during the final top-stitching step, so you don’t accidentally sew through it and create a snag. And if you find the top edge feels bulky, you can trim the seam allowances slightly at the corners to reduce bulk without compromising strength.\n\nWhat emerges is a sturdy, stylish tote that balances practicality with a polished finish. The zipper secures the contents while the roomy body and comfortable handles make it ideal for daily routines, weekend getaways, or thoughtful gifts. The process rewards patience and careful attention to alignment, especially where the zipper interacts with the fabric. In the end, the technique becomes a reliable blueprint you can reuse for future projects, whether you want a plain canvas tote or a more elaborate carrying solution with pockets and interior organization.\n\nExternal resources can offer additional perspectives or demonstrations if you crave a step-by-step video companion. For a detailed visual walkthrough and further tips, you can consult external guidance such as the recommended tutorial linked above.\n\nExternal resource: https://www.sew4home.com/how-to-make-a-zipped-tote-bag/
Zipping It Right: Mastering the Art of Attaching a Zipper to a Tote Bag
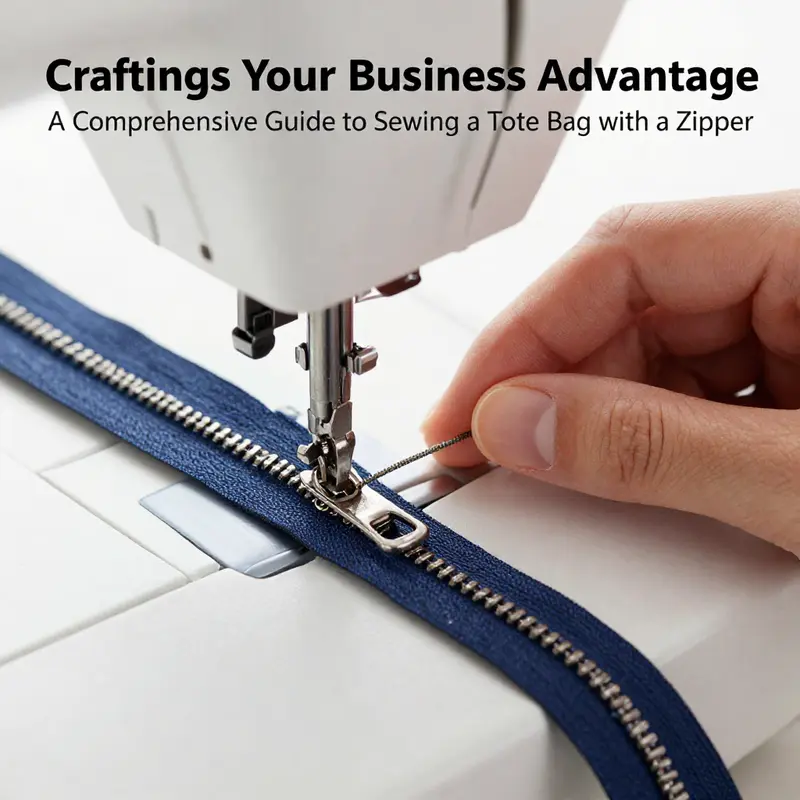
Sewing a tote bag that closes with a zipper is both a practical challenge and a quiet triumph of technique. The zipper is not merely a hardware element; it defines the bag s durability, the ease of use, and the overall clean look of the finished piece. The approach described here treats the zipper as a woven continuation of the fabric itself, a seam that must behave as one with the outer material and the lining. What follows blends preparation with precision, awareness of fabric behavior, and a sequence that keeps the project flowing rather than stopping for troubleshooting at every turn. If you want a quick visual reference later, you can explore a reliable guide on tote bags with zippers, which reinforces the alignment and attachment steps discussed here: tote bags with zippers.
Begin with two clear aims in mind: the zipper must sit flush along the top edge, and the layers around it must cooperate rather than bulk and misalign. Start by organizing the pieces you will work with. You should have two outer fabric panels, two lining panels, and one zipper of the chosen length. The general rule is to align the zipper tape with the raw edge of the fabric, with the teeth facing inward toward the bag interior. This orientation ensures the zipper blends into the seam when the bag is completed and prevents the teeth from catching on fabric corners during turning. The alignment is not a mere aesthetic choice; it reduces bulk and supports a smooth, bounded finish that lasts through frequent use.
From the outset, the zipper needs to be attached to the lining and outer fabric separately before the final assembly. This separation is where many beginners stumble, but it is the key to a neat, professional look. Place the lining pieces right sides together and bring them to the top edge where the zipper will live. Position the zipper face down on that seam, ensuring the zipper tape is flush with the raw edge. A couple of pins or clips are invaluable here to prevent shifting as you sew. With the zipper foot on your machine, stitch close to the teeth and through both layers of lining. The result should be a clean seam that holds the zipper firmly without snagging or waviness. Precision at this stage matters; if the lining edge catches on the needle or the foot, you may need to re-sew with a slower feed and shorter stitch length.
Repeat the same process for the outer fabric. Align the two outer fabric pieces right sides together, bring the zipper face down to the edge, and pin it in place. Sew along the same line using the zipper foot. The goal is to have two separate half bags, each with a zipper attached to its top edge. This separation is not a misstep; it is a deliberate method that helps control bulk and guarantees that once the bag is opened and turned, there is no substituted seam line that could misalign the durable exterior with the lining.
At this point, you have two prepared halves: the outer panel with its zipper and the lining with its zipper. The next step emphasizes the magic common to many zipper projects: turning the bag inside out to test your alignment and ensuring the zipper functions smoothly before closing the entire top edge. Carefully turn the outer half and the lining half so that the right sides face outward. The zipper will be sandwiched between them when you align and combine the halves during final assembly. A careful check here is worth the effort. Move the zipper pull to ensure it travels without catching the fabric, and check the alignment along each edge for small pleats or uneven edges that might throw off later stitches.
With both halves prepared, it is time for the moment of assembly that defines the bag s final silhouette. Lay the outer half atop the lining half, right sides together, with the zipper sandwiched between the layers. Align the raw edges, and begin pinning around the top edge. The pins should go perpendicular to the edge, every few inches, to hold both sides stable as you sew. Sew around the entire top edge with a consistent 1/2 inch seam allowance. The key here is to keep the seam line even, avoiding unevenness that could distort the bag s shape after turning right side out. Do not sew through the zipper pull tab. Leave it free to move; otherwise you will trap the pull and create tension that can kink the zipper later.
After this top seam is secure, it is time to turn the bag right side out and press the edge. Gently push the corners with a blunt tool, such as a chopstick, to avoid distorting the fabric. A crisp edge at the top gives the bag a polished finish and facilitates a clean hang when the handles are attached. Pressing is more than cosmetic in this phase. A well-pressed top edge reduces bulk at the zipper line and makes subsequent stitching look even and professional.
With the top seam in place and the bag turned right side out, the next step focuses on the handles and the final touch that will reinforce the construction. The handles, typically made from two strips of fabric folded and sewn to create a sturdy loop, must be attached so they do not shift or sag. Fold each handle strip lengthwise with the wrong sides together, press, and sew along the open edge with a narrow 1/4 inch seam. Turn right side out and press again. When you topstitch the handles down onto the top edge of the bag, keep the line of stitches about 1/4 inch from the edge. This not only secures the handles but also contributes to a clean, professional look. Distribute the tension evenly so the handles sit flat and do not pull at an angle from the top seam.
A crucial moment in finishing is the final pressing and the attention to the interplay between outer fabric, lining, and zipper. The top edge should lie flat, with the zipper functioning smoothly along its entire length. A final pass with the iron, using just enough steam to smooth out the seam allowances, will make a noticeable difference in the bag s overall feel. If you like a touch of personality, this is a good moment to consider decorative stitches or a small patch on the lining that sits away from the zipper, adding a subtle contrast without compromising the function of the closure.
There are small adjustments that can improve outcomes for different fabrics. Heavier fabrics such as canvas or denim benefit from a slightly longer stitch length on both the lining and outer fabric when attaching the zipper. Lighter fabrics require a careful balance to avoid puckering near the zipper teeth. When working with very bulky corners, trim seam allowances slightly where the outer fabric and lining meet the zipper tape to reduce bulk and create a cleaner turn line. If you are new to this, you may also consider basting the zipper in place with long, easily removable stitches before final sewing. This temporary step helps you confirm the alignment and pocket of fabric as you plan the seam lines.
In the broader practice of tote construction, this technique of zipper attachment is best understood as a coordinated dialogue between fabric, thread, and hardware. The zipper is not an afterthought but a functional thread in the fabric story of the bag. The result is a tote that opens smoothly, closes securely, and presents a calm, refined exterior. For a deeper sense of how these principles apply across styles and to variations such as visible versus hidden zippers, you can consult a practical guide on tote bags with zippers. This resource mirrors the approach described here and helps reinforce the alignment and attachment steps in real-world sewing projects: tote bags with zippers. As you gain confidence, you ll notice how the same approach can adapt to different fabrics and bag shapes, from casual canvas to more structured denim designs.
When you finish, inspect the zipper during a few trial openings. Make sure the teeth engage evenly, and that the pull does not skip or snag any fabric. A final survey of the bag s lines should reveal a tidy top edge, precise stitch lines, and sturdy handle attachments. If desired, you can further customize by adding a small decorative element on the handles or a subtle stitched label on the lining, but always ensure such additions do not interfere with the zipper s operation. The payoff is a tote bag that not only closes securely but looks intentional and crafted with care. For visual learners who want a quick, side-by-side demonstration of the exact motion of the zipper foot and the timing of the zipper during assembly, a detailed video guide can provide a complementary perspective that aligns with the written steps above. https://www.youtube.com/watch?v=7d9tJyL0aHw
Perfect Finishes: Pressing, Reinforcement, and Style for Your Zippered Tote

Perfect Finishes: Pressing, Reinforcement, and Style for Your Zippered Tote
A well-made zippered tote looks effortless, but that polished finish comes from careful final steps. Focus on three areas: seams and pressing, reinforcement at stress points, and thoughtful aesthetic choices. These elements lift a simple tote into something sturdy and attractive. Small actions now repay you with a bag that wears better and feels professional.
Pressing is the single most transformative finishing step. After each seam, press the allowance flat. Pressing does more than flatten seams; it sets stitches, aligns edges, and makes topstitching look crisp. For boxy corners, open the seam allowances and press them away from the bag body so the corner sits square. Use steam on natural fibers and a dry press on coated fabrics. If your fabric accepts it, use a tailor’s ham for curved areas to preserve shape. A well-pressed top edge makes zipper insertion and final joining align perfectly. For more on pressing techniques and why they matter, see this instructor’s guide: https://www.sweatshop.com/blog/pressing-seams-in-sewing-tips-for-beginners
Reinforcing high-stress spots prevents premature wear. The top ends of the zipper, the handle attachment points, and the bottom corners see the most strain. When attaching handles, sew a reinforced box with an X stitch through the layers. Backstitch at the beginning and end of each seam for security. At the zipper stops, add a small bar tack or sew several close zigzag stitches to anchor the ends. If your tote has a boxed bottom, double-stitch the seam allowance or finish it with a binding to avoid fraying. For extra longevity on heavy fabrics, consider topstitching a second row adjacent to the seam. These measures look intentional and increase the bag’s lifespan.
Thread choice affects both appearance and strength. For canvas, denim, and other heavy materials, use a heavy-duty polyester thread. It resists abrasion and keeps seams intact under load. For lighter linings, an all-purpose polyester or a cotton-wrapped polyester is usually best. Match thread color to the fabric for a seamless look, or use contrast thread for intentional decorative topstitching. When topstitching around the zipper and along the handles, lengthen the stitch to 3.0–3.5 mm for a cleaner finish and fewer punctures per inch. Also use a new needle appropriate for the fabric weight; a heavy-duty needle reduces skipped stitches and thread breakage.
Choosing the right zipper impacts function as much as style. Coil or nylon zippers are smooth and flexible. They bend around corners and endure repeated use without popping teeth. Avoid stiff metal zippers on bags with tight corners. If you prefer a visible zipper, select one with a neat tape and a pull that slides freely. For a hidden zipper, ensure the teeth align with the raw edge and that tape is caught in the seam without bunching. Topstitch just below the zipper tape edge to keep it flat and prevent fabric from getting caught when opening and closing.
The lining deserves attention equal to the exterior. A lightweight lining in a contrasting color gives a delightful reveal when the tote opens. Press the lining seams and finish raw edges with a serger or a zigzag stitch. If you added internal pockets, secure them with bartacks at the pocket corners. Leave a small opening in the lining base if you used the turning method; stitch that closed by hand with an invisible ladder stitch or machine-tack it neatly. A well-finished lining protects the bag contents and hides the structural seams of the outer fabric.
Edge finishing keeps fray-prone fabrics tidy. If you used natural fibers that unravel easily, finish raw edges with a zigzag, binding, or a narrow overlock. On bags with minimal bulk, pinking shears can reduce fraying while keeping edges thin. Alternatively, use seam tape on heavy seams to prevent stretching. For aesthetic frames, consider piping at the side seams or around the top edge. Piping provides structure and a tailored look when sewn with consistent seam allowances.
Handles and hardware complete both function and style. When sewing handles, fold and press them before stitching. Turn long straps using a safety pin or a loop-turner for a neat tube. Topstitch the handles on both sides to lock the strap into place and prevent twisting. If you add hardware like D-rings or swivel hooks, reinforce the attachment points with an extra layer of fabric or interfacing. For handles expected to carry heavy loads, sew through a handle reinforcing patch and stitch multiple lines for added strength.
Topstitching is the detail that conveys craftsmanship. Use a longer stitch length and a matching or contrasting thread. Keep the stitching lines parallel to the raw edge; measure and press a guide crease to maintain an even distance. When topstitching around the zipper, sew slowly over the zipper stops and use a zipper foot if necessary. A steady pace and accurate seam guides produce a professional look and make even simple shapes read as intentional design.
Trim and final checks are small tasks with large payoff. Clip any stray threads and trim seam allowances to reduce bulk. Inspect inside pockets and lining joins for loose threads or skipped stitches. Test the zipper repeatedly to make sure it glides without catching fabric. If the zipper rubs, press the surrounding fabric flat and re-topstitch if needed. Try loading the bag with typical contents to confirm that handles hold and seams remain smooth under weight.
Decorative finishes are optional but rewarding. Add a fabric label, a leather tab, or a subtle tassel to express your style. Consider using contrasting lining fabric or a printed pocket to surprise users when the bag opens. Apply a corner guard or a small metal stud to protect high-wear bottom corners if the design calls for it. Keep embellishments balanced with structure; decoration should not weaken a seam or interfere with function.
Finally, care and use extend the life of your tote. Pre-washing fabric before construction prevents post-sew shrinkage. Suggest gentle washing and line drying for canvas or linen bags. Spot-clean leather accents to avoid water damage. Store your tote empty or loosely filled to preserve shape and avoid creasing the zipper.
A thoughtful finish combines technical reinforcement with aesthetic choices. Press seams, reinforce where needed, select appropriate thread and zipper types, and tidy every edge. These final steps ensure your zippered tote is both beautiful and built to last. For inspiration on zipper styles and practical variations, explore this guide to tote bags with zippers: tote bags with zippers.
The Zip That Holds It All: A Practical Guide to Troubleshooting Your Tote Bag with a Zipper
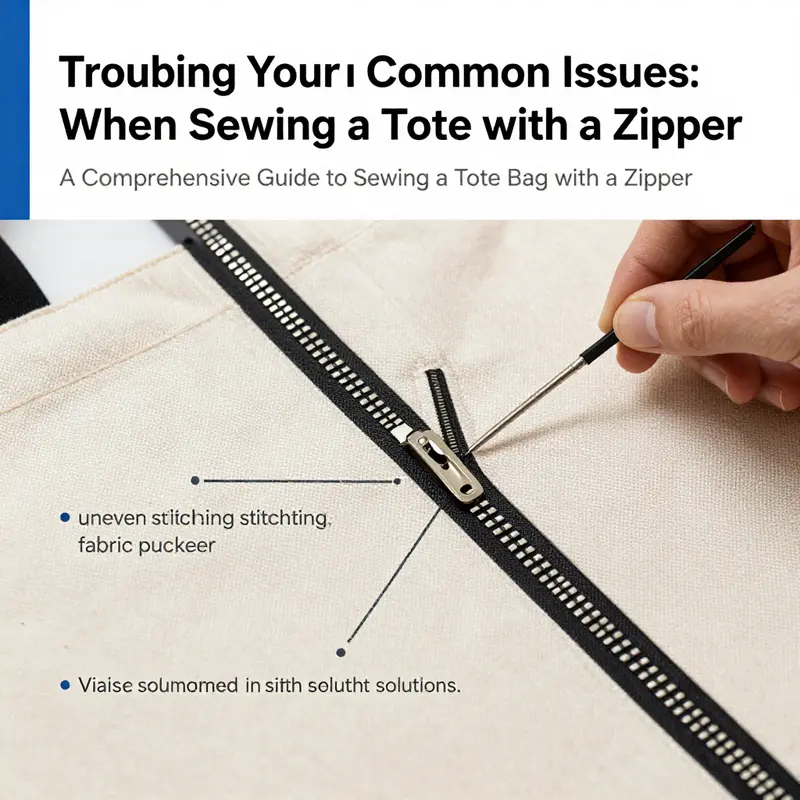
Sewing a tote bag with a zipper is as much about diagnosis as it is about technique. When a bag finally comes together, the zipper should feel like a quiet, reliable hinge, not a source of angst. Yet misalignment, puckering, sticky sliders, or teeth that gleam through the fabric can derail even a well-planned project. Troubleshooting isn’t a detour; it’s the practical art of reading what the fabric, the zipper, and your machine are telling you. Start with the scene you’re working in: the weight of your main fabric, the stability of the lining, the length and type of zipper you chose, and the sequence you followed as you stitched. From there, you can move with confidence rather than guesswork.
Misalignment is often the first clue that something isn’t sleeping right between the fabric and the zipper. The top edges may fail to line up, or the zipper teeth may seem to drift off-center as you sew. The remedy begins long before you place the needle. Center the zipper along the top edge of both the front and the lining panels, using pins or clips to hold the zipper in place. A zipper foot becomes a quiet ally, guiding the needle with a consistent distance from the teeth. If the edges still refuse to align, baste with long running stitches to fix the position temporarily, then re-check alignment before you commit to stitching the final seam. A quick test: zip and unzip a few times to confirm smooth action and to reveal tiny misplacements you might otherwise miss. When you re-check, do it with both sides visible—the front and the lining halves—so you aren’t surprised by a skewed result once the bag is fully assembled. In some cases, the invisible alignment is fine on the flat, but the moment you attach the sides and turn the bag, the subtle drift becomes noticeable. The habit of pre-basting a zipper into the top edge for a moment but then removing and re-securing the final seam can save a host of headaches later.
Fabric puckering around the zipper is another common hurdle, especially when you’re working with sturdy materials like canvas, denim, or linen blends. The root of the issue is tension: the machine is pulling more than the fabric can evenly feed, and the result is little waves of fabric along the zipper line. The most effective cure is a walking foot, also known as an even-feed foot, which acts like an extra hand to feed all layers at the same rate. Pair this with a shorter stitch length and a patient pace. Avoid pulling the fabric; let the machine guide the layers while you maintain a steady, even feed. If puckering still pops up, stabilize the top edge with a light fusible interfacing along the seam line or a thin stabilizer behind the zipper area. This layer distributes stress and helps the fabric sit flat under the needle. When you press after sewing, maintain a gentle touch so you don’t reintroduce distortion. The goal is a flat, smooth seam without visible ripple that catches when you run the zipper.
Another frequent issue is zipper teeth showing or appearing crooked after stitching. This usually means the stitching edge ran too close to the teeth or that the zipper wasn’t perfectly centered in the groove you intended for it. The rule of thumb is simple: sew as close to the teeth as possible without hitting them, and use the zipper foot to keep a uniform distance. If you notice the teeth peeking through, do not force the seam to stay as-is. Unpick those stitches carefully, reposition the zipper, and resew. Take care to align the zipper on both sides of the bag so the slider glides smoothly. This step may be tedious, but it’s essential; a tiny misalignment at this stage often becomes a conspicuous flaw when the bag holds contents and is used daily.
Thick fabrics can also challenge your machine, leading to jamming or skipped stitches mid-seam. A dull needle or the wrong needle size for the fabric is a frequent culprit. Replace the needle with a heavy-duty option suitable for dense layers, such as a larger-sized point that can penetrate multiple thicknesses without skipping. Ensure your thread choice matches the fabric’s demands—strong, smooth polyester works well for durable totes. Clean the needle plate and bobbin area to remove lint that can hinder stitching, and consider a tiny amount of machine oil if your model requires it. When you sew, slow the speed to give every layer time to feed evenly, and if your machine allows, increase presser-foot pressure slightly to help the fabric stay in place. If the stitches refuse to catch, rethread both needle and bobbin, re-seating the needle, and re-piercing the path with fresh thread. In some cases, the fabric’s bulk requires you to sew in shorter increments, stopping to realign and smooth the layers after each segment to avoid a skip in the seam. These steps, while iterative, protect the integrity of the finished top edge and the longevity of the bag.
Uneven seam allowances after installing the zipper can betray a careless start or inconsistent supporting pressure. The fix is a two-step ritual that begins before you even stitch the zipper in. First, press the seam allowances flat to settle them into place; warm heat helps them relax and align. As you sew, begin and end at the same points on both sides of the zipper and use a ruler or measuring tape to verify alignment along the top edge. Keeping the seam lines consistent from the start prevents a visible tilt once the bag is turned right side out. If you switch from one side to the other, maintain equal seam allowances on both panels, and verify that the zipper ends are matched and parallel. A tiny discrepancy here can turn into a noticeable asymmetry when the bag gains its final shape.
The debate between hidden and visible zipper styles is not merely about aesthetics; it influences how you approach placement and stitching. With a hidden zipper, your goal is to conceal the teeth while ensuring the slider moves freely, a detail that rewards meticulous placement and careful topstitching on the surrounding fabric. A visible zipper, by contrast, places the tape and teeth on display, which magnifies any misalignment. In either case, begin with a mock-up on scrap fabric that mimics the weight and texture of your final bag. This practice helps you feels the bite of the zipper against the fabric and adjust your technique before you commit to the actual pieces. You’ll gain a sense of how close you can safely stitch to the teeth and where the zipper should rest at the top edge for a clean finish.
Even with careful preparation, the top edge of the bag is a delicate transition where fabric, zipper, and lining converge. After you finish the top seam, give the bag a leisurely turn, test the zipper pull, and run it through its full travel without the contents to confirm smooth operation. A crisp press along the top edge helps set everything in place, and a quick pass of the iron along the corners helps eliminate any trapped bulk. If the construction permits, you can buffer the top seam with a light topstitch along the exterior for a subtle, durable finish. When you install the handles, recheck the top edge to ensure the weight of the bag won’t distort the line of the zipper.
In addition to hands-on practice, a well-timed reference can illuminate subtle pitfalls you might miss in the moment. If you’re planning several totes with zippers, consider how zipper placement interacts with the bag’s proportions and how thread color travels through the entire piece. A resource on tote designs with zippers can offer ideas about balancing the zipper with the bag’s silhouette and maintaining harmony across panels. For more context on zipper placement and practical layout strategies, see tote bags with zippers.
Troubleshooting a zipper is less about chasing a single fix and more about building a careful, repeatable routine. The principles you apply—centered alignment, controlled feeding, and precise seam allowances—are transferable to other projects that hinge on a secure closure. A calm workspace, the habit of testing on scrap, and the willingness to rework a segment when needed all contribute to a result you can trust. As you gain experience, you’ll recognize the signals that say a seam is not sitting true: a zipper that starts to feel sticky, a top edge that refuses to lie flat, or fabric that seems to bunch slightly as you approach the zipper line. Each signal is a chance to pause, reassess pattern placement, and adjust your approach before continuing. With this mindset, a tote bag with a zipper becomes not just a functional carrier for daily life but a reliable, durable creation that holds up under use.
External resource: For a clear, step-by-step guide with photos and additional tips tailored to beginners and intermediate sewers, see Crafty Panda’s detailed tutorial on sewing a zipper into a tote bag. The link offers practical demonstrations of the techniques discussed here and can reinforce your understanding as you tackle new fabrics and bag sizes.
Final thoughts
Sewing a tote bag with a zipper presents an excellent opportunity for business owners to create unique, functional products that can set their offerings apart in a competitive market. By understanding the necessary materials, step-by-step processes, and essential techniques for zipper attachment, you can craft quality tote bags that not only meet customer needs but also enhance your brand’s image. Troubleshooting common issues will help streamline your production and ensure consistent quality in your products. Equip your business with these skills, and you’ll be well on your way to impressing customers with beautifully made, practical tote bags.