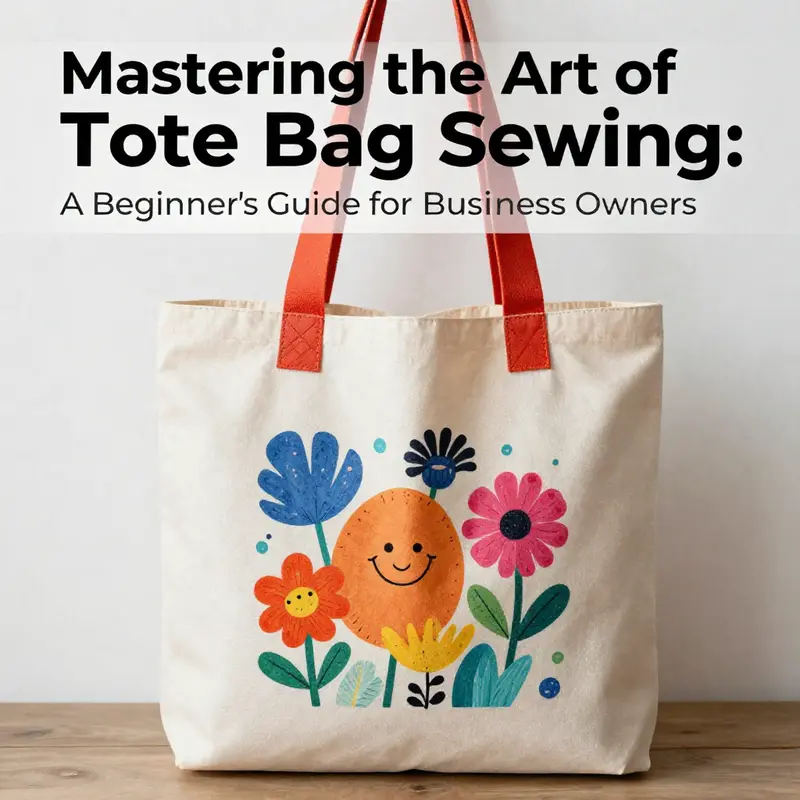
Sewing a tote bag may seem like a simple task, but it presents vast opportunities for business owners looking to make their mark in the fashion or gift industry. A well-made tote bag can serve as a brand ambassador, effortlessly marrying utility with style. This guide will cover the essential materials you’ll need to get started, provide a step-by-step process for sewing your first tote bag, share tips and techniques to ensure your success, and explore creative ways to customize and decorate your bags for maximum impact. Each chapter builds on the last, creating a comprehensive roadmap to help you create attractive, personalized tote bags that can appeal to customers and enhance your business offerings.
null
null
From First Stitch to Everyday Carry: A Beginner’s Way Through Sewing a Durable Tote Bag
The moment you set your first stitch into fabric, you step into a quiet space where patience guides your hands and intention shapes the outcome. Sewing a tote bag may be a simple project, but it carries the confidence that comes with completing a functional, personal item you designed and made yourself. For beginners, a tote bag is a perfect rite of passage: it uses straightforward techniques, requires only a handful of sturdy materials, and yields a lasting reward you can use every day. In this chapter, we walk through the process in a way that feels practical and encouraging, weaving together the practical facts with the small decisions that elevate a plain bag into something you can be proud of. The goal is a durable canvas tote that carries your books, groceries, or gym gear, yet remains friendly to your early learning curve. The path is clear enough to follow, but flexible enough to adapt to your fabric choice, your rhythm, and the occasional hiccup a beginner might encounter along the way.
Choosing fabric is the first meaningful choice. Canvas is a natural pick for a beginner tote because its weight gives structure without demanding fancy techniques. If you are drawn to repurposing, old jeans can offer a sturdy denim option that will stand up to repeated use. Whatever you choose, pre washing is a practical habit. Canvas and denim shrink, and pre washing helps you avoid surprises after you have proudly finished your tote. As a rule of thumb, washing also helps fluff up the fibers, making the fabric easier to work with and less likely to pucker when you sew.
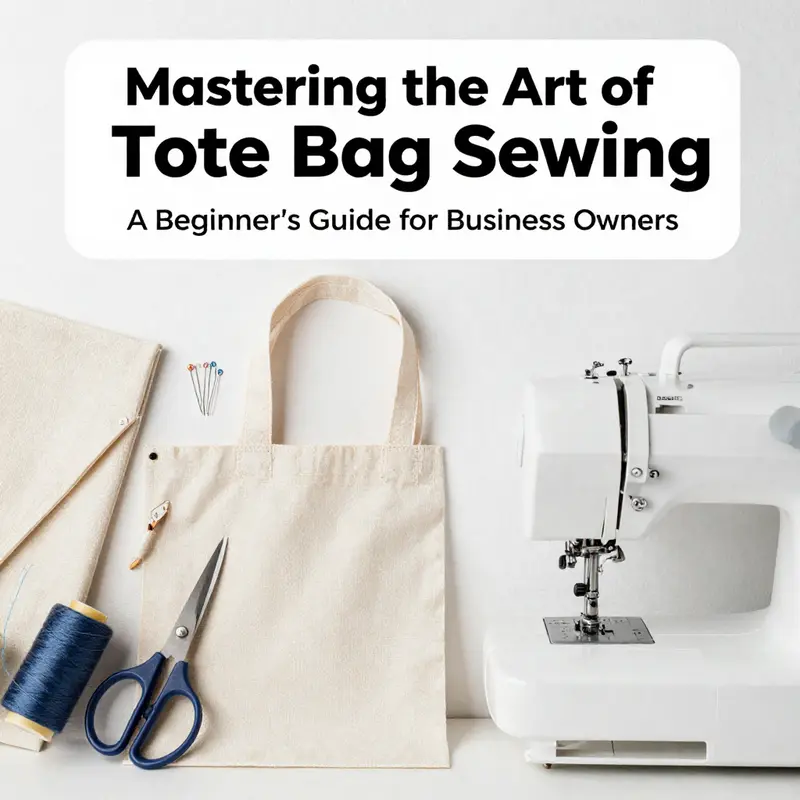
The materials list for this project is intentionally minimal. You will need a yard of medium weight fabric, such as cotton canvas, which strikes a balance between durability and ease for beginners. A spool of matching thread or embroidery floss can be used for decorative touches as well as for functional stitching. A basic sewing machine makes the task quick, but if you prefer hand sewing, a sharp needle in a strong thread can still yield a sturdy result. Scissors or a rotary cutter keep edges clean, while pins or clips secure pieces as you work. An iron and ironing board are your allies for crisp seams, and a water soluble marker or chalk pencil helps you mark guidelines without leaving lasting traces on the fabric. If you decide to use denim, you can set aside extra time to trim away buttons, rivets, and other hardware so the panels lie flat for cutting.
As you prepare to cut, imagine the tote taking shape as two panels that will become the front and back of the bag. The standard size to start with is 14 inches wide by 16 inches tall, a dimension that yields a bag roomy enough for daily errands without feeling oversized. If you prefer a more compact tote, you can scale down a touch, and if you want a roomier carryall, scale up a bit. Whether you cut from canvas or denim, you can also decide early if you want a lining. A light inner layer adds body and makes the bag sturdier when heavy items press at the bottom. If you are upcycling jeans, the outer panels can come from the strong leg sections, ensuring the sides stay robust when loaded with groceries or library books. The important detail is to cut two identical panels so the bag looks balanced once stitched together.
When it comes to straps, plan for two sturdy pieces that will endure weight and daily use. A practical size to begin with is two straps about 2 inches wide and around 24 inches long. Straps made from the same fabric as the bag look cohesive, though a contrasting fabric can add a dash of personality while still remaining easy to sew. If you have denim available, you can cut straps from that fabric for extra strength. The ends of the straps should be reinforced to prevent fraying and to distribute stress more evenly when the bag is carried. A simple square or zigzag stitch at the ends offers extra durability without complicating the build.
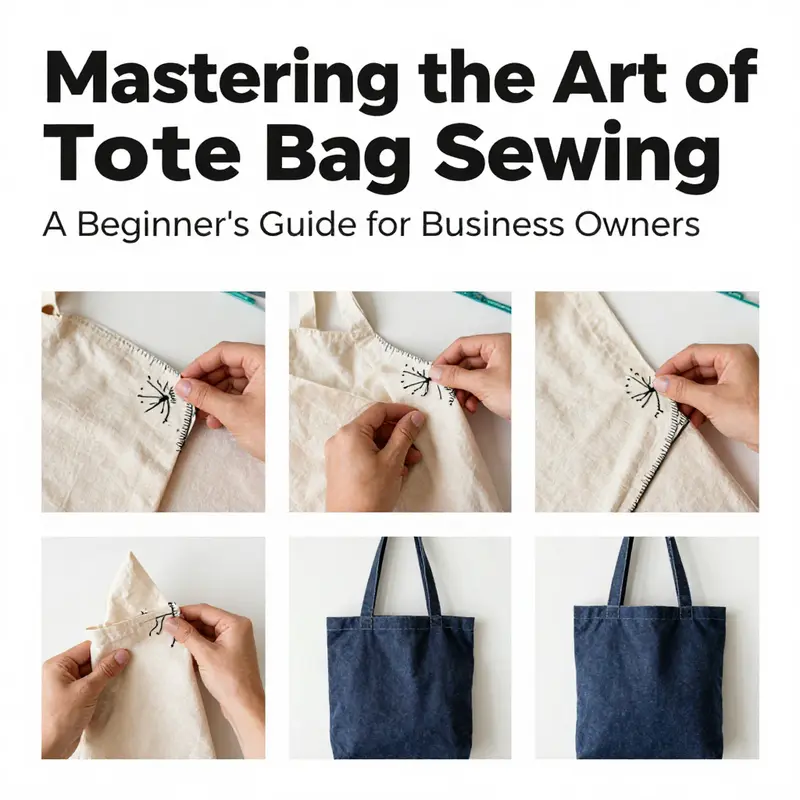
This tote comes together in a handful of straightforward steps, each reinforcing a fundamental skill. Start by placing the two main panels right sides together. Pin or clip along the sides and bottom so the edges stay aligned as you sew. A common beginner choice is to use a 1/2 inch seam allowance, a measurement that gives you a clean final shape without sacrificing bulk comfort. Sewing along the sides and bottom creates the bag’s basic boxy form, and trimming the corners diagonally at the bottom reduces bulk so turning the bag right side out is easier and the finished edges look neat. After you turn the bag, a quick press with the iron smooths the seams, helping the bag keep its shape and presenting a professional finish you can be proud of.
Attaching the straps is a moment when the bag starts to feel like a real accessory. Position the straps at the top edge, aligning them with the side seams or a little inward from the edge to distribute weight more evenly. Mark where each strap will attach, typically a couple of inches in from each side. The connection points deserve a bit more attention because they bear the load of every item you carry. A box stitch, or a row of backstitches, reinforces the joint where the strap meets the bag. If you want to be extra careful, stitch through both layers of fabric and strap to ensure it stays secure over time. You might find it helpful to sew a cross or a small square at the base of each strap for added strength. This is the moment to respect the materials and trust your stitches—steady hands, even speed, and a thoughtful approach yield the most durable result.
Finishing the top edge elevates the tote from a functional sack to something that looks complete. There are multiple clean finishing options. A simple, crisp method is to fold the top edge inward by about 1/2 inch, press it, and sew a straight stitch along the perimeter. This creates a clean, consistent edge that holds its shape when the bag is filled. If you prefer a more decorative finish, you can top stitch around the top edge or add a narrow binding or bias tape for a subtle accent. The key idea is to maintain a neat line that mirrors the rest of the bag, so the whole piece feels cohesive rather than improvised.
With the structure in place, you can personalize your tote to reflect your style or the intended use. Embroidery offers a durable, washable way to decorate canvas or denim. A simple running stitch or backstitch can form initials, a small motif, or a geometric pattern that speaks to your personality. When you embroider on canvas, the weave holds stitches well, and the fabric’s stiffness helps you avoid puckering. If you have a water soluble marker, sketch your design lightly before you begin stitching, then carefully anchor the threads to prevent loose loops. The result is a personalized bag that can become a cherished daily companion, a gift, or a small showcase of your growing sewing skills. If you enjoy the idea of a wearable canvas, this tote becomes more than a utility item; it becomes a canvas for creativity you can carry with you wherever you go.
As you gain confidence, you may find yourself juggling a few additional tips that keep the project smooth from start to finish. Always test your stitches on scrap fabric first; this is where practice pays off. Canvas deserves a heavier needle—often a size 18/100 or 20/110—so your stitches lie cleanly without skipping or shredding the fabric. Keeping your machine clean and well oiled is not a luxury but a routine that pays off in better stitches and fewer snags. If you are hand sewing parts of the bag, take your time, and use a sturdy stitch to match the strength of machine stitching. After you finish, give the bag a gentle wash and turn it inside out for dry care. Cold water helps preserve color and structure, so avoid aggressive agitation that could stretch seams or weaken the fabric)
The project also invites you to think about sustainability. If you upcycle old clothing into a tote, you not only reduce waste but also tell a story with your fabric choices. Jeans, for example, bring inherent toughness, while canvas offers a smoother texture and a more uniform surface for stitching and decoration. This is a practical, mindful exercise in material awareness that reinforces the simple idea that making something with your own hands can be both enjoyable and purposeful. The process teaches you to measure, cut, sew straight lines, and assemble components with care, all of which are fundamental skills you can apply to many other sewing projects in the future.
To help you visualize and expand your own learning, consider exploring additional resources that walk through similar projects with clear visuals and tips. For a comprehensive beginner guide with printable templates and video demonstrations, you can visit an accessible resource that aligns with the basic steps we’ve outlined here. tote-bag-with-computer-sleeve offers a practical example of applying the same fundamentals to a more specialized tote design, which can deepen your understanding of how panel alignment, seam allowance, and strap attachment affect the final form. This kind of step-by-step exploration can complement your hands-on practice and help you see how small decisions influence the bag’s balance and durability.
As you move forward, you will appreciate how a simple tote becomes a reliable companion. The joy lies not in complexity but in starting with solid basics and building on them with deliberate choices. The techniques you learn in this project—measuring with care, cutting clean edges, sewing straight seams, reinforcing high-stress points, and finishing with a neat top edge—are the toolbox you carry into your next sewing challenge. When you complete the tote, you also complete a small circle of skill and confidence. You will have created a bag that is not only practical but also expressive, capable of bearing groceries, books, gym gear, or a stash of knitting projects. Each use becomes a small celebration of the time you invested and the care you took with a fabric and thread that you chose yourself.
If you want to see this journey in a different light, a broader guide to tote bag making is available online, which may help you compare techniques and fabric choices. For the next step, you can explore variations such as adding a lining, inserting a short interior pocket, or using a contrasting strap color to personalize the bag further. These small additions can expand your repertoire without changing the fundamental approach that makes this tote a success for a beginner. The heart of the matter remains consistent: steady hands, thoughtful planning, and a willingness to learn from each stitch. The tote you finish today becomes the stepping stone for the projects you will tackle tomorrow, and that progression is what makes sewing a deeply rewarding craft.
External resource you may find helpful for visual guidance and additional tips: https://www.allthecrafts.com/sewing-tote-bag-beginners-guide/
Stitching Confidence: A Gentle, Comprehensive Path to Sewing a Durable Tote Bag for Beginners
Opening a project as approachable as a tote bag can feel surprisingly empowering. The act of turning flat fabric into a sturdy everyday companion is a gentle apprenticeship in fabric handling, seam control, and thoughtful design. For beginners, the tote bag offers a welcoming learning curve: a rectangular template, a couple of straps, and a finished edge that reads as polished rather than rushed. The comfort comes not from luck but from a sequence that respects the materials, the machine, and your growing confidence. When you understand the why behind each step, the how follows more smoothly, and the tote ceases to be a single object and becomes a craft practice you can repeat with ever greater ease.
Choosing the right fabric sets the tone for the whole project. Medium-weight cotton canvas is a natural favorite, sturdy enough to hold its shape and forgiving when you’re learning how to sew around corners and seams. Denim, if you repurpose old jeans, carries a similar resilience but adds a touch of character from wear patterns and color history. Either choice rewards you with a bag that behaves like a reliable workhorse rather than a delicate accessory. A key practice here is pre-washing the fabric. It vanishes sizing and finishes that might shrink or bleed after the bag meets the washer or a damp day in the world outside your sewing room. Treat the fabric with care before cutting, and you’ll avoid surprises later on.
As you plan, keep your project simple. A basic tote pattern with two main panels and a bottom, plus two straps, is enough to teach you the fundamentals without the intimidation of zippers, linings, or pockets. This is not a limitation but a deliberate choice: it frees you to master straight seams, turning corners, and the sequence of assembly. If you do decide to level up later, the same foundations will carry you forward with more complex designs. The goal at this stage is accuracy and control. Measure carefully, cut cleanly, and match your pieces as you go. A small error in measurement can cascade into misaligned sides or a bag that doesn’t sit flat, so take the extra moment to verify dimensions, mark lines clearly with tailor’s chalk, and keep your cutting area organized.
Begin with the cutting. Lay your canvas smooth on the cutting mat, smoothing away any wrinkles that might distort lines. Cut two identical rectangles for the body, each roughly 14 inches wide by 16 inches tall. These dimensions are a solid starting point for a compact, well-proportioned tote, but you can adjust them if you want a larger bag. If you anticipate needing a lining, you’ll cut two additional pieces for the inside later, matching the outer panels in size. If you’re upcycling denim from old jeans, select sturdy portions from the outer leg sections and avoid areas with fraying or weakness; consistency in texture helps the bag sew together more confidently.
With the body pieces prepared, turn your attention to the straps, an element that often makes or breaks the bag’s usability. Cut two straps each about 2 inches wide and 24 inches long. This width provides a comfortable grip without looking bulky, and the length offers a versatile wear experience, whether you carry it on the shoulder or grab it by the hand. Fold each strap lengthwise with right sides together, then press with a hot iron to set the crease. Sew along the long edge using a straight stitch, leaving the ends raw for now. Turn right side out using a turning tool or a safety pin, then press again to create a clean, square finish. If you want to add extra durability, you can reinforce the ends by stitching a small square or a zigzag through the end portions before attaching them to the bag. It’s a small touch that makes a big difference when the bag carries heavier loads.
The next phase embodies the core of the project: assembling the bag body. Place the two main panels right sides together, aligning the edges with care. Pin or clip the sides and bottom to keep the layers from shifting as you sew. A consistent seam allowance is your ally here; a standard 1/2 inch (about 1.3 cm) is a reliable target for a beginner, keeping the bag’s edges neat without sacrificing strength. Sew along both sides and bottom, then clip the corners to reduce bulk before turning the bag right side out. Turning can be a little fiddly at first, but take your time and use a turning tool to coax the fabric through. Once right side out, press the seams flat. A crisp seam line helps the bag lie flat and gives a more finished look, particularly along the bottom edge where gravity will do the work of shaping.
Attaching the straps is where the bag begins to take on its daily life. Position the straps at the top corners, aligning them with the side seams. Mark where the straps will attach—roughly 1 inch (about 2.5 cm) from the edge is a practical guideline that keeps the straps securely anchored while leaving room for a clean top edge. Sew each strap with a box-shaped stitch: a rectangular border with a couple of interior stitches. This reinforcement distributes stress across the strap area and reduces the risk of tearing under load. When you sew, go through all layers—bag and strap—to maximize strength. Take care to maintain a straight line; a slightly skewed line will be noticeable in the final finish, so use the presser foot as a guide and pause if you need to realign.
There is a simplicity to the top edge that matters as much as the strap attachment. If you want a cleaner, more structured finish, you can fold the top edge inward by a half inch and press it down. A straight stitch around the top edge secures this fold and gives a neat, professional look. This is not essential for a beginner, but it does improve the bag’s tidy silhouette and helps the top hold its shape when the bag is full.
The tote is nearly complete, but there is room for a touch of personality. Embroidery and decoration transform a basic silhouette into something uniquely yours. Use a water-soluble marker to sketch a simple motif—flowers, initials, geometric shapes—and stitch with embroidery floss. Basic stitches such as running stitch, backstitch, and satin stitch are friendly for beginners. The key is to anchor threads well and avoid pulling too tightly, which can cause puckering—an effect that is hard to reverse after the fact. If you want a wearable canvas that reads as a keepsake, this is a perfect moment to personalize. A little color or a small motif can make the tote feel like a cherished everyday companion rather than a plain carryall.
The final touches can be minimal or more elaborate, depending on your preference. You might decide to forgo a lining for your first tote and keep the project streamlined. If you do opt for a lining, you’ll cut two more pieces from the same fabric, seam them to the wrong sides of the outer panels, and treat the lining front and bag body as an integrated unit. The added lining contributes extra body and a finished interior that feels more deliberate to touch. Either approach teaches important seam concepts: finishing raw edges, aligning fabric layers, and ensuring that interior surfaces aren’t neglected in the construction. Whichever path you choose, remember that intent matters just as much as technique. A tote that feels solid and balanced in your hands will translate into everyday use with more confidence.
As you work through the steps, you’ll notice that practice matters more than perfection. Before you start your actual bag, consider sewing a few straight stitches on a scrap panel to establish a rhythm. Focus on maintaining a consistent seam allowance and a steady pace. This tiny warm-up builds the muscle memory you’ll rely on when you’re stitching the actual panels. It’s natural for beginner stitches to be imperfect at first; the goal is progress, not flawlessness. The most satisfying realization is that you have created something functional with your own hands, and the small irregularities you notice now will fade as you gain experience. The tote’s strength comes from the cooperation of fabric, thread, needle, and your growing skill in coordinating them.
If you’re curious about variations and more advanced features later, you can explore a broader range of tote designs and keep a mental catalog of ideas for future projects. For instance, a zipper pocket inside the bag can add security for personal items; a reinforced bottom panel can help the bag carry heavier loads; or a contrasting strap color might give the bag a playful, contemporary look. The notion of a tote bag as a canvas for experimentation is a wise one, especially for beginners who want to translate skills into tangible individuality. To see how designers approach zipper pockets and more complex features, you might explore resources that discuss broader tote bag options. For instance, if you want to understand different feature combinations and how they affect construction, you may find it helpful to review examples that discuss a range of tote configurations. A good way to connect with that idea is to look at variations and styles in accessible guides online.
Beyond technique, the mindset you bring to sewing matters as much as the stitch you use. Your tote project invites patience, careful measurement, and a tolerance for small imperfections. Those traits transfer not only to sewing but to any craft you pursue. The rhythm of measuring twice, cutting once, and pressing seams into place becomes a form of quiet practice that steadies both hands and mind. The tote, once finished, is more than a bag; it becomes a reflection of what you can accomplish through steady effort and deliberate repetition. When you carry your finished tote, you’ll feel the small thrill of knowing you built something practical from basic materials using nothing more than your growing command of the craft and a few simple tools.
As you move forward, you can gradually introduce more sophistication without abandoning the approach that serves beginners best: keep it simple, stay organized, and treat each piece as an opportunity to practice a skill you’ll refine in future projects. If you want to broaden your toolbox, consider adding features one by one on subsequent bags—perhaps a small inner pocket, a magnetic snap, or a gusset to increase depth. Each addition challenges a new set of skills while building on the same fundamentals: accurate measuring, clean edges, secure stitching, and thoughtful finishing. And the more you sew, the more your confidence grows, turning a first tote into the doorway to a larger, more varied sewing journey.
If you want to explore related perspectives on tote design and technique, you can read more about zipper-enabled totes and other functional features through this resource that focuses on versatile tote configurations. It provides a broader context for how beginners can grow from a basic project into a bag with pockets, closures, and smart details. For readers who want to investigate further, a practical way to integrate new ideas is to review this compiled guidance as you plan your next tote project. The continuum of practice—starting simple, recognizing what works, and expanding gradually—helps ensure the hobby remains enjoyable and rewarding rather than overwhelming.
To weave additional ideas into your learning path, consider placing a small, decorative pocket inside your tote for coins or keys, or adding a subtle leather patch to the front for texture and character. The possibilities are limited only by your imagination and your willingness to experiment within the framework you’ve established: accuracy, control, and patience. The tote you’ve created is your own proof that a beginner can transform basic fabric into a reliable companion that travels with you through daily life. It is not merely a bag; it is a quiet monument to the small, deliberate steps that mark real progress in any craft.
Internal link: As you explore variations and styles, you may want to browse additional tote design ideas and feature options, such as zipper-equipped configurations. A helpful reference for exploring these possibilities is this guide to tote bags with zippers, which offers context without overwhelming a beginner with complexity. This resource can serve as a gentle bridge from the uncomplicated tote you’ve learned to sew to more feature-rich designs in your future projects.
With your tote complete, you’ve not only produced a practical item but also laid down a reproducible sequence you can rely on again and again. The process—careful preparation, clean cutting, precise stitching, and mindful finishing—becomes a reliable toolkit you can carry into many future sewing endeavors. Each bag you sew will reinforce the steps you’ve practiced, while you gradually introduce your own preferences for fabric, color, and texture. The canvas of possibility stretches wide, but the core habit remains constant: slow, deliberate, and steady, with a clear sense of purpose for every cut, seam, and stitch. And as you gain experience, you’ll notice your confidence more than your technique shaping each bag to fit your daily routines, your style, and your unique approach to creating with your hands.
External resource for visual guidance: for a comprehensive, step-by-step video walkthrough that reinforces these concepts, you can view a detailed tutorial here: https://www.youtube.com/watch?v=9YJjVrHqQkI
Stitching Your Style: A Beginner’s Guide to Customizing and Decorating a Tote Bag
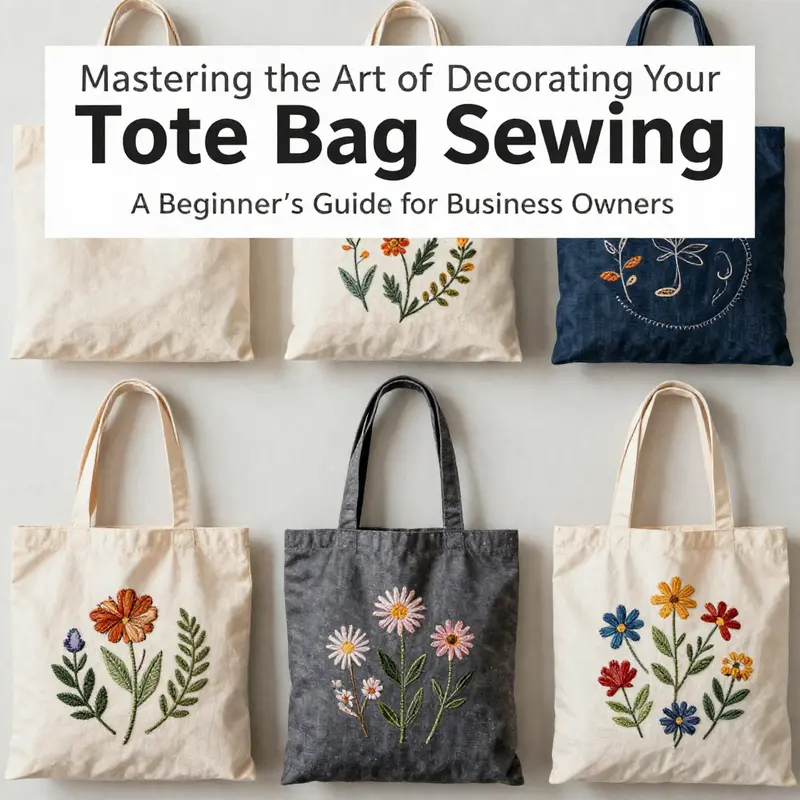
The tote bag you craft is more than a carrier; it’s a canvas for personal expression. For beginners, decorating a bag offers a bridge between the practical act of sewing and playful exploration of design. It’s where patience meets color, where a simple rectangle of canvas becomes a wearable story. You might start with a straightforward motif—perhaps a single word, a flower, or a geometric shape–and gradually layer texture and meaning as you gain confidence. The beauty of this phase is that there’s no single right way to do it. You can mix media, test ideas on scrap fabrics, and allow your bag to evolve with your mood, your skills, and the occasions you envision for it. In this space, you’re not chasing perfection; you’re crafting a piece that speaks to you every time you reach for it.
The idea of customization is particularly well suited to beginners because it grows with you. A plain canvas tote is an affordable, adaptable starting point. Upcycling a bag you already own or repurposing fabric from old garments makes the project even more rewarding. When you begin decorating, your focus shifts from producing a sturdy structure to shaping identity through color, texture, and form. That transition is a key moment in any learning path: from following a set of steps to making decisions about what feels right for you. You’ll find that with simple supplies and a clear plan, you can create a bag that doesn’t just carry things but carries your personal touch.
A thoughtful approach to customization begins with a plan that respects the bag’s fabric, its color, and how the finish will endure daily use. Canvas accepts paint and thread well, but the surface loves a little preparation. Before you begin decorating, ensure the bag is clean and fully dry, especially if you’ve washed it to pre-shrink and soften the fibers. Lightly brushing the surface with a clean cloth helps remove any loose fibers that might interfere with adhesion. If you’re upcycling denim or a heavier textile, this prep remains important—the goal is to give your chosen medium a clean, even surface to grip. A common, practical trick is to sketch your design in pencil or with chalk on the bag itself, then trace over the marks once you’re satisfied. Chalk lines wipe away easily if you change your mind, saving you from committing to a plan that doesn’t feel right after you see it in place on the bag.
Color selection is both a cosmetic and a psychological decision. Start with a palette you enjoy wearing or that suits your wardrobe. A harmonious palette often feels cohesive and intentional, while a bold, high-contrast combination can create a statement piece that reads as art. If you’re unsure, begin with a small, repeated motif in a limited color range. This lets you practice control and spacing before expanding to larger areas or more complex patterns. When you’re ready to expand, you can layer color in transparent washes or build up solid blocks of pigment. Fabric paints designed for textiles are forgiving and flexible, but they benefit from an even, thin layer rather than a thick, opaque coat. Layering is an art in itself: you might paint a base color first, then add a secondary color for shading, and finally bring forward a highlight with a white or lighter hue. Heat-setting follows in many cases, so consult the paint instructions and plan a dry, warm space for the bag to rest as the design cures. A calm, dry room becomes your studio for a few hours, and the result feels like a small, private gallery piece rather than a mere accessory.
The range of tools available to you as a beginner is a treasure chest of opportunities. Fabric paints give you broad, expressive capabilities, while fabric markers provide precision for lines, quotes, or tiny details. If you’re drawn to photography or graphic elements, consider iron-on transfers; they offer crisp edges and complex images without needing advanced drawing or painting skills. For texture and warmth, embroidery adds a tactile dimension that paints and markers cannot replicate. A simple embroidered motif, well executed, can anchor a design and give the bag a hand-crafted heartbeat. If you’re short on time but still crave personality, patches and appliqués offer a quick route to visual impact. You can pop a patched motif on the front, then stitch a few smaller patches around it to create a curated collage. The beauty of patches is that they’re forgiving; if a design isn’t perfectly aligned, the bag still reads as intentional and eclectic. Each technique brings its own character, and the decision to mix methods is itself a creative choice that reveals your evolving style.
Design decisions influence not only appearance but the experience of making. A well-considered layout prevents a cluttered result and helps your bag tell a coherent story. You might opt for a central focal point—a stylized flower, a meaningful word, or a monogram—that anchors the composition. Surround it with supporting elements such as a border pattern, a few small shapes, or a delicate line of embroidery. The balance between negative space and filled areas matters as much in decorative work as it does in sewing. Leaving space around the main motif allows the design to breathe and makes each element feel intentional rather than crowded. If you’re decorating while you sew, you’ll discover how placement affects the bag’s practicality. A design set high on the bag may be visually striking but could interfere with the straps or the top edge when carried, while a lower design might get smudged or worn more quickly. Testing the placement with removable pins or painter’s tape helps you visualize the final look without committing prematurely.
The practicalities of decoration deserve careful attention. Wash care and durability are not afterthoughts; they are integral to the finished piece. Always wash your plain tote before decorating to remove sizing chemicals that could cause the paint to peel or the ink to smear. If you choose fabric paints, follow the recommended setting methods and allow ample curing time. Some paints are heat-set; others require air-drying and gentle washing afterward. If you’re using markers or pens, choose those labeled for fabric and test on a hidden corner first. Markers can bleed along the fibers if the ink saturates too deeply, so practice a few strokes on a scrap piece of fabric. Embroidery threads should be tied off securely, and knots kept small to avoid bulk that could snag on clothing or surfaces. Patches and iron-ons require proper adhesion; a well-prepared ironing surface and accurate heat settings help them stay put through washing and daily wear. The more you think about how the bag will be used–grocery runs, library visits, commute–the more your decoration will suit real life, not just your imagination.
If you’re new to combining techniques, start with a simple project that doesn’t demand perfect mastery of several crafts at once. For example, paint a broad color block as a background, then add a single motif in embroidery or a tiny patch nearby. The contrast between the soft, painted field and the crispness of embroidery or patches adds depth without overwhelming the eye. As you gain confidence, you can expand to more ambitious compositions–layering paint with subtle shading, adding a quote with fabric markers, and finishing with a delicate outline in backstitch for emphasis. The more you practice, the more natural the process becomes. You’ll learn how to manage fabric tension, how to keep your lines straight, and how to prevent puckering when you switch from one technique to another. Each lesson learned on a single bag becomes a guide you carry into the next project, gradually turning decoration into a familiar handwriting on fabric boards.
Sustainability remains a thread that runs through every decision. Customizing a tote bag is inherently eco-friendly when you repurpose materials and use reusable supplies. It’s a way to slow the demand for new items by breathing new life into what might otherwise be discarded. If you’re working from a plain tote, you’re also weaving a narrative about your values. The small choice to decorate rather than replace translates into less waste and more personality in your daily routine. The process becomes a form of mindful practice–an act of creation that enriches your routine and, perhaps, your mood. The therapeutic value of painting, stitching, or drawing can be a welcome counterpoint to the demands of a busy day, offering a quiet space where you control the pace and the outcome. In this way, decorating a tote bag is more than a craft; it’s a moment of personal care that extends beyond the bag and into your everyday rituals.
As you finish decorating, you’ll want to consider how to protect your work during use. If you’ve chosen paints, ensure they cure fully before handling the bag extensively. Heat-setting and washing guidelines should be followed to maximize longevity. A light topstitch along the top edge or around the motif can add a crisp, finished look while also reinforcing the boundary where a dangling thread might snag. If you’ve added embroidery, carefully secure thread ends and trim them close to the fabric to avoid bulk. The result should feel durable enough for daily errands while still reflecting your aesthetic goals. The beauty of a hand-decorated tote is that every detail–from the way the design sits on the surface to the neatness of the stitching–speaks to the care you put into the craft. You’ll notice that as your bag develops a personality, your confidence grows too. This is the moment when your creative practice becomes a habit, a small but meaningful ritual you repeat with each new project.
With your tote finished, you may find yourself drawn to sharing the process or seeking new ideas. You can frame your bag as a learning artifact–proof that a beginner can transform a simple rectangle into a personalized piece of wearable art. The journey from sewing to decorating is a natural progression: you first learn the fundamentals of cutting, sewing, and assembling; then you explore the boundaries of color, texture, and technique. The result is a tangible testament to progress, a reminder that skills build upon each other when given space to grow. If you’re curious to see how others approach similar projects, there are plentiful examples online, but remember that your bag will always be unique. The small imperfections you notice–the slight wobble in a line, the way the paint settles into the fabric–these are markers of your hands at work. They reflect the imperfect, honest, improving craftsperson you are becoming.
As you plan your next tote, consider using this experience not only as a moment of creativity but also as a practical framework for future projects. The same principles apply: prep your surface, choose a palette with intention, test your materials, and respect the durability of your design. A well-decorated tote can be a gift, a personal uniform, or a functional piece that makes grocery runs feel a little more joyful. The skills you’ve begun to master–the control of a brush, the steadiness of a stitch, the patience to heat-set and cure–translate into every fabric you touch. And as you carry your new creation, you carry a narrative about your growing confidence and your willingness to explore a hobby that’s as useful as it is expressive.
If you’re seeking a touch more inspiration or a broader sense of how contemporary tote styling can align with your personal taste, you can explore a range of examples and ideas in the broader tote-bag landscape. If you’re seeking visual templates and design-forward ideas to spark your next creation, exploring simple, flexible tools can help you draft and refine your concept before you commit to fabric. For example, Canva’s design tools offer a user-friendly way to experiment with layout, typefaces, and color palettes, letting you visualize how a printed or painted motif might look on fabric before transferring it to your tote. This approach keeps your hands busy while your ideas take form, and it can be a gentle bridge from planning to execution. See how your future projects might unfold with a little digital aid, then bring those designs into the tactile world of fabric with the same sense of play you’ve cultivated here. The journey from idea to finished piece is not a straight line but a loop of testing, adjusting, and celebrating small milestones along the way. If you’re ready to look beyond the plain tote and into a broader creative practice, you’ll find that this early decorating chapter is just the opening scene of a broader, ongoing conversation with fabric, color, and your own growing skill set. And when you’re ready to take the next step, the practical feel of the bag in your hands will remind you that you’ve earned a space in the world of handmade goods through curiosity, patience, and a steady comfortable pace.
For a practical sense of tote style and options, see this resource on women’s canvas tote bags.
External reference for further inspiration and guidance: https://www.canva.com/
Final thoughts
With the knowledge gained from this guide, you are now equipped to take on the rewarding experience of sewing tote bags. Not only can this be a fun and creative venture, but it’s also a lucrative way to promote your brand—whether through unique designs or practical uses. Embrace the process, experiment with materials and techniques, and let each finished bag tell a story. The potential to offer something special to your customers awaits!