Sewing a reversible tote bag not only enhances your product line but also taps into the growing market demand for environmentally friendly options. This guide will walk you through each step, from gathering materials to adding customizations, allowing your business to create unique, stylish tote bags that cater to diverse customer preferences. Each chapter builds on the essentials for constructing a versatile bag that serves practical purposes while aligning with eco-friendly practices. Join us as we explore the detailed processes, ensuring you can confidently offer this popular product to your customers.
Double-Sided, Everyday Ready: Mastering Materials, Preparation, and the Reversible Tote
When you set out to sew a reversible tote bag, you are not just making a bag; you are crafting a small, everyday workhorse that can switch its mood as easily as your schedule. The secret lies in thoughtful material choice, careful preparation, and a method that creates a sturdy, double-sided structure without sacrificing ease of use or comfort. Start with two identical fabrics that feel reliable under weight but are still forgiving to sew. Common choices like cotton canvas, denim, or sturdy cotton blends strike that balance between durability and pliability. Each panel should measure roughly 140 cm in length and 38 cm in width, a generous scale that yields a bag with real carrying capacity. Matching thread, a basic sewing machine, or even a patient hand stitch, along with an iron, scissors or a rotary cutter, and pins or clips, all become part of a quiet choreography. If the fabric is soft, you can opt for fusible interfacing—about 60 g non-woven interfacings work well—to stabilize the panels and keep the bag’s silhouette crisp when you load groceries, books, or a beach towel. The aim is a tote that feels substantial in the hand yet remains approachable to craft, a balance achieved through preparation as much as through technique.
From the outset, plan for the reversible nature by ensuring both fabrics are cut to identical shapes. This is critical because a reversible bag doubles as two bags in one, so matching the scale sits at the heart of the design. Before you even load your machine, make sure the fabrics are clean and wrinkle-free. A quick press can set the grain and reduce shifting during assembly, especially when you are working with two different fabrics. Thoughtful pressing also helps you visualize how the two sides will align when the bag flips from one pattern to another. As you prepare, consider the aesthetics of the exterior and the interior. The larger, practical pockets you might reveal on one side can be tucked behind a plainer or complementing pattern on the other side. The choice of whether to add pockets or keep the interior open should hinge on how you intend to use the bag most often.
The process itself begins with the base structure. Lay the two fabric panels flat, right sides together, and align the bottom edges with care. The double-fold bottom technique starts by offsetting one piece slightly, then creating a line 25 cm up from the bottom across both panels. A single line forms the seam that will be the foundation for the bag’s depth, and stitching along that line with a 1 cm seam allowance adds strength where the bag will bear weight. After stitching, you carefully cut along the line, separating the lower portion that becomes the base from the upper portion that forms the main body. This approach is not merely clever theatrics; it yields a base that sits flat when the bag is set down and carries its load without collapsing. It also creates space for two roomy pockets when the bag is used on either side, a feature that is especially welcome for everyday errands or weekend trips.
Fold the lower section up, aligning the raw edge with the top of the stitched line. Mark a point 8 cm from the center of the folded edge. This distance serves as a guide for sewing a diagonal line from each corner to that center mark, effectively forming a triangle that creates a boxed bottom. Do this on both sides, trim away the excess, and then turn the bag inside out through the top opening. The result is a stable, flat bottom that helps the tote hold its shape as you load it with books, groceries, or craft supplies. It may seem like a small adjustment, but it makes a measurable difference in how tidy the bag looks when it’s set down as well as how it behaves while you carry it.
Handles come next. Cut two strips for the straps, typically 50 to 70 cm in length depending on how you want the bag to sit on your shoulder or in your hand. Fold each strip in half lengthwise with the wrong sides together, and press to create a neat crease. Topstitch along both long edges to reinforce the fold. Turn the handles right side out and press again. Position the ends about 5 cm from the center of the bag’s top edge on each side. Pin them securely at the top corners. For heavier use, you can substitute webbing or leather straps; such choices offer greater durability for frequent library runs or market days. The key is to ensure the handles attach firmly to the bag so they do not sag or loosen with weight. These are the touches that transform a simple cloth tote into a reliable everyday companion.
With the outer and inner components prepared, you can assemble the bag body. Place the two main panels with right sides together and pin or clip along the sides and bottom. Sew the sides and bottom with a 1 cm seam allowance, leaving a turning opening of about 20 to 30 cm somewhere along a side seam or near the bottom. This opening is essential for turning the bag right side out later. If you added fusible interfacing to the panels at the start, this is the moment when the fabric will appreciate the extra support. Interfacing helps prevent sagging in soft fabrics and keeps the bag from looking flimsy once filled. If you did not use interfacing, you can still achieve a neat finish by pressing the seams flat and topping the top edge with a line of stitching that anchors the layers together. When you reach the turning opening, you can leave it unstitched for the moment; you will close it with a careful hand stitch later. The turning gap also serves as a reminder that your bag is about the transition from a flat piece of fabric to a three-dimensional object—an object that will serve many roles depending on the day’s plan.
Turning the bag right side out is the moment where the design becomes tangible. Gently pull the fabric through the opening until the bag takes shape. Use a blunt tool, such as a chopstick or a turning stick, to push the corners square and to smooth the inside seams. A quick press with a hot iron helps set the edges and makes the final finishing steps neater. The bottom corners, formed by the diagonal cuts, should lie flat and neat, creating a stable footprint that prevents the bag from bulging abnormally when loaded. The beauty of a well-constructed reversible tote lies in how both sides contribute to the whole; you can flip it for a different mood or a different day’s need, whether you are pairing it with a work outfit or simply carrying a lightweight load to the park.
The finishing touches are where the art of sewing reveals itself. If you wish to add pockets, you can fabricate a simple interior pocket by folding a rectangle of fabric, sewing along three sides, and attaching it to the inside, ensuring it does not interfere with the turning opening or the overall symmetry of the bag. For the opening, a clean ladder stitch or a small backstitch line closes the seam gently and securely, leaving a nearly invisible finish. Topstitching along the top edge about 0.2 cm from the edge adds extra strength and a crisp, professional look. Remember, because the bag is reversible, the top stitching should be visually appealing from both sides, so choose thread color and stitch length that complement both fabrics. The result is a tote that not only carries items but also invites you to flip its personality with a simple gesture.
As you consider customization, the possibilities expand. You can repurpose old T-shirts with bold graphics to create a soft, colorful inner layer or outer pocket accents. Denim from worn jeans yields a rugged contrast that ages gracefully with use. Interfacing both panels before assembly helps maintain a tidy silhouette, especially if you expect a heavier load or prefer a crisper finish. The sustainable twist—reusing existing textiles—appeals to both practical needs and ecological values. Pairing two different fabrics, one for each side, offers a practical way to build a reversible design while maintaining strong alignment. When you cut identically and sew with consistent seam allowances, the two sides align neatly at the edges and corners, so the flip mechanic feels natural rather than fussy.
If you wish to explore variations or want a quick reference for related ideas, you can also examine a practical guide focused on additional bag features. For example, there is a resource that specifically discusses adding a laptop sleeve or a dedicated compartment while still preserving the reversible concept. See the example described as a tote bag with a computer sleeve for ideas on interior organization and secure attachments that work with two-sided designs. tote bag with a computer sleeve is a helpful anchor for thinking through pockets, sleeves, and removable components that remain compatible with both sides of a reversible tote.
What makes this approach enduring is not just the technique but the mindset you bring to the project. You plan for strength and convenience, then you allow room for creativity. The materials do the heavy lifting the moment you begin, but the finished bag carries your intent—simplicity with versatility. You can take pride in a bag that holds its shape after a long day, remains comfortable under load, and offers a different aesthetic whenever you decide to flip it. The reversible tote is more than a practical project; it is a modular, adaptive accessory that travels with you through work, errands, and leisure.
To deepen your understanding of pattern drafting and cutting beyond what this chapter covers, consult a broader sewing pattern resource. Although the precise steps vary by pattern, the underlying principles—identical cutting, aligned seams, and careful interfacing—remain universal. A widely used pattern reference offers free, detailed instructions for a reversible tote bag, providing a complementary perspective on structure, seam finishes, and turning methods that align with the approach described here. External resources like this can supplement your practice and help you troubleshoot any corner cases that arise as you gain confidence with two-sided designs.
External resource: https://www.allfreesewing.com/2019/07/16/reversible-tote-bag/
Solid Foundations: Building the Stable Base for a Reversible Tote
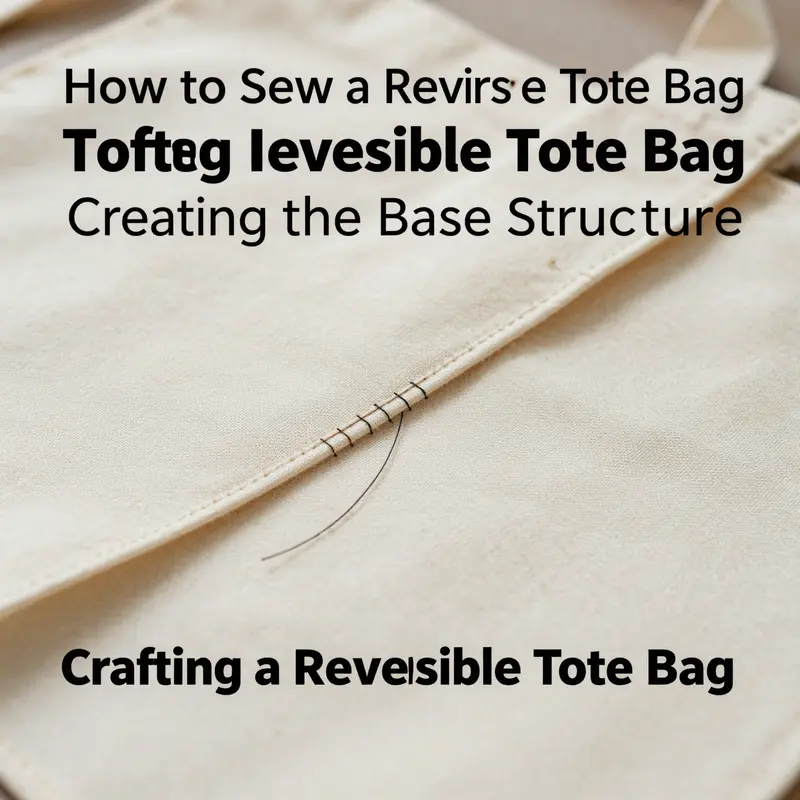
A reversible tote bag deserves more than a pretty exterior; its heart is the base. The base is the anchor that keeps the bag upright when it’s loaded with books, groceries, or a lively mix of everyday essentials. When the base is thoughtfully engineered, the sides stay straight, corners stay sharp, and the bag feels sturdy in hand rather than limp at the bottom. The goal here is to weave durability and shape into a single, practical structure that works in harmony with the two-faced design. You’ll notice the same techniques recur across fabrics and styles, because a solid base is the common language that makes a reversible tote behave like a real bag, regardless of which side is facing out.
Material choices set the foundation before any cut is made. For the outer layer, choose a sturdy fabric with enough body to hold its shape, such as cotton canvas or a mid-weight denim. A target range around 280 g/m² or higher gives you resilience without turning the project into a wrestling match at the sewing machine. The lining should be lighter but still durable enough to glide against itself as you turn the bag inside out. A lining fabric like a smooth polyester taffeta at 210D or 300D offers a gentle inner surface that reduces bulk while preserving the bag’s silhouette. A crucial step in any base-focused design is pre-shrinking both fabrics. A quick wash and dry cycle removes the most common source of distortion after construction, so the final tote sits right the first time it’s used.
If you’re translating a plan into patterns, the base becomes a dedicated component that connects the front and back panels. A practical starting point is a bag about 30 cm wide, 25 cm high, and with a depth around 8 cm when loaded. These dimensions translate neatly into two outer pieces and two lining pieces of equal size, with a central base panel that ties the sides together. Don’t forget a seam allowance; a safe, common choice is 1.2 cm around all edges. The base panel is cut to fit the width of the bag minus the seam allowances, so you’ll end up with a strip that anchors the bottom without adding excessive bulk at the corners. In this approach, the base panel effectively becomes the hinge that allows the tote to stand up and maintain a clean, flat bottom, even when you load it with heavier items.
As you prepare to assemble, consider notches as quiet heroes of clean corners. Small diagonal cuts in the seam allowance at each corner reduce bulk and make it possible to sew a smooth, flat bottom without puffing or bunching. When you stitch the base panel to the bottom edge of both the outer and lining bodies, these notches help you distribute the fabric evenly, so the finished corners are crisp rather than rounded or puffy. With the base attached, the bag begins to take on a defined, square footprint that will remain stable as you fill the interior.
Turning to the reversible element, the base structure remains the same on each side, but you’ll pair the outer and lining bodies in a way that preserves their two-way usability. The outer panel and the lining panel are stitched along the sides and bottom, with the base panel anchored to the bottom edge of each piece. When you’re ready to close the bag, align the top edges of the outer and lining bodies and stitch along the top opening. Leave a turning gap of about 10–15 cm so you can reverse the bag later. This arrangement ensures that the final seam sits on the exterior when the bag is right side out, giving the reversible design a polished finish on both sides while keeping the interior structure robust.
The turning process reveals the elegance of a well-executed base. After you turn the bag right side out, a blunt tool—such as a chopstick or turning stick—helps you push the corners into place so they’re perfectly square. A thorough press with an iron sets the seams and removes any remaining wrinkles, making the entire profile crisp and professional. At this stage you’ll begin to appreciate how the base, though hidden inside, informs every exterior line—the base is the invisible guardian of shape.
Handles, while often discussed as a decorative feature, also play a role in base stability and long-term wear. When you attach the handles, you’re also reinforcing the opening, which is where stress tends to accumulate. Cut two strips of fabric for handles, roughly 50 to 70 cm long, depending on your preference for shoulder or hand carry. Fold them lengthwise, wrong sides together, and press to create a clean crease. Topstitch along both edges to secure the fold, then turn the handles right side out and give them one final press. Position the handle ends about 5 cm from the bag’s center at each side of the top edge, pinning securely so that the stitches draw the weight evenly into the sides rather than concentrating strain at a single point. For heavier use, consider alternative materials like reinforced webbing or leather straps, which distribute load more evenly and resist wear better over time.
The assembly that follows is where the base and the body truly become one. Place the two main panels right sides together, now with the base already stitched to the bottom of each panel. Pin or clip the sides and bottom edges, keeping the base alignment intact as you sew. A careful 1.2 cm seam allowance ensures strength without excessive bulk. If you’re building a softer tote, you might opt for a fusible interfacing around the base or even a slim piece of cardboard to lend extra stiffness before final assembly. If you choose to add interfacing, fuse it to both panels before joining them so the base keeps its form in both the outer and inner layers. When you’re ready to join the outer and lining bodies, sew along the top edge and leave the turning gap. The resulting tube, once inverted, becomes a two-faced treasure that can stand on its own, its bottom kept square by the hidden but mighty base panel.
A common temptation is to rush toward the finishing steps, but the base deserves one more quiet consideration: how the bag rests when not in use. Skimming along the top edge with a short topstitch—about 0.2 cm from the edge—adds not only extra strength but also a clean, finished look. This topstitching is particularly beneficial for a reversible tote, where the top edge is visible on both sides, and any wobble would be conspicuous. The same approach translates smoothly to edge finishes or to the integration of pockets, should you decide to enrich the interior with a small stash pocket or a complementary exterior panel. Pockets can be added by folding a rectangle of fabric, stitching along three sides, and attaching it to the interior or exterior. The result is a bag that not only holds more but presents itself with an extra touch of organization—another small way the base supports the entire concept of durability and usability.
In keeping with the sustainable spirit that often accompanies handmade bags, think about repurposing old fabrics for the base and primary panels. A sturdy cotton shirt, a denim shard, or a canvas drop from an old tote can become the backbone of a new reversible treasure. The goal is to balance reuse with function: the fabric should be pre-washed to remove any future shrinkage and to ensure that the final shape remains steady after months of daily use. The base acts as a bridge between style and practicality, a place where your choices about materials meet the realities of how a bag is carried, set down, and filled.
If you’re curious to see how a similar base concept translates into a more feature-rich tote, you can explore a related project that extends the same foundational idea to a tote with a dedicated computer sleeve. It demonstrates how the same base logic can accommodate pockets and interior organization without sacrificing the two-way visual appeal of a reversible design. The link below points to a relevant example and can serve as inspiration for further personalization: tote bag with computer sleeve.
As you finalize the construction, remember that the reversible nature is about more than switching appearances; it’s about ensuring that every material choice, stitch, and reinforcement speaks to longevity. The base is quiet but essential. It keeps the bag upright when loaded, shapes the corners so they don’t collapse, and supports the weight distribution that makes a tote feel reliable and comfortable to carry. Your two faces will thank you for the care you invested in the base—the shared ground that makes both sides share a common backbone. With the base solid, the rest of the bag follows naturally: the panels align, the seams sit neat, and the moment you flip the bag inside out reveals not just different fabric but a structure that remains taut and dependable.
For further visual guidance on this process, consider the external tutorial that clarifies several reversible-tote techniques and presents diagrams that echo the steps described here: https://www.sewing.com/tutorials/reversible-tote-bag/ .
Between Fold and Foundation: Folding and Stitching the Bottom Corner of a Reversible Tote Bag
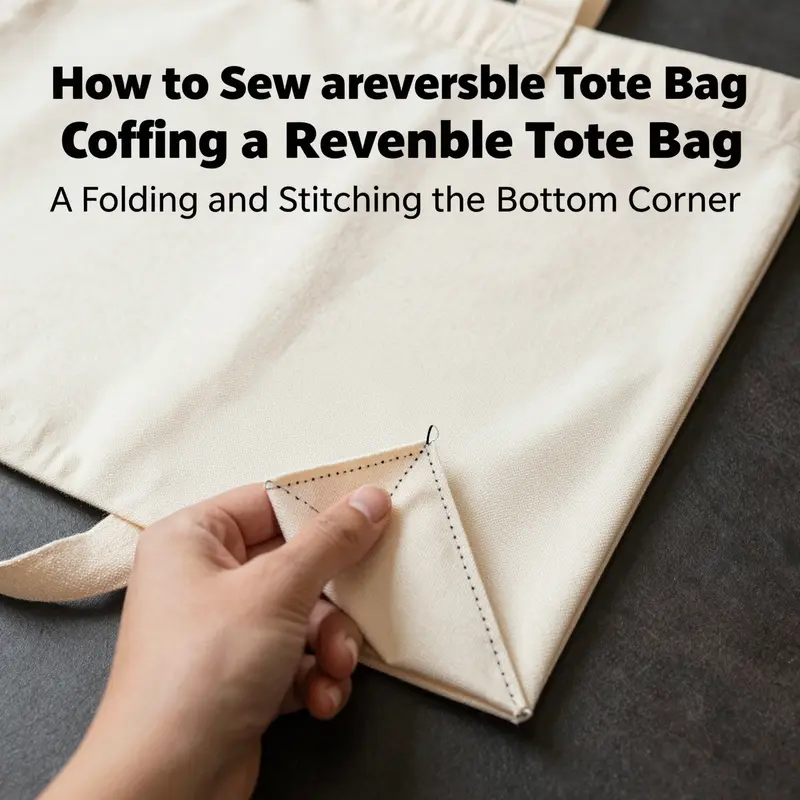
The bottom corner of a reversible tote is more than a mere junction of fabric; it is the quiet architect of the bag’s personality. It determines how the tote sits in your hand, how it holds its shape when loaded with groceries, books, or a splashy tote of supplies, and how cleanly it flips from one side to the other without losing its poise. When you sew a reversible tote, you want a base that feels substantial yet adaptable. The method you’ll use to fold and stitch the bottom corner accomplishes that with quiet efficiency, turning two flat panels into a sturdy, boxy foundation. In this approach, the bottom edge is not an afterthought but a deliberate fold that creates depth and stability. The beauty of it is that the same fold works whether the fabric is sturdy denim, cotton, or a canvas blend. If your fabric is soft, a light interfacing can help hold the shape without making the tote stiff. The principle is simple: you establish a line a short distance from the fabric’s base, fold along that line, and then secure the folded slab with a neat seam that becomes the bedrock of the bag. From there, the rest of the construction—with its reversible design and clean finishing—unfolds in a whisper of precise stitching and careful pressing. A single, well-executed bottom corner folds the door to a durable structure that looks right on both sides, no matter which color, pattern, or texture you choose for the two faces of the bag. The process also invites adaptation. If you’re using a heavier fabric, you may want to adjust seam allowances slightly for a more compact base. If you’re experimenting with a lighter fabric, you can still achieve a solid base by following the same foldline concept and applying a touch of interfacing or additional topstitching for reinforcement. In practice, the technique rests on a few universal steps that translate across fabrics and sizes. Begin by preparing the two main panels with the right sides facing each other. Align their bottom edges so that the two pieces share a consistent foundation. Then, instead of carving a deep, complex base, you create a controlled tuck along a precise line measured 8 cm up from the bottom edge. This horizontal line becomes your guide for folding the bottom portion upward. The folded section, now 8 cm thick, creates a sturdy base while keeping the raw edge safely tucked away inside. The goal is to have the raw bottom edge of the fabric end up facing inward as the tuck sits neatly inside the bag. Once this fold is established on both panels, you pin and stitch along the bottom edge of the fold, keeping the seam as close to the fold as practical—about 1 cm from the edge. This single seam locks the folded section in place and defines the base’s thickness. It’s a clean, straightforward stitch that resists fraying and endows the tote with its characteristic, grounded feel. After the two panels are prepared in this way, you turn them right side out so the right sides are once again facing outward, and you press the folds flat. The base now presents as a crisp, squared-off platform that will carry weight without buckling. The next phase is assembly. Place the two panels together with their right sides facing each other and pin or clip along the sides and bottom. You’ll sew around the sides and bottom with a 1 cm seam allowance, effectively enclosing the folded base within the stitched perimeter. It’s important to leave a reversal opening—roughly 10 to 15 cm—so you can turn the bag right side out. This turning opening serves a practical purpose: it keeps the interior smooth and allows you to push out corners thoroughly with a blunt tool after the bag is turned. If you’re using a softer fabric and you want more structure, you can slip in a light fusible interfacing before assembling the panels. A 60 g non-woven interfacing or similar weight can give the bag more body without making it stiff or inflexible. The presence of interfacing is a personal choice tied to fabric weight and the intended use of the bag. It’s entirely acceptable to skip interfacing if your fabric holds its shape well enough on its own, especially for a lighter, casual tote, or if you’re aiming for a fully reversible look where both sides contribute to the bag’s silhouette. Once you’ve stitched the main body, you turn the bag right side out and use a blunt turning tool to push the corners into sharp, clean points. A thorough press sets the seams, clarifies the fold lines, and locks in the tote’s structure. You may choose to finish the top edge with a simple fold and topstitch, or you can leave the edge raw if you plan to bind it later with a contrasting bias tape. For those who want a little extra detail, a line of topstitching a few millimeters from the top edge not only strengthens the finish but also gives a neat, professional look on both sides of the bag. The reversible aspect of this tote means you’re always presenting a polished face, whichever side you’ve chosen to display. There’s no separate lining to contend with; both sides serve as the exterior and interior, depending on the bag’s orientation. The pockets can be integrated in a few different ways. One approach is to fold a rectangle of fabric, sew along three edges, and attach it to the inside for a discreet, roomy pocket. Another is to form large, built-in pockets by treating the main panels as single layers of fabric and using the existing fold lines to create generous storage without adding extra pieces. The mindset behind this design is adaptability. By focusing on the bottom corner as the hinge of structure, you can vary the bag’s capacity and footprint simply by adjusting the initial fold line or the overall dimensions of the panels. If you’re exploring sizing, consider using a sizing guide to help you decide whether a “medium-size tote” profile would better suit your daily errands or your intended gift projects. As a practical reference, the idea of a Medium Size Tote provides a balanced starting point for proportion, keeping the base robust while preserving the bag’s flexible carry. Medium Size Tote offers a convenient frame of reference for proportioning the panels and the fold depth, ensuring that your reversible tote remains comfortable in hand and practical in use. When you finally decide to close the reversal opening, the choice of stitch is up to you. A ladder stitch, invisible from the outside, achieves a clean, almost seamless look, while a straightforward backstitch provides a firm seam that matches the rest of the bag’s sturdy construction. As with any handmade project, the joy lies in the small decisions that shape the final product—the weight of your fabric, the presence or absence of interfacing, and the precise distance you choose to mark for the 8 cm tuck. The bottom corner is the heart of the design, and this technique gives you a reliable foundation from which the rest of the bag can flourish. When you flip the bag over to reveal its other face, you’ll discover that the base remains steady, the sides stay square, and the entire piece performs as a cohesive, reversible accessory rather than two separate sides stitched together. This approach honors the idea that good construction isn’t just about the outer appearance but also about the quiet integrity of the bag’s interior and its ability to carry the things that matter. For readers who are building on earlier chapters or cross-referencing with other reversible projects, the bottom-corner fold provides a practical anchor to the overall tutorial. The method keeps you focused on one decisive seam that does the heavy lifting, while the rest of the bag falls into place through careful alignment and consistent stitching. If you’re seeking additional inspiration and stepwise visuals, there are excellent visual resources that walk through similar constructions. The Crafty Quilt’s step-by-step guide offers a clear, diagram-supported walkthrough that complements this chapter’s emphasis on fold, stitch, and turn. It’s a reliable external companion to your practice, giving you another lens through which to view the same fundamental technique. For ongoing learning and to explore a broader range of tote projects, you can also explore related articles that showcase different tote proportions and finishing touches, which can help you tailor your reversible tote to your own style and needs. External resources can broaden your understanding while you work on your own version of the bag. External source: https://www.thecraftyquilt.com/sewing-tutorial-reversible-tote-bag/
Strength in the Seam: Attaching Handles and Reinforcement for a Reversible Tote Bag
The moment you move from cutting and stitching the body to giving the bag its daily endurance, the handles become the defining test of your craftsmanship. A reversible tote thrives on practicality: both sides are worn, and the weight of groceries, books, or a knitting project will press outward at the top corners. That consequence makes attaching the handles with care not just a detail, but a guarantee that the bag will perform as well on day one as it does after months of use. The materials you selected—thick cotton, denim, or canvas—respond to a few precise techniques in ways that keep the fabric upright and the seams secure. Start with the length of the handles, which typically falls in the 50 to 70 centimeter range, a span designed to drape comfortably from the bag’s mouth to the wearer’s shoulder or to sit neatly in hand. If you envision a longer, more relaxed carry, lengthen the straps; for a shorter, hand-held tote, shorten them. Regardless of length, the key is symmetry and even tension. Place the two handles so their attachments sit a little to the sides of the bag’s center, about five centimeters from the center on each side. This offset creates a balanced silhouette when the bag is opened wide to its full capacity and prevents the top edges from pulling unevenly when weight is added. As you prepare the handles, fold each strap lengthwise, wrong sides together, and press into a crisp seam. The approach is simple, but the effect is sturdy and clean. A double row of stitching along the edges seals the fold and reduces shifting under load. If you’re using a heavier fabric or plan to carry heavier items, you can reinforce the handles by stitching through the bag fabric twice, creating a reinforced anchor that resists strain at the seam. A box-stitch or a reinforced rectangle at the base of each handle can distribute stress more evenly across the top edge and prevent the fabric from puckering or tearing. When you begin attaching, consider the thread as much as the fabric. A strong, color-matched thread—polyester or a denim-specific weight—won’t just blend with the exterior; it behaves better under tension. The machine’s needle should be appropriate for the fabric, not too fine, so a small- to medium-diameter needle maintains a clean line without skipping. The placement of the attachment lines matters as well. A single straight line can fail if the fabric is prone to fraying or if the load shifts. Instead, you’ll want a two-step approach: first secure the end of the strap with a few backstitches to lock the thread, then sew a rectangle or square around the point where the handle meets the bag. This secure patch is the point where most bags fail if left to fate. The next consideration is the stitching pattern. A classic box-stitch—backstitch, forward stitch, backstitch in a square or rectangle—creates a quiet, durable anchor that won’t pull away when the bag is loaded. Entering and exiting through both the strap and the bag pieces multiple times ensures that the stitches grab the fabric across its full thickness. If you’re working with a lighter fabric, you can add a small square patch of interfacing behind the top edge at the attachment points. This extra layer dampens any stretch and keeps the opening neat, a small but meaningful upgrade that preserves the bag’s shape across uses. A neat finish also comes from how you handle thread tails. Trim close to the stitching, but avoid leaving loose threads that could catch on fabric or fingers. Tie off or bury the ends within the seam if necessary, especially where the two layers of fabric join. You’ll notice that the reversible design adds another layer of thought to the process. Because the bag offers two faces, the top edge and its stitching should read well from both sides. Use a thread color that blends with both fabrics or choose a secondary color that creates a deliberate contrast on one side while remaining discreet on the other. This balance between function and appearance is a small but daily reward that makes the effort worthwhile. The reinforcement you apply isn’t solely about the moment of insertion; it’s about ongoing integrity. You can further enhance durability by stitching an “X” or an “H” pattern within the reinforced patch. These cross-stitches distribute load across more than one direction and help the handle remain anchored even if one path encounters a snag. If you’re sewing by hand rather than with a machine, a backstitch or a series of tight, even stitches will still provide the same stabilizing effect. The important thing is consistency. Uneven stitches or gaps in the reinforcement invite wear, especially when the bag is used daily for groceries or books. Once the handles are attached, the bulk of the work lies in the way you finish the top edge and ensure that the bag remains comfortable to use, regardless of which side is facing outward. A light topstitch about 0.2 centimeters from the top edge not only secures the appearance but creates a tidy casing for any future top edge detail, such as a decorative binding or an inner pocket edge. Because you’re building a reversible tote, it’s wise to check that the top edge reads well on both sides. If you’ve used contrasting thread for the reinforcement, you may decide to echo that detail along the top edge on one side while keeping a simpler finish on the other. This creates a subtle variation the moment you flip the bag, turning a practical object into a small statement of your craft. While the grip and the stitch are the primary performance features, the attachment points are also a testament to thoughtful design. The choice of strap material can shift the approach somewhat. Fabric handles require precise alignment and deeper anchoring, while webbing or leather straps demand reinforced stitching at the seam and careful seam allowance to manage bulk. For weightier loads, you might even consider adding a second pair of attachment lines on each side, skipping the exact centerline and offsetting slightly to further distribute stress. The result is not only a bag that carries weight gracefully but one that looks well-balanced and professional from both sides. If you’d like to explore a related approach that continues the theme of adaptable tote designs—one that shows how a single fabric composition can serve multiple practical purposes without sacrificing sturdiness—see this related guide on tote bags with a dedicated sleeve. It offers a practical example of using a similar reinforcement strategy in a slightly different context: tote-bag-with-computer-sleeve. As you read and compare, you’ll notice that the core idea remains constant: secure, even tension, reinforced attachments, and attention to how the bag performs on both faces of the fabric. The reversible tote rewards patience with two beautiful sides that endure, and the handles are the hinge that keeps them both usable. When you test the finished piece, lift it by the handles in several positions and without load to ensure no seam shifts occur. Then load a reasonable amount of weight and move the bag in a natural way, mimicking real-life use. If you observe any slight twisting at the attachment points, that’s your cue to double-check the stitching and, if needed, add another short reinforcing stitch in the same pattern. The gentle discipline of careful stitching translates into everyday durability. There is a certain quiet satisfaction in knowing your tote will last across seasons, carrying the items that matter most to you, while remaining elegant in both of its faces. The reinforcement isn’t about a single moment of construction; it’s about a habit of precision that travels with the bag wherever its two sides take it. External materials and methods always influence the final result, but the heart of a durable reversible tote lies in how cleanly and firmly you attach the handles, with reinforcement that respects the fabric’s flexibility. This is where craft becomes function, and function becomes style, as stable handles invite confident use from morning errands to weekend projects. For readers who enjoy a broader view of fabric adaptation and the sustainable approach this project embodies, a broader exploration of tote construction in related contexts can offer further inspiration and technique refinement. External resource: How To Turn Old T Shirts Into Trendy Tote Bags In 5 Steps. https://www.youtube.com/watch?v=example-tshirt-tote
Two Faces, One Bag: Mastering Final Assembly and Personal Touches for a Reversible Tote

When the pieces have been cut, the seams have been pressed, and the two fabrics have learned to live together as one, a reversible tote is finally ready to reveal its dual personality. The final assembly is where planning becomes presence, where the bag shifts from a practical shell into a wearable statement that can swap moods with a quick flip. The process remains faithful to the idea that two sides, with complementary textures or colors, can coexist in a single, sturdy companion for daily errands, library runs, or weekend explorations. In this chapter, the journey through interior construction, turning, closing, and the embellishments that give a bag character unfolds as a seamless continuation of the earlier steps, tying depth, structure, and style into one well-made piece.
Begin with the interior, the lining that will cradle your belongings and protect the outer shell. Cut two lining panels that mirror the outer fabric pieces in size. Sew these lining pieces together along the sides and bottom just as you did for the exterior. This creates a complete inner bag that acts as a discreet, fabric-first pocketing system. The lining is not merely decorative; its sturdiness affects the tote’s behavior when loaded. A resilient lining helps the bag stand tall, prevents sagging, and preserves the clean, boxy silhouette that makes a tote practical for books or groceries alike. Once the lining is assembled, you bring the two realms—the outer shell and the inner lining—into a careful embrace. Place them with right sides facing each other and align the edges around the entire perimeter. Pin or clip the layers in place, then sew along the edge with a modest seam allowance—traditionally about a half inch. Leave a turning opening of roughly four to six inches on one side of the bag. This small doorway is essential: it will allow you to reverse the bag so the outer shell and the lining interchange places, revealing both faces, both textures, both colors, depending on how you choose to wear the tote on any given day.
The turning opening is the hinge that keeps the reversible concept functional yet tidy. After stitching, do not rush to close this gap. It remains open to allow the lining and outer fabric to slip past each other during turning. When you’re ready to turn the bag right side out, gently pull the exterior fabric through the opening until the entire bag appears as one finished outer surface, with the lining tucked inside. Use a blunt tool—like a chopstick, a knitting needle, or a dedicated turning stick—to nudge the corners into sharp, square shapes. A crisp push at each corner sets the form and prevents the sac-like corners that can occur when fabric folds unevenly. Then press the bag with a hot, steamy iron to set the seams and flatten any residual waviness. The iron becomes a quiet ally, sealing the work you’ve done and giving you a professional finish.
With the exterior and interior aligned and the turning gap calibrated, you now bring the edges to a close. There are several reliable approaches to sealing the opening, each offering a different aesthetic and level of durability. Topstitching near the top edge is a clean, sturdy option that provides a visible, reassuring finish while reinforcing the opening. Hand stitching the opening with a ladder stitch—or invisible stitch—creates a nearly seamless repair that keeps the seam discreet. If you prefer a more modern or utilitarian approach, fusible webbing can be used to bind the raw edges together without needlework, offering a smooth, flush finish. Whichever method you choose, ensure the seam lies flat and secure, because the opening will experience daily use and slightly more strain as you load items into the bag.
Beyond closure, the final assembly also invites functional enhancements that suit personal needs and daily rhythms. Handles are not mere appendages; they define how you carry the tote and how comfortable it feels during long picks up or long walks. Cut two fabric strips for handles, typically around 50 to 70 centimeters in length depending on whether you prefer hand-carry or shoulder wear. Fold each strip lengthwise with wrong sides together, press to create a crisp crease, and topstitch along both long edges. Turning the handle right side out and giving it another press ensures durability and a neat look. Place the ends of the handles roughly five centimeters from the center of the bag’s top edge on each side. Pin securely at the top corners so the handles are attached with strength, not just a single stitch. If you’re planning to carry heavier loads, reinforce these junctions with a small interfacing patch or consider using webbing or leather for the handles, which distributes weight more evenly and adds a touch of texture.
Inside the bag, the inner lining presents a rich opportunity for organization. Small pockets stitched to the lining keep keys, phones, or a compact notebook from wandering to the bottom. The same simple rectangle-and-three-sides-stitch method used for the outer pockets translates easily to the lining, giving you discreet compartments that won’t intrude on the clean exterior lines. The beauty of a reversible tote is that any pocket you place on the inner surface also benefits the outer surface when you reverse the bag. This is a subtle reminder that functionality and versatility are not at odds but are, in fact, designed to coexist.
Once the interior is settled and the exterior has found its final shape, you turn again to the outer edges and the finish. If you’ve not already, reinforce the top edge with a line of topstitching—everywhere along the top edge—that catches the layers, adds a touch of polish, and helps the bag hold its form. For a reversible design, topstitching on both sides demonstrates care and uniformity, assuring that whichever side you present faces outward, the stitching remains consistent and visually intentional. Remember, the goal is a balanced, sturdy tote whose two faces present distinct personalities without compromising structure.
The customization possibilities that follow are where the project truly becomes personal. With a reversible tote, you might choose fabric pairs that reflect your calendar or mood: a bold graphic print on one side and a calm, solid or tonal weave on the other. Color blocking—placing two distinct colors on opposite sides—creates a dynamic silhouette that changes with the angle of view. Embroidery or appliqué on either side can immortalize a name, a favorite motif, or a meaningful quote, turning a practical bag into a personal emblem. If you enjoy slower, more tactile crafts, you can incorporate contrasting topstitching colors or even decorative stitches along the seams to echo the pattern on the opposite side.
Another compelling avenue is the sizing and shaping of the tote itself. The standard rectangle silhouette serves groceries and library books well, but you can tailor the dimensions to specific needs. A rounded bottom or a wider, flatter profile can yield a softer or more structured look, respectively. For sustainability-minded makers, repurposing old garments—such as a sturdy denim jacket or a graphic tee—offers rich textures and color stories while reducing waste. The inner and outer fabrics can be carefully chosen to preserve the mood of each side while ensuring durability for everyday use. When you think about customization, consider also practical upgrades: a hidden pocket for keys, a small detachable zipper pouch for valuables, or a magnetic snap to secure the top without compromising the reversible concept.
The reversible tote, at its essence, is a study in duality made tangible through careful assembly and thoughtful finishing. It is about balance: the outer shell and inner lining must move as one, the turning opening must dissolve into the seam, and the two faces must remain independent in their aesthetics while sharing a common, sturdy backbone. This approach makes the bag especially forgiving for beginners and satisfying for seasoned sewists who enjoy the payoff of a finished, usable piece that can transform with a flip. If you’re chasing inspiration for how to pair fabrics and pockets, you might explore examples of two-sided tote ideas that celebrate texture and tone—the kind of project that invites you to pull a second fabric from your stash and try a new pairing.
For further ideas on fabric choices and interior organization, you can explore related discussions around durable, everyday totes such as women’s canvas tote bags, which showcase how lining and outer fabric interact in practical designs. This reference can serve as a gentle primer for thinking through pocket placement, weight distribution, and how a well-placed lining can elevate usability without cluttering the exterior aesthetic. You can find more about this approach here: women’s canvas tote bags.
As you wrap up, remember that the reversible tote is more than a craft project. It’s a small, personal ecosystem: two sides, one bag, and countless combinations. The finishing touches—whether a neat ladder stitch, a discreet zipper, or a bold topstitch in a contrasting hue—are the quiet details that make the difference between a bag you carry and a bag you treasure. And because one bag can substitute for many, the act of creating it becomes a sustainable ritual, turning fabric scraps and old garments into something useful again. If you’re looking to broaden your material options beyond your own stash, a broader sourcing reference can be useful to explore different textiles and applications. External resource for further ideas on material options and wholesale possibilities: https://www.alibaba.com/wholesale/woman-carry-bag-13_4.html
Final thoughts
Through this comprehensive guide, you now have all the tools necessary to create your own reversible tote bags, blending practicality with sustainability. As a business owner, by aligning your products with eco-conscious values, you are meeting a crucial demand among consumers. Utilize your creativity and craftsmanship to offer personalized designs that not only enhance your brand but also contribute to the movement towards environmentally friendly fashion. Remember, each tote bag you create is an opportunity to inspire your customers towards sustainable living.