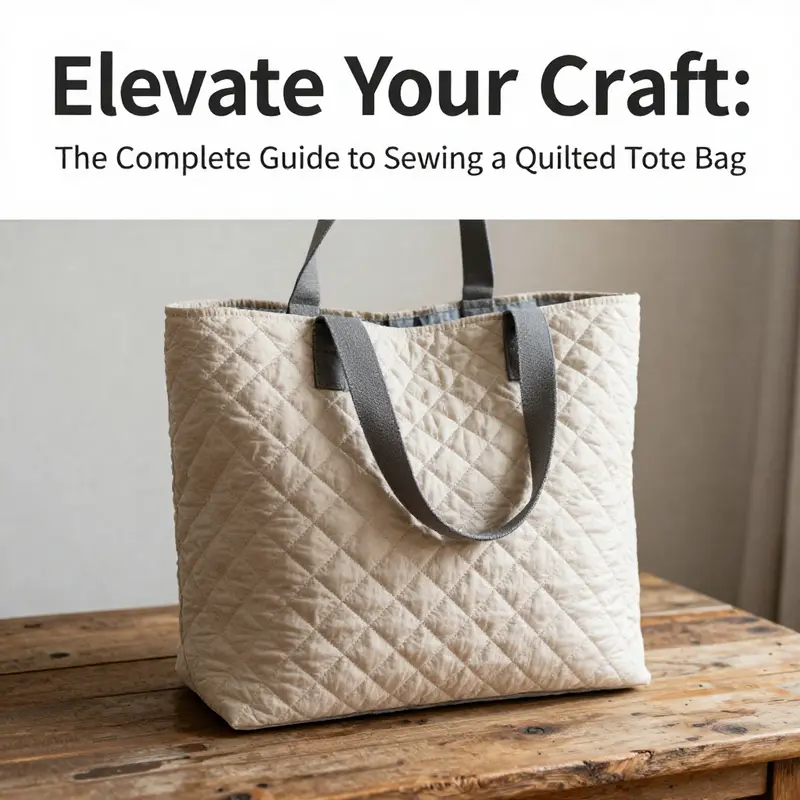
Creating a quilted tote bag provides a unique opportunity for business owners to enhance their brand while offering practical and stylish products. This guide will walk you through the essential materials and tools needed, the step-by-step process to create your quilted masterpiece, and insightful tips on customizing your piece for standout appeal. By the end of this article, you will be equipped with the knowledge to produce a high-quality quilted tote bag to serve your customers or promote your brand effectively.
Gathering the Groundwork: Essential Materials and Tools for Sewing a Quilted Tote Bag
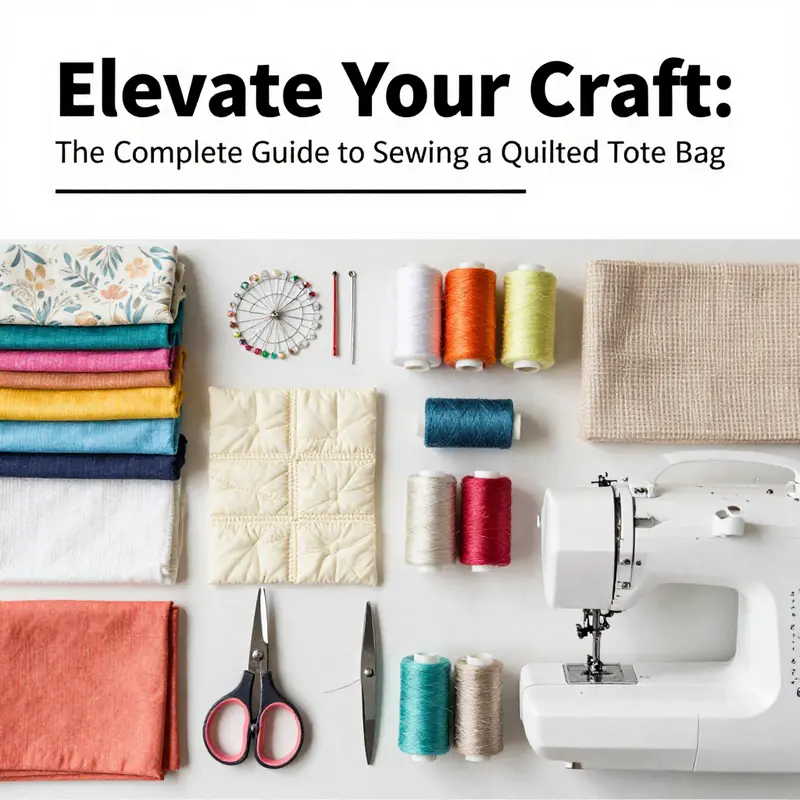
Every successful quilted tote bag starts long before the stitching begins. It begins with a careful gathering of materials and a thoughtfully chosen set of tools. When you select the right fabrics, padding, and hardware, you build a foundation that supports durable construction, clean finishing, and a look that feels purposeful from the first cut to the final topstitch. The goal is not merely to assemble parts but to align them so they work together as a single, cohesive structural system. In this phase, you are laying groundwork that will influence how the bag behaves when you carry books, a laptop, groceries, or a weekend’s worth of supplies. The choices you make here will echo through every subsequent step, influencing why you choose to quilt a particular pattern, how you manage bulk through seams, and the way the bag wears over time. A well-chosen kit of materials and tools can turn a modest project into a finished piece that looks polished and performs reliably day after day.
Begin with outer fabric. The drumbeat of durability and structure starts here, and the fabric you pick sets both the tone and the weight of the finished bag. Sturdy cotton canvas or denim are the classic choices for the exterior because they resist wear and retain shape even after repeated use. These fabrics have a natural stiffness that helps the tote retain its form when loaded with items. A medium-to-heavy weave provides a good balance between hand-feel and resilience. Lighter textiles tempt you with a softer drape, but they can sag and wear more quickly under the same load. If you enjoy a touch of color or a pattern, think about the way the exterior complementing the lining will align when both are layered with batting in between. For the lining, quilting cotton is a popular partner; it gives a smooth interior surface that slides easily against the padding and the exterior while still offering a chance for a pop of color or a coordinating print that makes the bag feel intentional rather than merely practical.
Next comes the padding—the quilted heart of the construction. The sandwich of exterior fabric, batting, and lining relies on layering to hold its shape and provide that cushioned, structured feel. A batting choice of 100% cotton is a classic option because it quilts evenly, breaks in softly with use, and maintains a flush, flat surface when pressed. Fusible interfacing can also be used to add stiffness without adding bulk; it adheres to the fabric and helps lock the quilted layer into place. The decision between batting and interfacing depends on how much structure you want and how much bulk you’re willing to manage in the seams. If you opt for batting, you can quilt through all three layers—the exterior, the batting, and the lining—creating a robust, evenly cushioned panel for front and back.
A practical, often overlooked detail is seam reinforcement. When you’re sewing a tote meant for daily use, seams need a little extra love to resist strain around the edges and at the corners. Binding tape or seam tape can reinforce seams and prevent unraveling, especially at the side and bottom seams where stress concentrates during shoulder carry or when the bag is pressed against a chair arm or a table edge. It’s a simple addition that pays off with longevity and cleaner edges after repeated washings or heavy use. The same principle applies to edges where the three-layer sandwich meets the final seam; a light taping can reduce bulk and give you crisper corners when you turn the bag right side out.
Thread, the quiet workhorse of any sewing project, deserves thoughtful selection. High-quality polyester or cotton thread that matches your fabrics helps the stitches disappear into the depth of the work or stand out as a deliberate design choice. The thread weight and fiber matter when you’re quilting through three layers and then topstitching around the perimeter. A balanced thread that tucks neatly into the fabric without binding or snagging will make the stitching look even and professional. If you plan to add decorative topstitching or quilting patterns, ensure the thread you choose respects the tension of your machine and the bulk of the layers. The goal is durable, even stitches that resist snagging and maintain a neat surface finish.
Handles are more than a functional component; they control how the bag sits on your shoulder and how it balances with your chosen content. For many sewists, handles are cut from sturdy fabric—either the same material as the exterior or a coordinating lining weight—so they wear in a similar way to the exterior and continue the bag’s overall durability. Alternatively, pre-made webbing straps can offer strength and a modern look with less bulk than fabric straps. The length of the handles is another crucial detail. If they’re too short, the bag won’t sit comfortably under the arm; too long, and it can swing awkwardly or drag on the ground. A common rule is to aim for a drop between 8 and 10 inches, but this depends on your torso height and how you intend to carry the bag. Whichever option you choose, ensure the handles are securely attached with reinforced stitching. A box stitch or a cross pattern where the handle meets the bag helps distribute weight evenly and reduces the risk of tearing.
In addition to the core materials, consider the small but significant details that contribute to a lasting finish. The project outline suggests a set of useful tools that enable precise cutting, accurate alignment, and clean finishing. A sewing machine is indispensable for consistency and strength. It handles long seams with minimal effort and delivers even topstitching, both of which are essential when you’re quilting through multiple layers. Sharp fabric scissors are the workhorse for cutting patterns and trimming threads, while a rotary cutter paired with a cutting mat can streamline the process of shaping both the exterior and lining pieces with clean, square edges. Pins or clips help keep layers aligned as you sew; they prevent shift and bulk that can throw off a precise seam alignment. An iron and ironing board are not mere finishing touches but critical to achieving a crisp, professional look. Pressing seams toward the lining after quilting reduces bulk and helps the bag keep its shape as you work. If you plan to add interior pockets, keep a small embroidery hoop handy for any decorative or personalized embroidery you might want to apply to the lining or exterior; and if you intend to do hand embroidery, embroidery needles with sharp points and large eyes are essential to thread smoothly through the fabric without fraying.
An often-overlook set of tools is the marking and guide kit. A water-soluble marker or chalk pencil lets you lay out pattern lines, quilting grids, or pocket placements with confidence and then wash away or brush off easily when you’re done. A good marker ensures you can design symmetrical grids or interesting stitch patterns without committing to a line you’ll regret later. When it comes to quilting, you’ll encounter two broad paths: grid quilting, where you stitch horizontal and vertical lines to create a dependable, measured surface; or free-motion quilting, which opens up avenues for more artistic designs once you’re comfortable with controlling the machine and you’ve added a walking foot to help feed all three layers evenly through the needle. If you’re aiming for precise lines that stay put, stitch-in-the-ditch can be a reliable method when you’re using a patchwork design or a more structured exterior. Either way, the aim is to keep the layers evenly pressed and the stitch lines clean and consistent.
The kit for the tote bag also invites some thoughtful preparation for finishes. The top edge needs finishing that matches the bag’s intended use; if you anticipate heavy daily use, you might decide to add a zipper, a magnetic snap, or a button closure to secure the opening. The materials list includes the option to reinforce the top with such closures as part of the broader design conversation. The choice of closure affects the hardware you select—zippers require specific zipper tape and slider, while magnetic snaps demand a stable placement and a stronger lining to prevent sagging. For those who want flexibility, a simple top opening with reinforced edges can be both practical and stylish, leaving room for future modifications as you refine your technique.
The instructional path you follow to assemble the tote depends on your confidence with layering and stitching. A practical approach begins by laying out the exterior fabric, placing the batting on top, and finally the lining with the right sides facing in. This sandwich becomes the canvas for your chosen quilting pattern. As you stitch, keep an eye on alignment around the edges, as an uneven edge can lead to difficulty when you trim the pieces later. It helps to verify that all three layers fit within the intended final dimensions before trimming. The goal is a smooth, flat surface with even thickness that reads as a single piece rather than a stacked pile of fabrics. When you finish quilting, trim the edges to align with the intended outer dimensions, then cut out two identical quilted panels for the bag front and back.
Optional pockets, if you choose to include them, are typically placed onto the lining before assembling the main bag body. This avoids fiddling with pocket attachments after the bag is already sewn and turned. Pockets become convenient places to stash keys or phones and can be a way to introduce a third color or print for a touch of personality without sacrificing practicality. As you sew the sides and bottom of the main body, keep the seam allowances at a consistent 1/2 inch, which is a standard for many tote patterns. This even seam width makes topstitching stronger and helps the bag keep its rectangular shape as it ages. When you turn the bag right side out, use a blunt tool to push out corners and edges and then give the entire piece a gentle press to set the shape. The topstitching around the perimeter, roughly a quarter inch from the edge, adds both strength and a finished look. It also helps seal the exterior and lining layers into a stable form that resists fraying along the exposed edges.
With the quilted body complete, you’ll attach the handles. The process is straightforward but deserves attention to placement and reinforcement. Position the handles about 3 to 4 inches from the top edge so they don’t obstruct the opening when you load the bag. Securely sew them with a box stitch or a double-stitch method to distribute the load across a wider area and reduce the risk of tears at the attachment points. It’s wise to test the strength by gently pulling on the handles before finalizing stitching; this gives you early feedback on whether any reinforcement is needed. Finally, inspect the bag as a whole. Run your fingers over the surface to feel for consistent thickness and to catch any thin spots or loose threads that could worsen with use. Final topstitching around the bag’s outer perimeter adds the last visual cue of craftsmanship and helps resist abrasion in everyday wear.
The materials and tools you gather are not merely a shopping list; they are an investment in the bag’s longevity and your own satisfaction. The choices you make here—fabrics with weight, the right batting for cushion and structure, sturdy handles, and the small hardware decisions—will echo through the bag’s daily life. The process invites you to consider not just how the bag will look but how it will endure. In practice, many makers find that investing a little time in choosing the correct outer fabric and the proper batting thickness saves hours of frustration later, especially when you’re trying to quilt through multiple layers without causing bulk that slows or distorts your seams. The balance of fabric, batting, and lining is delicate and personal, but the reward is a tote that stays true to its shape, travels well, and reflects your own style.
As you move from the materials list into actual construction, you’ll likely refine how you set up your workspace, how you mark your lines, and how you test the stitching density. Some quilters prefer grid quilting for its predictable results; others enjoy the freedom of free-motion quilting for a more expressive surface. If you plan to embroider decorative touches, an embroidery hoop may become part of your kit, and the listed embroidery needles will help you manage the thread tension and fabric thickness. If you’d like to explore different closure options, you can consider the tension and alignment required by a zipper or magnetic snap—both of which demand careful planning for lining structure and top edge stability. Either way, you’re shaping not just a bag but your own approach to sewing with confidence and care.
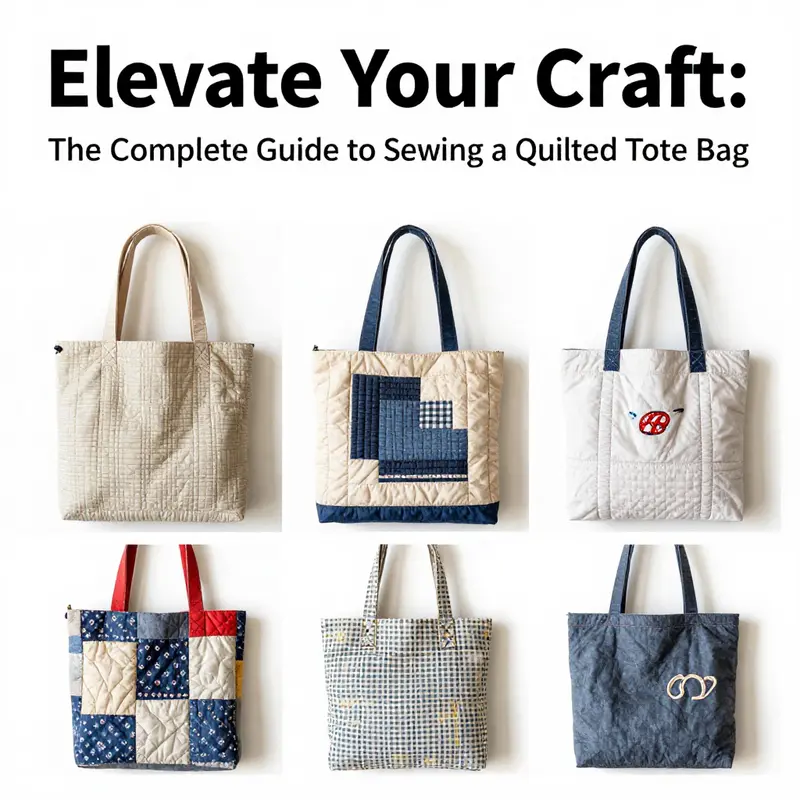
In terms of practical sourcing, you’ll find value in considering how the materials’ textures and colors interact. A cohesive palette—where the exterior fabric’s weight and color complement the lining’s print or solid tone—helps the bag feel intentional rather than accidental. The same is true for the quilting pattern you choose. A simple grid can emphasize the fabric’s texture, while a more intricate pattern can transform the piece into a statement accessory. The guidance you follow here aligns with broader craft wisdom that encourages durability, thoughtful design, and adaptability. For a practical blueprint that matches the level of detail in this chapter, many makers consult step-by-step tutorials that demonstrate how to work through the entire process—from cutting and layering to quilting and finishing. The Spruce Crafts workshop-style guide provides visual templates and technique notes that resonate with the approach described here, helping you see how a quilted surface can be both structured and expressive. To explore a detailed visual reference, you can consult their quilted tote pattern and adapt it to your preferred dimensions and fabrics. This alignment of principles keeps your project grounded in tested methods while inviting your own creative voice to come through in color choices, stitching patterns, and handle style.
For readers who want to connect the process to broader bag-making ideas, there is value in considering how these materials and tools translate across different tote designs. The same fundamentals apply whether you’re crafting a laptop-ready carrier, a canvas shopper, or a tote with a refined, dedicated interior organization. The core concept remains: a quilted tote bag is a composite of thoughtful material selection, careful layering, and sturdy stitching—each part reinforcing the others to create a durable and stylish everyday companion. If you’re curious about how this approach maps onto other designs, a quick look at related tote patterns online can illuminate how fabric weight, batting thickness, and hardware choices shift the finished feel of a bag while preserving the same core technique. The result is a versatile skill set you can translate across a range of sewing projects, from simple drawstring totes to more structured, zipper-top carryalls.
To keep this guidance grounded in practical steps, consider the following concise reminder: start with the materials that will carry the bag’s load without compromising shape; choose a lining that slides easily against the batting; select a quilting approach that matches your fabric and pocket plan; reinforce the seams and edges; and finish with topstitching that seals the work and adds a touch of polish. If you encounter a moment when you need a quick reference for a closure option or a specific technique, remember that multiple reputable sources offer visual guides to double-stitching seams and edge finishing—techniques that frequently appear in advanced projects and can elevate a straightforward tote into a long-lasting, heirloom-like piece. As you gain confidence with the process, you’ll feel how the combination of sturdy materials and precise technique transforms a simple grid of fabric into a practical and personal object that accompanies you through daily life.
For readers who want to see a concrete, hands-on demonstration of the approach described here, a detailed, visual tutorial is available through a trusted craft resource. It walks you through the exact steps—from cutting and layering to quilting and final assembly—so you can compare your own progress with a complete, tested pattern. This kind of resource is especially helpful if you’re new to quilting through three layers or if you’d like to experiment with a range of quilting motifs on a single tote design. The method recommendations reflect current best practices and expert advice, including how to ensure a consistent thickness across the bag and how to check for bulk that could affect turning and topstitching. The resulting tote will be sturdy, well-proportioned, and ready to accompany you on daily errands or weekend getaways.
If you’re looking to deepen your understanding of the interplay between materials, texture, and utility, consider a test run with a small scrap project using your chosen outer fabric, lining, and batting. Build a mini quilted panel, then attach it to a simple pocket or a scrap tote-style bag. This exercise will illuminate how thickness, stitch density, and fabric behavior change with your chosen thread and needle. It’s a practical way to build confidence before committing to a full-size tote. In the end, what you learn from gathering the right materials and tools will pay off in every seam you sew, every edge you finish, and every time you slip the tote over your shoulder and step out the door.
Internal resource: tote bags with zippers offers a related approach that can be adapted if you decide to add a top closure for extra security and sleekness. While the focus here is on a robust, quilted structure, the underlying principles of material selection and careful finishing remain the same, and the ability to test variations can expand your repertoire for future projects.
External resource: For a detailed visual reference and templates that complement the techniques described, see https://www.thesprucecrafts.com/quilted-tote-bag-pattern-4135258. This guide provides clear illustrations that align with the broader practices outlined in this chapter and can help you picture how to translate the written steps into coordinated, real-world results.
Stitch by Stitch: Crafting a Quilted Tote That Carries Your Everyday World
Every tote bag carries a story as much as it carries items. A quilted tote, carefully stitched and thoughtfully layered, tells a story of practicality meeting craft. It is not merely a container but a portable surface for your days—a sturdy companion that blends texture, color, and purpose. The beauty of this project lies in its balance: a padded exterior that holds its shape, a lining that keeps things neat, and stitching that binds all layers into a single, dependable piece. When you approach the task with a clear plan and patient hands, the bag emerges with a quiet confidence that mass-produced bags rarely possess. You’ll find that the process rewards deliberate steps and a respect for both form and function. The method begins with the materials you choose, because the fabrics you pair, the batting you sandwiched in between, and the thread you select are the first stitches in the bag’s personality. You want fabrics that will wear well and look good as you crisscross the day: sturdy cotton canvas for the exterior, a fabric that can take weight and resist wear; denim for a touch of rugged charm; or quilting cotton if you want vivid color and a playful print. The lining should be a compatible fabric that feels smooth to the touch and cleans easily. A batting or fleece of the right loft anchors the tote’s structure, giving it body without adding bulk that would make it hard to carry. A few basic tools—scissors or a rotary cutter, pins or clips, a ruler, an iron and ironing board, and a sewing machine or a patient hand-sewing setup—round out the essential kit. And then there are the little decisions that turn a good tote into a personal keepsake: whether to expose a bold contrast in stitching, how to position a patch, or whether to include a row of pockets to keep your items organized. Each choice nudges the bag toward a specific character while preserving its everyday practicality. Proximity to the fabric’s grain and careful cutting are more important than they might seem. Cutting two identical exterior panels, each around the size of your preferred tote, is the first practical challenge. A common dimension—say roughly 32 centimeters by 70 centimeters for each exterior piece—offers a balanced silhouette that won’t overwhelm a petite frame yet provides ample space for daily goods. The lining follows the same dimensions, so the two fabrics can lie against the batting in a neat three-layer sandwich. The batting itself needs to be slightly larger than the fabric pieces to prevent shifting at the edges during quilting. It’s this simple sandwich that will become your bag’s backbone, its inner memory, giving the tote a consistent feel and shape after every use. The process begins with a careful layout: outer fabric face up, batting laid on top, lining fabric face down. This arrangement feels counterintuitive at first, but once you sew through all three layers, the exterior will read with crisp edges and a smooth surface. Securing the layers with pins or clips is not just a matter of keeping things tidy; it’s a guard against shifting that would otherwise create lumpy quilting and uneven seams. The quilting itself is the moment of magic. A straight stitch through all three layers locks the pieces together and preserves the sandwich’s integrity. You can embrace a grid pattern—horizontal and vertical lines every couple of inches—to create a crisp, modern look. Or you can let your hand roam with free-motion quilting, letting stitches wander into soft curves or geometric motifs that echo your personal taste. If you choose to quilt with a decorative motif, keep the density moderate; too dense can create stiffness that makes the tote less forgiving to carry, especially when loaded with groceries or books. A useful tip is to press the seam allowances toward the lining after quilting. This small action reduces bulk around the edges and helps the bag keep a neat, square profile. When the quilting completes, trim the edges so you have clean, straight boundaries. You’ll then cut two identical rectangles from the quilted sandwich to serve as the final front and back panels. This trimming is not merely cosmetic; it ensures the bag’s sides align properly and that the top edges lie parallel to each other, which makes later steps more reliable. Pockets can be a delightful addition. Interior pockets, in particular, are a practical touch for keeping keys, phone, or lipstick within easy reach. If you decide to sew pockets, it’s often tidier to cut them from a contrasting fabric and attach them to the lining before you assemble the bag body. You can fold the top edge of a pocket by 1–2 centimeters and press it flat for a clean hem. Position pockets where you want them—perhaps near the bottom for larger items or centered for quick access—and stitch around three sides to keep the top edge open for insertion. The pocket’s presence can transform a tote from a simple open sack into a well-organized everyday tool. With the quilted panels prepared and pockets in place (if you’re adding them), you’re ready to assemble the bag body. Place the two quilted panels right sides together and pin along the sides and bottom with care. A common seam allowance is 1/2 inch (about 1.25 centimeters), but adjust to your preference if you prefer a sleeker or more substantial edge. Sew the pinned edges, backstitching at the start and end to secure the seam. Leave one side open to turn the bag right side out. This turning hole is a small gap that makes the difference between a flat rectangle and a fully formed tote with a real opening. It also becomes a turning point for learning. When you’re ready, turn the bag inside out through the hole, then push the corners out to achieve sharp points that give the bag its structured finish. A blunt tool helps here—a chopstick or the end of a dull pencil works well without tearing or stretching the fabric. After turning, press gently along the seams to set the shape. The topstitching that follows not only reinforces the edges but also adds a refined look. A line of stitching about a quarter of an inch from the edge capably anchors the layers and prevents any shifting with use. Topstitching also defines the bag’s silhouette and helps the edge resist wear, especially at the top where hands reach in and out. Next comes the handles. Cut two sturdy strips from the same fabric as the exterior or a coordinating material. Fold each in half lengthwise with wrong sides together, press, and sew along the long edge to close. Turn right side out and press again. Position the handles inside the bag so their ends lie about 1–2 inches from the top edge and are evenly spaced. Secure with a robust stitch pattern—box stitches or double stitches provide the strength needed when the bag carries heavier items. If you want extra durability, you can reinforce the handles by backstitching or whipstitching the ends to the interior seam line. A gentle test—pulling lightly on each handle—will tell you whether the attachment points are solid. The next consideration is how you finish the opening. A zipper, magnetic snap, or button closure can add security and polish, especially if you plan to carry loose items. The closing mechanism can influence both the bag’s aesthetic and its practicality. If you leave the top open, your tote remains airy and quick to access, perfect for books or groceries. If you add a closure, ensure the top edge remains flat and the hardware does not pull the fabric away from the seam. The final fine-tuning is about durability and appearance. Run your fingers across the surface to feel for thickness consistency; a uniform thickness is the mark of a well-stitched quilted panel. The size and proportion of the bag should feel balanced on your body, neither overpowering a petite frame nor seeming undersized for the things you intend to carry. Color and pattern choices contribute as much to the final impression as the construction itself. A bold exterior can be softened by a neutral lining, or vice versa, to create a controlled contrast that draws the eye without shouting. You may also consider a small label or patch on the lining to mark your creation and add a final personal touch. As you complete the bag, the sense of achievement grows with each careful seam, each secure attachment, and every clean edge. The bag’s body now stands as a practical sculpture crafted from fabric and intention. If you want to explore variations on the theme, you can experiment with different pocket configurations, such as adding a zippered interior pocket for valuables or placing a shallow exterior pocket for quick access to a phone or keys. The quilted texture can also influence how you accessorize. A contrasting thread color can highlight grid lines or decorative motifs, while a single bold panel can serve as a focal point on the front or back. The tote becomes both a functional object and a small work of wearable art, tailored to your daily rituals. For readers who want a deeper visual guide or templates, there is a broader tutorial that demonstrates the quilted tote bag pattern with step-by-step imagery and diagrams; this external resource provides a comprehensive walkthrough if you want to see the technique translated into pictures and measurements. See the external reference here: https://www.thesprucecrafts.com/quilted-tote-bag-pattern-4135258. In addition, to illustrate how the quilting and construction choices can adapt to different uses, consider an interior-pocket-focused approach such as a tote-bag-with-computer-sleeve design; the linked idea can inspire how to distribute pockets and secure items inside a bag built around a quilted foundation. You can explore that concept here: tote bag with computer sleeve. This combination of methods—careful layering, thoughtful quilting, and mindful finishing—results in a tote that feels solid in the hand and stylish on the body. The project rewards patience, but even a longer evening session yields a bag that is ready for daily use the moment you finish stitching. When you hold the finished tote, you notice the balance of weight and form, the way the quilting holds the bag in a stable shape even when it’s lightly loaded, and the pride that comes with wearing something you made yourself. The quilted tote is more than a pattern applied to fabric; it is a workspace turned into a portable companion that can adapt to groceries, books, or a laptop, depending on your needs. The craft is approachable to beginners and satisfying for experienced sewists who crave a practical project that still lets their personality surface through fabric choices and quilting designs. If you want to push the design further, you can experiment with different topstitching angles, alter the pocket sizes, or add feet to the bottom for extra stability when the tote is set down. The possibilities extend as you gain confidence, and the process itself becomes a form of mindful routine. The quiet repetition of sewing through layers becomes a meditative rhythm, and the moment you trim the final thread and snap the last button, you’re left with a durable, stylish tote that carries your world with reliability and grace.
Stitching Your Signature: Customizing a Quilted Tote Bag with Style and Structure
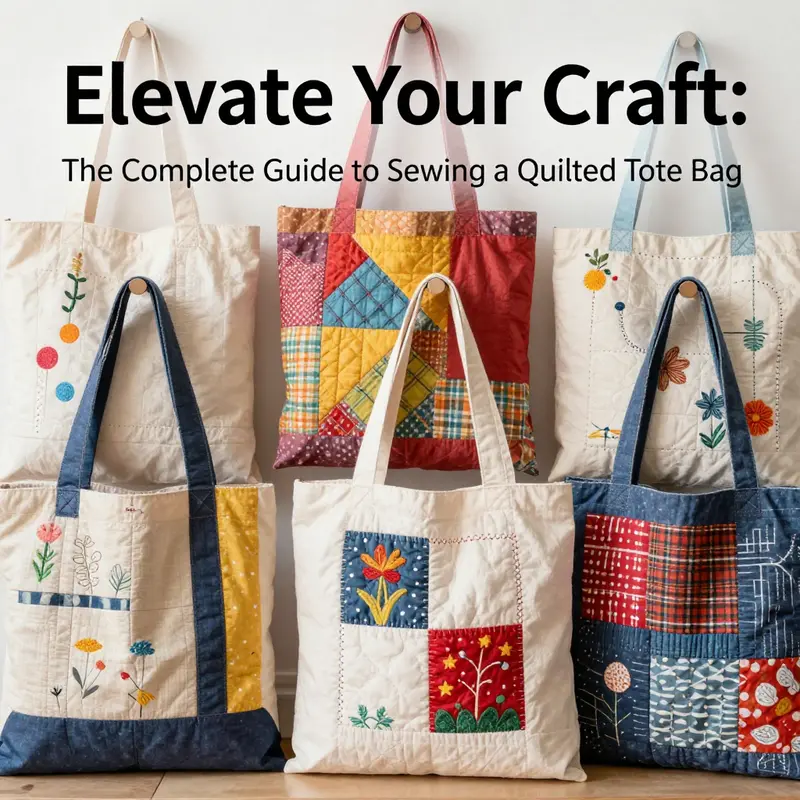
Choosing to customize a quilted tote bag is more than picking colors or adding a decorative motif. It is a deliberate conversation between technique, texture, and purpose. The weave of fabric, the bite of the stitch, the weight of the handles, and even the way you place a pocket all speak to how the bag will be used and who will carry it. This chapter explores how to translate a simple quilted tote into a personal accessory that blends artistry with everyday practicality. It starts from the idea that style and function are not rivals but partners, each enhancing the other as you shape the bag to fit your wardrobe, your events, and your routines. Whether you are stitching for yourself or giving a handmade gift, the path to customization begins with a clear sense of intent. You might be drawn to the bold energy of patchwork, the quiet storytelling of appliqué, or a refined, minimalist silhouette that relies on color and texture rather than embellishment. Each route has its logic, its own discipline, and its own rewards. The key is to align your chosen technique with the bag’s intended life. A sturdy daily tote benefits from structure and durability, while a playful weekend bag invites experimentation with pattern and contrast. The journey from fabric selection to final finish is a careful choreography of decisions, each shaping how the tote looks, feels, and wears over time. In practical terms, customization starts with style choices that match your skill level and your goals. Patchwork quilting, for example, invites you to use fabric scraps intentionally. It is ideal for beginners who enjoy color-mixing and improvisation. A grid or random patchwork can yield a vibrant, one-of-a-kind surface that celebrates sustainability and creativity. The process rewards patience and planning: you’ll lay out a palette, cut pieces with precision, and sew through multiple layers to create a durable, cohesive front and back. The visual impact comes from how the patches relate to each other across the bag’s face. You might choose a color story that mirrors a season or a mood. A calm palette—creams, taupes, and soft blues—pairs with a professional wardrobe, making the tote a reliable workhorse. A brighter set of fabrics—citrus yellows, moss greens, pinks—signals a playful spirit suited to market days or casual weekends. Patchwork also offers the joy of storytelling, especially when you employ reclaimed fabrics from meaningful garments or textile remnants that carry memories. The surprise in patchwork is not only color harmony but the texture that emerges when different fabrics meet. You watch seams become lines of rhythm, each seam a deliberate pause in a larger design. In contrast, appliqué provides a different route to personalization. It allows you to introduce imagery, symbols, or scenes onto the surface of the tote. Flowers, animals, weather motifs, or whimsical characters can tell a narrative that resonates with the bag’s owner or its recipient. The technique can be machine-assisted or hand-sewn, depending on your comfort level. Appliqué requires careful planning: you draft the placement, stabilize the base fabric to prevent distortion, and then secure the applique pieces with a tight, even stitch. The edge finishing matters as much as the placement. A raw edge may fray over time, so consider finishing edges with a satin stitch, a narrow zigzag, or a fused edge to preserve longevity. The choice between patchwork and appliqué, or a combination of both, is a creative decision that also reflects your time, patience, and aspiration for the final piece. As you decide, it helps to think about color and pattern coordination in practical terms. Seasonal harmony is not about following every trend but about ensuring the tote complements your wardrobe. Neutral basics—black, navy, gray, or cream—offer timeless versatility, letting accessories and footwear take the spotlight. If you want a fresh look, even small pops of color can refresh old outfits. A single accent hue, repeated across a zipper pull, a stitched motif, or a subtle patch, can unite disparate fabrics into a coherent whole. Theme integration offers another path. If you are crafting a gift for a themed event or a child’s party, let the motif guide the rest of the bag’s design. A turtle pattern or a set of botanical appliqués can be echoed in a coordinating lining color or in decorative stitching that frames the design. The goal is a balanced composition where the motif feels intentional, not pasted on. Beyond aesthetics, the chapter on customization must respect the bag’s structure and how it carries weight. Adding interfacing helps the bag hold its shape, especially when using lighter fabrics. This is not mere ornamentation; it preserves the tote’s silhouette as you fill it with books, groceries, or a makeup kit. The bag’s size matters, too. Proportion is critical for comfort and style. A mini tote under ten inches is elegant for evening wear, a medium tote around ten to fourteen inches suits daily errands, and a larger tote over fourteen inches is practical for work or weekend trips. When you try on a new design, hold the tote at hip level or near the body where you expect to carry it. If the bag sits too high, it may ride up into your arm; if it sits too low, it can brush the hip bones and feel bulky. The right proportion is one that feels balanced against your frame. When the construction begins, consider how you will finish the top opening. A zipper or magnetic closure offers security, particularly when the bag will be carried in crowded places. A button or simple snap can provide a clean line if you prefer a minimalist look. The decision carries through to the interior: if you add pockets, you create organization, but you also add weight and bulk. Interior pockets are a practical feature that can stay hidden from view until you open the bag, yet they should be placed with purpose. Some people place a pocket toward the lining’s bottom for easy access to a phone or keys, while others position a larger pocket higher to keep loose papers or a small notebook organized. The quilting process itself informs subsequent steps. Grid quilting or a decorative motif through all layers produces a uniform thickness that reinforces durability. After quilting, you trim the edges, and you may press the seam allowances toward the lining. This small step reduces bulk and keeps the exterior surface smooth. The next stage—cutting out the bag shape from the quilted sandwich—demands accuracy. Two identical rectangles form the front and back, and their edges must align perfectly for neat side seams. Once the bag bodies are assembled, turning them right side out reveals the exterior fabric with the newly quilted texture. A careful press helps set the finish, but avoid stretching or distorting the shape. Topstitching around the perimeter is more than cosmetic. It anchors the seams, adds a crisp edge, and helps the bag resist wear. The recommended distance from the edge is about a quarter inch, a proportion that keeps the stitching visible without overpowering the design. Attaching the handles is a pivotal moment. Use sturdy fabric for the straps, fold them lengthwise, and press to a clean crease before stitching. Place the handles about three to four inches from the top opening, and secure them with a box or double stitch so they bear weight without loosening. Before you finalize, test the handles by gently pulling to feel their strength. This small test can prevent disappointment during daily use. If you choose to line the bag, you can add a pocket or two to the lining for additional organization. The order of assembly matters here: the lining goes inside, right sides together with the exterior, and you sew around the top edge, leaving a turning gap. Then you turn the bag right side out, press, and slip-stitch the turning gap closed. Finishing touches like contrasting topstitching, decorative trims, or a carefully placed patch can elevate the bag from handmade to personal treasure. The line between ornament and utility should always point toward durability. Precision matters: accurate cutting, straight seams, and clean edge finishes are essential to the bag’s strength and longevity. The durability of appliqué, for example, depends on reinforced edges or stitched-on shapes that won’t peel away after repeated use. If you plan to gift the bag, you might tailor it to the recipient’s purposes—office days, gym sessions, or weekend picnics—by selecting a size, motif, and closure that fit their routine. It helps to sketch a simple plan before you cut. A small diagram can map where pockets will go, where the motif should be placed, and how handles will align with the bag’s body. A practical tip is to think of color in terms of wardrobe coordination. If your recipient often wears neutrals, add a color punch in a single patch or a bright zipper pull. If their wardrobe leans toward bold hues, balance the energy with a neutral backing or a subtler lining. The careful choice of color and pattern also transmits mood: the bag can feel calm and refined or lively and adventurous, depending on the palette and the placement of appliqué shapes or patchwork blocks. When you are ready to finalize, review each seam for stray threads, check that the stuffing between layers lies evenly, and feel for thickness disparities that could create bulk at the edges. A well-made quilted tote should not feel lumpy in any area where two fabrics meet. A smooth surface is a sign of control in both cutting and stitching. If your design includes a zipper, consider reinforcing the zipper area during construction to prevent warping. Zippers may be challenging for beginners, but a clean finish comes with patience and careful alignment of the top edge. The result is a secure, tidy opening that still showcases the bag’s exterior quilting. If you prefer a more open aesthetic but with a hint of security, a magnetic snap can be an elegant compromise. The snap should be anchored into a reinforced seam or small interfacing patch to prevent pull-out under strain. A button closure, when used, benefits from a small loop or a fabric tab that avoids bulk at the top edge. These decisions affect not only the bag’s function but its visual line. The final piece should feel cohesive, as if the choice of patchwork blocks, appliqué motifs, and closure hardware all grew from a single concept rather than assembled ad hoc. This coherence is what makes a handmade tote genuinely stylish. For readers who crave guidance on specific finishing details, there is a straightforward path to exploring closure options without sacrificing the bag’s clean lines. See the guide on tote bags with zippers for a concise reference to how designers balance security with simplicity, and how the zipper line can be integrated into the quilted surface so it remains an integral part of the design rather than an afterthought. tote-bags-with-zippers In practice, you can alternate between quiet lines and statement statements, letting the bag’s outer quilt act as both a texture and a frame for the elements you add. If you are working with limited time, you can simplify the approach by choosing a single feature—perhaps a bold appliqué motif—and letting it dictate the rest of the design. Conversely, if you have more time and resources, you can layer multiple features—patchwork blocks, appliqué shapes, and a strategic color narrative—to create a tote that unfolds as a story each time you carry it. The beauty of customization lies in the fact that the story remains flexible. You can adjust the size, the weights of the fabrics, or the prominence of the motif to suit future needs. The same tote can be transformed with new hardware, trimmed with a differently colored lining, or given a new interior pocket arrangement to reflect a shift in how you use it. The process remains accessible because the core skills—measuring carefully, aligning edges, and finishing seams—are the same regardless of the embellishments. You are not simply decorating a bag; you are building a reliable companion for daily life. In the end, personalization is about creating a tactile, durable object that fits its owner as precisely as a well-tailored garment would. It is about translating inspiration into a physical form that withstands the wear and tear of everyday use while still feeling fresh and expressive. If the goal is to gift something that speaks to a moment in time, the customization might center on a meaningful palette and a compact, well-thought-out pocket arrangement. If the goal is daily use, the priority shifts toward strength, easy maintenance, and a design that ages gracefully with the wearer. The best quilted tote you can sew is the one that feels inevitable—the result of choices that harmonize so naturally that the bag almost sews itself from your intent. For further inspiration on how to approach this balance between technique and aesthetics, you can consult a detailed visual tutorial that walks through patterns, measurements, and practical demonstrations. And to ensure your chapter remains coherent with broader guidance, consider how these customization choices connect to the broader themes of style, utility, and personal expression that frame the entire article. For visual templates and templates that support your decision-making, the reference below offers a helpful perspective on patterns and layout that align with the principles described here. Finally, if you seek a comprehensive look at the process with step-by-step visuals, a detailed external resource provides additional validation of the methods discussed. The Spruce Crafts tutorial offers an authoritative walkthrough of techniques, ensuring your tote is both sturdy and stylish as you finish your personalized design journey. https://www.thesprucecrafts.com/quilted-tote-bag-pattern-4135258
Final thoughts
Sewing a quilted tote bag not only creates a durable accessory but also serves as a marketing tool and an avenue for personal expression in your business. By mastering the materials, following the structured process, and implementing customization techniques, you can effectively produce tote bags that resonate with your target audience. Embrace the creative process and let your brand shine through your unique, handcrafted products.