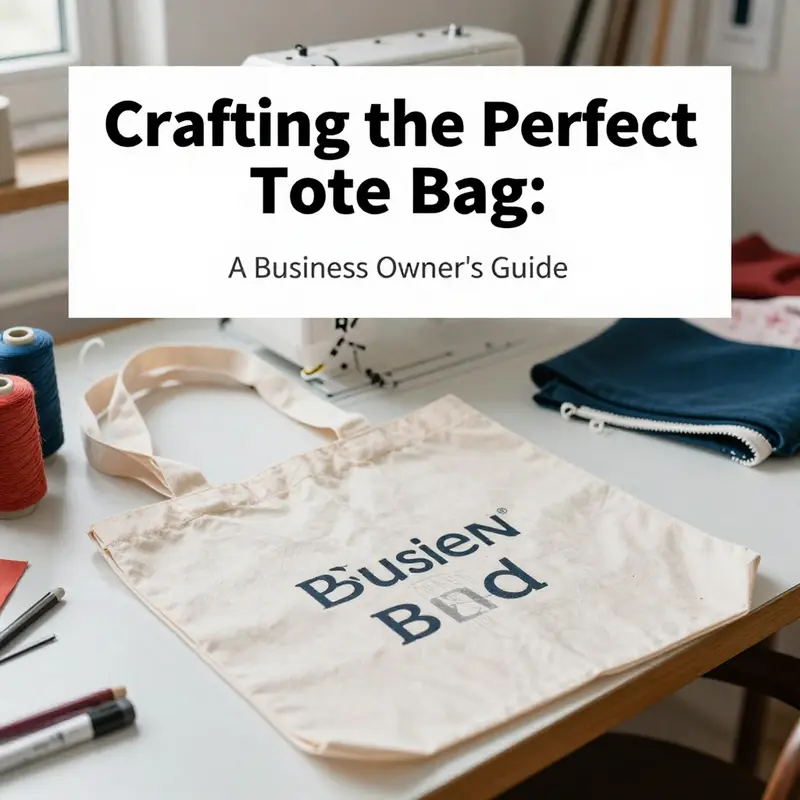
Creating tote bags is not only an engaging crafting project but also a strategic business opportunity. This guide provides business owners with detailed insights into selecting the right materials and tools, a step-by-step construction process, and various customization options to make your tote bags unique and market-ready. Each chapter focuses on a crucial element of tote bag creation, ensuring you have the knowledge to produce high-quality products that reflect your brand’s vision.
Material Matters and Mastery: Crafting a Tote That Carries Life and Lasts
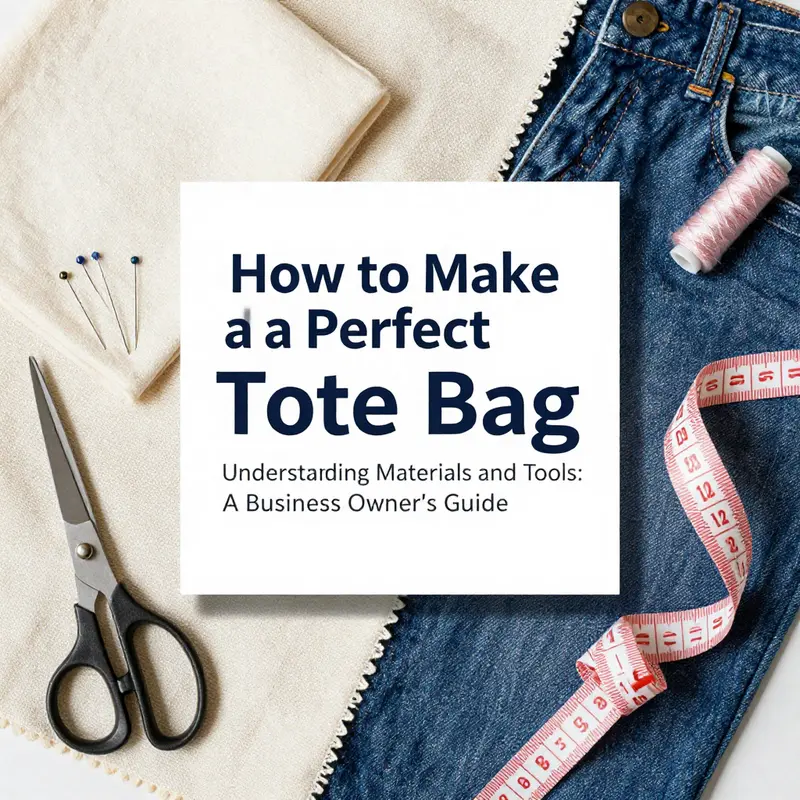
A tote bag is more than a simple container; it is a small structure that travels with you, quietly supporting a day’s rhythm. The true heart of a durable tote lies in the materials you select and the way those materials respond to use. The fabric you choose sets the tone for how the bag looks, how it drapes, and how it withstands daily adventures. Canvas, waxed canvas, cotton duck, recycled PET fabric, recycled ballistic nylon, and even full grain leather each bring a distinct character to the project. Canvas, with its sturdy weave, offers a dependable backbone that wears in rather than out, and when you add wax or a water-repellent finish, that backbone becomes a shield against sudden showers and damp sidewalks. Waxed canvas, in particular, tells a story as it ages. It darkens in places where it’s touched, develops a dry, suede-like patina in others, and the waxed surface gains a subtle resistance to moisture that feels almost tactile in your hand. Cotton duck gives you a robust, holdable body that remains forgiving to work with, while still delivering a clean, linear silhouette. If environmental considerations top your list, recycled PET fabric provides a resilient surface that resists stains and moisture and carries a lighter ecological footprint. Recycled ballistic nylon, although originally engineered for rugged use, offers extreme abrasion resistance in a lighter weight form—an appealing option when you want strength without excess bulk. For those seeking a touch of refinement and a sense of history, full grain leather offers natural durability, a degree of water resistance, and a patina that evolves with every outing. The choice is never just about durability; it is about the story you want the bag to tell as it travels beside you.
The first step in turning a good fabric into a great tote is tactile. Always run your fingers over the material to assess its weight, weave, and drape. If a fabric feels thin, loosely woven, overly smooth, or plasticky, it’s likely to wear thin after repeated loads or exposure to sun and moisture. This material inspection is not merely a preflight check; it’s a relationship with the bag you are about to sew. You are choosing a partner for your daily routine, and longevity should be a central criterion. Once you confirm the material’s bulk and hand, you begin to pair it with the tools that will coax it into shape. A sharp pair of scissors or a rotary cutter ensures clean edges, and a reliable sewing machine accelerates progress while maintaining uniform stitch quality. Pins or clips keep layers aligned, and a stable ironing setup helps the seams lie flat, creating a crisp, professional look that will endure. A ruler or pattern template anchors your measurements, turning a potentially messy fabric into a predictable canvas for precise stitching. This is where the craft begins to translate into function; a tote becomes a dependable daily companion rather than a decorative afterthought.
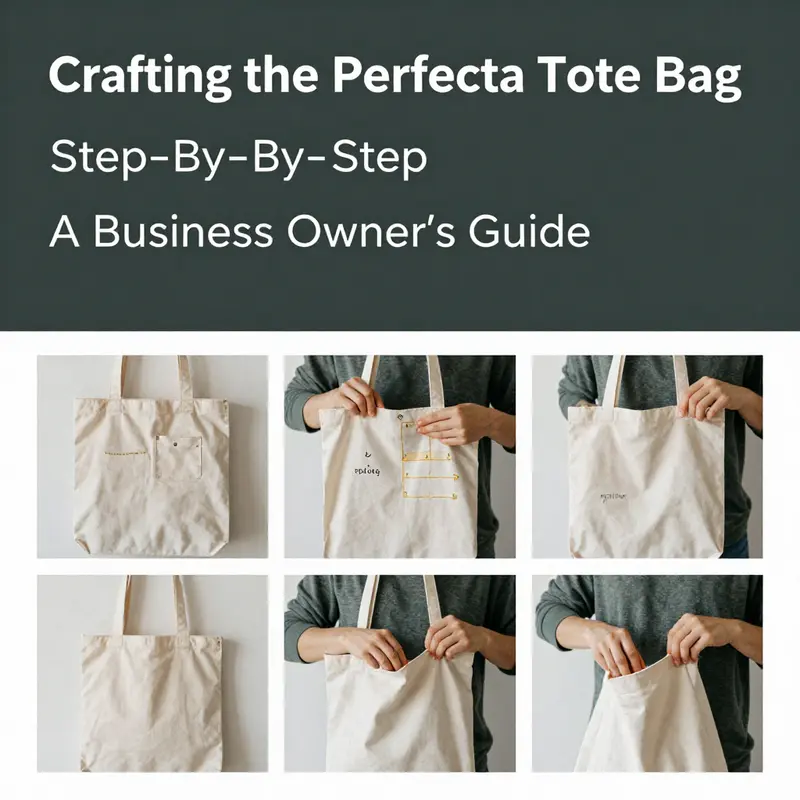
The practical architecture of the tote depends on pockets. Pockets are not mere accessories; they organize your daily essentials and maintain balance within the bag. Outer pockets should be positioned where they are easy to reach yet protected from accidental spills. The hems of the pocket openings deserve attention, too. A double-fold hem—folding the top edge down by a small amount, then folding again—creates a neat, durable edge that won’t unravel with repeated use. Pressing the fold with an iron is essential; it sets the shape and aligns the fabric for secure topstitching. The inner pocket, smaller in scale and tucked inside the lining, benefits from the same principle of clean edges. A simple hem along the short sides, followed by a secure topstitch, ensures that even a pocket used for coins or keys stays in good condition and doesn’t fray after washing or rough handling. Once the pockets are prepared, attach the outer pockets to the main fabric with a careful alignment and a gentle, reinforced stitch along the sides and bottom. The intent is to create a practical, shallow pocket that preserves space for contents without distorting the bag’s silhouette. The inner pocket takes its place on the lining, sewn around three sides to keep it accessible yet unobtrusive when the bag is worn.
Handles form the emotional connection between you and the bag. They must feel substantial yet comfortable, able to carry weight without biting into your hands. Cut two strips of fabric long enough to suit your height and preference, typically around 60 centimeters for a standard tote. Place the pieces together with their right sides facing and sew along the long edges. Turning the handle right side out is a small rite of passage in the sewing process; a turning tool or a safety pin helps you coax the fabric through, after which a firm press sets the shape. Topstitch along the long edges, close to the edge, to secure the seam and create a crisp, durable finish. The handle’s length determines the bag’s silhouette and how you will carry it—over the shoulder or in the crook of your arm. If you anticipate heavier loads, you might opt for a slightly longer handle or a reinforced attachment method to spread the weight across a wider area of fabric.
With the pockets and handles ready, you assemble the main body and the lining. The main body pieces, now carrying pockets, are placed right sides together and sewn along the sides and bottom, leaving a turning gap at the bottom. The lining is prepared in the same way, but with the same turning gap at the bottom. Do not turn the pieces yet; this stage is the scaffolding for a sturdy, integrated bag. Next, the handles are anchored to the main body at the top edge, aligned with the bag’s center to distribute weight evenly. Secure the handles with a robust stitch pattern that travels across the full width of the top edge where attachment points lie. The attachment needs to be resilient because handles bear the living load of every daily excursion.
The critical step of combining the main body and lining is where the bag transforms from a collection of parts into a single object. Place the main body and the lining right sides together, aligning the top and bottom edges with care. Pin or clip around the entire perimeter to keep everything square as you sew. Use a seam allowance of about one centimeter for a neat finish that still allows the layers to breathe and move with use. The turning gaps you left become the portals through which the bag will be turned right side out, revealing the finished exterior and the interior lining in harmonious contrast. The order in which you execute these steps matters. If you rush the alignment on one corner, you can spend extra minutes unpicking later. Taking time to re-check the alignment around the handles and along the bottom seam pays off in a flawless, durable edge.
When you turn the bag right side out, you reveal the beauty of the construction. A blunt tool, such as a chopstick, helps you push out corners and ensure the bag maintains its intended square form. A thorough press along all seams and edges gives the bag a crisp, professional look that holds up to scrutiny and daily wear. The final step—closing the bottom opening—requires a nearly invisible stitch. A blind stitch or ladder stitch preserves the exterior clean line while ensuring the interior seam is securely joined. The moment you finish the seam and give the bag its final press, you sense the culmination of careful planning, accurate cutting, careful stitching, and patient finishing.
As you step back and study the finished tote, you perceive more than its utility; you sense the careful dialogue between material choice and method. The fabric’s weight and texture, the pocket placements, the handle’s roll, and the lining’s orderly interior all converge into a single object designed to carry life—from groceries and notebooks to countless little items that accompany you through the day. A well-made tote is a small craft that refuses to be disposable. Its resilience invites you to reflect on how even a simple object can incorporate deliberate choices to endure. If you ever want to adapt the design for modern tech needs, think about configuring a dedicated sleeve or a padded pocket within the lining to cradle a laptop or tablet. Such variations can be imagined within the same construction principles, allowing your tote to grow with your everyday needs without sacrificing the integrity of the original design. For readers who want to explore variations that lean into tech-friendly carrying, you can explore further ideas in this related reference: tote-bag-with-computer-sleeve.
The journey from material selection to a finished tote is not merely about following steps; it is about cultivating a mindset that values durability, craft, and personal expression. The materials you choose are more than variables on a page; they are partners in your daily life, capable of developing character as they endure. The tools you use are not just convenience; they are extensions of your hands, translating intention into fabric and stitch. The construction method you employ is a conversation with gravity, wear, and traffic—the everyday physics of a bag that must carry, protect, and age gracefully. In the end, the tote you create becomes both a practical object and a quiet celebration of making by hand. It stands as a testament to what careful selection, respectful handling of materials, and patient stitching can accomplish in a single functional piece. If you would like to broaden your understanding of how durable materials perform in everyday totes, a broader reference on materials and durability can offer useful comparisons and additional perspectives: https://www.thesprucecrafts.com/durable-stylish-tote-bag-materials-4157386.
Stitches That Carry: A Thoughtful, Full-Cycle Guide to Crafting a Durable Tote Bag
A tote bag is more than a simple container for items; it is a portable, everyday companion built from fabric, careful planning, and attention to the details that turn a piece of cloth into a reliable carrier. The journey from raw material to finished tote is a quiet sequence of decisions that influence durability, appearance, and how well the bag handles the rhythms of daily use. When you approach this project, you are not just sewing; you are shaping a practical object that can bear groceries, books, or a laptop, while still expressing personal style. The process invites you to balance structure with flexibility, stability with ease, and craft with convenience. It begins with choosing two complementary fabrics, typically one for the outside and one for the lining, and it ends with a clean, almost invisible seam that seals the final opening. In between, a series of deliberate steps—pocket placement, handle construction, assembly, and turning the bag right side out—combine to create a tote that looks good and lasts.
One of the most satisfying elements of making a tote is the opportunity to customize every feature to your needs. You might opt for a sturdier outer fabric like canvas or denim and a lining that complements the color or weight of the exterior. If you want extra stiffness, a lightweight interfacing can be fused to the outer layer to provide body without adding bulk. Small details—such as a neatly finished outer pocket, a discreet inner pocket for keys, or a pair of well-made handles—set a handmade tote apart from ready-made options. The following narrative unpacks the construction in a way that reads as a single, seamless journey, tracing how the materials become a bag that is both practical and personal.
Begin with a moment of upskilling rather than rushing. Lay out the two main fabrics on a clean surface, aligning edges so that the printed pattern, nap, or texture runs consistently. If you choose to incorporate interfacing, apply it to the wrong side of the outer fabric as directed by the interfacing’s instructions. The aim is not simply to cut and stitch but to prepare a foundation that will resist sagging and keep the bag’s silhouette crisp over time. As you measure, cut, and prepare, you set up a rhythm that will guide the entire project. You might find the steps below helpful as you imagine the tote assembling itself in your hands: the outer pieces coming together, the lining forming its own quiet shell, and the handles becoming anchors that carry weight with every wear.
The pocket strategy is an essential part of this tote’s design, and it deserves thoughtful planning. The outer pockets are not mere adornments; they are practical, accessible compartments that can hold a phone, a pen, or a small notebook. The inner pocket provides a secure place for keys or cards, tucked away inside the lining where it remains flat and unobtrusive. Pressing plays an important role here; the top edges of the outer pockets are folded twice to create a clean, sturdy hem, and the inner pocket is finished with a double fold to prevent fraying. When you place the outer pockets onto the outer fabric, you do so with purpose: position them where they will be most useful, then pin them carefully before stitching along the sides and bottom with a modest seam allowance. The shape created by the stitched sides and bottom resembles a shallow “U,” which helps the pocket sit neatly on the bag’s front panel without creating bulk that could snag or twist during use.
The inner pocket is a smaller, more intimate element. It rests on the lining, oriented so you can reach it from inside the bag. Finishing it with a double fold on the short edges and topstitching along the exposed edges ensures a polished look that resists wear over time. These pockets do more than store items; they teach you to think about weight distribution and fabric behavior. A well-placed pocket can influence how the bag carries weight, how it resists sagging, and how the exterior panels align when the bag is filled.
With pockets complete, turn your attention to the handles, the elements that connect you to the tote’s purpose. Handles can be sized to your comfort, but the classic choice remains a length that allows the bag to sit comfortably at the shoulder when filled. A typical handle dimension is around 5 centimeters wide and 60 centimeters long, though you can adjust to your own shoulder height and preference. Sew the two handle pieces right sides together along their long edges to create a clean, double-layer strap. Then turn the strap inside out and press it flat. Topstitch along the long edges to reinforce the curve and give the handles a crisp, durable finish. A well-made handle is the difference between a bag that feels flimsy under a light grocery load and one that confidently supports a few books or a laptop.
After completing the pockets and handles, the construction enters a more expansive phase: building the main body and its lining. The standard approach is to assemble the outer body and the lining separately, then join them in a single, confident step. The main body consists of two fabric pieces—the outer face and its lining counterpart—stitched together at the sides and bottom with a seam allowance that balances durability and the bag’s overall shape. The lining is formed in the same way but remains inside the bag, creating a retreat for contents and a neat interior finish. It is customary to leave a gap at the bottom of both the outer body and the lining. That gap will later serve as the channel through which you turn the bag right side out after all pieces have been joined. This turning step is a moment of transformation: the bag which seemed flat and inert becomes a three-dimensional form that can carry a purchase, a notebook, or a daily assortment of tools.
The step that often feels most tangible is attaching the handles to the main body. Place each handle at the top edge of the outer fabric, aligning their centers with the bag’s center to achieve balanced weight distribution. Pin the handles firmly in place, ensuring that the ends and the seam lines are secure. Sew them with a strong, straight stitch that traverses the entire width of the connection. The weight that the handles will bear depends on the security of these attachment points, so this stage deserves a careful backstitch at the beginning and end to prevent loosening over time. When you finish this step, you can see the tote’s top edge as a clean, uninterrupted line, punctuated only by the parallel seams that anchor the handles and the fabric’s natural grain.
With the outer body and the lining assembled, it is time to combine them. The process involves turning the lining inside out and placing the main body and lining wrong sides together, so the right sides face out at the top edges. Align the top edges, joints, and side seams with precision, then pin around the entire perimeter. The next seam, sewn with a comfortable 1-centimeter allowance, fusing the outer bag to the lining, creates the full bag structure. The act of sewing through both layers—outer and lining—establishes a strong, unified form. It is here that the tote shifts from a collection of parts into a coherent object ready to bear weight. The roped, continuous seam that unites the pieces also begins to reveal the bag’s silhouette, an invitation to imagine what it will hold and how it will move with its wearer.
It is at this stage that a small, practical detail matters: closing the bottom opening left to turn the bag right side out. You will need to carefully remove the exterior and interior layers, then align the pieces and sew closed the bottom gap. The exact method for finishing this seam can vary; some builders opt for a hidden ladder stitch, the so-called blind stitch, which preserves the bag’s exterior smoothness. If you prefer a more durable alternative, you can choose a small, discrete seam and finish the edge with a gentle press. The goal is to keep the outside appearance uninterrupted while ensuring the interior is neatly enclosed and the bottom remains flat when weighted. Once the turning is complete, you push the bag through the opening, working the corners with a blunt tool to sharpen them and achieve a professional finish. The act of turning is more than a mechanical necessity; it is the moment when the bag begins to look like something you would pick up and carry, rather than a pair of fabric pieces awaiting assembly.
At the end of the process, the final step is to close the opening that you used to turn the bag. The most discreet method for this closure is the blind stitch, a tiny ladder-like stitch that disappears into the fabric. It is a small but telling sign of care—the difference between a bag that looks homemade and a bag that looks thoughtfully crafted. Press the bag thoroughly, paying particular attention to the top edge and the seams. A well-pressed tote maintains its shape, presents clean lines, and better resists wrinkles. The finishing touch is the moment when you stand back and acknowledge what you have created: a tote that is sturdy, functional, and a reflection of your careful work. This finished item can accompany you through grocery runs, library visits, and weekend getaways, its quiet profile suggesting both utility and timeless style.
If you wish to explore variations or expand the project into a more specialized version, such as a tote with a computer sleeve or an additional interior pocket for organization, the underlying approach remains compatible with those enhancements. The foundational concepts—two-piece outer and lining construction, pocket planning, careful interface where needed, reinforced handles, and a clean closure—translate across many tote configurations. You can adapt the dimensions to your preferred size, adjust the seam allowances to your sewing machine’s capabilities, and even introduce features like a zip top or magnetic snap closure without sacrificing the integrity of the original method. In this reflection, the tote’s construction becomes less about rigid steps and more about a practical philosophy: design with intention, stitch with care, and finish with precision. The result is a bag that serves daily needs while holding up to repeated use and washing without losing its shape.
For readers curious about how variations can influence the finished product, consider how a laptop-centric tote differs from a casual everyday carry. The main body dimensions may expand to accommodate a laptop sleeve, while the pocket configuration might include a dedicated interior sleeve and a small additional pocket for chargers. Yet the essence remains intact: a structured exterior, a secure interior, and a durable pair of handles attached with confidence. The mindset is the same: plan, cut, sew, turn, press, and finish. If you want to see how these ideas translate into a broader landscape of bag-making, you can explore related ideas and examples that share a focus on utility and style while embracing the same careful craft that you practiced here. In the end, a tote bag is not just a container but a companion you designed for daily life, a personal object that carries more than items—it carries your intention to make, mend, and move through your world with a little more ease.
As you move forward with this knowledge, you may find value in certain refinements. For instance, you might consider reinforcing stress points where the handles join the bag, using double or triple stitches to resist wear. You could also experiment with topstitching along the exterior seams for a refined, finished look that echoes the double-fold hems you used on the pockets. The choice to add interfacing to the exterior is another possibility that can yield a more sculpted silhouette, particularly if you expect your tote to bear heavier items. Each decision you make—whether it involves heavier fabric, a stronger thread, or a sturdier needle—contributes to a bag that performs with reliability. The beauty of the tote lies in how these details combine: the chosen fabric’s character, the crispness of the folds, and the assurance that every stitch has been placed with purpose. The craft, once learned, becomes a familiar rhythm that you can adapt, repeat, and refine.
If you would like to see a practical example of this interplay between form and function, you can explore a related project that emphasizes carrying capacity and organization—such as a tote designed with computer gear in mind. For a concrete reference, you might examine how a tote with a built-in sleeve and additional compartments supports daily routines, then adapt the same principles to your own pattern. You can find more on how design enhances usability in related discussions and examples that focus on daily practicality and style, including detailed images and step-by-step demonstrations that echo the careful process described here. To see a tangible example that aligns with the themes of this chapter, visit the following resource: tote-bag-with-computer-sleeve.
Ultimately, the beauty of making a tote bag is that it invites repetition and experimentation. Once you have the hang of how the outer and lining pieces join, pockets sit neatly in place, and handles anchor reliably, you can vary fabrics, embellishments, and closures to suit different occasions or wardrobes. You may want a tote that reads as a minimalist, monochrome essential for weekday errands, or you might lean toward a canvas bag in a bold hue for weekend adventures. The fundamentals hold true across these variations. The bag remains a vehicle for your hands, your taste, and your daily needs. The process rewards patience and precision, but it also leaves room for personal expression. The more you practice, the more adept you become at predicting how the fabric will behave, how a fold will press, and how a seam will look when the bag is fully formed. In this way, making a tote bag becomes a small, reliable lab for creative problem-solving—a practical exercise in turning fabric into function without losing sight of style.
If you are seeking further insights into material choice, finishing techniques, and design tweaks, there are richer resources that explore a wider array of approaches to tote construction. These discussions extend the core ideas of this chapter into broader patterns and projects, helping you to innovate while maintaining the sturdy foundation that makes a tote truly dependable. For readers who wish to deepen their understanding and expand their toolkit, continuing to study these techniques will support future projects—whether you are adjusting proportions for a larger capacity or refining the interior organization for a more specific use. In the long run, the tote becomes not only a practical item but also a project you return to, a point of reference you can revisit when you want to explore new fabrics, new closures, or new ways to attach hardware. The chapter ends here with the sense that you have built something enduring—an everyday tool that carries your things and your intent with equal ease.
External resource for further reading: https://www.threadsmagazine.com/
Personalize It: Crafting a Tote Bag That Reflects You Through Fabric, Embellishment, and Smart Details

The tote bag you decide to sew is more than a carrier; it becomes a canvas for expression, a practical workhorse, and a small sculpture you carry through daily life. When customization moves from a practical afterthought to a design philosophy, the process of making a tote bag shifts from routine stitching to thoughtful problem solving that honors both function and form. In this chapter, we explore how fabric choices, decorative elements, and smart construction decisions align to produce a bag that not only carries your things but also tells a story about who you are and how you move through the world. The base of any customizeable tote starts with fabric, and this is where the mood of the project is first set. Cotton canvas offers durability and a classic utility look, providing a sturdy frame that can withstand daily use and weight without losing its shape. Denim, especially when sourced from recycled jeans, brings a rugged, slightly worn charisma and a sense of sustainability that many makers value. Linen, lighter and breezier, can offer a refined, breezy contrast to heavier pieces, ideal for spring and summer looks. Beyond these, the option to blend fabrics invites a considered play with texture and drape: a denim body with a lighter lining, for example, can create a subtle two-tone effect that reads as intentional rather than accidental. When color and pattern enter the decision space, the possibilities multiply. A deep, monochrome base can be elevated with pockets in a contrasting hue or with a bold geometric panel that catches the eye. A muted palette can be enhanced with small, bright accents such as a stitched tag or a tiny, emblematic appliqué. The key is to balance scale and proportion: large blocks of color are powerful; tiny details require careful placement to be legible and cohesive. The goal is a bag that is easy to pair with multiple outfits while still offering a signature touch that makes it unmistakably yours. The customization options extend beyond color and texture into the realm of structure and details that improve everyday use. One of the simplest but most impactful choices is how you integrate pockets. Pockets anchor the bag to a purpose. An outer pocket on the front or back of the main fabric piece enables quick access to keys, a phone, or a transit card, while interior pockets keep smaller items organized and separate from the main compartment. The process described earlier for pocket sizes—two outer pockets and a smaller inner pocket—can be adapted to suit your needs. You might want a larger exterior pocket to accommodate a tablet, or several slim sleeves for pens, a notebook, or a travel map. The inner pocket can be divided into sections to corral items like tickets, lip balm, or a compact umbrella. When you choose to embellish, the kit of options expands. A soft, forgiving place to begin is with patches or appliqués—sturdy iron-ons or fabric patches that you sew into place. Patches offer a quick path to color and texture without requiring advanced embroidery skills, yet they also invite you to curate a tiny, portable gallery of motifs that matter to you. For those who enjoy a more tactile hand, embroidery adds a personal signature to the bag. A simple border along a seam or a tiny monogram can transform a plain surface into something elegantly engraved with your presence. Fabric paint or dye yields another exciting route for customization, especially when you want a one-of-a-kind pattern or gradient that cannot be achieved with fabric alone. You might paint geometric shapes that echo the geometry of the pockets or hand‑draw a botanical motif that finds its echo in the stitching of the handles. When embellishing, it helps to plan with a clear idea of scale and placement before you cut or sew. A rough sketch on paper can guide where to place a motif, which pockets to emphasize, and where to keep the bag visually calm. It is important to consider how embellishments will wear. A patch sewn near a strap attach point or a pocket seam can add visual weight and draw the eye toward a focal point, but it can also wear more quickly at stress points. The stabilization of the fabric around such areas is essential so the bag remains as durable as it is beautiful. The hands-on logic of this project also invites you to rethink closures and how the bag opens. A zipper closure is a sturdy, clean option that keeps contents secure and reduces bulk around the top edge, making maintenance and cleaning easier. If you want to explore this closure option in more detail, you can consult resources that discuss tote bags with zippers, which cover different zipper styles, attachment methods, and finishing techniques. tote bags with zippers. That reference highlights how a zipper can be integrated without disrupting the clean line of the bag while still allowing you to access the main compartment with ease. At times you might prefer a more open, unstructured feel that suits a casual, everyday mood. In this case a simple magnetic snap or a small toggle can provide a light closure that remains unobtrusive. The selection of hardware—whether a discreet magnetic snap, a metal ring, or a wooden toggle—offers another avenue to tailor the bag to its wearer. Hardware should be considered not just for aesthetics but for durability, especially for pieces that will see frequent use or carry heavy loads. The handles deserve the same careful attention as the body of the bag. A tote is carried by its straps, and the feel of a strap against the shoulder or hand can determine how much you reach for it. The classic approach uses single, long handles anchored firmly to the body with robust stitching. If you want more versatility, you may choose to implement an adjustable feature with a sliding buckle or to add a second pair of shorter handles that can be tucked away when you want a more compact silhouette. In any case, reinforcing stress points at the attachment areas is essential. Reinforcements might include extra rows of stitching, the use of a stronger thread, or a slightly wider seam allowance at the anchor points so the bag keeps its shape after repeated use. The interior is a second stage of customization, one that can drastically improve everyday usability without changing the outer appearance. An organized interior turns a tote from a sack into a well‑read toolkit. You might design a shallow divider to separate notebooks from a lunch box, or include a zippered pocket for valuables and a small fabric sleeve for a phone or a pen. The fun of interior design is that it can be modular: you can sew the lining with the intended portions during the initial assembly, or you can add extras later using fabric scraps, a bit of imagination, and careful seam work. When you begin to think about assembly, it is helpful to visualize the flow of the bag from the outside to the inside, and then to the inside lining. The stepwise approach described earlier—assembling main body pieces with pockets, attaching handles, and then pairing the main body with the lining—can be adapted to include additional internal features. The margin you leave for turning the bag right side out is not merely a practical necessity; it is an opportunity to hide stitching that would otherwise interrupt the clean outer edge. The leftover turning gap becomes a stage for final adjustments: you can slip in a thin strip of fabric to stabilize the top edge, or you can cushion the top seam with a light layer of interfacing to give the bag a more refined silhouette. And speaking of silhouette, you can use the trim of the bag to imply shape. A narrow top with a slightly wider base can feel sturdy and grounded, while a straight, rectangular frame reads as modern and utilitarian. The entire aesthetic rests on careful balance: how much weight the design carries visually, how heavy the hardware feels against the fabric, how the pockets align with the grain of the fabric, and where your eye rests as you carry it. Pattern matching becomes a quiet hero in the customization process. If your fabric features a repeating print or directional stripes, aligning the seams so that patterns continue across the body creates a professional finish that elevates the entire piece. When you choose to work with recycled materials like denim or upcycled neckties, you gain a layer of storytelling that connects your bag to waste reduction and mindful consumption. The bag becomes a narrative about reimagining materials rather than simply choosing new ones. A necktie, repurposed as a decorative element, can be cut into geometric shapes and appliquéd onto the bag for a bold, almost collage-like effect. This approach allows you to mix old with new in a way that emphasizes sustainability while also giving you a visually striking result. The design language you settle on should consider who the bag is for and how the wearer moves through spaces—subway platforms, markets, libraries, or weekend picnics. If you are making a tote for a specific person, you can tailor the details to their habits: pockets sized for a passport and a phone for travel, or a larger interior sleeve for a tablet or a notebook. In that spirit, the planning phase can include a simple test fitting on a rough mock-up. A small fabric swatch or a trial strip helps you decide how a given fabric will behave when sewn, whether it gains stiffness after washing, or whether the dye may bleed with exposure to moisture. The practicalities of fabric care matter as well; choose materials that hold up to your lifestyle. For example, canvas and denim can be washed with care, but you may prefer linings and trims that are easier to clean or more resistant to staining. Your finishing steps are the final whisper of quality in a handmade bag. Ironing the seams flat, trimming loose threads, and pressing the top edge to create a crisp finish send a message that you care about the bag’s presence in the world. The last stitch is the moment when the bag moves from a project into everyday use. A carefully applied blind stitch to close the bottom opening preserves the exterior’s clean line while keeping the interior materials securely tucked away. Beyond the physical act of sewing, consider how you document your process. Taking notes about fabric types, stitch counts, and pocket placements can be a quiet ritual that informs future projects. If you plan to share your work with others, a concise description of your design choices—why you chose a certain fabric, where you placed pockets, and what you wanted the bag to communicate—can help readers connect with your piece on a personal level. The creative arc of customization is not a solitary one. It often benefits from looking outward toward ideas in the wider sewing community without becoming overwhelmed by trends. You can draw inspiration from someone repurposing an old garment into a tote with a bold, painterly patchwork, or from a friend who stitched tiny initials onto the lining as a personal touch. The important thing is to keep your own priorities at the center: what you intend to carry, where you will carry it, and how you want the bag to perform under real-world conditions. Finally, the digital planning that accompanies this hands‑on craft is worth mentioning, even though it is not the focus of the sewing itself. A simple, drawn layout or a digital sketch can help you see how a final design will read when carried by a person. This forward planning helps align the fabric choices, pocket placements, and decorative elements before you sew a single seam. If you want to explore design planning tools in a non-brand context, there are online resources that allow you to visualize your tote before cutting, enabling you to test color schemes, pocket geometry, and closure placements. The beauty of this approach is that you can iterate quickly, making adjustments in a way that saves material and time while amplifying your satisfaction with the final product. As you move through the steps of customization, you are also cultivating a practice of making that honors both practicality and personal taste. The tote you create becomes a reflection of your daily rhythm: a sturdy, reliable companion with a personality that is uniquely yours. In sum, customizing a tote bag is a layered, thoughtful activity that blends material knowledge with a sense of story. It invites you to choreograph how each seam, pocket, and embellishment will support the way you live. The result is not merely a bag, but a hand‑made partner that carries your work, your adventures, and your ideas with equal care. External resources and practical references can widen your horizons, but the heart of the project remains in the decisions you make at the sewing table and in the quiet moments when you adjust a stitch and test a pocket for fit. For ongoing exploration of the design facet, this chapter serves as a living guide—one that evolves as your taste changes, as your materials teach you new lessons, and as you gain confidence in translating concept into tangible form. External resource: https://www.canva.com/
Final thoughts
The journey of crafting tote bags offers invaluable opportunities for business owners to engage with customers, enhance brand visibility, and create functional products. As you’ve explored in this guide, understanding the materials, mastering construction techniques, and embracing customization can turn a simple crafting project into a powerful marketing tool. By creating unique tote bags, you not only provide a practical item but also a canvas for your brand’s identity. Whether you’re selling at markets or promoting your business, a well-crafted tote bag can leave a lasting impression.