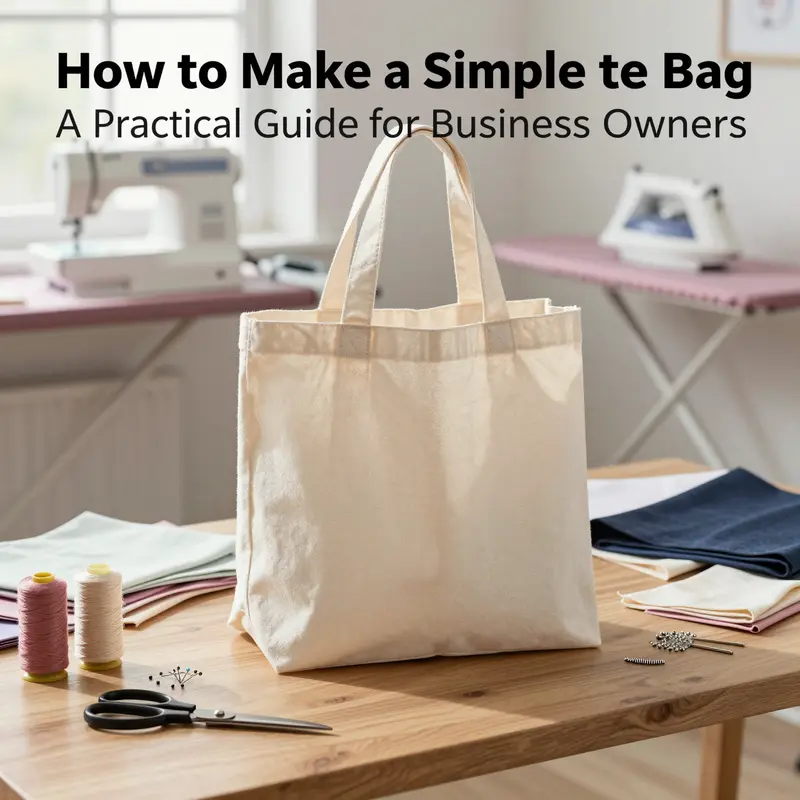
Creating simple tote bags offers business owners a versatile product opportunity that combines practicality with branding potential. Whether you’re looking to enhance your merchandise lineup or start a small-scale production, mastering the fundamentals of tote bag making empowers you to deliver quality, durable bags that meet customer expectations. This comprehensive guide is structured to equip you with clear insights on sourcing essential materials and tools, executing a methodical sewing process, and exploring valuable tips and variations that enhance both production efficiency and final product appeal. Each chapter builds upon the last, ensuring a holistic understanding that supports your business’s growth and product excellence in the tote bag market.
The Right Stuff: Essential Materials and Tools for Crafting a Simple Tote Bag
Choosing the right materials and having the right tools is more than a shopping checklist. It shapes how your tote bag behaves in the world, how long it lasts, and how easy the sewing journey feels. When you start with sturdy fabrics, careful linings, and well-chosen hardware, you set yourself up for clean seams, crisp edges, and a bag that holds its shape even when you stuff it full of groceries, books, or your daily essentials. The path to a reliable tote begins with this simple truth: durability comes from thoughtful material choices and compatible tools, not from clever tricks you’ll figure out later. If you move with intention here, your progress through the rest of the project will feel like a natural flow rather than a string of surprising setbacks.
Core materials form the backbone of any tote. The outer layer should be a fabric that doesn’t stretch under load and that can resist small abrasions and daily wear. Cotton canvas, denim, and cotton-linen blends stand out as dependable options for a beginner-friendly tote. They strike a balance between structure and weight, holding their shape without turning the bag into a brick. A practical guide to fabric suggests aiming for a weight in the neighborhood of 200–250 g/m². This range keeps the bag sturdy enough to carry a full load while remaining easy to sew for someone still learning the rhythm of seams and topstitching. Heavier fabrics can be beautifully durable, yet they demand more careful needle work and a willingness to slow down through bulkier layers. Lighter fabrics may require stronger reinforcement or thoughtful lining choices to ensure the tote remains functional and not flimsy at the first sign of a stray item.
If you want a touch of style without complicating the build, consider a double-fabric approach: use a durable outer fabric and a lighter lining that adds a clean interior finish. A contrasting lining can brighten the inside and help you locate keys or a phone more easily. For the lining, a lightweight, smooth material such as a polyester blend or a sheer-ish satin-like fabric works well. The lining should move independently of the outer fabric enough to prevent bulk at the top edge, yet be compatible enough to bag out neatly when you turn the tote right side out. The lining also becomes a hidden stage for reinforcement: where you stitch a few extra rows, you can secure the handles to a double layer that includes both outer fabric and lining, keeping the attach points robust through years of daily use.
When you plan the hardware, you can elevate the tote from a simple carryall to a durable everyday companion. For handles, wide webbing is a stellar choice. A sturdy 1.5–2 cm width webbing made from nylon or polyester feels comfortable over the shoulder and resists twisting under load. The emphasis here is on durability and comfort. The handles are points of stress, and they deserve careful attachment. Instead of relying on a single long seam, plan anchor points that distribute the load along the top edge and into the body of the bag. Reinforcement stitches around the handle anchors, and extra stitches where the handles meet the bag, dramatically extend the life of your tote. If you want a closure, a simple top zipper or magnetic snap can be considered, but the simplest option that keeps the project approachable is to forgo a closure and rely on a wide opening for easy access. It’s a choice that suits beginners who value speed and practicality over gadgetry.
Inside the bag, the lining fabric can also contribute to long-term performance. A smooth interior fabric with a bit of glide reduces friction between the inner lining and the outer bag during turning and use. This is especially helpful if you’re using a heavier outer fabric. A lining that slides against itself as you extract a book from the bag lowers the chance of pilling or friction that can wear the seams over time. If you’re inclined toward color play, contrast is a simple, effective way to deliver personality. A light lining paired with a dark outer fabric makes interior items pop when you search for them, and it helps you see stains or debris quickly so you can clean the bag before it feels less fresh.
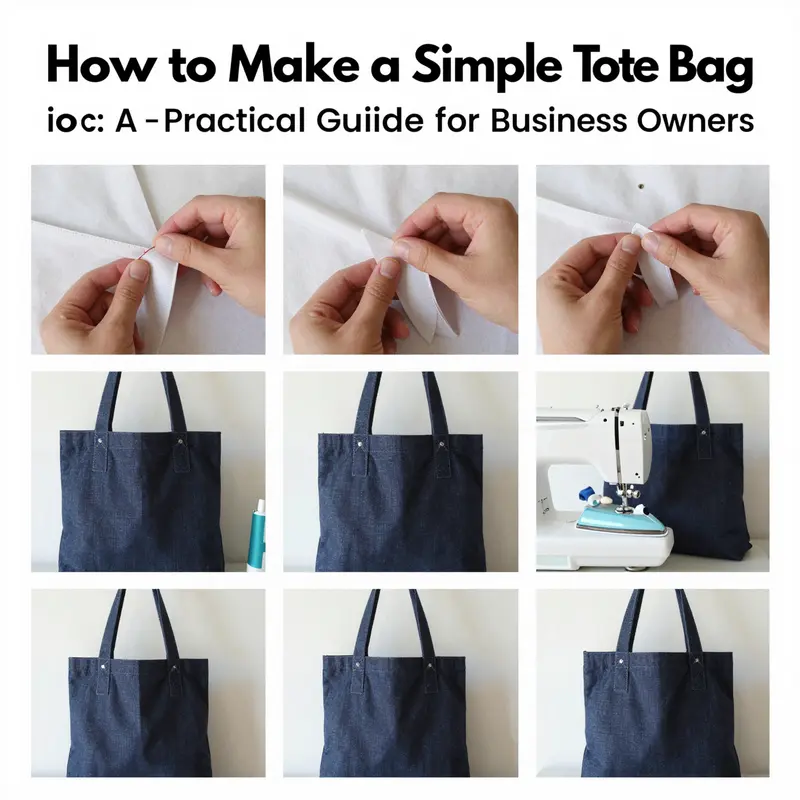
All of this begins to come together when you consider reinforcement and hardware. Handles need to be more than decorative; they must carry real weight and resist tearing. The recommended approach is to cut two long strips for handles, typically around 18–20 inches long and 2 inches wide. Fold each strip in half lengthwise with wrong sides together, then press to set a sharp central crease. Next, fold the raw edges inward along the length of the strip and press again. A neat, evenly pressed handle is not simply attractive—it’s a practical necessity, ensuring the binding holds when you carry a heavy load. Sew along the two long edges to enclose the strip, creating a clean, durable strap. When it’s time to attach the handles to the bag, sew through the top edge of the outer fabric and into the lining if you’re using one. The goal is to have each handle anchored securely to multiple layers so that wear isn’t concentrated on a single thread line. The row of stitches around the handle attachment should be reinforced, with extra stitches at the points where the handles meet the bag’s body. A well-executed handle can transform a basic tote into a sturdy partner for everyday life.
The realm of decorative elements is optional but worth a moment of consideration. If you enjoy personal touches, consider repurposed items—such as vintage hardware or small decorative elements—that can be stitched onto the bag for a unique, handmade feel. Patches, embroidery, or fabric paint can personalize the tote without complicating the construction. The aim is to celebrate your creativity while preserving the tote’s structural integrity. When you add any decoration near the top edge or strap anchors, test that the additional weight doesn’t pull on the stitches in ways you didn’t anticipate. Small, sturdy stitches and careful placement keep your bag’s silhouette clean while adding a touch of your personality.
In the toolbox of essential tools, a few pieces make a big difference in the ease and quality of your tote. A sewing machine that handles straight stitching and basic zigzag patterns is perfectly adequate for a beginner project. The ability to switch between a straight stitch for seams and a zigzag stitch for finishing raw edges matters more than a long list of fancy stitches. When you’re working with thicker fabrics—like canvas or denim—choose a needle appropriate for heavy fabrics. A common recommendation is to use a needle sized around 90/14 for denim-weight materials. This size helps prevent skipped stitches and needle breakage as you sew through multiple layers at the corners and sides. If you’re sewing by hand, a strong needle and a steady rhythm can produce a durable seam, though most beginners will find a sewing machine with a suitable needle far more efficient.
Cutting tools should be sharp and comfortable in your hand. A pair of sharp fabric scissors or a precise rotary cutter will give you clean edges with minimal resistance. The edge you cut matters later when you’re turning the bag right side out and then topstitching along the top edge. A transparent grid ruler helps you measure and align the fabric accurately before cutting, ensuring that your outer and lining pieces match perfectly. Marking tools—such as tailor’s chalk or a fine fabric marking pen—let you transfer the pattern carefully without leaving permanent marks that show up on your finished bag. Keep a set of sharp pins or clips to hold the layers in place while you sew; this is especially important when you’re working with two layers that may shift as you stitch along the edges.
Pressing is another often-overlooked step that makes a remarkable difference. A steam iron and a pressing cloth set you up for crisp seams and precise topstitching. Pre-shrinking and pressing fabric before cutting helps prevent distortion after assembly, which is a gift to both the professional and the hobbyist who wants a clean, square tote. A well-pressed bag looks more polished and wears more evenly over time. It also makes the top edge feel flat and ready for finished stitching, whether you choose a hidden stitch along the top or a visible edge line. A simple tip here is to press as you go. After you sew each side, lay the panel flat and press the seam allowances to one side; then repeat on the other side. This keeps the fabric from curling and helps your final top edge lie neatly.
Pro tip: always pre-wash and pre-shrink your fabric using steam or gentle washing. This small step prevents future shrinkage and color bleeding after the bag is completed. It also reduces the likelihood that the lining and outer fabric will pull at different rates, which can cause distortion in the finished tote. Pre-washing is especially important if you opt for natural fibers, which tend to relax a bit after the first wash. If you’re reusing old fabric or a thrifted textile, a gentle wash cycle helps you assess how the material behaves under heat and agitation before you commit to a full project.
The beauty of a simple tote lies in its balance between sturdy fundamentals and just enough flair to feel personal. With a durable outer fabric, a smooth lining, reliable handles, and well-chosen hardware, you’ll be well on your way to a bag that holds its shape and serves you well for years. If you want to explore further options for outer fabrics and how they behave under stitching and loading, you can browse a curated collection that highlights fabric families ideal for tote construction. For example, you can explore options like cotton canvas and denim along with their practical attributes and accompanying care guidelines. This deeper dive into fabric families helps you match material choices to your lifestyle and sewing speed.
To broaden your understanding of fabric and tote design, take a look at the broader ecosystem of tote options that emphasize both form and function. For readers who are curious about how different fabrics behave in real-world use, many resources explore how fabric weight and weave affect drape, bulk, and seam stability. This is a practical, grounded way to connect the dots between material selection and the performance you’ll experience when you haul groceries, books, or a laptop in a tote you crafted yourself. If you’d like to see concrete examples of how fabric families translate into tote outcomes, consider exploring this wide range of examples that demonstrates how exterior and interior fabrics interact on a finished bag. For additional guidance and visuals, you can refer to a trusted visual guide that provides downloadable patterns and instructional notes tailored for beginners. It offers a structured path from fabric selection to final stitching and has become a popular starting point for many who want to understand how each choice affects the final result. For practical inspiration on materials and construction, the following resource serves as a detailed companion to the concepts discussed here: Fabric tote bags for women.
As you gather your materials, you’ll feel the project taking a more tangible shape. You’ll understand why certain fabrics need extra reinforcement and why the sewing technique you choose matters as much as the fabric selection. You’ll also recognize how the interplay between lining, shell fabric, and handles can either simplify your task or demand a bit more patience. The process is iterative: you make choices about weight and drape, you cut accurately, you sew with steady hands, you press with intention, and you finish with a top edge that looks polished. The result is not just a bag; it’s a reliable everyday instrument that carries your life in a way that feels personal and satisfying.
If you want a practical, visual guide to pattern and step-by-step assembly, you’ll find detailed tutorials that walk you through the same principles here. The emphasis remains on using basic sewing techniques, accessible materials, and straightforward construction methods that you can replicate at home. The end goal is to deliver a tote that’s sturdy, reusable, and easy for a beginner to complete in a single session or over a weekend without feeling overwhelmed. The materials and tools described above are your compass, helping you navigate the early steps with confidence and curiosity. As you become more comfortable with the rhythm of cutting, sewing, and pressing, you’ll develop your own preferences for fabric combinations and finishing touches that fit your everyday life.
External reference for further study and visual guidance can be found in a comprehensive pattern-based resource, which provides free downloadable patterns and illustrations to reinforce the ideas discussed in this chapter. It offers clear visuals and a complete list of materials and tools tailored for beginners: https://www.craftypanda.com/simple-tote-bag-sewing-pattern/
From Fabric to Finish: A Practical, Beginner-Friendly Tote Bag You Can Sew in One Sitting
A simple tote bag is more than a project you check off a list. It’s a small, repeatable ritual of making something useful with your own hands. The appeal lies in its honesty: straightforward materials, reliable stitches, a design that respects what you already have in your sewing space, and a bag that can carry groceries, books, or a day’s essentials with quiet confidence. This chapter invites you into a calm, practical process that emphasizes structure, durability, and a little creativity. You’ll learn to turn two plain rectangles of fabric into a sturdy, double-layer tote, and you’ll see how a few deliberate choices—like seam allowances, pocket options, and handle length—shape the bag’s personality as much as its function. The method here is intentionally beginner-friendly, using common household materials and basic sewing techniques. If you’re new to sewing, you’ll discover that confidence grows with each small step completed well, and if you’ve sewn a few things before, you’ll appreciate how this approach emphasizes clean lines, strong construction, and a finish that looks polished without requiring fancy gadgets.
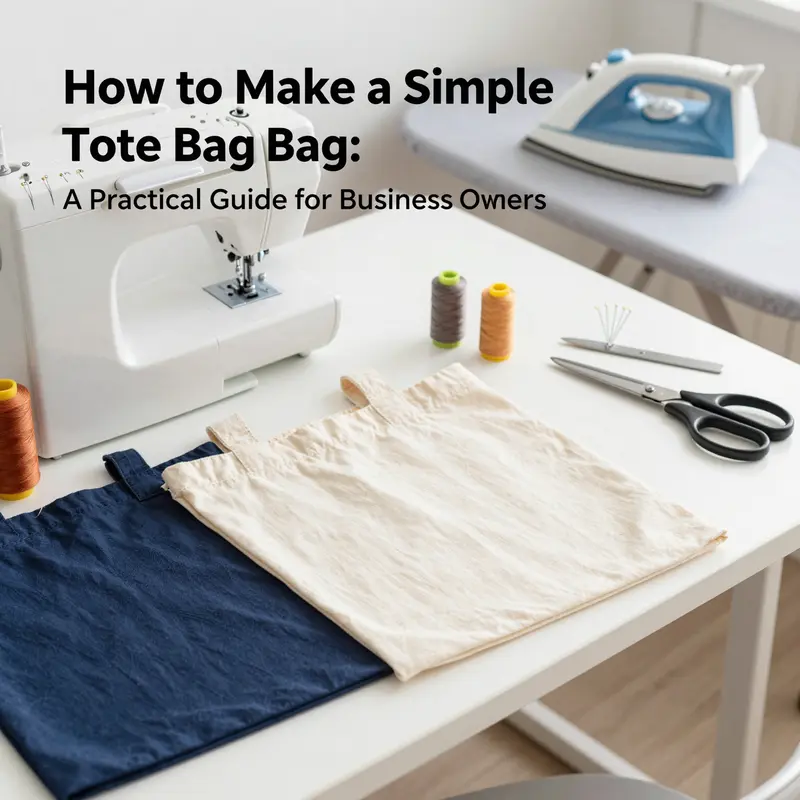
To begin, gather what you need: two pieces of fabric, ideally one for the outside and one for the lining, both around 14 inches wide by 16 inches high as a compact starting point, plus matching thread, a sewing machine or a needle for hand-sewing, scissors or a rotary cutter, pins or clips, and an iron and ironing board to press as you go. If you want a different look, you can swap in heavier-weight fabrics such as canvas or denim, which hold their shape better and stand up to daily use. A simple tote benefits from a touch of contrast; for example, you might choose a sturdy exterior in a solid color and a patterned lining. The result is practical and visually engaging without requiring a lot of extra craft supplies. This approach aligns well with the spirit of slow, mindful making, where every stitch matters and the bag is built to last.
Start with the fabric. Cut two identical rectangles from your chosen material: one for the outer bag and one for the lining. The measurements you choose set the bag’s proportions. A common and reliable starting point is 14 inches by 16 inches for each piece. If you decide to adapt the size, keep the two layers in sync so the outer and lining align neatly when you assemble them. You can also choose to add a layer of interfacing to the outer fabric, which gives the bag a little more body. A light fusible interfacing—applied to the wrong side of the outer fabric and cut to the same size—will help the bag stand up and hold its shape, especially if your fabric is a lighter cotton. Iron the interfacing in place according to the product’s instructions and then proceed. The option to use two fabrics, outer and lining, creates a simple double-sided bag that offers visual interest when you turn it inside out, and it makes a durable finish that’s less prone to snagging on the inner seam edges.
Next comes the moment of assembly. Place the two fabric pieces together with their right sides facing each other—the “good sides” touch. Pin or clip along the edges to keep everything aligned. The goal is a clean, even seam where the outer and lining join, so take time here to ensure the edges are perfectly matched at the top, bottom, and sides. Using a ½-inch seam allowance (about 1.3 cm) is a reliable standard for tote bags because it creates enough room for turning the bag inside out while maintaining a neat profile. Sew along the three sides—the left edge, the bottom, and the right edge—leaving the top edge open for turning later. Backstitch briefly at the start and end of each seam to reinforce the stitch line. This reinforcement is not merely a precaution; it pays off in the bag’s long-term durability, especially where the handles will attach and where the bag flexes as it carries weight.
At the corners, you can reduce bulk by trimming the seam allowances diagonally at each corner. This dog-ear removal helps turn the bag smoothly and reduces the chance of chunky corners forming after turning. Be careful not to cut through the stitches. The trimming is optional but recommended, especially if you want a crisp, professional edge when the bag is finished. Once the corners are trimmed, turn the bag right side out through the open top. A blunt tool, like the end of a chopstick or a pencil, can coax the corners into shape without distorting the seams. Take a moment to push out the corners so the bag presents a neat silhouette from edge to edge.
Now comes the pressing. Iron the bag flat, paying particular attention to the seams and edges. A crisp flat finish makes the bag look finished and professional and helps it keep its shape when you carry items inside. If you’re using a lining, you’ll press the edges of both layers where they will be joined later, so the top edge sits neatly. The pressing step is small but powerful: it acts as a guide for your top stitching and makes the bag look thoughtfully constructed rather than hastily sewn.
The next stage is where many makers choose to customize. If you’re using a separate lining, place it inside the outer bag with right sides together, aligning the top edges. Sew along the top edge only. This creates a clean finish where the outer fabric meets the lining and prevents exposed raw edges on the exterior. Once this seam is sewn, you can fold the lining back into place and press again to set the line. At this point, the bag has a usable form, but the interior can feel like a simple blank canvas. If you want interior organization, you can add a pocket or two to the lining. A simple approach is to stitch a shallow pocket into the lining at a comfortable height, creating a small space for keys, a phone, or a notebook. You can decide to keep the interior pocket compact or expand it to multiple compartments, depending on your needs and the fabric you’re using. The pocket serves both function and aesthetics; it breaks up the flatness of the lining and makes the interior feel more thoughtful and usable.
The handles are the heart of the bag’s practicality and its personality. For a classic tote, cut two strips of fabric about 18–20 inches long and 2 inches wide. If you prefer a lighter, easier carry, you can make them shorter, but for shoulder or long-carry versatility, longer handles are better. Fold each strip in half lengthwise, wrong sides together, and press to create a crisp crease. Then fold the raw edges inward toward the center and press again to create a neat, clean edge along the length. Sew along both long edges to form sturdy straps. The key is to attach the handles securely to the top edge of the bag, preferably through the top edge of the outer fabric and, if you’re using a lining, through the lining as well so the handles are anchored on both layers. Space the handles evenly—ideally about 4 to 6 inches apart on each side of the bag’s top edge—and stitch firmly, using a rectangular box or cross-stitch pattern to distribute the load and prevent tearing when the bag is loaded with items. If you want to reinforce the points further, sew additional rows of stitches across the top edge where the handles meet the fabric. You’ll be surprised how much this extra reinforcement extends the bag’s life, particularly if you plan to haul heavy groceries or books.
With the handles attached, you can complete the top edge finishing. There are two elegant options. One is to hand-stitch the top edge with a neat whip stitch for a discreet, classic finish. The other is to machine-stitch a topline around the entire top edge, about ¼ inch (0.6 cm) from the edge. A topstitch line not only looks polished but also helps keep the upper layers from shifting with use. It also makes a visually tidy edge that holds up to repeated washing or carrying. The choice between hand-stitching and topstitching is a small design decision, but it has a noticeable impact on the bag’s appearance and heft in the hand.
Once the primary construction is complete, inspect the bag for any loose threads or uneven edges. Trim stray threads and double-check the handle attachments. If you included pockets or other interior details, verify they’re secure and lie flat against the lining. A simple final press can bring everything together: a quick pass with the iron along the top edge, the seams, and the handle areas makes the bag look finished and ready for daily use. The entire process—from fabric selection to final pressing and stitching—offers a satisfying sense of accomplishment, especially when the bag stands upright on its own and looks balanced from every angle.
This is a bag you can customize as you go. If you’d like a double-sided tote, you can flip your look by choosing a bold exterior on one side and a contrasting interior lining that peeks through at the top. If you want extra structure, you can experiment with a light interfacing on the outer panel as described earlier. If you’re feeling extra inventive, you can add a pocket on the exterior as well, or stitch a small patch or embroidery on the outside for personality. The key to a successful tote is not to overcomplicate the process, but to respect the materials and the basic constraints of the project: two fabrics, straight seams, and a secure attachment for the handles.
As you finish, you might reflect on how this simple project translates beyond the tote itself. It’s a framework for making: choose a fabric you love, consider how it will wear with daily use, plan a finish that will wear gracefully, and stitch with care. The tote you’ve created is more than a bag; it’s a testament to the simple power of practiced technique and patient, deliberate work. If you’re curious to see a slightly more elaborate variation that preserves the same straightforward approach, you can explore a design that features a built-in sleeve or laptop compartment, which adds a modern twist while maintaining the core principles of sturdy construction. For inspiration on that topic, explore the design shown in tote-bag-with-computer-sleeve.
The practical takeaway is clear: a well-made tote begins with simple decisions executed well. Start with balanced measurements, secure seams, and thoughtful finishing. Choose a handle length that fits how you’ll carry the bag most often. Press often, stitch confidently, and test the bag with a few items before declaring it “finished.” The result is a reliable, reusable tote that serves you well without demanding a complicated workflow or specialized tools. It’s a small, repeatable craft that you can adapt to your needs and your style, time and again, with only minor adjustments to fabric type, size, or pocket arrangement.
If you’re seeking a visual guide to accompany these steps, a video tutorial can be a helpful companion as you gain confidence. The linked resource provides a complete walkthrough of similar techniques, including corner finishes and how to handle the top edge with a zipper if you prefer that variation. External resources can complement your practice, but the core satisfaction comes from finishing your tote with your own hands and then carrying it into the world, proudly showing that a simple bag can be both practical and personal.
Beyond the Basic Tote: Practical Tips and Creative Variations for a Simple, Sturdy Tote Bag
A simple tote bag often begins as a blank canvas and ends as a dependable daily companion. The beauty of this project lies in its accessibility: sturdy fabrics, straightforward seams, and a few well chosen details can transform a plain rectangle into something you reach for with every errand, class, or spontaneous weekend adventure. To move from a basic construction toward a bag that feels tailored to your life think of three questions as you sew: how will the bag hold its shape? how will it carry the weight you need it to bear? how will you keep the finish clean and durable over time? The answers show up not only in what fabric you pick, but in the subtle decisions you make about cutting, interfacing, finishing seams, and choosing handles. They also open doors to variations that let you express personality without sacrificing function. The chapter that follows is not a recipe that must be followed to the letter; it’s a rhythm you can tune to your preferences, a map for adding layers of structure, texture, or color while keeping the project approachable for a beginner. The core technique remains the same, but the options multiply once you start to treat the tote as a canvas for your style and your needs.
Begin with precise cutting, the quiet prerequisite to a bag that sits flat, holds its shape, and wears well with use. If you cut the front, back, sides, and bottom inaccurately, you’ll see slight misalignments when you sew the pieces together, and those misalignments compound in every turn of the bag. A rotary cutter on a cutting mat makes the edges square, which is especially helpful when you plan to use a lining or a contrasting outer fabric. Take the time to measure twice and cut once, keeping all pieces labeled and aligned. For a dual-fabric look—the outside fabric and a coordinating lining—this careful cut also helps you visualize how the two layers will nest during construction. When you’re ready, place the fabric pieces right sides together. Pin or clip with purpose, making sure corners and edges align. This careful alignment pays off when you sew the sides and bottom with a crisp, even seam. A 1/2-inch seam allowance is a reliable standard for tote bags; it provides enough room for the fabric to bend without bulk but stays compact enough to keep the bag neat. Backstitch at the start and end of each seam to reinforce the garment’s structure. The small act of backstitching at these endpoints is a quiet, unsung hero in the final durability of the tote.
After the main body is sewn, many makers turn to the corners. Trimming the corners diagonally reduces bulk when the bag is flipped right side out. It’s a simple step, but it makes a noticeable difference in how the bag sits and how smoothly corners turn. When you turn the bag right side out, use a blunt tool—a chopstick, pencil, or the blunt end of a knitting needle—to ease the fabric into the point of each corner. Gently coax the fabric until the seam line is neat and the corners look square. Then press the bag with a hot iron. Pressing isn’t only about aesthetics; it also sets the seams so subsequent steps—like topstitching or folding the top edge—are clean and precise. A well-pressed tote behaves like a well-behaved companion, lying flat along the seams and showing a crisp silhouette.
With the main shell complete, you can decide whether to add a lining. A lining adds durability, especially if you’re using lighter-weight fabrics, and can help protect your personal items from the outer layers. Place the lining inside the outer bag with right sides together, align the top edges, and sew along the upper edge. When finished, you’ll turn the bag and see a double-layered interior that makes the finish look refined and professional. The moment you insert a lining also opens space for pockets—inside the lining or along the exterior—which are invaluable for keeping keys, a phone, or a small notebook organized. If you decide to include pockets, place them before you sew the top edge and ensure they’re securely anchored. For a clean, hidden look, tack the pocket from the inside or sew a small top seam so the pocket edge hides neatly under the lining.
Handles are the heart of the tote’s practicality and its personality. The most common approach is two fabric straps, cut around 18–20 inches long and two inches wide, folded and pressed to create a clean, durable loop. If you’re using a lining, attach the handles to the outer fabric first, then reinforce the joining points with extra stitches or a double line of stitching. After all, straps bear the load of everything you carry, so they deserve a thoughtful attachment. You can press and topstitch along the length of each handle to give it a crisp edge, or choose a simple, unstitched finish for a softer, more casual look. Alternatives to fabric handles abound: leather straps for a touch of luxury, braided fabric cords for a handmade feel, or repurposed belt straps for an industrial vibe. Each option will change the bag’s weight distribution and aesthetic, so consider how you’ll use the tote when selecting the material. For a more complex silhouette, you might experiment with topstitching at the point where the handles meet the bag to add visual interest and extra reinforcement. As a practical note, evenly space the handles along the opening, and test the fit by lifting the bag with a few lightweight items before you finish the top edge. This small test helps you ensure there’s an even balance across the bag’s opening and prevents tension from concentrating at any single point.
The top edge itself is a subtle stage for finishing touches. You can decide whether to hand-stitch the upper seam or to machine-stitch a topline 1/4 inch from the edge for a polished, durable finish. If you choose the machine option, a straight topstitching line will echo the bag’s silhouette and help the top edge maintain a clean line as it wears. Alternatively, the ladder stitch or slip stitch can close the turning opening invisibly after turning the bag right side out, a small technique that yields a seamless interior finish. This invisible closure is particularly satisfying when you want a simple tote that looks almost store-bought in its refinement.
Beyond the basics, there’s a universe of variations that breathe distinct life into the same pattern. One practical variation is to add a lining that contrasts with the exterior, if you enjoy color blocking or playful fabrics. A lining creates a light, airy interior that’s easier to wipe clean, especially when you’re carrying damp groceries or a spill-prone lunch. A pocket or two sewn into the lining becomes a reliable home for small items that tend to vanish in the bottom of a bag. If you’d like to keep the exterior free of extra seams, you can place a lining directly inside and stitch along the top edge to secure it, allowing the interior pocket structure to form from the lining’s own pieces.
Another variation centers on structure. If your fabric is lightweight or you want a tote that holds its shape more confidently, consider stabilizing the main panels with a fusible interfacing. A 60-gram interfacing or a similarly light fusible can give the bag body without making it stiff, preserving flexibility for everyday use. Interfacing is especially helpful when you plan to carry heavier items like a laptop or books. If you prefer an even stiffer silhouette, you can double the interfacing or choose a heavier-weight option. The choice of interfacing affects how the bag handles folds and how crisp a top edge you get after pressing. A well-interfaced tote holds its form in a way that makes it feel intentional, not flimsy, and it pays off in professional-looking results that don’t require stitching perfection to appear neat.
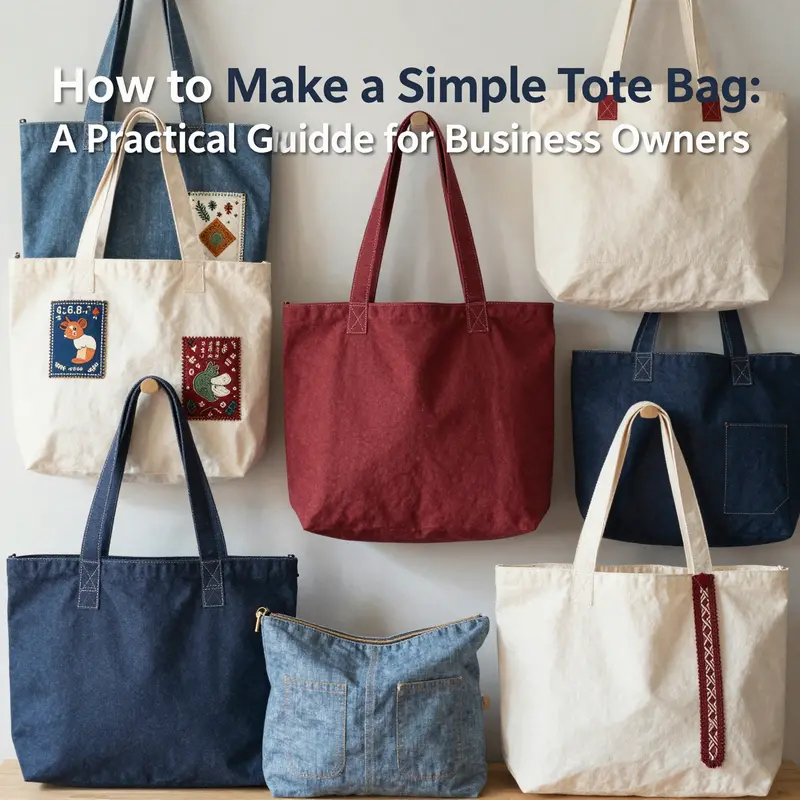
Color blocking and fabric choice are natural ways to personalize a simple tote. You might pair a sturdy outer fabric like canvas or denim with a contrasting lining in a softer material. Or you could experiment with a single fabric that features a subtle pattern, letting the weave or texture do the visual work. The key is consistency in scale; large prints can overwhelm a small tote, while small prints or solid colors tend to look more cohesive across the surface. You can even repurpose materials for a sustainable twist. Old jeans can yield durable panels, while a worn-out sheet or curtain can supply the lining or pockets with a nostalgic, upcycled look. The flexibility here is a joy to learners who want to see immediate, tangible results from their choices.
A more structured variation emerges when you consider the bag’s silhouette. The fold-and-sew technique from a different tote guide shows how folding corners inward and stitching along a defined line can generate a boxy shape that stands upright even when empty. If you want that effect, you’ll need to control the width of the folded section. This approach gives the bag a distinct architectural vibe, turning a simple rectangle into a small standing tote that carries its own sense of purpose. The same underlying method—the careful alignment of pieces, the steady hand when sewing, and the patient finishing—remains at the core, but the result shifts from casual to refined with each calculated fold.
Accessories and ornamentation are the final layer that can elevate a basic tote without compromising its simplicity. A small, zipped pocket on the outside offers secure space for keys and a card, while an embroidery motif or an applique on the front panel adds a personal touch. Embellishments should be carefully balanced with the bag’s weight and use; heavy appliqués or thick patches can distort the silhouette or strain the seams at stress points. If you’re unsure, start with a subtle accent: a single embroidery motif, a stitched border, or a small patched area that echoes the fabric’s color family. You can also explore finishes like a hidden magnetic snap or a simple fabric loop closure for a tidy top line that keeps contents secure while maintaining the tote’s minimalist charm. The aim is to keep the bag functional and clean while letting your personality shine through small, purposeful choices.
When you’re developing your technique, a few practical tips from broader tote-making guidance can help you stay on track. Precise cutting remains the foundation of a tidy finish, and it’s worth investing a little extra time in that step. Stabilizing with interfacing makes sense when the fabric weight is light enough to flop, but you don’t want the bag to feel stiff or uncomfortable to carry. Pressing after each major seam helps align pieces, sets stitches, and makes the final assembly feel confident rather than hurried. A secure handle attachment, reinforced with multiple stitches or a double line of stitching, ensures the tote can carry the weight you expect it to bear. Finally, a well-chosen top finish—whether hidden or visible—gives the bag a professional edge that elevates the entire project from a hobby to a durable everyday companion.
If you would like to explore additional variations that align closely with the concept of a simple tote while offering a more complex visual or functional outcome, consider viewing design examples that emphasize adjustable or hidden closures and smarter interior organization. A practical, easy-to-implement upgrade is a zipper pocket or a small zippered top panel for a quick security boost without disrupting the bag’s clean lines. For a sense of how these details look in practice you can explore a collection of related ideas here: tote bags with zippers. The page provides ideas on incorporating zipper closures in a tote, a feature that can be adapted to almost any fabric and lining setup without sacrificing the simple aesthetic you’re aiming for. This reference supports the mindset that small changes can deliver meaningful results while keeping the core technique approachable for beginners.
As your tote evolves, it’s worth noting that sustainability and resourcefulness can guide many of your choices. Heavier fabrics like canvas or denim deliver longevity, while lighter fabrics may be enhanced by interfacing to hold their shape. Upcycling fabrics from old garments, curtains, or sturdy linens invites a playful experiment with color and texture while teaching about material stewardship. The interplay between exterior fabric and interior lining becomes a canvas for your taste whether you favor a bold contrast, a subtle harmony, or a single elegant tone. The key is to approach each decision with the same calm, methodical pace you used to cut and stitch the bag’s body. If you’re ever unsure about a particular variation, test it on a mock-up or scrap piece before committing to the final bag. This approach minimizes waste and helps you learn from small mistakes in a low-risk way.
In closing, a simple tote bag is more than a functional carrier. It is a compact exercise in measurement, planning, and finish, a project that rewards patience and care with a durable, adaptable companion. Each decision you make—from cutting and interfacing to handle construction and top finishing—contributes to a sense of ownership and craft. When you finally carry your finished tote, you’ll feel the satisfaction of a project that began with a rectangle of fabric and ended as a personal tool for everyday life. The tote has absorbed your choices, your methods, and your style, becoming not just something you own but something you made with intention. For those who prefer a visual guide as they work, a comprehensive video tutorial can provide a helpful demonstration of the fold-and-sew emphasis and other variations described here: a link to a video can offer practical context.
Final thoughts
Mastering how to make a simple tote bag combines understanding essential materials, adhering to a clear production process, and applying thoughtful variations to stand out in the market. For business owners, this skill opens avenues to provide sustainable, reusable bags that resonate with customers and enhance brand visibility. By implementing the guidelines and tips shared, you can efficiently produce durable tote bags that not only meet functional needs but also present opportunities for creative branding and customer engagement. Embracing this craft transforms a basic sewing project into a strategic business asset poised for success.