
Making your own tote bag is an excellent way for business owners to showcase their brand while reducing environmental impact. This DIY project not only offers a practical, reusable accessory but can also serve as a promotional item that speaks volumes about your company’s commitment to sustainability. In the following chapters, we’ll delve into the essential materials needed, effective cutting techniques, handle preparation tips, the sewing process for assembly, and personalization strategies that can elevate your tote bag from functional to fabulous.
The Material Map: Choosing Fabric, Fasteners, and Finishes for a Tote Bag
The tote bag is more than a practical container; it is a canvas for how we move through the day. The choices you make at the material level set the tone for durability, appearance, weight, and how the bag behaves when you load it with groceries, notebooks, or a quick gym change of clothes. A thoughtful approach to fabrics, linings, and hardware helps you design a bag that fulfills a purpose while also reflecting your personal style. In this chapter, we explore the material map that guides every tote—from the broad category of main fabrics to the quiet decisions that determine how sturdy the bag will feel in your hands. This is where the project stops being generic and starts feeling personal, because the fabric you pick, the lining you choose, and the hardware you attach are the tactile evidence of your choices: how it wears, how it carries weight, and how it ages with you.
Begin with the main body fabric, the backbone of the tote. Cotton canvas offers a reliable blend of strength and lightness. It breathes, it launders well, and it accepts dye and print with satisfaction. Canvas tends to be forgiving for beginners, forgiving in part because it doesn’t stretch much and holds a crisp shape if you add a touch of interfacing where needed. If you want a bag with more texture and a touch of rugged charm, denim is another excellent option. It holds its shape, hides minor scuffs, and develops a patina that tells a quiet story over time. For a more economical and eco-friendly approach, brown kraft paper provides a minimalist option that works well for simple, printed totes or a natural aesthetic. It is not as forgiving as fabric when it comes to heavy loads or wet conditions, but it can be surprisingly durable for light daily use and is easy to recycle or repurpose after its first life.
Beyond these, there are more luxurious paths. Leather or leather-like options bring an instant sense of refinement and weight. Calf or goat leather, for example, can elevate the tote to something that feels crafted and enduring. But leather requires careful consideration: it adds cost, weight, and care demands, and its use often drives design decisions about closures and structure. The material choice also influences how you approach construction. A leather exterior may benefit from a structured lining and reinforced handles to prevent sagging or failure over time. If you lean toward experimenting with texture, consider twill or a heavier weight fabric that can be dressed up with contrast stitching or tonal hardware. Each material has a personality, and what matters is how it serves your daily routine and handling preferences.
After you select the main fabric, the lining becomes the quiet partner that defines the bag’s interior experience. Felt offers a soft cushion and a protective boundary for delicate items, while suede-lined interiors convey luxury and a refined touch, albeit at a higher maintenance cost. Canvas can function well as a lining, offering a durable, easy-to-clean interior that holds up to repeated use. Microfiber or other ultra-fine fibers provide a plush, smooth feel that glides against contents, which is particularly appealing for a tote that carries electronics or fragile items. Polyester or non-woven linings, often used in mass-produced bags, balance cost and practicality, presenting a clean interior with decent resistance to staining and odor absorption. The choice of lining affects not only aesthetics but also the bag’s shape retention. A stiffer lining can help the tote maintain a crisp silhouette, especially when you don’t use a lot of interfacing elsewhere.
When you begin to assemble the hardware and structural elements, the conversation shifts from the face of the bag to the bones that support it. Handles or straps can be fabricated from fabric for flexibility or from leather for durability and a luxury feel. The length of the handles should be tailored to how you carry the bag; common sizes range from comfortably hand-held to shoulder-friendly, depending on your height and how you intend to use the bag. D-rings, small metal rings, are practical anchors for straps, providing adjustability and a clean finish. Zippers, snaps, or buttons offer closures that keep contents secure and help shape the top edge. For pockets and external details, consider metal decorations or rivets that reinforce stress points while adding subtle personality. Remember that hardware isn’t just ornamentation; it is a functional element that influences how you plan stitching lines and reinforcement.
Interfacing plays a pivotal role when you want more structure without adding excessive weight. Interfacing or fusible backing can be used on the handles to prevent stretching and on the bag body to maintain a tidy silhouette. The decision to add interfacing depends on the fabric’s inherent stiffness and the bag’s intended use. A tote that will regularly carry heavy items, such as a laptop, benefits from a sturdier structure, whereas a light tote made from canvas might only need a touch of interfacing in the bottom seam to resist wear. Thread choice matters as well. A strong, medium-weight cotton or polyester thread with a bit of give helps seams survive repeated opening and closing without snagging the fabric. The seam allowance you choose—commonly around a half inch for a sturdy tote—works with most fabric families, but you can adjust it to balance bulk with durability.
Careful material selection is not merely about how the bag looks on the first day; it’s about how it ages and what you are willing to maintain. A canvas tote may show wear through brushed edges and patina at corners, while a leather-topped tote will gather creases, scratches, and color shifts that can be cherished as character. If sustainability matters, you might prioritize fabrics that can be reused, repaired, or repurposed. Reclaimed denim, for instance, can yield a tote with a story and a rugged charm, while a light cotton canvas with a simple dye is easy to refresh with a wash and a gentle press. Consider the load you plan to carry most, the climate in which you live, and your willingness to care for the material. A bag that’s easy to clean and quick to dry has its own appeal, especially for daily errands and on-the-go use.
As you wire together these material choices, you begin to see the tote emerge as a cohesive system rather than a collection of parts. The main fabric and lining must work in harmony; the hardware should support the design without overpowering it; and the finish should reflect the level of care you want to invest in the project. Many makers start with a yardage plan that aligns with standard sizes, such as a 14-by-16 inch body, and then map out headaches and breakthroughs alongside the fabric’s grain and stretch. If you are including handles, you’ll want to calculate their length and width against your chosen fabric and the weight you expect to haul. A wider strap distributes weight more evenly, reducing discomfort, while a narrower strap can work beautifully for lighter loads or a more delicate aesthetic. The interplay of these elements—grain alignment, stitch density, and edge finishing—creates a tote that feels balanced and reliable in the hand.
For readers who want to translate these ideas into a concrete starting point, the sensory evaluation of fabric can guide decisions. Put your fabric under a simple stress test: pinch the edge and pull gently to feel how the fibers respond. Does the canvas resist distortion, or does it limp under pressure? Are the denim fibers stiff enough to retain form, or do they require heavier interfacing? If you lean toward natural fibers, consider whether you’re ready to invest time in maintenance, such as occasional conditioning for leather accents or careful spot cleaning for suede. If you favor synthetics for their stain resistance and lighter weight, think about how the interior lining will interact with moisture and odor. The practical calculus of material choice reveals the character of the bag you will carry through your days.
A note on exploration and inspiration: if you want to see how fabric choices translate into finished totes, you can explore a range of fabric-focused designs in collections such as fabric tote bags for women. This resource offers a view into how texture, color, and weight play together in real-world projects and can spark ideas for your own tote. For a quick, focused example of how zipper hardware can influence design, consider the practical realities of a tote with zipper closures that keep contents secure during daily commutes. When you plan, you are shaping not just a bag but a daily companion that accepts your habits and adventures.
In the end, the materials you choose determine the tempo of your build. They guide your cutting plan, your seam allowances, and your finishing touches. They influence how you press, how you finish hems, and how you secure the bottom to withstand a weighty load. The chapter of materials is the preface to every stitch you will sew. It is where intention becomes form—and where form earns function. As you move forward, you’ll find that the right combination of fabric, lining, hardware, and reinforcement makes the rest of the process feel almost inevitable: the bag comes together with a quiet confidence, and you carry it with the sense that it was designed with you in mind.
External resource: https://alltotebags.com/tote-bags-with-zippers/
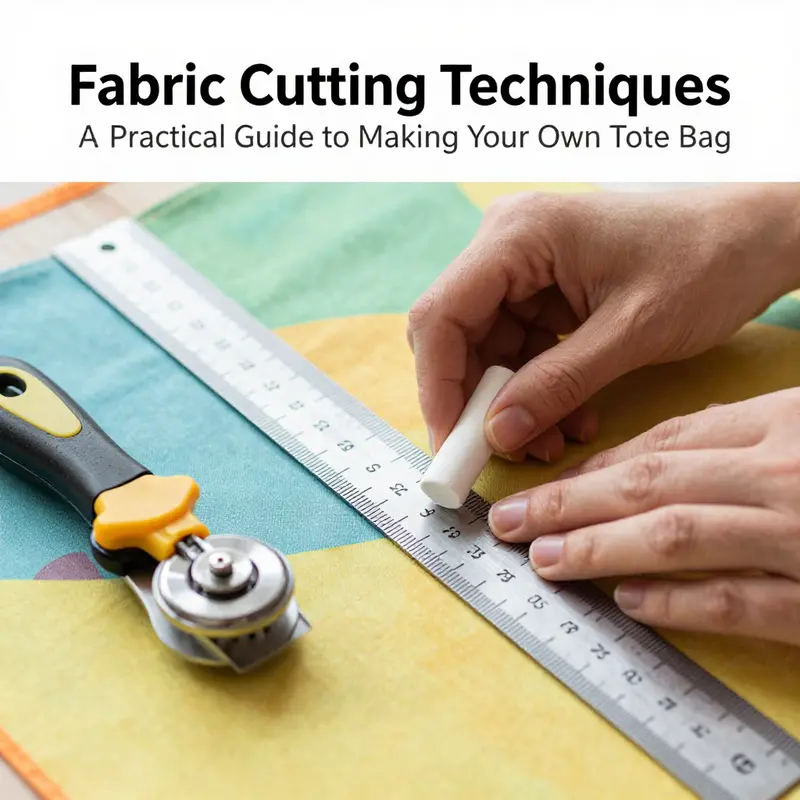
From Flat to Form: Mastering Precision Cutting for a Durable Tote Bag
The art of making a tote bag begins long before the needle meets the fabric. It starts with a precise, thoughtful cutting process that transforms flat material into a sturdy vessel ready to carry daily life. When you cut with care, everything that follows—seams, shaping, and even how the bag wears over time—falls into place with a quiet confidence. The cutting stage is the moment you translate measurements into a three-dimensional object. It is where patience becomes profit, where accuracy yields durability, and where your personal design choices begin to emerge from the fabric itself. To do it well, you need a clean workplace, a calm plan, and tools that respond to your intention rather than fight against it. First, prepare the fabric as if you were laying out a map for the journey ahead. Iron the yardage until every crease dissolves, especially across the grain. Wrinkles distort angles and can skew the final dimensions, so a crisp surface is your ally. A well-pressed sheet makes it easier to align patterns, trim edges, and keep seams true as the bag grows from two pieces into a single, confident form.
The tools matter as much as the mindset. A rotary cutter glides through fabric with a glide that a straight pair of scissors sometimes cannot achieve. It is the choice that smooths long, straight edges and keeps the cut line consistent from one edge to the next. A self-healing cutting mat protects the work surface and gives a forgiving surface that won’t nick the blade. A clear acrylic ruler helps you establish true 1/2-inch seam allowances and trace precise lines. When you measure, you measure twice and cut once, tracing out the panel shapes on the fabric with chalk or a washable marker so you can see the lines clearly through the fabric without leaving permanent marks. The goal is to create repeatable, symmetric panels that will sew together with minimal fiddling later.
Understanding how the fabric will behave after sewing requires thinking about grain and stability. Cut two identical front and back panels for the main fabric, and do the same for the lining if you’re adding one. If you’re including a bottom piece for extra structure, decide whether you want a separate bottom or a double-layered approach by folding and stitching the sides together for a reinforced base. The grain should run parallel to the bag’s height, especially for the front and back panels, so the tote wears evenly and resists distortion under load. If you’re using canvas or denim, the stability of the weave will help the bag retain its shape; if you fold or cut across grain, you’ll notice draping and edge wobble that makes finishing more challenging. Layout planning becomes the quiet hero of a clean cut. Place pattern pieces on the fabric with a careful eye for waste, but also with the intent of symmetry. This is where planning pockets or decorative panels should be considered before you make any cut. As you plan pocket placements or different handle styles, review layouts that appear in typical fabric tote guides such as those found in Fabric Tote Bags for Women.
When you map out each panel, mark cut lines and notches clearly. Notches help align pieces that are not mirror images or are offset by pockets, zippers, or corner reinforcements. Use a fine chalk line or washable marker to trace the outline of each piece, ensuring the lines are straight and parallel to the edges. If you’re incorporating a lining, cut two identical pieces for the lining as well, keeping the same seam allowances to guarantee a smooth interior and exterior seam alignment. The standard seam allowance for tote construction is 1/2 inch (about 1.3 cm). This measurement carves out a small but reliable buffer that preserves the final dimensions after stitching, preventing a bag from shrinking or widening unexpectedly as you sew. It sounds small, but a consistent 1/2 inch everywhere is what keeps corners square and sides parallel.
Pre-washing the fabric before cutting is more than a habit; it’s a safeguard against future distortion. Fabrics can shrink or warp in the laundry, especially if you are using cotton or denim blends. Pre-wash, dry, and then iron again before you lay out your pattern. The pre-wash step stabilizes the fabric so that the cuts you make today will align with the finished product after turning the bag inside out and giving it that final press. This often means you will recalculate a line once or twice, but the payoff is a tote that keeps its shape through repeated use. The idea of layout also extends to incorporating features like pockets or external panels. Plan their locations during the cutting stage—stitching them later without knowing where they’ll land can lead to misaligned seams and inconsistent finishes. The layout phase thus becomes the developer of your bag’s personality, balancing function with style as you decide where to place a pocket, a contrast panel, or a reinforced bottom.
When you begin cutting the main pieces, adopt a system that keeps your hands steady and your mind sure. Place your fabric on the mat, align the edge with the ruler, and trim along the line with a smooth, continuous pass of the rotary blade. Do the same for the lining panels. If you’re using a contrasting bottom piece for extra strength, cut that piece with the same respect for grain and access to the seam allowance. Keep the cut edges parallel; avoid jagged edges that will complicate stitching or cause the bag to skew as you sew. If you are cutting two pieces that must match perfectly, lay them one atop the other and cut them simultaneously, if your pattern and tools allow. This practice minimizes the chance of slight differences creeping in between the front and back panels, a subtle but visible flaw once the bag is assembled.
The moral of cutting lies not only in the act of trimming but in the forethought of how each piece will align during construction. Mark all notches, cut lines, and placement guides on every panel, then double-check the layout before moving to sewing. A small misalignment at the cutting table is much easier to correct than the same error discovered under a seam ripper when you’ve already joined pieces. Even the handle pieces deserve deliberate handling. Cut them with intention: the same width across both pieces, the same length for a secure, comfortable grip, and with ends finished to resist fraying. If you plan to attach handles directly to the front and back panels, position them roughly 3–4 inches from the top edge so they won’t slip during use yet will be easy to grab when you reach for your bag. This step, though seemingly minor, influences how the tote sits when it’s carried and how its weight distributes across the seams.
As you work through the cutting phase, consider how you will join and reinforce edges later. The bottom edge and side seams gain strength from the 1/2-inch seam allowance, but you can add extra stability with a bottom piece or by stitching a fabric interlining as you sew. The idea is to create a foundation that resists stretching and sagging when the tote is loaded. If a stiffness is desired, you might also consider interfacing or a light batting to the main panels, though this adds bulk and changes the bag’s drape. In either case, plan these additions during cutting so you know where extra layers will be placed and you don’t inadvertently cut through them later. The discipline here saves time and nerves in the sewing room.
A finished tote bag emerges from an unassuming act of careful cutting. The cut lines, notches, and seam allowances become the scaffolding that support the full assembly, turning raw fabric into a sturdy, practical companion. When you sew the pieces together, the precision of your cuts shines through in the bag’s corners, its straight edges, and its ability to hold its shape with use. The result is not just a bag but a testament to a process where calm planning and precise measuring pay off with a durable, attractive finished piece. This approach—preparation, layout, accurate cutting, and deliberate marking—creates a foundation you can rely on whether you’re crafting a simple everyday tote or a more feature-rich version with pockets, linings, and optional closures. For further guidance and example layouts, you can explore a broader range of fabric tote designs in the guide on Fabric Tote Bags for Women. And when you want a comprehensive, illustrated reference to the cutting process and step-by-step visuals, you may find a detailed, image-rich tutorial at Maake that complements this chapter’s approach. External resource: https://www.maake.com/how-to-make-a-tote-bag-easy-12-steps-guide-with-images/
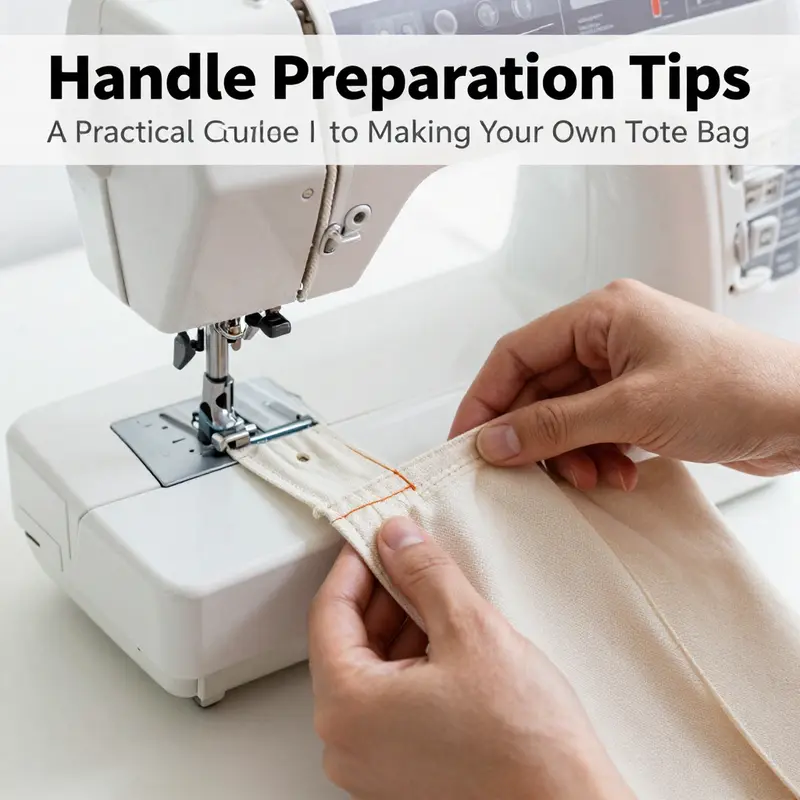
Handles That Last: Preparing Strong, Comfortable Tote Bag Straps
Preparing Strong, Comfortable Handles
Handles are the functional heart of any tote. They carry the load, define how the bag hangs, and shape the user experience. A well-made handle feels sturdy and balanced in your hand. It resists stretching and wear. It sits comfortably on your shoulder. Preparing handles well transforms a simple tote into a reliable everyday companion.
Start by choosing the right material. Heavy-duty cotton canvas, denim, or woven webbing work best for repeated use. Canvas provides a soft, durable feel. Webbing offers immediate strength and needs no folding. If you repurpose fabric, aim for pieces without weak spots or heavy fading. Thin quilting cotton looks pretty but strains quickly under weight. When durability matters, pick cloth with tight weave or consider adding interfacing for reinforcement.
Length and width matter more than you might expect. For a shoulder tote, measure handles between eighteen and twenty-four inches from end to end. This length allows the bag to sit comfortably under the arm. Shorter straps suit hand-carry totes. Width affects comfort: narrow straps concentrate pressure and dig into the shoulder. Aim for three to four inches in fabric width before folding, or use ready-made webbing around one inch wide. Wider handles spread weight and feel gentler when carrying groceries or books.
Cut your handle pieces precisely. If you are making fabric handles, cut two strips for each handle if you plan to sandwich an inner lining. Typical dimensions are three to four inches wide and twenty to twenty-four inches long. If you add interfacing, cut it slightly narrower so it won’t peek out after folding. Trim ends square and press consistently; neat ends make topstitching simpler.
Folding and pressing are where a handle starts to look professional. Fold each strip in half lengthwise with the right sides facing. Sew a long seam along the long edge using a quarter-inch seam allowance. Turn the tube right side out and press flat. If you used webbing, trim the ends and press only the bag edge areas. For fabric tubes, topstitch along both long edges about one-eighth to one-quarter inch from the edge. This keeps the tube flat and reduces fraying. A second, decorative row of stitching can add strength and visual interest.
Reinforcing the attachment points prevents future tears. Handles focus stress on small areas of fabric. Treat them like structural elements. Add a small square of interfacing or a fabric patch on the inside of the bag where each handle will land. Use a denser interfacing for heavy loads. Apply it before assembling the bag so it sits flat. For extra insurance, add a narrow strip of fabric inside the seam where the handle meets the bag to spread the load across more fibers.
Stitching technique influences longevity. Sew the ends of the handles in place with a box stitch pattern: a square of stitches with an X inside. This pattern distributes stress across the patch and stops pulling. If your machine supports it, use a reinforced zigzag or triple-stitch through the box for extra hold. Always backstitch at the start and end of seams. If you prefer a simpler look, sew a double row of straight stitches close together where the handle meets the bag. Keep stitches even and tight for maximum strength.
Consider how the handles attach to the bag for both strength and aesthetics. Option one is to pin the handles to the inside of each panel and topstitch through both the handle and the bag opening. This method keeps the seam tidy and hides raw ends. Option two is to sew handles into the side seams, creating a loop that follows the bag’s edge. This approach hides raw edges inside the seam and makes the handle base inherently stronger. A third option uses metal hardware or rivets. If you use rivets, reinforce with a backing patch to avoid cutting the fabric’s integrity.
Small details make a big difference. Round the handle ends slightly for a cleaner look and to prevent corners from catching when you slip the bag on your shoulder. Clip seam allowances at the corners if sewing handles into a folded edge. Trim excess thread and press attachment points flat after sewing. Topstitching across the handle base not only holds the handle flat but also reduces movement and abrasion where it meets the bag.
Test the handles under realistic loads before finishing the bag. Fill it with books or canned goods and lift. Look for signs of strain: stretched stitches, puckering, or fabric tearing. If seams distort, remove the handle and reinforce with a larger patch or additional rows of stitching. Repeat the test until the handle stays secure with the intended weight.
Comfort is often overlooked but crucial. Padding can be added to the handle for heavy loads. Insert a thin strip of foam or batting inside the handle tube before closing the seam. This gives the shoulder a softer interface and reduces fatigue. Another option pairs a soft inner strip with firmer outer fabric. Choose a balance that supports load while remaining comfortable.
Pay attention to placement for balance. Position handles three to four inches from the top edge of a standard mid-size tote. This distance centers the weight and prevents the bag from tipping. If your bag is wider than average, space handles farther apart to keep items from spilling when you set the bag down. Measure each placement carefully and mark symmetrically on both panels for even alignment.
Finishing techniques enhance both function and style. Edge-stitch the top of the bag after attaching handles to lock everything in place. Applying a narrow binding across the top edge cleans raw seams and adds a decorative finish. When possible, match thread color to fabric for a subtle look, or contrast for a bold accent. Concealed stitching gives a refined finish, while visible topstitching emphasizes craftsmanship.
If you want examples of handle styles and patterns, consult a detailed visual guide. It will show pictorial steps for making tubes, attaching webbing, and sewing box stitches. That external resource helps clarify techniques quickly and shows alternatives for every skill level. For more tips and style inspiration, check a relevant internal resource on women’s canvas tote bags.
Well-prepared handles extend a tote’s life. They keep contents secure and make carrying a pleasure. Careful choice of material, precise cutting, clean folding, and reinforced stitching pay off in durability. Test your work under load and refine as needed. Those extra minutes of attention create handles that look great and last for many trips.
Stitching the Tote: A Seam-by-Seam Guide to Assembling Your Bag
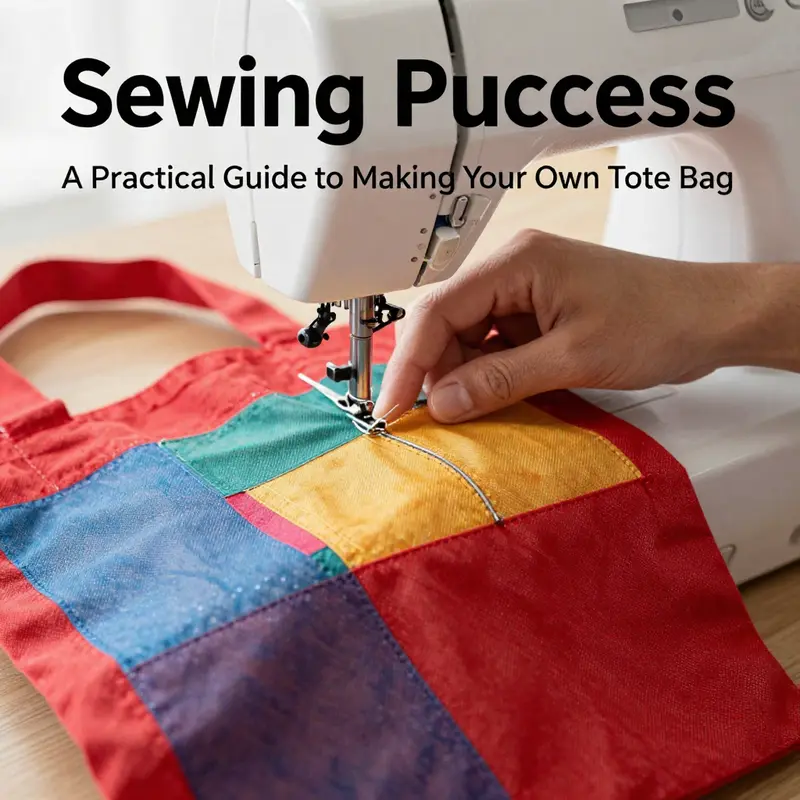
Creating a sturdy, attractive tote bag starts with a clear sewing plan and finishes with confident pressing and secure stitching. This chapter walks you through the sewing process in an integrated, practical way, taking you from prepped fabric to a fully assembled tote that will last. Along the way you’ll learn small techniques that make a large difference: how to reduce bulk, strengthen stress points, and keep seams neat. Read each step as part of a single, continuous workflow so the end result feels cohesive and professional.
Begin by checking your materials and preparing the fabric. If you prewashed and pressed your yardage, your pieces will hold their shape and match the measurements you cut earlier. Lay the two main body pieces right sides together on a flat surface, aligning raw edges and corners. Pin or clip the side and bottom edges, placing fasteners every 2 to 3 inches to prevent shifting while sewing. If you are using heavier canvas or denim, use longer pins or binding clips so the layers stay put.
Choose a stitch length that suits your fabric. For medium-weight cotton or canvas, a straight stitch at 2.5 to 3 mm gives a durable seam. Heavy fabrics may need a longer stitch length so the machine feeds smoothly. Start sewing at one bottom corner and stitch up one side, across the top edge where the opening is left, then down the other side and across the bottom to form a continuous seam. For a simple tote, stop before the top edge; for a boxed bottom—if you prefer extra depth—leave a small opening at the base for later trimming and turning.
Backstitch at each start and stop for strength. At stress points where handles will connect, reinforce with extra backstitches or a small box-and-cross stitch later when you attach straps. Keep your seam allowance consistent—typically 1/2 inch for casual totes and up to 5/8 inch for heavier fabrics. Mark the allowance with a fabric pen or tape on the machine plate if you need a visual guide.
Pressing the seams open after stitching transforms a homemade bag into a neater, longer-lasting one. Use an iron on the appropriate heat setting and press the seam flat. Open the bag through the top, turn it so you can access the inside, and press both side seams open. If seams are bulky, trim one seam allowance slightly before pressing to reduce thickness. For added durability, consider finishing raw edges with a zigzag stitch, pinking shears, or a serger before pressing.
If your design includes a lining, assemble it the same way you assembled the outer pieces. Sew the two lining panels together at the sides and bottom, leaving a small turning gap in the bottom seam if you plan to turn the bag through the lining. Press the lining seams open and set it inside the outer shell with wrong sides together, aligning the top raw edges. Pin or clip around the opening at evenly spaced intervals to keep the lining from shifting as you sew.
Handles deserve attention because they carry most of the load. If you made fabric straps, press each strap flat, fold raw edges to the center, then fold in half and press again for a clean tube. Topstitch along both edges of the strap to keep it flat and strengthen the construction. For machine-sewn straps, stitch down both long edges, then stitch a center line if you want a slimmer appearance. If you are using pre-made straps, position them so they are centered and equidistant from the side seams.
Attach handles before closing the top edge whenever the straps need to be stitched into the seam. Pin or clip the handles to the inside of the outer bag, placing the raw ends inside and aligning them with the top raw edge. Position them symmetrically, usually about 3 to 4 inches from each side seam, but adjust for your design and carry comfort. To sew the handles, stitch a small rectangle with an X through its center at each end of the strap. This box-and-X pattern distributes stress and prevents the straps from pulling loose when the bag carries weight.
With handles secured, it’s time to join the lining and outer shell at the top. Place the lining inside the outer bag with right sides facing each other, aligning raw edges and matching any side seams. Pin or clip the top edge carefully, smoothing fabric to avoid puckers. Sew around the top edge with a consistent seam allowance—1/2 inch works well. Leave a small turning gap if you did not leave one in the lining earlier. Trim seam allowances and clip curves or corners if your design includes them, being careful not to cut through stitching.
Turn the bag right side out through the gap or through the lining opening. Use a blunt tool to push out the corners for crisp points. Hand-stitch the turning gap closed with an invisible ladder stitch or machine-stitch it closed by topstitching close to the edge if the gap lies along a seam allowance. Press the top edge flat and topstitch around it about 1/8 to 1/4 inch from the edge. This topstitching secures the lining, creates a clean finish, and adds stiffness to the rim, helping the bag hold its shape.
If you opted for a boxed bottom, make sure the corners sit flat. Press them and sew a few reinforcing stitches across the corner seam about 1/2 inch from the tip. For extra durability, add a strip of fusible interfacing to the bottom inside before closing the lining. This strengthens the base and prevents sagging under heavy loads.
Add closures or pockets at this stage if your design includes them. Sew pockets to the lining before assembling the lining panels. For zippers, attach them between the outer and lining top edges before joining the two layers, or install a zipper pouch in the lining as a separate step. Snap or magnetic closures can be set into the top edge after the bag is turned and pressed; follow the hardware manufacturer’s instructions for placement and reinforcement.
Finish by giving the entire tote a final press. Concentrate on the top edge and handle attachments. Check all seams for loose threads and trim them carefully. Test the handles by lifting the bag and adding a modest load. If any seam shows strain, reinforce it with additional stitching from the inside.
Small finishing touches elevate the finished tote. Edge-stitch decorative seams, add a fabric label, or sew on a small loop for keys. If you used interfacing, a little additional topstitching around the base or pocket edges improves the bag’s structure. For a polished look, use matching thread and keep stitching lines straight and even.
For inspiration and variations on fabric choices and sizes, browsing examples of fabric tote bags can help refine your design and proportions. See a range of styles and fabric uses at this resource on fabric tote bags for women: https://alltotebags.com/fabric-tote-bags-for-women/. For technical reference on seam finishes, pressing techniques, and machine settings, consult this external sewing resource: https://www.threadsmagazine.com.
Sewing the tote is a continuous process where each step builds on the previous one. Follow a steady workflow: stitch, press, trim, assemble, and finish. With careful pinning, consistent seam allowances, and thoughtful reinforcement at stress points, your handmade tote will be both attractive and functional. The techniques here scale easily: use heavier thread and larger stitches for rugged materials, or finer finishes for delicate cottons. Whichever path you choose, a methodical, seam-by-seam approach ensures a durable bag you’ll enjoy using.
Finishing Flourishes: Personalizing Your Handmade Tote to Tell a Story

Personalizing a tote bag is where practical craft meets personal narrative. After you sew the body and attach handles, choices about texture, color, and details turn a functional carrier into a piece of wearable expression. Think of the tote as a small canvas. Each decision—patch placement, a single enamel pin, a stitched motif—should have intent. One well-chosen accent reads clearer than ten competing ones. Aim for that clarity as you plan final touches.
Start by considering balance and scale. A 14×16-inch bag needs a focal point roughly the size of a postcard to draw the eye without overwhelming the fabric. Place this element off-center or slightly above the midpoint for pleasing composition. Contrast matters: a matte embroidered patch pops against a glossy background. Likewise, a metallic pin paired with a soft leather tassel gives a tactile counterpoint that invites touch. Choose one dominant piece, then add one or two supporting elements to create a subtle hierarchy.
Materials are the language of personalization. Canvas, denim, and cotton accept paint, print, and stitching differently. Use fabric-safe paints and inks on natural fibers for vibrant, lasting color. For heavier canvas, consider adding light interfacing behind a printed or embroidered area to keep details crisp. Interfacing also prevents sagging when you mount heavier items like metal pins or layered patches. If you opted for a lined interior, use that extra layer to reinforce stress points and secure hardware. Reinforced topstitching where handles meet the bag increases longevity and makes bold attachments feel secure.
Surface techniques offer varied effects and accessibility. Simple heat-transfer vinyl gives a clean, modern look and works well for geometric shapes or text. Stenciling with fabric paint can produce a handcrafted aesthetic and allow for repeated patterns across multiple bags. Embroidery adds warmth and texture; even a modest satin stitch outline gives personality. For three-dimensional accents, sew on fabric patches or appliqué pieces. When attaching appliqués, stitch through all layers and finish edges with a small, tight zigzag to prevent fraying.
Interactive and dynamic elements make a tote memorable. A small, changeable card pocket on the exterior enables rotating displays. Insert a lenticular card for eye-catching motion effects, or a hand-cut illustration that slips in and out. For collectors, a clear sleeve inside the pocket protects delicate inserts while keeping them visible. Use a durable, resealable closure for the sleeve so you can swap contents often without damage. These choices let the bag evolve with you. The same tote can carry a different mood each week.
Hardware and closures also shape the user experience. A magnetic snap offers easy access while keeping contents secure. Consider a short zipper for the top if you often carry loose items. Metal rivets or decorative washers at handle bases provide both reinforcement and style. Choose finishes that complement the rest of the bag—brushed or matte metals pair well with natural fabrics, while polished metals suit glossy accents. When installing hardware, mark placements precisely and pre-punch holes when necessary to avoid fabric strain.
Small organizational touches increase the bag’s usefulness. Add an interior pocket sized for a phone, and a slimmer sleeve for pens or a compact notebook. If you plan to carry a laptop, integrate a padded sleeve that stays put when you open the bag. These features keep the interior tidy and protect valuables. A key leash or clip inside prevents searches at the bottom of the bag. Thoughtful organization feels like a luxury and makes daily use smoother.
Color and texture choices guide emotional tone. Muted palettes read classic and versatile. Bright, saturated hues feel energetic and playful. Consider the environment where you’ll use the bag. A dark base hides dirt; a lighter canvas shows paint and embroidery vividly. Texture combinations—raw canvas with glossy vinyl, or soft suede with antique metal—create visual depth. When mixing textures, limit the number of finishes to three or fewer. This preserves cohesion and avoids visual clutter.
Pay attention to placement durability. Items near edges or on seams receive more stress. Place heavy embellishments away from bottom corners and attach them through reinforced layers. If you plan to wash the tote, choose attachment methods that tolerate laundering. Sewn patches and embroidery survive machine wash better than glued-on embellishments. For anything glued, use high-quality fabric adhesive, and consider a small topstitch to add security. If you add a detachable element, like a charm or keychain, use a secure clip so it won’t fall off during regular use.
Personal touches tell stories. A stitched date, a small map coordinate, or a tiny pocket holding a memento can make the tote uniquely yours. Use labels sparingly; a single woven tag with initials or a brief quote can become a signature detail. Keep personalization legible and well-placed. Avoid cramming writing into narrow spaces. When adding text, test fonts and sizes on scrap fabric to ensure readability after wash and wear.
Presentation and protection matter if you plan to gift or display your tote. A clear protective sleeve inside a box keeps delicate attachments safe. For collectors who rotate decorative cards or pins, organize the extras in clear page protectors so they remain pristine. These cases also make swapping items quick and tidy. If the bag will live in a closet, store it lightly stuffed to maintain shape. Avoid hanging heavy tote bags from narrow hooks to prevent strap deformation.
Maintenance ensures your customization endures. Brush off loose dirt and spot-clean stains promptly with a gentle detergent. Air-dry the bag away from direct heat or sunlight to prevent fading and distortion. For painted areas, allow full cure time before washing. For embroidered or sewn details, check stitching periodically and re-sew any loose threads. Replace worn hardware proactively. Little repairs extend the life of both the bag and your handiwork.
Finally, temper creativity with restraint. Let a single piece dominate and support it with subtle complements. Consider the bag’s purpose and the owner’s lifestyle. A grocery tote benefits from sturdier fabrics and fewer fragile accents. A daily city bag can carry one meaningful charm and a tidy interior layout. A gift bag can be more ornate, with layered details and a decorative sleeve.
For inspiration on fabric choices and ready-made designs, see a curated selection of canvas tote ideas for everyday use. External reference: https://www.sohu.com/a/86754321_120000
Final thoughts
Creating your own tote bag is not just about functionality; it’s an opportunity for business owners to express their brand identity while promoting sustainability. By following the detailed steps in each chapter, you can produce a high-quality, custom tote bag that resonates with your business values. Embrace the creative process, invest in quality materials, and showcase your brand in a unique way that attracts customers and enhances your reputation. Start crafting today and see how a simple tote can make a significant impact.