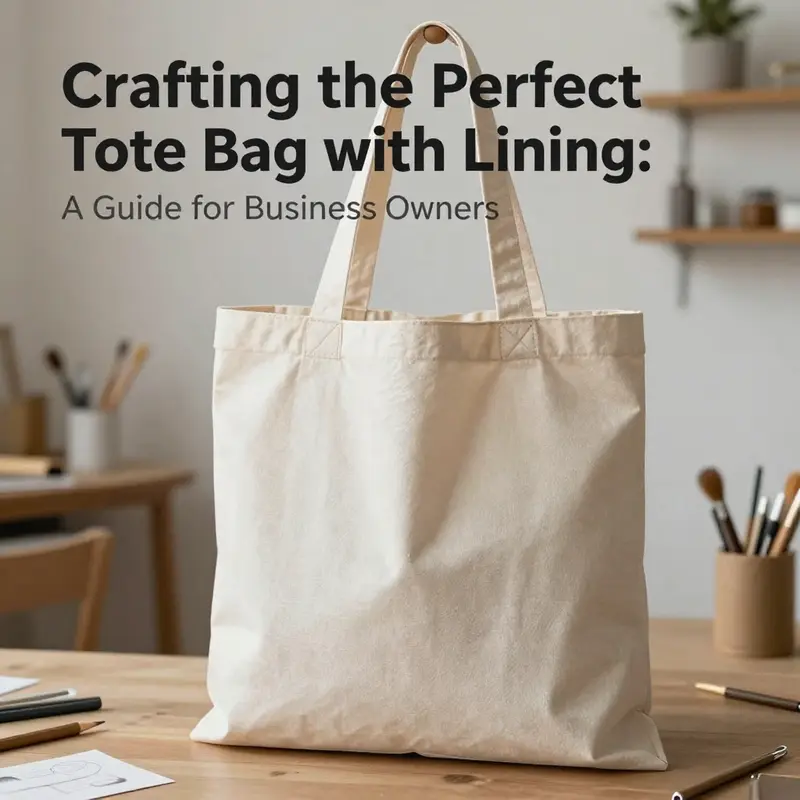
Creating a tote bag with a lining is not just a sewing project; it’s an opportunity to add a personalized touch to your offerings as a business owner. A lined tote bag not only provides ample functionality but also enhances the overall aesthetic—making it a desirable product for your customers. By understanding the necessary materials, sewing techniques, finishing touches, and tips for durability, you can craft a tote bag that aligns perfectly with your brand and meets customer expectations. This guide will walk you through each step, ensuring you gain the skills to create quality merchandise.
Laying the Groundwork: Thoughtful Material Prep for a Durable Lined Tote
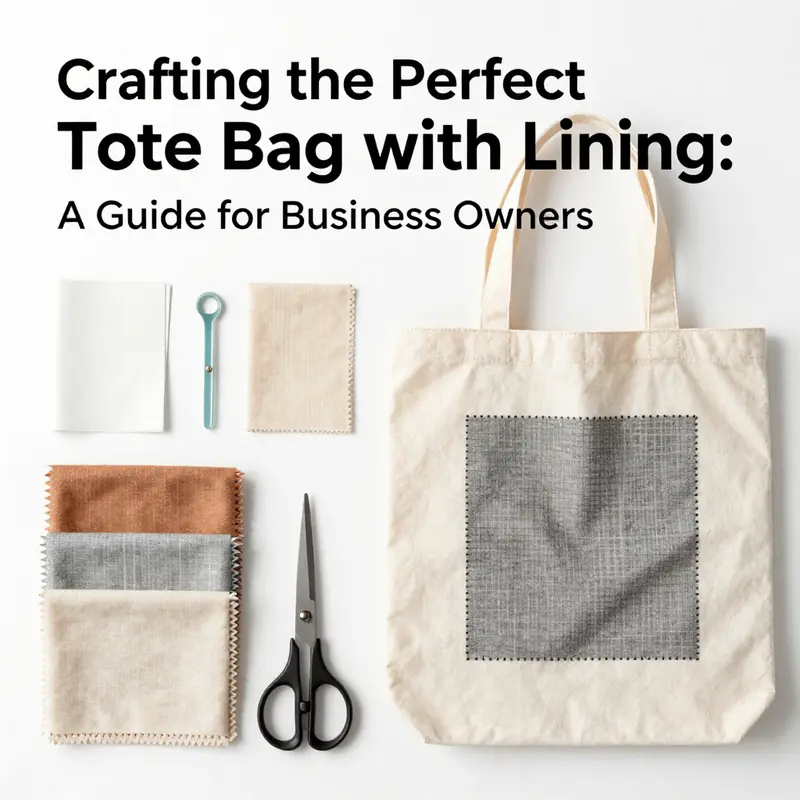
Preparing the materials for a lined tote is more than gathering fabric and thread; it is the quiet research that determines how well the bag will perform under daily use. When you choose outer fabric, lining, and the supporting components, you are setting a trajectory for strength, shape, and ease of construction. The outer shell should be capable of withstanding weight and abrasion, while the lining offers a smooth interior that adds structure without bulk. Together, they form a partnership that supports the bag’s capacity and longevity. The material choices you make here ripple through every stitch you sew later, influencing decisions about interfacing, thread weight, seam finishes, and even the way you handle turning and finishing. This chapter threads those ideas into a cohesive approach to material preparation that honors both practicality and personal style.
Start with the outer fabric. A tote is not a delicate accessory; it is a daily workhorse. Durable options such as canvas, sturdy 100% cotton, or repurposed denim provide the essential balance of body and resilience. Canvas tends to hold its shape well and tolerate a wide range of weights, while 100% cotton offers a softer hand with good wear resistance. Recycled denim brings a rugged texture and substantial weight, which can be advantageous for a tote that carries heavier items. The weave matters: a tight, even weave resists stretching, and a fabric with good structure will contribute to the bag’s silhouette even before you add any interfacing. If you decide to upcycle old garments, you gain character and sustainability in one move, but you must consider the fabric’s finish, colorfastness, and any repairs needed before you cut. The key is to pick a material that will not shrink excessively after washing, and that can handle the stress of repeated use while remaining comfortable to carry. A practical approach is to select outer fabrics with a consistent grain and a modest amount of body, so the bag retains its shape even when lightly loaded.
Inside the bag, the lining is the unsung hero. It hides raw edges, protects the contents, and softens the interior edges so every seam feels clean to the touch. Lightweight cottons, poly-cotton blends, or smooth polyester linings provide a gentle glide for items that slip in and out of the bag. The lining should be lighter in weight than the outer fabric to prevent bulk at the seams, but sturdy enough to resist tearing at the corners where the bag experiences the most friction. A well-chosen lining also offers opportunities for neat pockets and organizers that enhance everyday usability. If you imagine slip pockets for a phone, keys, or a small notebook, a simple 20 cm by 13 cm pocket insert can be enough to keep essentials easily accessible without cluttering the main compartment. The pocket fabric, like the rest of the lining, should be smooth enough to allow items to slide in and out without snagging.
Interfacing acts as the bridge between softness and structure. An iron-on interfacing is not always essential, but it can be a decisive factor in how well a softer outer fabric holds its shape and how crisp the bag’s edges appear. When you choose interfacing, consider how it will interact with both the outer fabric and the lining. A light-to-medium weight interfacing adds just enough body to keep the tote from collapsing under weight, especially if you choose a fabric with a lot of drape. If your outer fabric is already stiff, you may opt for a lighter interfacing or skip it altogether to preserve flexibility. The best practice is to test a small swatch of the interfacing on a matching scrap of your outer fabric and lining. Check for heat sensitivity, the way it adheres, and whether it introduces any stiffness that could distort seams or create puckers around corners. If you decide to include interfacing, apply it to the outer pieces before you begin any sewing; this can simplify subsequent steps and keep the lining clean and smooth when you join the two halves.
Thread and needle are the quiet workhorses that hold the bag together. The thread should be strong enough to withstand daily use, yet flexible enough to glide through multiple layers without snapping. A polyester or cotton-wrapped polyester thread is a reliable choice for a lined tote because it resists breakage and maintains color over time. Matching the thread color to the outer fabric often results in a neater surface, but if you want the interior seams to disappear, you can choose a thread color that blends with the lining or the interior pocket fabric. Needle choice depends on the fabric you are using: a sharp, slightly thicker needle works best for durable weaves like canvas or denim, while a universal needle is usually sufficient for lightweight cottons. If you are new to sewing thick layers, consider a walking foot or a non-slip foot to keep all layers feeding evenly under the needle. The goal is to achieve even tension and clean stitches that do not snag or skip, especially around bulky corners where the outer fabric meets the lining.
The toolkit you assemble will determine how smoothly you can translate ideas into a finished bag. Sharp scissors are essential for clean, precise cuts, particularly when you are working with multiple layers. Pins or clips keep everything in place as you sew; clips are especially handy when dealing with bulky fabrics and binding edges. A measuring tape or a ruler helps you mark precise stitch lines, seam allowances, and pocket placements. A fabric marker or tailor’s chalk guides you without leaving stubborn marks. While a sewing machine speeds things up, a sturdy hand-sewn finish can be equally durable if you take your time with every stitch. Decide on a seam allowance that feels comfortable for the fabric you are using—1 cm is a reliable standard for many woven fabrics, providing enough room to manage the edges without crowding the seams or creating a bulky finish.
Beyond the mechanics of cutting and stitching, there is a mindful side to preparation that makes the process more sustainable and personally meaningful. Upcycling old clothing—like turning an unused pair of jeans into the tote’s main body—simplifies sourcing while infusing the bag with character. Leftover cotton scraps can become the lining accents, and smaller fabric pieces can become internal pockets or tag strips. Pre-washing and pressing fabrics before cutting is essential; it stabilizes fibers, removes any residual finishes, and minimizes the chance of later shrinkage that would distort the bag’s proportions. This approach aligns with a broader DIY ethos that values resourcefulness and care for materials. It also reduces waste, letting you create something practical and beautiful from pieces that might otherwise be discarded.
When it comes to actual sizing, the numbers you begin with are your compass. In many common tote designs, outer pieces measure 32 cm by 70 cm, and the same dimensions apply to the lining pieces. The pocket, if you include one, often lands around 20 cm by 13 cm. These dimensions are helpful starting points, but the real discipline lies in preserving consistent seam allowances and grain orientation. Mark your rulers clearly on scrap fabrics first, so you know how much room you have for finishing and turning. If you are using iron-on interfacing, fuse it to the outer panel pieces before assembling, following the interfacing’s instructions for heat, pressure, and duration. A neat layout begins with a careful plan: place the outer panels right sides together, then align the lining pieces in the same way. The pocket should be positioned within the lining where it won’t interfere with seams or with the bag’s structure during turning.
Even the act of cutting—an ordinary step—deserves attention. Consider laying out your fabric on a flat surface, aligning the grain with the longest direction of your cutting mat or table, and placing pattern weights or weights you already own to prevent shifting. Use a fabric marker to trace the pattern, keeping your lines crisp and straight. If you are using a directional print or a nap on your fabric, be mindful of orientation to ensure the bag’s exterior looks coherent from any angle. Group the pieces logically: outer body pieces, lining pieces, pocket pieces, and any interfacing panels. Label the pieces clearly with a water-soluble marker or a small cotton tag to avoid confusion during assembly. The moment you take these small steps—measured, deliberate, and patient—can dramatically reduce misalignment and miscuts later in the project.
As you assemble, think about the turning port and the order of operations. The turning port is a small opening left unstitched near the top edge, which you will use to invert the bag after stitching. Planning its location in advance saves frustration and helps you achieve a crisp finish. It is often wise to stitch around the top edges with a straight stitch, then backstitch at the corners to secure the seams. When you turn the bag right side out, use a blunt tool to push the corners to sharp points and to nudge out any remaining fabric folds. A firm press follows: run a hot iron along the top edge and along each seam line to set the shape. A neat finish can be achieved by hand-stitching the opening closed with a ladder stitch, which hides the seam and maintains the clean interior appearance. If you prefer a machine finish, a careful topstitch along the opening can also look very professional, provided the stitching is even and sits just inside the edge.
The bottom deserves special attention, even though it may be the most overlooked part of a tote. A reinforced bottom—whether through rivets at the corners or a separate bottom panel sewn to the interior—greatly enhances durability for bags that carry heavier loads. The decision to add bottom reinforcement depends on how much weight you expect to bear and how active your daily routines are. If you anticipate frequent use with items such as notebooks, lunch containers, or tools, the extra bottom strength is a worthy investment. It also contributes to a more stable, boxy silhouette, particularly as the bag wears in over time. A few careful changes at the bottom can transform a tote from a simple fabric container into a reliable daily workhorse.
Handles are the final piece that ties the design together in both function and feel. The length you choose for the handles affects how the bag sits on your body and how comfortably it can be carried. A common range is 50 to 60 cm for shoulder carry, but you can adjust to your preference by measuring it against your own torso and how you plan to wear the bag. Fabric handles can be created by folding long strips of fabric, pressing them, and topstitching along the edges for durability. Alternatively, you can use sturdy pre-made twill tape or rope handles if that aligns better with your aesthetic. Attach the handles securely to the top corners, ensuring they are symmetric to distribute weight evenly when the bag is loaded. The finishing touches—such as a final press, careful topstitching along the handle attachment points, and a tidy interior finish—will help the tote feel balanced and well-made, whether you are using it for shopping, commuting, or weekend adventures.
If you want to visualize how these principles translate into a finished product, you can explore related patterns and configurations that emphasize different internal layouts or exterior forms. For instance, a design oriented toward laptop use requires careful attention to the interior pocket layout, reinforced corners, and a slightly different balance of weight across the bag. See also laptop-tote-bags-women. This internal link points to a resource that demonstrates how the same material-prep logic scales to variant designs, reinforcing how a well-prepared base remains the anchor for any successful tote.
As you move from fabric selection and cutting toward actual assembly, you will realize that preparation is more than a checklist; it is a method for shaping expectations and ensuring a high-quality outcome. The materials you choose, the way you treat them, and the care you take with each step determine not just the bag’s performance but its personality. A tote that bears weight gracefully, inside and out, is a reflection of thoughtful planning and disciplined workmanship. When you have gathered the right fabrics, tested your interfacing options, organized your tools, and planned your layout with attention to seam allowances and turning openings, you are ready to move forward with confidence. The next phase—assembling the outer bag, the lining, and the interior details—will unfold with a clarity that comes from having done the groundwork well. It is in these moments of consolidation, rather than the flash of a perfect stitch, that quality takes root and endures.
External resource for further visual guidance and patterns: https://www.craftycat.com/diy-tote-bag-personalization-guide
Secrets of the Stitch: Mastering Sewing Techniques for a Durable Tote Bag with Lining
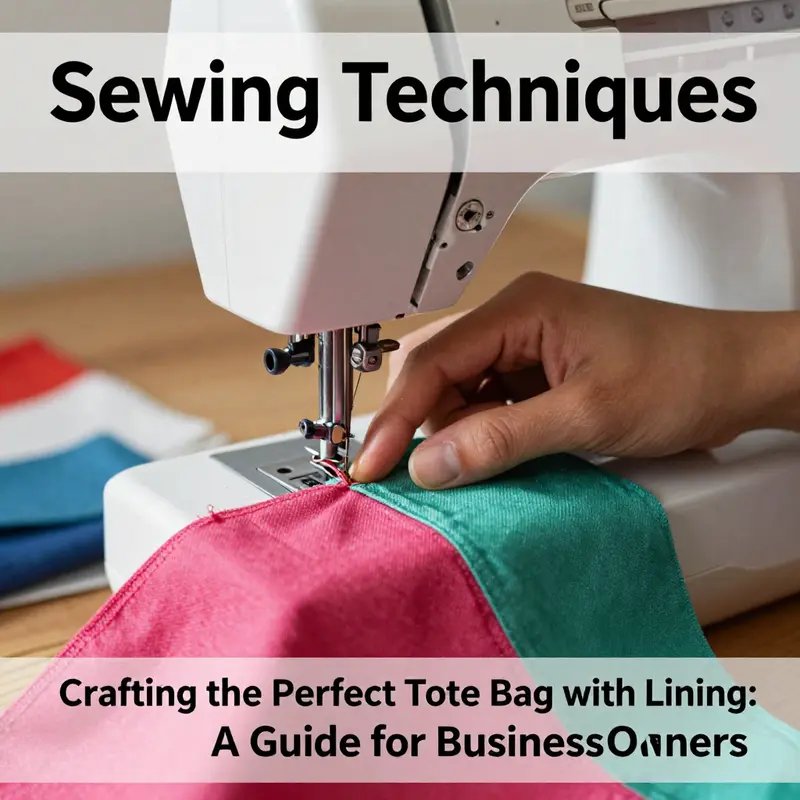
When you reach for a tote bag, the first thing you notice isn’t always the outside fabric or the color, but the way the bag holds its shape as you load it with groceries, books, or daily essentials. A well constructed lining isn’t merely decorative; it anchors the structure, provides a clean finish at the top edge, and protects the outer fabric from wear. The journey to a durable tote begins long before you stitch the first seam. It starts with careful preparation, thoughtful material choices, and a mindset that regards every press as a step toward precision. The following narrative winds through practical techniques that elevate a simple two piece outer canvas and a two piece lining into a bag that looks sharp, wears well, and ages gracefully with you. It’s a process that rewards patience and a steady hand, where each fold, each stitch, and each turn contributes to a finished product that feels coherent and sturdy from the moment you lift it up.\n\nThe foundation rests on preparation. Fabrics, even those as forgiving as denim or canvas, respond best when they are prewashed and pressed. Shrinkage later in life can distort seams, pull at corners, and leave the bag looking uneven. Prewashing removes the scale of potential surprises and stabilizes the fibers so that after years of use, the bag still sits neatly and the lining remains tucked and tidy. It’s a habit Dana Reyes, a seasoned instructor and designer, champions: pressing between steps is not a cosmetic flourish but a discipline that yields cleaner seams and easier alignment. You dry the pieces, then iron them flat before you lay them out to cut. When you begin cutting, you treat outer and lining as two parallel projects that will eventually become one. For the exterior and the lining, you’ll typically end up with two rectangular pieces each, sized to your chosen dimensions. The simple rectangle is deceptively powerful; it’s the accuracy of those edges and the straightness of the sides that determine how well the rest of the bag will come together.\n\nPlanning the pocket is the quiet, optional step that sets the interior apart. A pocket is not merely a surface feature; it’s a conversation between the lining’s surface and the bag’s daily rhythm. If you decide to include one, cut a piece of pocket fabric around 20 by 13 centimeters. Fold the top edge down by about 1 centimeter, press to crease, and stitch along the bottom edge to secure the fold. This pocket becomes a small stage inside the bag where keys, lipstick, or a notebook can rest in an organized space. Position it centrally on the lining with a few pins, then stitch it into place with straight stitches, ensuring the fold remains clean and the edges align with the fabric’s grain. The moment you attach the pocket to the lining, you’re reinforcing the idea that the interior should be as thoughtfully finished as the exterior.\n\nWith the interior concept in mind, you shift to assembling the outer body and the lining body separately. The outer bag body begins with the two outer fabric pieces right sides together. Sew along the left and right side edges, leaving the top open to form the bag’s silhouette. As you sew, you’re setting the fundamental lines of the bag. You trim seam allowances to reduce bulk, especially at the corners where two curves meet a straight edge. Bulk at corners can create lumpy corners and a misaligned top edge later, so this trimming is more than cosmetic; it preserves the bag’s overall shape. Turn the outer bag right side out, and you see how the fabric’s texture, weight, and color can be appreciated in a new light. The same sequence applies to the lining: place the two lining pieces right sides together, sew along the side edges with the top open, trim, and turn. If you included a pocket, double-check its placement before you turn the lining to its correct orientation. The moment the lining is turned, a quiet transformation occurs—the interior begins to mirror the exterior’s logic while adding its own internal depth.\n\nThe next, critical moment is to join the lining and outer bag around the top edge. This is where the work moves from simple assembly to controlled construction. Place the outer bag and lining right sides together, aligning the edges with precision. Pin around the entire perimeter, ensuring that the two top edges meet cleanly and lie flat. Stitch around the whole bag, but leave a deliberate opening—typically about 10 to 15 centimeters—at the top. This turning port is your gateway to turning the bag right side out. It’s a small step with a large impact: a well placed turning port helps you avoid fighting fabric as you enable the final transformation. After the stitch line is complete, you gently loosen any pins, then prepare to turn the bag through the port. It’s a moment of patience; the inner lining emerges and the outer fabric takes its place as a continuous, comprehensible form.\n\nTurning the bag right side out is both simple and satisfying. Use a blunt tool—the end of a wooden spoon, a chopstick, or a turning stick—to coax the corners into shape. The edges become crisp, the lines become clear, and you can press the bag flat with an iron to lock in the structure. Pressing isn’t a button you press and forget; it’s an ongoing habit that keeps the bag’s lines clean, especially along the top edge where the outer and lining fabrics meet. With the corners crisp and the sides even, you close the turning port. A neat method for finishing the opening is to stitch the port closed by hand with a ladder stitch for invisibility, or with a straight stitch if you’re comfortable with visible seams. The choice depends on your preference for a clean, almost invisible final edge or a consistent, visible seam that reads as part of the bag’s design.\n\nThis intersection of outer and lining is the heart of the interior’s discipline. The bag now has a seamless exterior rhythm and a lined interior that supports daily use. Yet it’s worth considering reinforcement ideas for longevity. The bottom, in particular, can bear most of the load. Optional yet practical improvements include rivets or small patches at the bottom corners, or even sewing in a separate bottom panel designed to distribute weight more evenly and maintain a flat base. These steps, while not mandatory, offer a tangible upgrade in durability without compromising the bag’s aesthetics. If you’re someone who carries a lot at once—books, groceries, or gym gear—the added bottom reinforcement can make a meaningful difference in how the bag behaves when it’s full and when it’s empty.\n\nWith the main structure complete, you turn your attention to the handles. Handles provide the tactile interface between wearer and bag. You can choose to make your own handles from fabric strips or to use store-bought handles for convenience. If you decide to craft your own, cut two strips of fabric long enough to be comfortable when carried over the shoulder or by hand. A common length is in the 50- to 60-centimeter range, but you can adjust to your height and preference. Fold each handle in half lengthwise, press, and topstitch along the raw edges to secure both sides. The critical moment is attaching them to the top corners of the bag. Consider attaching the handles at equal distances from the center, on opposite sides, to ensure balance when you carry the bag. You’ll often attach the handles to both the outer fabric and the lining at the top, stitching through all layers to boost strength. The goal is a handle that feels sturdy with a smooth, even pull, and that remains secure through daily use.\n\nThe finishing details matter as much as the big steps. Matching the thread color to the fabric helps the overall effect read as intentional rather than accidental. A walking foot is a wise companion when you sew through multiple layers, especially when canvas or denim is involved; it helps feed the fabric evenly and prevents skewing. Pressing between steps remains essential; it keeps seams neat and yields crisp corners. The intertwined beauty of lining and exterior comes from these small, considerate acts—press, align, stitch, and repeat. If you’re curious about options for the interior that extend beyond a basic pocket, you can explore designs that include multiple compartments, pen holders, or a separate zippered pocket. Each addition invites more careful measurement and more deliberate pressing, but the payoff is a bag that organizes itself as you use it.\n\nAs you breathe life into your tote, you begin to notice a common thread: precision in small steps yields confidence in the finished product. The seam line must be even, the top edge aligned, and the interior pocket, if present, securely anchored without puckering. The goal is a professional seam that feels deliberate rather than hurried. The finished bag should sit squarely on a surface, its corners crisp, its interior clean, and its top edge even and parallel to the bottom. It’s a practical achievement as much as an aesthetic one, a bag that can be used daily or gifted with pride. And though the process can feel like a sequence of repetitive tasks, each repetition hones your technique, reinforcing muscle memory that makes future projects smoother and more predictable.\n\nWithin this journey, the value of an integrated approach becomes clear. You don’t simply stitch two rectangles and call it a bag; you craft a living object, a small daily companion with a lining that protects the outer fabric and adds structure. The lining’s presence shapes how the bag wears, how it keeps its shape when piled with items, and how it feels when you reach inside for your phone or keys. In this light, the interior is not a mere afterthought but an interior design of practicality and resilience. If you’d like to see a related approach that demonstrates how a bag can accommodate a particular accessory—such as a laptop sleeve—you can explore a tote bag with computer sleeve for a concrete example of how pockets and internal organization can adapt to modern needs. For a broader sense of this kind of tailored interior, consider the tote bag with computer sleeve.\n\nIf you aim to expand your toolkit further, you’ll find that many sewists rely on the same principles across projects: prewash and press, maintain alignment, and choose right weight interfacing when the pattern calls for it. The experience of making a tote bag with lining becomes less about chasing a flawless result on the first try and more about building a reliable process you can repeat with confidence. The steps discussed—preparing the fabric, cutting thoughtfully, assembling the outer and lining, turning and finishing, reinforcing the bottom, and attaching handles—come together as a cohesive system. This system is more than a sequence; it’s a philosophy of durable design, a modest but meaningful way to express personal style while honoring the practical realities of daily life. The tote you create is a quiet invitation to thoughtful craft, a small piece of art that carries your world with order and grace. It’s a reminder that, in sewing as in life, the most durable things are often the result of careful, patient work done in a steady rhythm.\n\nTo complement this narrative, and to support those who want additional guidance, a concise, beginner friendly resource can be found in a step by step guide that emphasizes the basics of sewing a tote bag with lining. It covers the essential skills—prewashing, pressing, precise cutting, and careful turning—without losing sight of the overall harmony between structure and finish. You’ll find that the same core techniques recur across patterns and projects: consistency in seam allowances, insistence on neat edges, and clarity in how the lining relates to the exterior. As you gain confidence, you’ll begin to notice your own preferences—the balance between a visible topstitch and a clean, invisible finish, the type of bottom reinforcement that feels right for your needs, and the length of handles that best suits your daily routines. The more you sew, the more this quiet craft becomes part of your everyday toolkit, enabling you to create items that are not only useful but also expressive.\n\nExternal reference: https://www.allsewing.com/sewing-tips/step-by-step-guide-to-sewing-a-tote-bag-with-lining-for-total-beginners/
A Polished Lined Tote: Finishing Touches That Elevate Your Handmade Bag
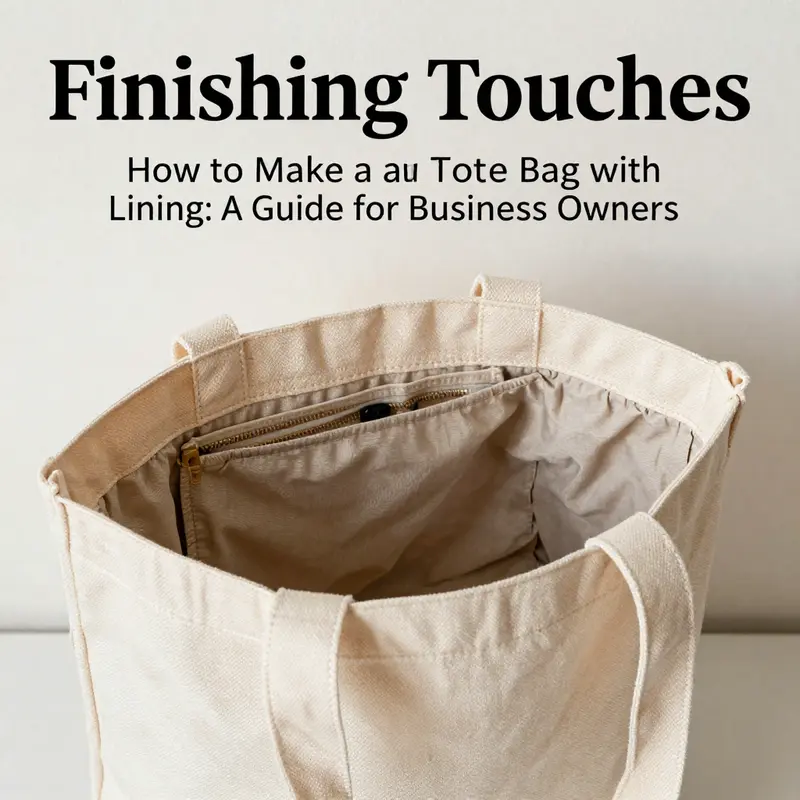
Finishing touches are the quiet work that makes a tote bag feel finished rather than merely assembled. They are the last careful motions that translate a pattern into a reliable everyday companion. In a lined tote, these touches do more than please the eye; they protect the fabric, reinforce stress points, and give the bag a silhouette that holds its shape as it carries everyday loads. The art of finishing begins long before the last stitch—in how you align edges, how you manage bulk through thick seams, and how you imagine the bag’s future use. When you approach finishing as a deliberate, thoughtful sequence, the interior lining becomes more than a decorative shield for the outer fabric. It becomes the backbone of the bag’s structure, a quiet source of durability, and a canvas for subtle details that reveal character without shouting. The sense of accomplishment comes not from a single dramatic move, but from a series of precise choices that knit together the exterior and the lining into a cohesive whole.
To begin, consider the foundational decisions that frame the finishing process. The outer fabric and lining are already cut and sewn into tubes or panels, and the turning port has been left open. What follows is the careful choreography of turning, aligning, sealing, and reinforcing—steps that, when done with care, yield a bag that sits squarely, wears well, and presents a clean, professional edge even after daily use. The first moment of transformation occurs when you bring the two main bodies together for the final join. You will place the outer fabric and the lining right sides together and pin with a calm, even pace. The goal is to trap the layers in a single, smooth seam that will become the perimeter of the bag. It is worth spending a little extra time to ensure the alignment is precise: outer edges flush, corners matched, side seams dovetailing cleanly. A small amount of care in this moment prevents a wavy top edge or a misaligned pocket later on. As you stitch, the thread path should resemble a river that travels steadily along the edge, with tension steady and uniform. A slightly longer stitch length can help minimize bulk where the edges meet, particularly if you are working with canvas or a heavier weight lining. You are not merely enclosing fabric; you are shaping the bag’s final face and its hidden heart.
Turning the bag right side out through the opening marks a pivotal moment in the process. It is the moment when layers that have lived face-to-face for hours suddenly reveal themselves in three dimensions. Use a blunt turning tool, a chopstick, or a dedicated turning stick to ease the corners and push out crisp points. Corners can be stubborn, especially at the bottom where the lining material might resist the outer fabric. Patience here pays off with clean, square corners that help the bag stand and resist collapsing under weight. After turning, give the whole surface a thorough press. A hot, steady iron helps set the shape and smooths any stubborn folds along the perimeter. Be mindful of the fabric’s heat tolerance; a synthetic lining may require a lower temperature, a pressing cloth, or a shorter press duration to prevent shining or scorching. The goal is a crisp, flat profile that looks deliberate rather than rushed.
Closing the opening is the practical moment when function and aesthetics meet. You have two main paths here: topstitching around the outer edge or employing a near-invisible blind stitch to seal the opening from the inside. Topstitching creates a visible, durable seam that anchors the upper edge and can serve as a decorative accent if you choose thread color that contrasts with the fabric. A chair-rail of stitches around the opening also helps keep the lining from creeping. A blind stitch, by contrast, hides the seam inside the bulk of the bag, offering a clean, uninterrupted outer line. Either choice works well; your selection should reflect how you want the bag to feel at a glance and how visible you want the stitch line to be from the inside. When you choose topstitching, it is worth running a line of basting stitches first to ensure the edge remains perfectly aligned as you stitch. The key is precision: the opening should sit flush and neat when closed, with no ripples along the edge. If you plan to add a zipper at the top, the closure step may occur earlier, or you may stitch the zipper to the upper edges of both outer fabric and lining before final assembly. A zipper gives a secure, contained top and can be a robust finish for busy tote users.
Perimeter topstitching doesn’t just add strength; it also defines the bag’s silhouette. When you run a continuous line around the edge, your bag gains a subtle frame that helps the lining stay put and resist wear at the top edge. A well-executed topstitch line sits slightly away from the edge, creating a clean border that draws the eye along the bag’s outline. For a polished look, you can mirror the topstitching on both the outer fabric and the lining along the same seam allowance. The result is a refined edge that suggests careful construction. If the fabric color is light, testing your thread choice on scrap fabric is wise. The goal is a thread that disappears into the seam yet remains sturdy enough to defend the edge against fraying and tugging.
The finishing stage also invites you to consider reinforcement at stress points. The bottom corners are common sites of wear, particularly when the bag sits on a table or is slid across surfaces. Some makers opt for rivets or metal reinforcements at the base corners; others choose an extra patch of fabric or interfacing stitched to the bottom layers. Either approach helps distribute weight more evenly and reduces the risk of an edge bulge or a seam rip as the bag carries heavier loads. If you choose to add an extra bottom panel, align it with the outer fabric and lining in a way that keeps the bottom flat and the sides straight. Reinforcements should be discrete yet effective, so they don’t intrude on the bag’s interior space or bulk the corners in a way that makes turning more difficult.
Handles are the next critical element in finishing. The moment you attach them is a test of both balance and durability. Cut two handles from your chosen material, whether fabric strips or sturdy twill tape, and finish the ends to prevent fraying. Length is a design choice, but 50–60 cm per handle is a comfortable range for many tote styles. Fold the handles in half lengthwise and press, then topstitch along the two edges to secure the fold. When attaching handles, space is everything. The base attachment points should align symmetrically with the bag’s sides and be positioned to distribute weight toward the sides rather than the center. A secure attachment uses multiple stitches and backstitching at the ends, and it often benefits from reinforcing patches on the inside where the handle meets the bag. If you’re working with a lining that supports a double layer, you can stitch through both layers to anchor the handles from inside for a cleaner exterior finish. Easy alignment helps ensure the handles ride evenly when the bag is carried, which makes a tangible difference in everyday use.
Optional details can elevate the bag’s finish without overpowering the design. For example, adding a small interior pocket to the lining can transform the tote from simple utility to a practical daily companion. A pocket offers a discreet place for keys or a phone, and its inclusion can actually improve the bag’s balance by providing a structured interior anchor. If you choose a pocket, position it centrally on the lining before turning. The pocket piece is typically folded at the top and stitched along the bottom edge, then attached to the lining with a straight stitch along the side and bottom edges, leaving the top edge open for easy access. This interior pocket, while modest, contributes to a sense of tidiness that the user will notice the moment the bag is opened.
In addition to pockets, some makers like to place decorative or functional sleeves or small patches. A contrasting trim along the top edge can subtly echo the handle color or add a spark of personality. Monograms or patches can reflect style without compromising durability, especially when placed away from high-stress zones. The balance here is to keep decoration minimal and purposeful, so the bag remains versatile rather than themed. If you are inclined toward personalization, consider a small embroidered emblem near the opening or along a side seam. The stitches should be secure and well finished to resist unraveling with use. Decoration should feel integrated, not tacked on as an afterthought.
Beyond aesthetics, the subtleties of finishing contribute to the bag’s longevity. A careful pressing after each significant step helps maintain crisp lines and a neat silhouette. Consistent pressings—after aligning seams, after turning, after attaching handles—set the fabric, reduce bulk, and discourage distortion as the bag is used. Dry pressing with a clean cloth or pressing aid helps prevent shine on delicate or synthetic fabrics and keeps the tote looking fresh after many trips to the market or the library. The choice of thread color also matters aesthetically; matching thread blends into the seam for a clean look, while a contrasting thread can highlight the craftsmanship and add a touch of personality. When in doubt, test a small seam on scrap fabric to observe how the thread behaves under your chosen fabric and tools.
If your tote features a zipper or another type of closure, the finishing rhythm may adjust. A zipper requires careful alignment at the top edges and often a reinforcing strip on both the outer fabric and the lining to keep the zipper stable as it moves. Centering the zipper and testing its operation before final stitching ensures a smooth glide and avoids bulk that could catch on the lining. For those who prefer a simpler, more tactile finish, a clean fold and blind stitch to close the turning port may be enough, especially if you want the exterior edge to read as a continuous line from one side to the other.
Another finishing detail that deserves attention is the interaction between the lining and the outer fabric at the top edge. If the lining sits slightly lower than the outer edge, you’ll enjoy a clean, defined top line when the bag is carried. Conversely, if the lining peeks above, you’ll get a softer edge that can be visually interesting but may require extra attention to seam alignment and turning accuracy. You can choose your approach based on the fabric’s texture and the bag’s intended use. Heavier fabrics like canvas can tolerate a firmer top line with a bolder topstitch; lighter fabrics may benefit from a subtler finish that keeps the silhouette delicate rather than bulky.
As you reach the final moments of finishing, an invitation to reflect on your bag’s potential life emerges. A lined tote is not merely a rectangular vessel; it is a daily companion that stores belongings, carries a sense of your personal style, and withstands the rhythm of errands, commutes, and casual strolls. Your finishing choices—how you close the opening, how you reinforce the corners, how you attach handles, and whether you add pockets or patches—together form a story about how the bag will be used. The best finishes marry form and function: they look deliberate and feel sturdy, while remaining comfortable to use. They invite you to reach for the bag with confidence, knowing it will hold its shape and protect its contents.
If you want to explore a related aspect of finishing that can complement the techniques described here, you can learn about closures and how they interact with lining and outer fabrics in the context of tote design. For an illustration of how closures can be implemented in real projects, see tote bags with zippers. This resource focuses on the mechanics of zipper installation, alignment, and finishing, and it can provide practical insights that align with the finishing choices described above. tote bags with zippers.
As a final note, allow your finishing process to be guided by deliberate testing and patience. Before you declare a project complete, hold the bag by its handles and test its balance, measure the top edge for evenness, and simulate common uses. A brief trial with light items lets you observe how the lining interacts with the outer fabric when the bag is in motion, whether the interior pocket remains accessible, and whether any seams edge toward bulk in places you don’t want. This kind of practical check reinforces a design you’ve already imagined and helps you refine your technique for future projects. The aim is not only to finish the current bag but to cultivate a reliable method that makes the next lined tote even easier to complete with the same level of craft and care.
For readers who want a broader, technique-forward visual guide to finishing a tote with lining, there is additional guidance and patterns that walk through the same principles with images and step-by-step diagrams. These resources complement the hands-on practice you’ve just completed, enabling you to compare textures, layer management, and final finishing decisions across different fabrics and hardware sets. A thoughtful finish is, at heart, a conversation between your materials and your hands: a dialogue that ends with a bag that looks deliberate, functions smoothly, and ages gracefully. If you’re planning another tote in a different size or fabric, bring the lessons learned from this project to the next one, and you’ll find your finishes becoming more instinctive, more precise, and more expressive of your personal craft.
External resource: For a deeper visual guide to finishing a lined tote and understanding the interplay of lining, outer fabric, and closures, see The Spruce Crafts’ illustrated tutorial on making a tote bag with lining. https://www.thesprucecrafts.com/make-a-tote-bag-with-lining-4150728
Stitched Fortitude: A Practical Guide to a Lined Tote That Lasts
Preparing a lined tote is a study in patience and deliberate technique. Begin with thoughtful material choices for exterior and lining, pre-shrink fabrics, cut pieces with precision, stitch thick seams with a walking foot, and finish edges to prevent fraying. The exterior should balance durability and silhouette, using canvas, denim, or heavy twill. The lining should be smooth and forgiving, such as cotton or a cotton-poly blend. Before assembly, press and trim seam allowances, then join outer and lining with right sides together, leaving a turning gap. Turn, press, and close the gap with a nearly invisible stitch. Reinforce the base if you expect heavier loads, and attach handles in a manner that distributes tension. Test stitching on scrap fabric first. Finish with careful topstitching and thoughtful finishing touches like an interior pocket or subtle hardware choices. The result is a tote that carries daily essentials with confidence and quiet style.
Final thoughts
Creating a tote bag with lining is an enriching project for business owners seeking to enhance their product line. By preparing your materials thoughtfully, employing effective sewing techniques, and adding those all-important finishing touches, you ensure that your tote bags are not just functional but also appealing to your customer base. Use this guide to produce thoughtfully crafted items that reflect your brand’s dedication to quality and style, resonating with your clientele on a deeper level. The tote bags you create not only serve as beautiful merchandise but also enhance your brand image and customer loyalty.