Tote bags are versatile accessories that can serve multiple business needs. With a flat bottom design, these bags offer stability and a fashionable aesthetic. Whether you’re looking to promote your brand, provide clients with a practical gift, or explore a new product line, knowing how to create these bags can significantly elevate your business offerings. This guide will take you through the essential materials, the construction of the flat bottom, effective sewing techniques, reinforcement options for added durability, and the necessary finishing touches that will complete your tote bag. Each chapter aims to equip you with knowledge and skills to effectively enter or expand in the tote bag market.
Gathering the Essentials for a Flat-Bottom Tote: Materials That Shape the Shape
Choosing the right materials is not just a preparatory step; it sets the tone for how well a flat-bottom tote will hold its shape, stand upright, and carry everyday loads. Start with fabric that has enough body to resist collapsing when you fill the bag. Durable, medium-weight fabrics like canvas, denim, or heavy-duty polyester strike a practical balance between rigidity and flexibility. They cooperate with the flat-bottom geometry by providing a stable base and crisp side seams, which helps the bag keep its silhouette when you reach for it on a busy morning. If you’re working with lighter fabrics, you can compensate by adding interfacing. Fusible interfacing on the inside of the bag’s body reinforces the panels, especially around the bottom and the sides, where the most stress occurs. This optional layer is a quiet ally in a tote that stays neat and upright even when you load it with books, groceries, or a sweater. The choice here is not merely about stiffness; it’s about how the fabric behaves under use. A heavier fabric that’s too stiff can feel rigid in a way that’s uncomfortable to carry, while a very limp textile may refuse to hold the flat base’s shape. The goal is a fabric with enough body to support the base while remaining comfortable to carry and sew. Thread and needle selection follow from fabric choice. High-quality thread that matches or closely complements the fabric color makes the stitching less noticeable and more durable. Polyester or cotton-wrapped polyester thread offers strength and some give, which is valuable when you’re sewing through multiple layers or a fused interfacing. The needle should match the fabric weight; a universal needle in the mid-range is usually a safe bet for canvas or denim, while heavy-duty needles help when you’re working with thicker layers. The idea is to prevent skipped stitches, uneven tension, or a torn seam at the bottom corners when the bag is full. This careful pairing of thread and needle becomes a subtle but crucial element of a professional finish. The layout tools are small details with large impact. You’ll want sharp scissors or a precise rotary cutter, pins or clips to hold layers together, and a good ruler or measuring tape to keep every cut true. The pattern or template is not just a suggestion; it’s the skeleton of the tote’s architecture. The bottom panel is intentionally wider than the sides to form a stable base. The flat-bottom effect comes alive when the geometry is respected: two diagonals forming the characteristic “X” at the bottom after you mark the center and the 8-centimeter rise on each side. This geometry is more than a trick; it’s a design principle that ensures your bag doesn’t wobble when set down or loaded. When you sew, the bottom corners become a single plane rather than a soft, rounded base. The result is a bag that stands on its own, a practical partner for daily errands. Interfacing remains an important consideration. If you’re using a sturdy fabric like canvas or denim, you may skip interfacing in favor of shape retention from the fabric itself. If the fabric feels limp or you’re aiming for extra stiffness, fusible interfacing is a wise addition. It stabilizes the bottom area and sides, helping the bag to hold its form as you fill it. The interfacing should be chosen with care—weight and bond strength matter, but so does how it behaves when heated and pressed. A well-chosen interfacing will laminate the fabric slightly, giving you crisp edges and a neater overall appearance. When it comes to handles, the material selection matters almost as much as the fabric of the body. Fabric straps cut from the same material as the tote create a cohesive look, while straps in a contrasting color or texture can add a vibrant accent. The length and width of the handles influence comfort as well as balance. You’ll typically see strips around 2 to 3 centimeters wide and long enough to wear over the shoulder or across the body. Handle construction should include a sturdy fold and a reinforced stitching pattern where the straps attach to the bag. It’s the detail that ensures you won’t find yourself worrying about a strap detaching during a hectic commute. A small reinforcement at the top edge, accomplished with extra stitches or a bar tack, makes a visible difference in durability and longevity. Top-edge finishing also deserves attention. A tidy top edge not only improves aesthetics but also helps the tote resist wear at the opening. A light topstitch along the edge—about 0.2 centimeters from the edge—creates a clean, professional look and helps to keep fabric from puffing up when the bag is loaded. If you’d like, you can add a pocket inside the tote. A simple interior pocket made from a scrap of fabric provides a convenient place for keys or a small notebook, and it introduces a small amount of structure that can aid in organization and shape maintenance. Beyond materials, think about the small but meaningful steps that contribute to a durable result. You may press seams as you go, ensuring crisp lines that reflect careful planning. Pressing is more than a momentary pause; it’s the backbone of a neat finish. When you press the bottom corners after stitching, you define the flat base, making the whole bag feel substantial and ready to stand on a countertop without tipping. For added structure, you can insert a simple stiffening piece inside the bottom after assembly. A lightweight board or plastic insert can transform a soft tote into a sturdy companion for a day of groceries or a stack of books. The insert should be sized to fit inside the bottom, not interfere with the seams, and be easy to remove if you wish to reconfigure the bag’s shape. The practical beauty of this project lies in the balance between form and function. The materials you choose influence every step that follows. The base’s flatness depends on the bottom panel’s size and the precise angles you mark and sew. The sides will meet the base in a crisp line if the fabric remains stable throughout the process. That stability comes from thoughtful fabric weight, careful cutting, clean seams, and a well-timed press. The result is a tote that carries confidently, holds its shape when set down, and remains comfortable in daily use. If you’re uncertain about fabric choices or want to see how different textures interact with the same construction, you can explore resources on related materials. A helpful way to extend your understanding is to view content focused on fabric choices for tote-like bags, which can provide nuanced guidance on weight, drape, and durability. For a related exploration, you can also consult a practical guide focused on the broader concept of durable flat-bottom totes, which delves into bottom reinforcement and stitch planning in greater depth. For more on fabric options that pair well with tote construction, consider this category: fabric tote bags for women. You can explore a range of fabrics and weights to help you decide what best suits your needs while maintaining the flat-bottom structure. fabric tote bags for women. As you gather materials, keep in mind that the journey from fabric to finished bag is a sequence of small, deliberate choices. Each choice—fabrics, interfacing, thread, needles, padding, stitching, and finishing—works together to create a tote that not only looks right but behaves right when you carry it. The flat bottom is not merely a visual feature; it’s a structural decision that shapes the bag’s practicality. It invites you to plan with care, to measure with discipline, and to sew with patience. When you approach the project with this mindset, your tote becomes more than a container for items; it becomes a dependable companion designed to support your daily activities with grace and reliability. To support your progression, keep this chapter’s guidance in mind as you draft your own pattern or adapt an existing one. The bottom’s width, the side panel height, and the seam allowances all contribute to the flat-bottom effect. A mindful approach to cutting and sewing will save you from reworking the piece later and will help ensure your edges align as you assemble the panels. The materials become more than a checklist; they’re a listening guide that helps you hear the bag’s needs as you work. In time, with steady practice, you’ll feel the difference between a bag that merely exists and one that stands up to daily use with quiet confidence. External resource for deeper exploration: How to Make a Durable Tote Bag with a Flat Bottom. This guide offers a complementary perspective on reinforcement and practical tips for achieving a long-lasting flat-bottom tote that stands up to everyday tasks.
From Flat Foundation to Everyday Stand: Building a Tote Bag with a Flat Bottom
A tote bag with a flat bottom is more than a pretty face in a fabric stack. It stands up, holds its shape when you fill it with books or groceries, and makes a daily carry feel purposeful rather than floppy. The flat base acts like a tiny chassis for the bag, distributing weight evenly and preventing the sides from folding inward under heavy loads. When you approach the project with intention, the bottom isn’t just a detail; it becomes the backbone of the bag’s practicality, shaping how you cut, sew, and finish every edge. In this chapter, the journey from raw fabric to a confident, self-supporting tote unfolds as a seamless narrative of method and material, with the flat-bottom technique weaving through each step as a unifying thread rather than a checklist item. You’ll hear the rhythm of the work—the fold, the mark, the seam, and the press—coming together to create a bag that can stand on its own and still look clean and refined when you set it down.
Begin with the fundamentals: two identically sturdy panels that will form the main body of the tote. The choice of fabric matters, because the way the bottom behaves depends on how the fabric drapes and how stiff it is, or how much you introduce extra structure. Heavier fabrics such as canvas or denim lend immediate stability, while lighter cottons benefit from a touch of interfacing, which acts like a quiet ally in maintaining shape without adding bulk. Before you even touch the machine, have your pieces paired with matching thread, sharp scissors or a rotary cutter, and pins or clips arranged for quick access. The aim is to create a bottom that can hold its own when the bag is filled, yet remain gentle enough to press flat and crisp under a hot iron.
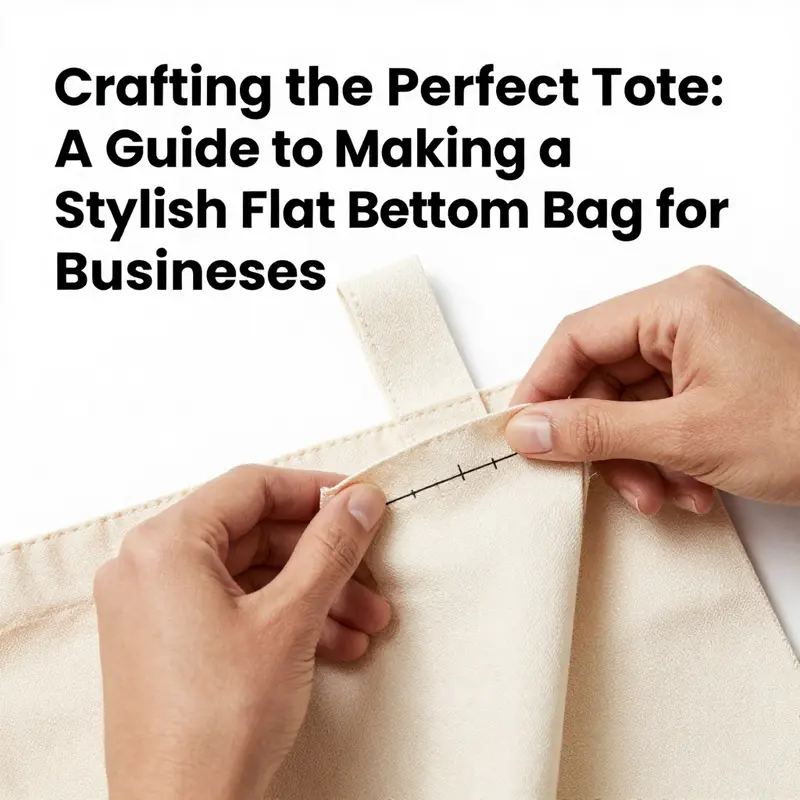
The heart of the flat bottom lies in a controlled set of angles at the base. Start by laying the two fabric panels together with right sides facing inward and edges perfectly aligned. The bottom center becomes your reference point. From that center, you mark an 8‑centimeter rise along each edge of the bottom. Those points become the corners of the flat base, and you draw straight lines from each 8 cm mark to the center. The resulting diagonal seams form an inverted diamond or a shallow “X” shape at the bottom—whichever your eye prefers to call it. This angled seam is not a decorative flourish; it is the structural motion that creates the shallow, stable base that can sit upright when the bag is empty or lightly filled.
Sew along those diagonal lines with a steady stitch, using a standard seam allowance as your guide. A 1‑centimeter seam is a reliable choice here, balancing durability with a clean, unobtrusive finish. After stitching, trim away the excess fabric close to the seam line, leaving a conservative 0.5‑centimeter allowance. The trimming reduces bulk in the corner and helps the base sit flat once turned right side out. Press the newly formed bottom seams open and flat. The iron becomes a partner in this moment, coaxing the corners into a crisp, stable edge rather than letting the fabric crease into a stubborn lump. This careful press is what makes the flat bottom emerges as a distinct, self-supporting feature rather than a temporary crease to be ironed away later.
With the bottom anchored, you move to the sides. Keep the right sides together and sew along the two vertical side seams, typically using a 1‑centimeter seam allowance. This yields a basic tote tube that already has a defined bottom and a coherent silhouette. Turn the bag right side out through any opening left at the top, then evaluate how the bottom sits when the bag stands on a surface. A well-executed bottom will align with the front and back panels to form a clean line from the base to the top edge. Now is the moment to press every edge and seam to sharpen the lines. A crisp finish here translates into a more professional overall appearance as you move through the remaining steps.
Optional reinforcement can be a wise choice if you expect heavier use or if your fabric is on the lighter side. A fusible interfacing applied to the inside of the bag body adds stiffness, helping the sides resist sag and the bottom to stay nicely squared when loaded. If you do not wish to use interfacing, you can still reinforce the bottom corners with extra stitching or by adding a small square of sturdy fabric stitched to the interior at each corner. This internal reinforcement is subtle but effective in maintaining the bag’s upright stance over time. The aim is not to create a rigid box, but a stable, confident shape that supports the contents while remaining comfortable to carry and pleasant to look at.
The handles are the final functional act of assembly that completes the bag’s personality. Cut two fabric strips to form the straps, typically around 10 to 12 centimeters long and 2 to 3 centimeters wide in the given approach. Fold each strip lengthwise and press to create a crisp, stitched ribbon with a defined midline. Attach the handles at the top edge, aligning them with the bag’s center so that each end anchors symmetrically. Sew securely with a straight or zigzag stitch, and consider reinforcing the handle attachments with a few extra stitches across the seam to distribute tension. If your fabric is stiffer, or you anticipate heavier use, you can add a second row of stitches or a small reinforcing bar of stitches across the handle junctions. The simplest, most reliable method is to ensure the handles anchor into the top seam with multiple passes and thorough reinforcement, so the bag’s lift and carry feel is balanced rather than tugging awkwardly at one point.
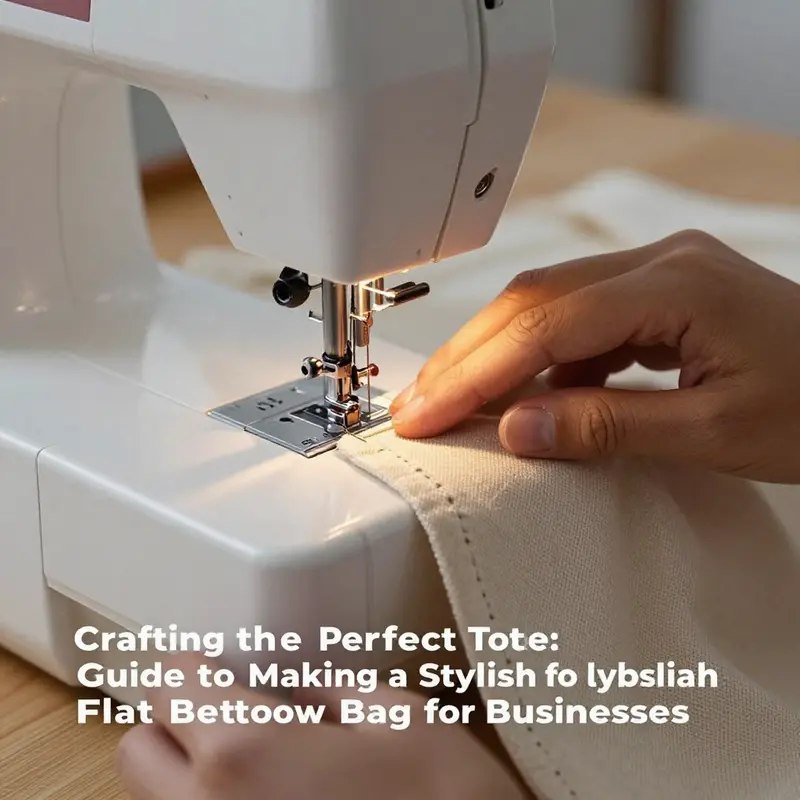
Finishing the top edge completes the external polish. Topstitch along the upper opening, aiming to sit the stitch about 0.2 centimeters from the edge. This doesn’t just secure the edge; it provides a refined, finished line that helps the bag hold its shape and keeps the raw edge from curling outward. If you want a touch of personality, a decorative topstitch can echo the color of the thread or introduce a subtle contrast that is still tasteful and cohesive with the overall design. Some makers like to add a simple interior pocket by folding a small piece of fabric and sewing it to the interior wall, near the top edge or at one side, depending on how you intend to use the tote. This pocket remains lightweight and unobtrusive, preserving the bag’s clean exterior while offering a practical storage option inside.
Beyond the mechanical steps, the flat-bottom tote invites experimentation and personalization. You might choose a stiffer lining or add a thin protective layer at the bottom to increase durability for groceries or textbooks. You could also adapt the method to experiment with a slightly wider base, a subtle taper, or a rounded interior for easier packing. The foundational concept remains consistent: a structured bottom, clean top edges, and sturdy handles that together form a bag that stands up and presents itself with confidence whenever you set it down. For readers seeking a broader variation with additional features, a guide on a tote bag with a computer sleeve offers a space to imagine built-in compartments without compromising the core flat-bottom logic. Learn more about that variation here: tote bag with computer sleeve.
If you crave a richer, more visual understanding of the bottom construction, a detailed, step-by-step visual demonstration can be incredibly helpful. A reputable external video guide walks through the same bottom-creation principles, translating the written steps into actions you can watch and mimic. For a visual walkthrough, you can consult this external resource: How to Make a Tote Bag with a Flat Bottom – DIY Guide.
As with any sewing project, patience primes accuracy. Take a moment to align edges precisely at every stage, to keep seam allowances consistent, and to press with intention rather than haste. The result is a tote that not only stands on its own but will age gracefully with use. A well-executed flat bottom is a quiet testament to planning and method: the moment when fabric, thread, and intention come together to create something practical, reusable, and stylish. When you carry such a bag, you feel the benefit of every measured fold and every deliberate seam—the kind of craftsmanship that makes a simple tote feel like a trusted companion for daily life.
The Flat-Bottom Tote: Precision and Stability in Everyday Sewing
A tote bag with a flat bottom is more than a simple carrier; it sits upright on a table, carries a book without tipping, and folds neatly into a day’s routine. The secret is to treat the bottom as a built structure: align two panels right sides together, form the base, then sew the sides. Start by placing two identical panels with right sides facing inward, then stitch along the side seams to create the bag walls. The heart of the technique lies in the base geometry. With the bag laid flat, locate the bottom center on both panels and mark points 8 centimeters up along each side of the bottom edge. Draw diagonal lines from each 8 cm point to the center, forming an intentional X. Stitch along these diagonals to lock the flat bottom in place. The silhouette will resemble a shallow diamond or a short hexagon, depending on fabric and measurements, but the principle remains: a defined base that resists tipping. After stitching, trim away excess fabric close to the seam, leaving about 0.5 centimeter of seam allowance. Press the seams open to keep the base flat as you sew the sides.
Next, sew the vertical side seams with a modest seam allowance (about 1 centimeter) while the right sides still face each other. Turn the bag right side out through one opening and press along all edges. The base should sit flat and the sides rise in clean lines. Reinforcement is optional but worth considering: insert fusible interfacing inside the body for extra body, or apply small corner patches to resist wear. If you want a stiffer look, you can add a lightweight bottom insert after assembly, though many makers prefer the softer drape. Finally, attach handles by sewing two fabric straps to the top edge, with extra stitches or bar-tacks at the attachment points to endure daily use. A topstitch along the top edge, close to the edge (about 0.2 centimeters), neatens and stabilizes the opening. The result is a tote that stands on its own, with crisp lines and a sturdy base that remains balanced when loaded.
With practice, you’ll refine your rhythm: mark, stitch, press, reinforce, and finish. The flat-bottom tote becomes a dependable everyday bag—simple in concept, reliable in form, and adaptable to different fabrics and loads. If you want to customize, consider substituting fabrics or adding decorative topstitching, while keeping seam allowances generous enough to preserve the shape.
Upright by Design: Reinforcement Techniques for a Flat-Bottom Tote

A flat-bottom tote offers a clean, modern silhouette and a generous interior, yet its ability to hold its shape under load comes from thoughtful reinforcement. The base is where practicality meets aesthetics: it must bear weight without wrinkling into the sides and should stand upright when set down. This chapter covers reinforcement options that complement a flat-bottom construction and turn a simple stitched rectangle into a sturdy everyday partner for groceries, books, or daily essentials. The goal is to blend function with style, so the bag remains upright whether you fill it with a few notebooks or a full lunch, while keeping the lines crisp and the finish neat. When reinforcement is chosen thoughtfully, the tote stays true to its flat-bottom design, avoiding sag that soft fabrics can show.
Reinforced bottom panels are among the most reliable strategies. Use a separate, slightly stiffer panel cut to match the bag’s footprint. A lightweight plastic board or a thin firm interfacing sheet inserted inside the bottom can act as a tiny internal skeleton to preserve the base shape. Position the panel flat against the interior bottom and secure it along the seam lines without creating bulky edges. You can stitch around the exterior edge or tuck the panel under the bottom seam allowances within a shallow interior pocket. For heavier loads, use a slightly larger panel and trim to fit so a neat border of fabric remains around the stiffener, preventing snagging on clothes or items when inserting or removing the bag.
Corner and seam reinforcement helps prevent sag where the bottom meets the sides. Double or triple-stitched seams at the bottom corners add resilience where stress concentrates. Run two parallel rows of stitches along the bottom edge and again at the intersection where the side seams meet the bottom panels. In high-stress zones, bartack stitches—short, dense stitches—can be added where handles attach to the body. Bartacks distribute pull and protect against a single line of weakness.
Some crafters opt for ready-made stiffeners such as lightweight EVA foam or a rigid interfacing sheet placed inside the bottom panel or along the interior. A stiffener keeps the bag upright and resists fabric creep when the bag is set down. Trim the stiffener to fit the bottom precisely and avoid edges that protrude into seam lines where they could irritate the hand. If you use adhesive, choose a fabric-safe glue that remains flexible after curing so edges don’t lift over time. For a more secure hold, sew the stiffener along its edges to the inner lining or to a narrow seam binding that anchors it without altering the exterior look.
Fusible interfacing is another path to additional body without extra bulk. A layer of fusible interfacing on the interior can give the bag more stiffness while keeping the exterior profile clean. It works well with lighter fabrics that still hold a pattern, such as cotton prints or chambray. Follow the manufacturer’s instructions for heat and time to avoid warping. A well-applied interfacing layer yields a smooth interior that supports the body shape and helps the bag stand up on a table or shelf. For heavier fabrics, consider lighter interfacing or balancing with a bottom panel for the desired stiffness.
Handles deserve attention too. Strong handle attachments prevent failure when the bag carries weight. Reinforce handle attachments with a longer seam extension that travels into the bag’s interior and back out to the exterior. Align handles to the top edge so the stitch line forms a slight diagonal toward the body’s center, and add bartack stitches at the attachment points. If lining the bag, anchor a small patch of fabric at each attachment point inside as a buffer to distribute stress and reduce tearing. The result is a strap system that feels solid in hand and sits flush against the bag’s sides, keeping the flat bottom clean and upright under load.
Design choices should fit how you plan to use the tote. For heavy daily use, combine bottom panel, corner reinforcement, and an interior stiffener for a stable, upright form. For lighter everyday use, a single bottom panel or a fusible layer might be sufficient while preserving flexibility. Testing matters—load a few sample items, set the bag down, and lift it again to observe any tipping, seam stress, or shifting of the stiffener. Use what you learn to balance structure with ease of use, washing, and storage. The elegance of a flat-bottom tote lies in its clean lines, which reinforcement should support without bulk. If you want to explore security-focused variations without sacrificing form, you can consider a zipper option in a way that respects the reinforcement principles described here. External resources can provide broader context on materials and behavior, complementing hands-on techniques.
Reinforcement is a toolkit to adapt to fabric, expected load, and bag personality. Start with a single method and gradually layer in others as you gain experience. Over time you’ll develop a sense for protecting the flat-bottom silhouette while inviting your own creativity to shape the bag’s final character. The result is a durable tote that stands up to use and still looks polished, ready to accompany you through daily routines.
Final Flourishes for a Flat-Bottom Tote: Strength, Style, and Stand-Up Shape
Finishing touches are where a sturdy tote stops being merely useful and starts telling a personal story. A flat bottom tote, with its clean lines and upright stance, rewards patience in the final steps as much as in the cut and stitch work that preceded them. In this chapter we move from the basic construction to the small, deliberate choices that transform a simple rectangle into a bag that stands on its own, carries a load, and looks ready to go from farmers market to office, from library shelf to cafe corner.
The bottom corners deserve extra attention. They bear the weight and the wear of everyday use. Reinforcing them with double stitching or a small fabric patch on the inside keeps the base crisp and resists squaring off when the tote is full. If the fabric is lightweight, a thin layer of interfacing pressed to the inside at the base can help maintain shape. The result is a base that sits squarely on the table and supports the bag upright when set down, which in turn makes loading and unloading easier and neater.
Handles are another critical touch point. They must withstand daily stress without pulling free or shifting. The finishing touches here are not just about sewing a seam; they are about placement and reinforcement. The standard approach described in the starter guide is to cut two strips of fabric about 10 to 12 cm long and 2 to 3 cm wide, fold, press, and attach at the top edges. But the art of the finish lies in how those handles meet the bag. Position them so the load stays balanced. Use a zigzag or a dense straight stitch to secure the folded edge, then add extra lines of stitching across the attachment points to distribute strain. If the project uses heavier fabrics such as canvas or denim, consider a V-shaped reinforcement at each handle base where the weight concentrates. A simple trick is to sew a small bar tack or multiple short stitches across the base seam, a cue that the handle has earned its keep.
Personalization is where a flat-bottom tote can become truly yours. A neat label, a monogram, or a tiny embroidered motif adds personality without altering the functionality. If you want a crisp, subtle touch, press a fabric label inside the bag or sew a discreet tag near the top edge. For the more expressive crafter, embroidery or fabric paint can be used to create initials or a small scene on the exterior panel. The result is a bag that carries groceries and books with flair, without looking fussy or forced. Decoration should never compromise strength; keep any embellishments away from the top hem where the edge is most likely to flex or fray.
Decorative stitching is a simple and effective way to unify the look of the tote with its shape. A topstitch along the outer edge of the bag creates a clean line that echoes the flat bottom angle. You can run parallel rows of stitching along the side seams for a hint of texture, or you can introduce a contrast color in a single decorative motif near the handle attachment. In all cases, test the stitching on scrap fabric first to ensure tension, stitch length, and thread choice harmonize with the fabric you used. The goal is not to shout decoration but to elevate the bag with quiet, considered detail.
If you want to expand the design with pockets, a secure zipper, or a concealed inner sleeve, the finishing steps are still careful. Adding pockets inside or outside the bag should be done after ensuring the main seams are square and well pressed. For ideas on zipper details and related features, see the concept of tote bags with zippers. tote bags with zippers.
Pockets, if added, should be proportionate to the bag size. An interior pocket is convenient for keeping keys and small notes from getting lost among the contents. When you place any pocket, reinforce the area around it with extra stitches or even a small patch of fabric on the inside to prevent sagging over time. A pocket facing the interior gives you a soft landing for items that might rub against the bag fabric, especially if you are using a lighter weave or a natural fiber.
The final stage of finishing is the top edge and the overall presentation. A neat topstitch along the top opening not only looks polished but also helps hold the inner seam allowances in place. The distance from the edge matters; a shallow, consistent distance creates a frame that makes the bag feel complete. In addition to topstitching, a careful press along all edges defines the line where the fabric folds and intersects with the corner seams. If you have an iron that can generate steam, use it to set the crease along the flat bottom corners so the angle remains crisp after use. A final pass with a dry, clean cloth on the interior helps remove any stray fibers and leaves the inside as tidy as the outside.
No chapter about finishing a flat-bottom tote would be complete without a nod to durability. The structure can be further reinforced by layering a lightweight stiffener at the bottom or by inserting a small, flexible base support after assembly. If you choose such a base, measure carefully to avoid binding the side seams and to preserve the bag’s natural profile. The choice between a cardboard insert, a plastic base, or nothing at all depends on usage patterns and fabric weight. Your decision affects how the bag behaves when loaded; a firm base helps the tote stand upright on a busy counter, while a softer base preserves flexibility for soft fabrics.
All these details—the bottom corners, the handle attachments, personalization, decorative stitching, pockets, top edge treatment, and optional base support—work together to deliver a tote that is practical from the moment you finish sewing, yet refined enough to accompany you through daily tasks. The flat-bottom design helps the bag stand on its own, making it easier to load groceries or books without tipping, and it accepts a bit of weight with less collapsing at the base. The finish should respect that geometry and preserve the clean lines you planned from the start. If you ever doubt the value of careful finishing, remember that a bag with crisp corners and secure handles remains attractive as it ages, while a bag with soft, lax edges can begin to appear worn long before its time.
For readers who want a broader view of finishing techniques, a comprehensive visual guide exists at The Spruce Crafts. It walks through finishing with diagrams and close-up photos, helping you translate these principles into a mirrored practice on your own fabric. https://www.thesprucecrafts.com/finishing-a-flat-bottom-tote-bag-4128935
Final thoughts
By following this comprehensive guide to creating a tote bag with a flat bottom, you can seamlessly integrate stylish and functional products into your business offerings. Such bags not only serve practical purposes but also enhance your brand’s visibility and image. The detailed steps, from choosing the right materials to applying finishing touches, ensure that the bags you produce will be both durable and appealing. Whether for promotional events, direct sales, or retail opportunities, creating a stunning tote bag can set your business apart and meet the needs of your customers effectively.