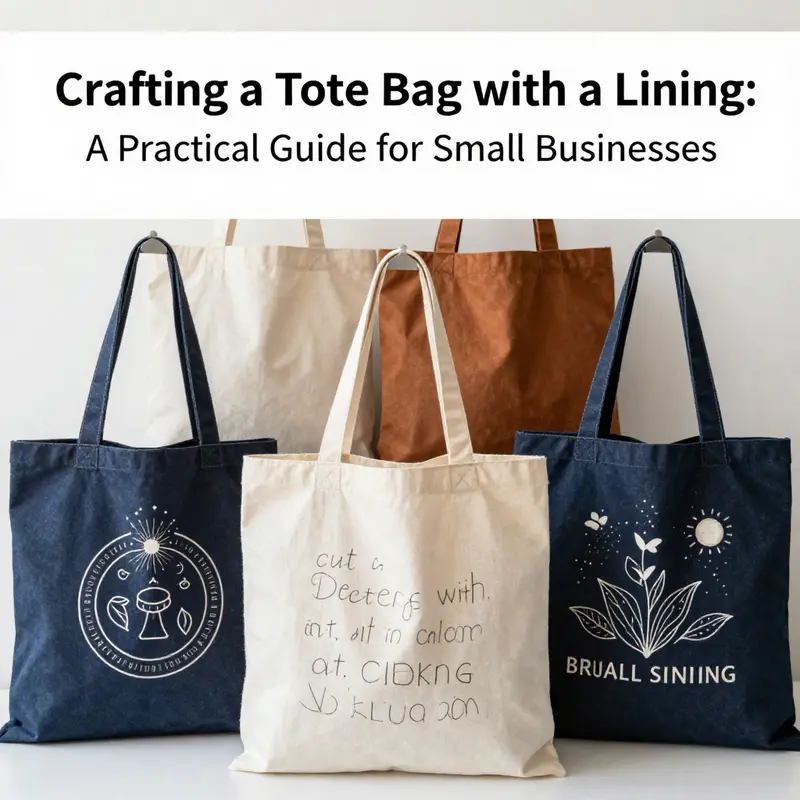
This guide provides a practical, shop-friendly approach to creating a tote bag with a lining. It covers material selection, precise cutting, careful assembly, and finishing touches to produce a high-quality product that customers will trust and reuse. Follow the chapters to build a repeatable process that can scale with your business while maintaining consistent craftsmanship.
Choosing the Right Stuff: Material Selection as the First Stitch in a Well-Lined Tote
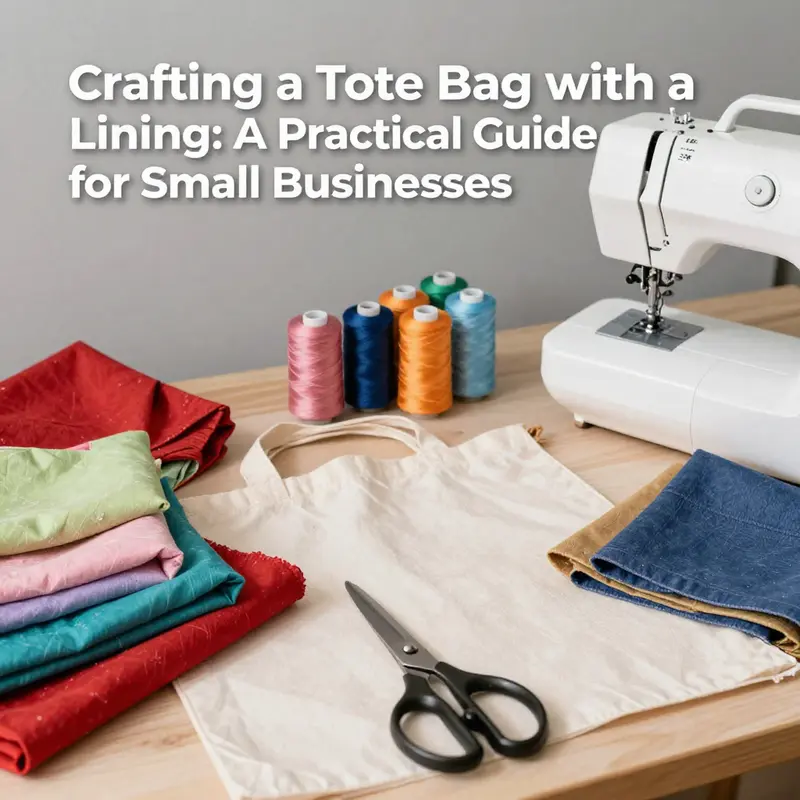
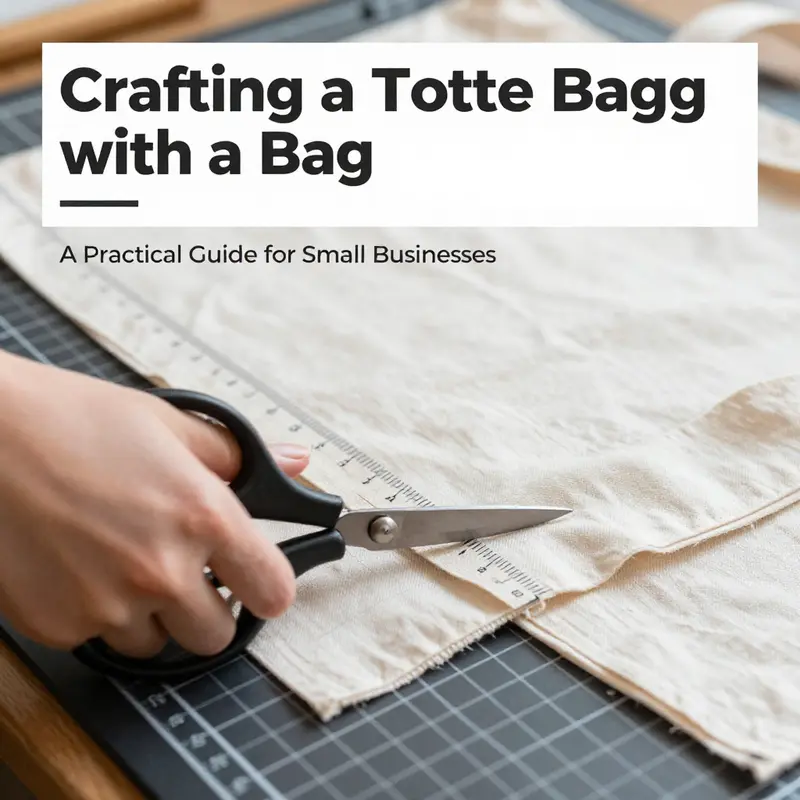
Material selection is more than a shopping list; it is the quiet promise behind every well-made tote. The fabric you choose for the outer shell sets the bag’s character and resilience, while the lining quietly guards the items you carry. A thoughtful combination of fabrics, thoughtful planning, and a clear sense of use will shape not only how the bag looks but how long it lasts. When I begin a tote project, I imagine the daily life it will meet: the weight of a laptop, the spill of a coffee, the pinch of a thumb through a crowded doorway. Those imagined rituals guide my choices. The outer fabric should be durable yet forgiving, easy to wash, and gentle on the hands that carry it. Canvas and denim are the classics here. Canvas offers structure, a matte finish, and a surprising softness after a few washes. Denim brings casual texture and a forgiving drape. Either can become a sturdy, everyday companion when cut and sewn with care. For the lining, the goal is comfort and a sense of inner order. A good lining should glide over the outer fabric without catching, while remaining graceful when the bag is turned right side out. A cotton or cotton-poly blend works well. It holds color, it resists wear, and it won’t stick to the contents during turning. The lining pieces should be cut in the same dimensions as the outer pieces, so the bag’s interior remains clean and organized from the moment it’s finished. If you plan pockets, think about where they should be placed for convenience and balance. An interior pocket, perhaps 20 cm by 13 cm, can keep small items easily accessible without crowding the main compartment. An exterior pocket, sized about 32 cm by 24 cm, can offer a quick-reach spot for a phone or keys. The pocket fabrics can come from the main or lining fabric, whichever harmonizes best with your chosen color story. The interplay of tones—contrast, complement, or a subtle match—gives the tote its personality. When it comes to handles, length and comfort are the unsung anchors of a bag’s usability. Two handles, each about 2.5 cm wide and roughly 100 cm long, strike a balance that fits comfortably over the shoulder for most users. This dimension keeps the bag’s weight distribution even and reduces strain on the fabric over time. The thread, too, matters. A robust all-purpose polyester or a cotton-wrapped polyester thread provides strength without excessive stiffness. The stitch length and tension must be calibrated so the seams sit flat against the fabric while still holding a solid bite. A good thread choice matters more than many people realize. It is the subtle, lasting bond between layers that endures daily use. Beyond the basics, think about how the bag will feel in your hands. If you want extra structure, an interfacing can give the outer panel a gentle, resilient backbone without adding bulk. Interfacing is optional, but it can make a big difference when you’re constructing a tote meant to carry heavier loads. If your stash includes upcycled materials, you can even incorporate a decorative element that doubles as a conversation piece. An old tie, repurposed into a small emblem or tab, can elevate a simple tote into a meaningful, eco-friendly object. Such accents are not only stylish; they reflect a thoughtful approach to materials that resonates with many makers and wearers alike. In planning the cut, start with the two outer fabric pieces and the two lining pieces, each cut to the same final dimensions—32 cm by 70 cm is a common, practical example that translates well to many tote sizes. If you want pockets, you’ll need additional pieces: one interior pocket about 20 cm by 13 cm, and, for an exterior option, a piece around 32 by 24 cm. The exact numbers are less important than the proportional relationships they establish. The idea is to maintain enough space for the bag’s contents while preserving the moment when the lining and outer fabric meet and align at the top edge. Before you cut, map out a simple layout on your fabric. Place the outer pieces side by side with right sides together, and do the same with the lining. This visual helps you minimize waste and ensures that the grain runs in a way that supports the bag’s shape. When you cut, keep your edges clean and your seams straight. A steady ruler and sharp scissors make a noticeable difference when you turn this plan into a usable object. As you work, think about how the pieces will eventually come together. The exterior pocket, if you add one, should be constructed with a top edge turned under and stitched. The interior pocket follows the same idea and provides a discreet place for small items you’d rather not lose in the main compartment. If you are curious about a related approach that includes a dedicated sleeve for a laptop or tablet, you might explore a broader project that presents variations on the same core principles, and you can see a practical example here: tote bag with computer sleeve. This linked concept underscores how a lined tote can evolve when you optimize pocket placement and internal supports. Once the pieces are cut, you turn your attention to preparation. If you’re using interfacing, fuse it to the wrong side of the outer fabric pieces according to the manufacturer’s instructions. Interfacing adds body where it’s needed most: at the bag’s top edge and along the side panels, which helps the tote hold its shape even when loaded. The top edge often bears the brunt of daily wear, so a light-to-medium weight interfacing here can make a meaningful difference in durability without softening the bag’s silhouette. Now imagine walking through the assembly sequence. You sew the outer bag body by placing the two outer fabric pieces right sides together and stitching along the side and bottom edges with a narrow seam allowance—0.5 cm in many guides. This narrow, careful seam keeps bulk at the corners low and helps the bag retain a crisp, neat profile after turning. After sewing, trim the excess seam allowances to about 0.3 cm. This trimming reduces bulk, especially at the corners where layers converge. For the lining, you repeat the process on the lining pieces, sewing only the side and bottom edges while leaving the top open. Clip the corners and trim seams slightly to prepare for turning. When you turn the lining right side out, you’ll press it flat so its edges align neatly. The next crucial moment is attaching the lining to the outer bag. With both pieces right side out, you place the lining inside the outer bag, right sides together, and align the top edges carefully. Pin around the top edge, ensuring the sides and corners line up. Sew around the entire top edge with a 0.5 cm seam allowance. This seam becomes the visible, durable join that holds the two layers together. Then you create a reversal opening. Leave a gap about 10 cm at the top edge before finishing. This opening is essential for turning the bag right side out once you’ve stitched and secured the top. After sewing, gently turn the bag through the opening. You’ll use this moment to shape the tote, smoothing edges and ensuring the lining sits flush inside the outer fabric. The opening is then carefully pressed inward by about 0.5 cm, and a final topstitch along the entire top edge secures the fold and reinforces the structure. The top finish sets the tone for a clean, professional look. Next come the handles. Cut two sturdy strips, each about 2.5 cm wide and long enough to fit comfortably over your shoulder. Fold each handle in half lengthwise, press, and sew along the long edge to form a tube. Attach the handles to the bag’s top corners by stitching securely through both layers of fabric. Secure, symmetric placement matters here; the handles should distribute weight evenly without pulling on one side of the bag. After the handles are set, it’s time for final touches. Remove stray threads with a seam ripper, and give the bag a thorough press. A crisp crease along the top edge and along the handle joins creates a sense of finish that elevates the entire project. If you want to bring in a personal or upcycled touch, consider small decorative accents like a fabric tab made from a repurposed tie. It’s a simple flourish that pays homage to sustainability without interrupting the clean lines of the design. The result is a durable, well-structured tote bag with a clean interior lining that breathes when you fill it. It should feel ready for daily use, not just for display. In practice, this process rewards patience and precision. Collecting the right materials upfront, planning each cut, and aligning the seams with a steady hand create a finished piece that wears well and lasts. For anyone starting out, the steps here map closely to the example materials: two outer fabric pieces, two lining pieces, pockets as desired, and sturdy handles. The planning minimizes surprises at the sewing machine and keeps the project moving smoothly toward a robust final product. External resources can offer additional viewpoints on finishes and variations, like adding a zipper or decorative trims, if you want to expand the scope of the basic tote. External resource: https://www.youtube.com/watch?v=examplevideoid
null
null
null
null
Lining Up the Finish: Mastering the Art of Attaching the Lining to a Tote Bag
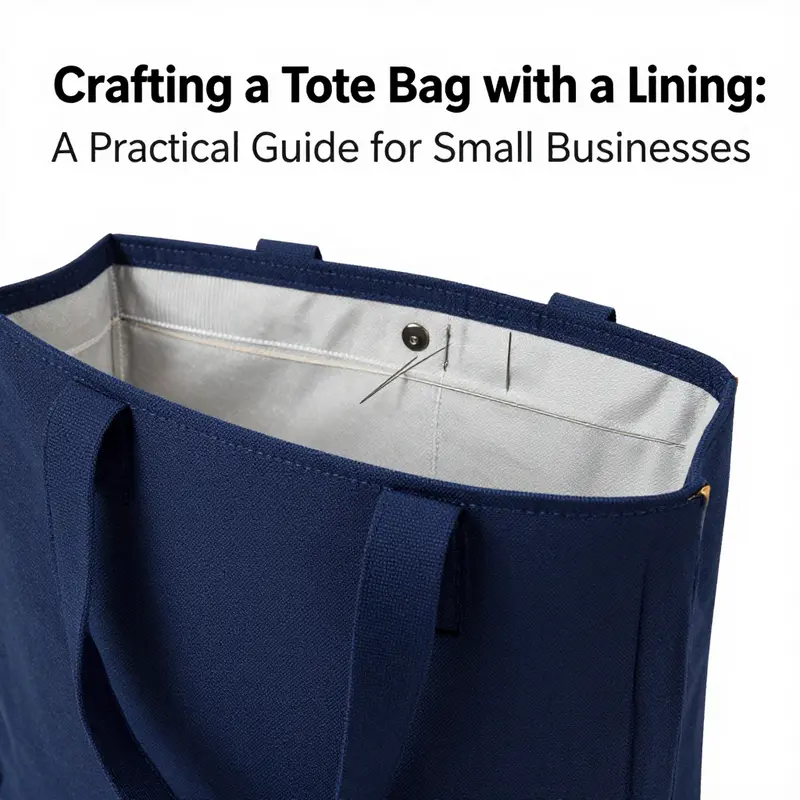
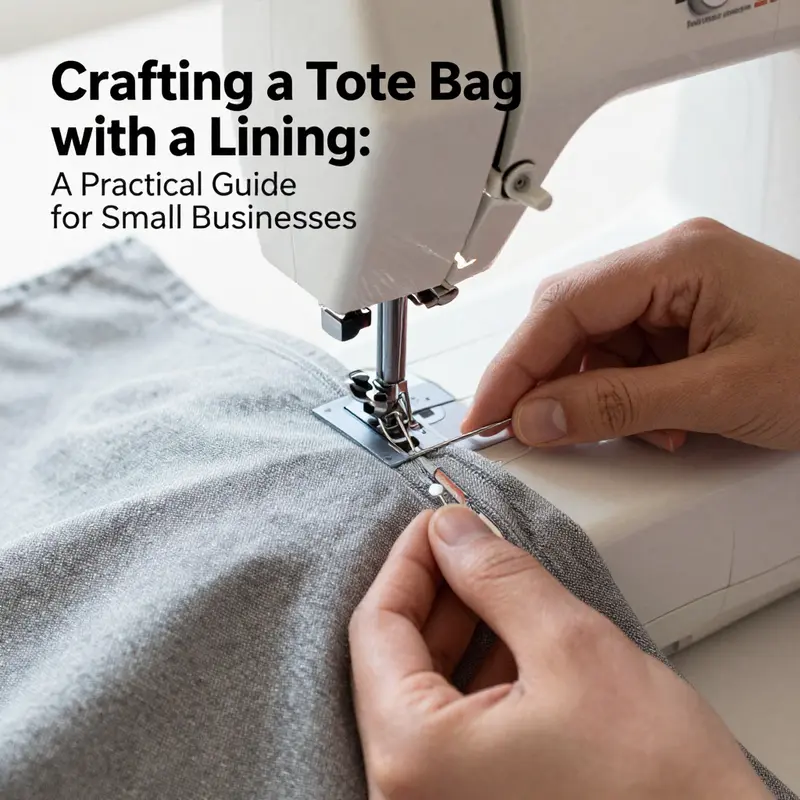
The moment you attach the lining to a tote bag marks the turning point from a simple pocket of fabric into a purposeful everyday carrier. The lining does more than hide the bag’s guts; it anchors the silhouette, cushions the interior, and preserves a clean, professional finish that stands up to daily use. In this chapter, the act of attaching the lining is explored as a careful dialogue between inner and outer layers, a choreography that yields a durable, well-constructed bag with a smooth interior and a confident exterior. The process hinges on a few practical decisions: selecting matching weights of fabric, handling seam allowances with respect for bulk, and choosing a turning method that minimizes strain on the fabric at corners and along the top edge. When you approach this step with intention, you not only secure the lining in place but also set the stage for a bag that looks and wears better over time.\n\nBegin with a quiet, methodical mindset. The lining is drafted as a separate pouch, sewn along its own side seams and bottom, then turned right side out so its seams lie cleanly inside the pocket of the bag. This separation matters: by assembling the lining first, you gain the advantage of a clean edge and a predictable interior width. It also gives you a chance to verify that the lining pieces match the outer pieces in size and shape before they finally meet in the final join. For most tote bags, two lining pieces are cut to the same dimensions as the outer panels, and any interior pockets are added to the lining before the two layers are joined. The result is a lining that sits neatly within the outer shell, a kind of soft armor that keeps the interior tidy and accessible.\n\nAs you begin stitching the lining, keep your fabric’s grain aligned and your edges squared. Place the two lining pieces right sides together and sew along the side edges and bottom with a modest seam allowance. The guideline used in many basic tutorials—about 0.5 cm—works well here, because it holds the lining firmly without creating unnecessary bulk at the corners. Trim the excess seam allowances to roughly 0.3 cm to reduce bulk, especially where the corners will become a turning point. If you plan to include pockets on the lining, this is the moment to sew them in—an interior pocket piece, for example, measuring about 20 cm by 13 cm, can be added to the lining front with a simple straight stitch along the sides and bottom, leaving the top edge free to accommodate opening access.\n\nClipping corners slightly is a small step with a big payoff. When you turn the lining right side out, those clipped corners help the fabric sit flat and prevent the dreaded bulk that can rope up along the bottom and sides. A neat lining makes the bag feel sturdier and more refined. Once the lining is turned, press it flat to create a crisp, clean edge that will align more easily with the outer bag during the final assembly. Pressing is not a cosmetic luxury here; it is a structural aid that reduces friction and helps the layers glide into position when you fuse the outer bag to the lining.\n\nWith the lining prepared, you move to the stage that tests coordination between layers. Place the outer bag and the lining right sides together, aligning the top edges and matching any side seams. The goal is to create a seamless top line where the fabric layers kiss each other and the raw edges disappear beneath a finished hem. Pin carefully around the edge, letting the pins guide the fabric so that the lining’s top edge aligns exactly with the outer bag’s top edge. The seam allowance for this top stitch is also a modest 0.5 cm, a standard choice that yields a strong, consistent finish without pulling the fabric inward or creating a puffy appearance along the opening.\n\nA crucial moment follows: you must leave a reversal or turning opening, typically about 10 cm long, at the top edge. This gap is essential because it serves as the thread of life through which the entire bag will be inverted from its inside-out state to the outside-facing reality you will carry. Sew around the entire top edge with the same 0.5 cm seam allowance, but do not close the opening. This deliberate choice preserves the ability to turn the bag right side out later and keeps the structure intact through the process. Once the stitching is complete, gently remove the pins and prepare for turning. The turning step is where you see the practical effect of your careful internal work: the bag now begins to resemble its finished form, with the lining tucked neatly inside and the exterior fabric sheltering it all.\n\nTurn the bag right side out through the opening you left. This operation requires a careful hand as you ease the edges through the gap, pulling until both the lining and the outer fabric lie smoothly against each other. After turning, press the top edge to ensure the raw edges are forced inward and align perfectly along the opening. A crisp fold here is the hallmark of a professional finish, and it translates directly into durability as the bag’s daily life begins. The top edge should sit flush and confident, with no misaligned seams or pulled fibers creating a wavy line along the opening. To secure this, topstitch around the entire top edge, catching both layers in a single, consistent stitch line. The act of topstitching not only reinforces the seal between lining and outer fabric but also provides a visually neat boundary that signals the bag’s degree of craftsmanship.\n\nHandles are attached to the top corners of the bag, completing the construction. Cut two sturdy handle pieces, perhaps 2.5 cm wide and long enough to drape comfortably over the shoulder. Fold each handle in half along its length, press, and stitch along the long edge to form a tubular strap. Attach the handles securely, stitching through both layers of fabric at each top corner. This step is not merely decorative; it anchors the load-bearing points and distributes weight evenly across the bag. A well-attached handle resists pulling and twisting, preserving the bag’s shape and internal lining through countless uses. When the handles are in place, give the entire bag a once-over with a seam ripper to remove any stray threads, then press again. A final press, done at a low heat suitable for the fabrics you chose, reveals a crisp silhouette and a reset inside the bag’s structure.\n\nIn practice, the interplay between the lining and the outer fabric is what gives a tote its character. The lining provides a quiet, durable interior, while the exterior fabric offers the bag’s visual statement. The method described above is intentionally straightforward, designed to yield a sturdy seam with a clean interior and a professional finish. If you want to broaden your technique or explore how to tailor the lining to different bag uses, you can look to a few focused resources for visual reference. This kind of resource can serve as a helpful companion while you fine-tune your own approach, especially when working with more slippery fabrics or bulkier interfacings. External reference: https://www.wikihow.com/Sew-a-Lining-in-a-Bag
Polished Edges, Secure Corners: The Finishing Flourish of a Lined Tote

The moment a tote bag truly comes to life is not when the fabric is cut or the first seam is sewn, but when the final touches seal the piece with quiet confidence. Finishing a lined tote is the artful transition from a functional rectangle to a bag that feels personal and ready for daily use. It is in these careful, almost intimate, details that durability and elegance meet. The final touches—turning the bag, pressing, closing openings, reinforcing corners, and adding subtle embellishments—are more than chores; they are the expression of craft that elevates a simple project into a reliable everyday companion. As with any well-made tote, the rhythm follows a pattern: reveal the interior, smooth the exterior, secure every edge, and invite the bag to stand up to the weight it will carry without betraying its seams.
Turning the bag right side out after the two halves—the outer fabric and the lining—have been joined with the right sides facing each other is a small act with outsized consequence. The opening left for turning is not merely a gap; it is the conduit by which the interior lining becomes visible to the maker’s eye. With patience, ease the corners through the opening, using fingertips and a gentle tool if needed to nudge the fabric without causing distortion. The corners tend to hide stubborn fullness, so a careful push from each angle ensures the pointy shapes resolve into neat, confident angles. As the bag slides into its new orientation, the top edge begins to align itself in relation to the body, and you can start to glimpse the tote’s future silhouette—straight sides, a sturdy bottom, and a mouth that sits evenly across the opening.
Once turned, the next act is pressing. Heat, pressure, and a touch of steam coax the layers to behave as one, removing the small puckers that often attend the final seams. A warm iron, applied with deliberate, even strokes, smooths the top edge and the side seams. The goal is not a glossy finish but a crisp, professional one: seams that lie flat, edges that meet neatly, and a surface that invites light to glide across it without catching. On fabrics with a natural nap or grain, a light touch is essential to avoid flattening those character lines. The pressing step also helps pre-set the top edge before you secure it through stitching, so subsequent steps feel more precise and less trial-and-error. If you’ve used interfacing for structure at the earlier stages, this is the moment those additions earn their keep, helping the bag stand tall when supported by its contents.
Closing the turning opening is where artistry meets technique. A slip stitch, or ladder stitch, is a quiet, almost invisible craft that grants the finished edge a seamless continuity. You begin by threading a slender needle with thread that matches the lining or the exterior, depending on which you wish to emphasize. The stitch is tiny and evenly spaced, sinking slightly into the folded seam line and reappearing just inside the fold, so the raw edge disappears from sight. The beauty of a properly executed slip stitch is that it leaves no telltale line on the exterior, yet the seam holds fast. The tension remains gentle enough to prevent puckering, but secure enough to withstand daily wear. When the stitch runs in a straight, uninterrupted line, the interior opens no gap and the lining stays neatly tucked in against the outer fabric. If any thread tails emerge, a few careful knots hidden on the inside keep everything tidy and durable.
Reinforcing the corners is a practical flourish that pays off in longevity. Bottom corners bear the most weight and the most abrasion, especially when a tote is carried on a shoulder or slid onto a car seat, chair, or floor. A small piece of interfacing or a few extra stitches along the corner seam can dramatically reduce wear over time. Some makers prefer a tiny square of webbing or a reinforced patch tucked into the inside corner; others rely on extra stitches along the seam line that form a subtle, but effective, layer of protection. The goal is not to bulk up the bag but to provide a quiet reinforcement that resists the flattening and stress that occur with frequent use. When corners are secure and the bottom lies flat, the bag not only looks more purposeful but also behaves more predictably—standing when placed down, resisting tilt, and maintaining its shape with a predictable, even drape.
Finishing details carry the final whisper of personality and care. A label set into the interior seam can offer a sense of ownership without disturbing the exterior design. Decorative stitching along the top edge or at the seam lines introduces a tailored touch that catches the eye without shouting. A contrasting thread used for topstitching, visible on the exterior when the bag is flipped or hugged by the light, can add a subtle accent that elevates the overall look. The top edge itself deserves attention: a deliberate, even topstitch around the entire mouth helps lock the lining and outer layers in a single, crisp unit. This topstitch not only strengthens the bag’s edge but also anchors the interior to the exterior, preventing any wobble as the tote fills. The finishing touches extend beyond aesthetics; they are an opportunity to encode resilience into the design.
Handles—the tactile bridges between bag and wearer—receive their own careful confirmation. Cut from sturdy fabric, the handles are formed into tubes, pressed flat, and stitched along the long edge to seal them. Their attachment points must bear the loads of daily use, so secure stitching through both layers at each top corner ensures they won’t roll or loosen with weight. When you sew the handles in place, consider the angle at which the bag will rest on the wearer’s body. A slight forward tilt, rather than a perfectly horizontal placement, reduces slippage and distributes weight more evenly across the shoulder. After attaching the handles, give them a test with a light load. If any movement or strain appears, reinforce with additional stitching at the attachment points. A bag that emerges from this phase can carry its load with grace and stay comfortable to wear, even after hours of use.
The work does not end with a perfect exterior; the interior deserves the same courtesy. A gentle trim of stray threads, a final once-over with a lint roller if needed, and a light press across the entire bag bring the project to a finish that feels complete rather than provisional. As you handle the tote, you may decide to add small, practical touches such as an interior pocket, a pen sleeve, or a key clip. Each modification should be harmonious with the lining and the outer fabric, so the overall weight distribution and balance of the bag stay steady. If you are incorporating decorative accents—perhaps a hint of upcycled fabric or a vintage tie repurposed into an interior label keeper—these elements should complement rather than overwhelm the clean lines of the bag. The simplest path to elegance is restraint: let the construction convey sturdiness, and let the finishing flourishes register as thoughtful details rather than loud statements.
For those who want to explore how this finishing philosophy translates into more complex interiors, a deeper dive into the practical integration of features such as a computer sleeve or structured compartments can be enlightening. See this guide on a tote bag with a computer sleeve for a concrete example of how sturdy interior design complements the polished exterior. tote bag with computer sleeve guide.
As you finalize your work, consider the subtle ways you can personalize the tote without compromising its integrity. A well-chosen linen thread tucked into a seam line can add a whisper of color. A coordinated label, neatly stitched into the lining, speaks of care and intention. The finished bag should invite touch and use—its lines crisp, its interior ready for daily life, its weight balanced so that it feels dependable in a crowded elevator or a busy street. The art of finishing a tote with a lining is not about dramatic transformation but about steady, incremental refinement. It is a cadence of steps that respects the material, supports the wearer, and honors the craft. When you lift the bag and run your fingers along the top edge, you should sense a boundary between two fabrics fused into one durable unit, a boundary that is less a seam and more a promise of longevity. The tote is not merely a container; it is a practiced instrument for everyday activity, built to endure, cleanly presented, and quietly elegant in its own right.
External resources can offer additional perspectives on finishing techniques. For more techniques and visual guidance, a Pinterest guide provides two effective methods for lining a tote bag and tips on hiding raw edges and adding color to plain canvas: https://www.pinterest.com/pin/268473091755372955/.
Final thoughts
Creating a tote bag with a lining is an opportunity to showcase craftsmanship while expanding your product catalog. By following these steps, you can deliver a durable, stylish bag that reinforces your brand and appeals to customers seeking quality and longevity. With practice, the process becomes more efficient, enabling scalable production without compromising detail or finish.