
Creating a tote bag with a flat bottom is not only a creative venture but a practical necessity for many businesses. Whether you’re looking to provide customers with eco-friendly bags, promote your brand, or simply add a stylish accessory to your offerings, mastering the artisan skills required to craft these tote bags can set you apart from competitors. This guide will walk you through the necessary materials, clear step-by-step instructions, and innovative finishing touches to make your tote bags stand out in the market. Each chapter builds upon the last, ensuring you leave with a comprehensive understanding of how to create functional bags that meet the needs of your business.
Chapter 1: From Fabric to Form—Choosing Materials for a Flat-Bottom Tote

A flat-bottom tote is more than a simple carrier; it’s a small architectural project that blends material science with everyday practicality. When you first sketch the bag in your mind, you picture a rectangle that remains upright even when it’s empty, a generous interior that swallows books, groceries, or a laptop, and a finish that looks crisp and durable after months of use. The feel of the fabric, the weight of the handles, and the stiffness of the bottom all come together to determine how well your tote performs in real life. With the right materials, the flat-bottom design becomes not just functional, but dependable and attractive, capable of standing up to daily wear while maintaining a clean, streamlined silhouette that carries as well as it looks.
In this chapter we move beyond the basic pattern and into the heart of the craft: selecting fabrics, interfacings, threads, and hardware that together form a bag with real staying power.
The first decision is fabric, and that choice sets the tone for the entire project. A flat-bottom tote benefits from a fabric with body and resilience, fabrics that resist sagging when the bag is loaded. The heavyweight cotton canvas is a perennial favorite for this reason. It has a natural, slightly rugged look that recalls traditional totes and messenger bags, yet it wears gracefully with modern finishes. Canvas also takes dye and finishes well, so you can achieve a wide range of looks—from the raw, natural canvas to richly dyed tones. Denim, particularly repurposed from old jeans, offers another compelling path. It brings a unique character with subtle color variations and a texture that adds depth to the finished piece. Upcycling denim isn’t just stylish; it’s sustainable. A guide to repurposing old jeans into tote-style projects emphasizes how approachable this material can be for crafters working from home—no fully equipped workshop is required, and most supplies are already in reach. When you choose denim, you lean into durability and a sense of personal reuse, which resonates with many makers who want to blend craft with environmental responsibility.
Polyester blends and blended cottons occupy a middle ground. They can provide extra resistance to wrinkling and moisture, while still offering sufficient heft to hold the bag’s shape. If you anticipate heavy loads—groceries, textbooks, or gym gear—these blends can help the tote maintain its silhouette even when the fabric itself is not as stiff as canvas. For a bag that sees more rough handling or outdoor use, treating the fabric with a light water-repellent finish can be beneficial, but you should choose a finish that won’t compromise the tactile appeal of the fabric or reduce breathability to an uncomfortable degree. Whatever fabric you pick, test a small sample by folding it and carrying a few objects worth of weight; this will give you a practical sense of how the material behaves at the bottom edge, where the tote needs to sit upright.
A second major material choice is interfacing, the material that gives your bottom panel—and, in some designs, the entire bag—a little extra structure. Interfacing acts like a backbone, helping the bottom stand firm and resist the pressure of contents. Fusible fleece or fusible woven interfacing work well for flat-bottom constructions. Fusible fleece adds a soft, squared-off stiffness that still feels flexible; it’s excellent for a bottom panel that needs some puff but not a rigid edge. A woven interfacing, on the other hand, tends to yield a crisper, more formal finish that helps the bottom hold its shape through repeated use. The scale of rigidity you want should align with the weight of the fabric you selected. For a heavy canvas, you might lean toward a slightly thicker interfacing to maintain a neat, flat base; for a lighter fabric, a thinner interfacing often suffices. The goal is to achieve a stable bottom that maintains that signature flat, square edge when the bag is filled, without making the entire bag feel stiff and unyielding.
Thread is the silent workhorse of any sewing project, and for a tote with a flat bottom, you want a thread that can handle thickness without snapping or cutting through the fabric. Polyester or nylon threads are the preferred choices here because they offer strength, durability, and a bit of give that helps them move with the fabric rather than girding it so tightly that seams become brittle. When you’re stitching through multiple layers—the outer fabric, the lining (if you add one), and the bottom interfacing—thread tension and stitch length become important. A slightly longer stitch length can help reduce bulk where the bottom attaches, especially if you’re using a heavier fabric. In some cases, you may consider polyester-waxed threads for extra abrasion resistance in the seams that bear the most weight.
Hardware matters, too, and the right handles and attachment choices can make or break the bag’s usability. Handles should be sturdy and comfortable, with enough width to distribute weight across the shoulder or hand. A typical tote uses handles around two inches wide, cut from the same fabric, webbing, or a reinforced cord that you weave into the bag’s top edge. The attachment area deserves particular attention: secure stitching, reinforced anchors at stress points, and sometimes a small tab or patch to protect the fabric where the handle meets the body. Reinforcement is essential; you want to prevent the handles from loosening over time, especially when the bag is full. If you choose metal or plastic grommets for handle attachments, ensure they’re corrosion-resistant and sized to accommodate the thickness of your fabric and any lining you’ve included. A quiet, permanent finish is often better than a flashy hardware choice that looks good initially but wears out quickly.
The bottom panel itself is the heart of the flat-bottom concept. The panels you add to the interior or between the outer layers create the footprint that keeps the bag upright. In a straightforward approach, you use two bottom pieces that mirror the width of the main bag panels and are shaped to form a box-like base when sewn in. The size of these bottom panels depends on the desired depth and the width of the bag, but a common starting point is to cut panels that, when added, create a bottom about four to five inches deep. For a standard tote around fourteen inches wide and sixteen inches tall, the bottom panels can be sized around eight by five inches, though you can adjust these measurements to achieve a flatter or deeper base. When you place the bottom panels between the two main outer fabric pieces, you fuse the structure so the bag stands on its own rather than collapsing or tipping forward under load. The alignment of the top edges is critical here, as is careful pinning and seam allowance control. A half-inch seam allowance is typical for many bags, but you may choose a slightly wider allowance if your fabrics are particularly bulky or the interfacing adds extra bulk. After sewing around the entire perimeter, you’ll trim the corners at a diagonal to reduce bulk and make turning the bag right side out smoother. Turning is a small ritual in its own right—use a blunt tool, like a chopstick or the eraser end of a pencil, to push the corners until they’re sharp and square.
The finishing touches tie everything together. Once the bag is turned right side out, a thorough press helps the bottom lay flat and the corners stay crisp. Pressing should be deliberate but gentle; crisp corners are essential for that geometric, boxy bottom that gives the bag its upright stance. A light spray or steam can help set the shape, followed by a careful topstitch around the outer edge. This topstitch serves a dual purpose: it secures the seam allowances and creates a refined, finished look that emphasizes the bag’s flat base. If you’re adding a lining, the lining should be attached in a way that maintains the external silhouette. A lining can help protect items inside, improve weight distribution, and add a neat interior finish that makes the bag feel more substantial in hand. The liners also give you a place to include small pockets or a zipper closure if you wish to add a touch of organization to the interior without sacrificing the flat-bottom aesthetic.
Because a tote’s bottom needs to hold its shape through repeated use, many makers look for reinforcement beyond the bottom panel itself. A few popular approaches include attaching a lightweight, open-ended structure to the inside of the bottom. Some opt for a thin piece of foam or a layer of thicker interlining that can resist compression while remaining flexible enough to adapt to contents. Another approach is to implement a boxed corner technique within the main outer panels, where a small amount of fabric is stitched to form a squared-off base. The result is an even more pronounced flat bottom that stays true even as you stuff the bag full. If you’re aiming for a more technical finish, you can add a small amount of stiffeners along the base seam or even insert a gentle semi-rigid panel into the bottom seam before you stitch the final top edge. Each method has its own feel—some give a crisper, more professional look; others emphasize a softer, more casual vibe—but all share the common objective: a base that makes the tote stand tall and confident on a table or shelf.
Personalization is a satisfying dimension of tote making, especially when the aim is to craft something that feels uniquely yours. Fabrics can be dyed or printed, and motifs drawn with fabric paint or markers can transform a simple bag into a personal statement. If you’re drawn to upcycling, consider adding a patch of denim with visible wear or a carefully chosen applique that speaks to your taste. When it comes to aesthetics, the flat-bottom design provides a stage for those design choices without compromising practicality. The same materials that give you structure—heavy fabric, proper interfacing, and robust handles—also give you a durable canvas for creative expression. The goal is to strike a balance: a bag that looks stylish and modern while remaining tough enough for daily errands. In this spirit, you might explore ways to coordinate the interior lining with the exterior fabric, or experiment with contrasting stitching or topstitch thread color for a subtle, graphic effect. If you want a bit of expert perspective on fabric choices and tote construction, you can refer to examples and discussions on related product lines and designs, such as women’s canvas tote bags, which provide real-world inspiration for material pairings and practical performance. The idea is to learn from both the hands-on process and the fashion-forward thinking that has shaped tote design for decades, then apply what resonates most to your own project.
As you consider the total package—the fabric, the interfacing, the thread, the hardware, and the bottom panels—you begin to see how a well-chosen combination yields a tote that not only stands upright but also carries its weight gracefully. The flat bottom is the literal anchor of that stability, but it is the careful pairing of every material choice that gives the bag its character. The bottom edge, the corners, and the base are the first places where quality is revealed in practice: a crisp seam line, a square profile, and edges that resist fraying after repeated use. The rest of the bag follows naturally from those decisions. The fabric’s body and the bottom’s stiffness set the bag’s silhouette; the handles distribute weight across the hand or shoulder; the lining protects the contents and adds a refined interior finish; and the topstitching closes the loop with a neat, finished look. In short, what starts as a simple rectangle becomes a living, usable object through the careful choice of materials and the attention paid to their interaction.
If you’re ready to explore the practical assembly steps in depth, you’ll find that the material choices made at this stage inform every following move. The fabric’s thickness dictates needle choice and stitch length; the interfacing’s rigidity shapes the measurement of your seam allowances and the turning radius of the bag’s corners; the handles’ width and attachment strategy determine how many anchor points you’ll need and how you’ll reinforce them; and the bottom panels’ size and the way you sandwich them into the bag will influence how you align edges and how you press the final piece. The elegance of the flat-bottom tote emerges when these details are coordinated, when you can look at the finished bag and feel the sense of solidity that comes from carefully chosen materials that were accepted for their performance, not just their appearance. This is the moment where the craft becomes tangible; you can lift the bag, press it, and see it stand independently on a table, presenting a clean, geometric profile that signals a thoughtful, well-executed build.
In the broader arc of the project, materials are also about sustainability and resourcefulness. Reusing old textiles, selecting fabrics that can be washed and cared for easily, and choosing hardware and threads that will stand up to decades of use all contribute to a tote that remains relevant as a practical daily tool. By balancing the aesthetic with the functional—the look you want and the weight it can handle—you craft a bag that’s not just an accessory but an ally in daily routines. The flat bottom isn’t an end in itself; it’s a feature that invites reliable utility, a quiet promise that the tote can carry what you need and still look neat when you set it down. The materials you choose now will echo in the feel of the finished piece, from the way the fabric moves when you lift the bag to the way the bottom remains flat even after a long day. And as you move toward the next phase of construction—assembling the panels, sealing the bottom, and adding handles—you’ll carry with you the knowledge that every choice beneath the surface matters. The materials become a language you speak with your hands, translating intention into a sturdy, stylish tote that stands as confidently as a well-made piece of furniture on a small scale. For readers seeking concrete examples and practical inspiration on fabric choices, the internal reference above offers a window into how real-world options translate into finished goods. The dialogue between material and method is what turns a DIY tote into a reliable everyday companion, a small achievement that folds neatly into your ongoing craft practice. External resources can broaden this understanding, offering demonstrations, tips, and variations that complement your own experiments in material selection. For broader sewing fundamentals that support this project, consider resources such as the external guide found at the end of this chapter.
Chapter 2: Crafting a Sturdy Flat-Bottom Tote — A Seam-by-Seam Journey to an Upright, Generous Bag
A flat-bottom tote is more than a simple carried object; it is a portable work surface, a reliable grocery companion, and a canvas for everyday living. The beauty of a well-executed flat bottom lies in its ability to stand upright with confidence, giving you easy access to what’s inside and a clean silhouette that wears well with almost any fabric choice. In this chapter, we move through a cohesive, flowing narrative of how to bring that kind of structure to life using sturdy fabrics such as cotton canvas or denim. The goal is not only to follow a set of steps but to cultivate a practiced eye for balance, proportion, and finish. From the initial fabric decisions to the final topstitching, the process rewards patience and attention to detail, and it remains adaptable to a range of sizes, uses, and personal styles. Along the way, you’ll discover how the geometry of the bottom transforms a bag from merely functional to confidently stable, with corners that tuck neatly and a base that remains square even when the bag is fully loaded. The method described here borrows from trusted, common-sense sewing practices, reinforced by practical tips on cutting, assembly, and finishing that help you avoid the common missteps that can derail a flat-bottom project. If you’re thinking about a laptop-ready variant, you can explore a laptop-focused approach through the dedicated guide linked here: tote-bag-laptop. This reference is not a requirement, but it offers a complementary view for anyone who expects to carry heavier digital gear and needs a snug, protective fit for the electronics inside a robust tote.
To begin, select the fabric with care. Durable materials like cotton canvas or denim give the bag real staying power, but you can also repurpose sturdy textiles such as upcycled jeans if you want to emphasize sustainability. Pre-wash the fabric to minimize later shrinkage, and press it flat so all cutting lines stay true. Clear thinking about the fabric’s grain and pattern direction now will pay off later when you align and sew the panels. The cutting plan is straightforward: two main body panels cut to the desired width and height — a common starting point being about 14 inches wide by 15 inches tall for a practical everyday tote — plus two flat-bottom corner squares, each around 8 inches square. If you prefer a deeper bag, you can adjust the height and the width, but the bottom corners should remain proportional to the main panels so the final form stays balanced. Use chalk or a fabric marker to mark cutting lines and seam allowances, then set up the workspace so that you can work with the pieces laid out in their intended order. A clean, well-lit station makes the following steps easier and helps you avoid misaligned edges that would show up as you turn the bag right side out.
The next stage focuses on the foundation of the flat bottom: attaching the four bottom corners to the main panels. This isn’t a cosmetic step; it is where the structure of the bag begins to take shape. Start by laying one main panel flat, face up, and position a corner square at the bottom center, aligning the edges exactly before pinning. Repeat on the opposite side of the same panel so each corner is secured. Then take the second main panel and attach the remaining two corner squares to its bottom edges in the same way. What you’re aiming for is a precise seam line where the corner square meets the main panel along each edge. Sewing these corners to the panels with a standard ½-inch seam allowance provides the sturdy seam that will resist the pressure of items stored inside. After stitching, trim away the bulk at the corners carefully to reduce bulk when the bag is turned right side out. A small diagonal cut on each corner where the seam meets the panel will help the fabric lay flat as you press. These corner attachments create the initial boxy volumn and begin to render a perfectly square base when the bag is fully assembled. It is helpful to press the seam allowances open or toward the panels as you go, so they lie flat and contribute to a crisp final appearance.
With the bottom corners secured to each main panel, you’re ready to assemble the main body. Place the two main panels right sides together, meaning the outer面的 surfaces should face inward so the interior faces will be exposed after turning. Align the top edges and pin along the sides and bottom. Sew around the entire outer perimeter with the same ½-inch seam allowance. At this stage, consider leaving a turning opening along the bottom edge about 6 to 8 inches long. This opening will let you turn the bag right side out later, a necessary step for most tote constructions unless you choose to add a lining that hides the process. If you plan to work with very heavy fabric like dense denim, you may want to reduce the seam allowances slightly or switch to a heavy-duty needle to prevent skipped stitches. The key is to keep the side seams neat and parallel and to ensure the bottom corners remain aligned with the panels so the base remains flat once turned.
Turning the bag right side out is a small test of patience but a satisfying one. Slip a turning tool or a blunt object into the opening and push out the corners until they are sharp and square. Take care to avoid distorting the bottom; gently coax the corner points to keep the boxy silhouette that matters most for a flat bottom. Once the bag is fully right side out, it’s time to give it a thorough press. Pressing is not mere vanity; it is how the fabric remembers the plan you laid out on the cutting table. Smooth the side seams, press the bottom corners so they are crisp, and keep the top edge clean and straight. A good press creates a foundation for topstitching, which not only strengthens the bag but also adds a finished look that catches the eye. For a polished result, run a light topstitch around the outer edge of the bag, a stitch that runs close to the edge at roughly ¼ inch from the edge. This line of stitching acts as a guardrail against stretching and helps the bag retain its shape under load.
When you’re satisfied with the stability and the edge finish, finish the opening at the bottom. There are two routes to consider. The first is to topstitch along the bottom edge, which neatly closes the opening and reinforces the top edge at the same time. The second is to fold the raw edges inward by about ½ inch, press, and then topstitch close to the folded edge. If you choose to close the bottom in this way, you’ll have a clean, hidden seam that contributes to a more refined exterior. Whichever route you select, ensure the bottom opening is securely closed and that the base remains flat and evenly shaped. For added durability, stitch a small X across each bottom corner from the outside. This cross-stitch pattern distributes stress across the corner and helps resist wear where the bag naturally carries load and weight.
Handles are the final key to completing the tote’s silhouette and usability. The handles can be made from the same fabric as the bag or from a stronger material such as woven webbing for added durability. If you opt for fabric handles, cut two strips about 24 inches long and two inches wide. Fold each strip in half lengthwise, wrong sides together, and press. Then stitch along the long edge with a narrow seam allowance, turn right side out, press flat, and topstitch along both long edges to stabilize. The attachment points are typically at the top corners inside the bag, about 2 to 3 inches from the side edges. Sew securely using a double-stitched method, such as a back-and-forth stitch, which increases strength where the handles join the bag. The exact length of the handles is a personal preference, but a comfortable range is usually around 18 to 24 inches from end to end. If you’re taller or want the bag to sling more over the shoulder, lean toward the longer end; if you prefer a hand-carry or short shoulder carry, a shorter length often feels more secure.
If you’re thinking about adding a lining, it’s best to attach the lining before you finalize the handles. A lining adds structure, protects the interior, and offers a neat finish where the exterior seams disappear from view. The lining should mirror the main panels in size and shape, except that you might choose to sew the lining with a side or bottom seam that permits a little extra ease so the bag isn’t tight around any items you place inside. When stitching the lining, keep the seam allowances consistent with the outer bag so that the two layers align smoothly along the opening and sides. Once the lining is in place, you can proceed to attach the handles, making sure the handle anchors are robust enough to bear weight. If you’re unsure about the exact anchor points, a simple rule of thumb is to position them about 2 to 3 inches inward from the side edges, both on the left and the right, to create an even, balanced shape.
As you near the finish line, consider the final touches that elevate a handmade tote from functional to refined. A thorough press with the iron, focusing on the bottom corners and the top edge, helps eliminate any trapped puckers and gives the bag a crisp, professional look. If you wish, you can add a lining with a small inner pocket or a stitched name tag as a personal signature. A little customization can transform a practical tote into a daily companion that carries stories as surely as it carries belongings. And if your aim includes careful weight distribution and long-term resilience, you can insert a light weight interfacing or a slim stabilizer along the bottom area or within the panels to reinforce the boxy profile without sacrificing flexibility. Such subtle improvements guard against sagging and keep the bag upright even when it’s carried empty.
A few practical considerations help you translate this project into a reliable everyday bag. First, choose your fabric based on how you intend to use the tote. For groceries, you’ll want a dense, washable material that handles moisture and abrasion. For library trips or daily commutes, a sturdy canvas or denim provides the right mix of durability and flexibility. Second, pay attention to thread selection. A heavy-duty polyester or a denim-specific thread strands the seams with confidence and reduces the risk of fraying after repeated loads. Third, consider the hardware. If you include any metal components like rivets or fasteners, choose corrosion-resistant options and keep them away from raw edges to prevent chafing. Finally, tailor the size of the bottom and the height of the panels to your needs. A deeper bag will carry more items, but it will also require careful distribution of weight so the bottom remains flat and the sides don’t bow under load. The balance here is practical: a slightly wider main body with a square, flat base offers maximum stability while maintaining portability.
As you reflect on the journey from fabric to finished bag, the flat bottom emerges as a small radical transformation in the bag’s geometry. Where a simple rectangle might slump or tilt when set down, the combination of square bottom corners and a measured seam allowance creates a shape that sits squarely on any surface. It is this predictable foundation that makes a flat-bottom tote particularly appealing for everyday use, whether you are filling it with groceries, books, notebooks, a water bottle, or a laptop. The finish matters because it signals care and intention. A well-pressed edge, a clean line of topstitching, and evenly reinforced corners communicate that the bag has been built to last, not just slapped together. The result is a versatile, durable tote that acts as a reliable companion through busy days, quiet moments, and everything in between.
If you want a broader set of ideas or patterns that explore variations on the flat-bottom concept, you can also explore related content that digs into different approaches to tote construction. For an extended discussion of patterns, diagrams, and printable templates that align with the flat-bottom method, see the external resource linked earlier. The guidance here is deliberately adaptable: with the fundamentals of cutting, corner attachment, and finishing in hand, you can shape the bag to your exact needs while maintaining a crisp, square base that helps the bag stand on its own. The joy of sewing such a project lies in the quiet confidence that comes from understanding how each decision — the size of the bottom corner squares, the seam allowance, the placement of the handles — contributes to a cohesive, durable whole. As you practice, you’ll find your own pace and your own preferred order of operations. The important point is not to rush but to respect the geometry of the bag you’re building. When you body the craft with patience, the flat-bottom tote becomes a dependable everyday tool, a handmade staple that carries items with grace and keeps them organized, all from a single, well-considered set of steps.
For readers seeking additional visuals, diagrams, or printable templates that align with the flat-bottom approach, the linked external resource provides a complementary perspective that can clarify the shaping of the base and the alignment of the corner panels. While the exact measurements may vary from project to project, the core concept remains constant: the bottom should anchor the sides with a crisp, squared profile that supports the bag’s silhouette. With this understanding, you can tailor the dimensions to any fabric width or height you choose, confident that the bottom will stay flat and stable as you load the bag with daily essentials.
External reference for patterns and diagrams: https://www.allfreepatterns.com/diy-tote-bag-pattern-with-flat-bottom/.
Finishing Flair: The Artful Final Touches That Make a Flat-Bottom Tote Stand Out
The journey from flat sheet to practical tote is almost complete once the main panels are sewn and the bottom sits squarely. Yet the finishing touches are what turn a functional bag into a personal item you’ll reach for again and again. This stage invites you to blend craftsmanship with a touch of your own style, to reinforce what you’ve built, and to ensure that every edge, seam, and corner will endure the rhythms of daily use. A well-finished tote communicates care, durability, and a bit of personality, all while keeping the bag’s structure stable as you load it with groceries, books, or work essentials. The idea is not to overwhelm with flash but to elevate the overall silhouette and function with thoughtful details that feel intentional rather than accidental. You can approach this stage with the same calm confidence that guided the earlier steps, knowing that a few deliberate actions will yield a clean, professional, and durable result that wears well over time.
First comes the pressing. Pressing is more than smoothing fabric; it is shaping the bag’s character. With the bag turned right side out, work on the exterior seams and the bottom edge with a sharp iron and a pressing cloth. The pressing cloth is essential when you’re dealing with cotton canvas, linen, or any textured weave that could scorch or shine if exposed directly to heat. A firm, even press helps set the stitches and minimizes lingering puckers around the bottom corners where the canvas folds. It’s tempting to rush the process, but patience here pays off in the long run. Take care to lift the iron between sections rather than sliding it, which can stretch or distort the fabric. In addition to pressing the main body, return to the bottom panel area and ensure that the corner points where the bottom meets the sides are pressed crisp. Those corners carry a lot of the bag’s day-to-day stress, so crisp corners help maintain the intended flat-bottom profile even after repeated full loads.
Next, consider topstitching. A single, tidy line of stitches around the top edge anchors the bag’s opening and reinforces the seam where the lining meets the outer fabric. Topstitching can be decorative as well as functional, but the goal is a precise, evenly spaced line that lies just outside the fold line. If you choose a contrast thread, you introduce a tailored, high-end feel; if you prefer a more seamless look, matching thread helps the line disappear. When you topstitch, maintain a steady hand and consistent foot pressure along the outer edge. If your machine allows, engage a longer stitch length for the top edge and a slightly shorter stitch length for reinforcement around the bottom seam. This distinction helps the bag keep its shape without appearing stiff. A good practice is to run a test strip on a scrap piece of your fabric to dial in tension and stitch length before touching the actual bag. The result should be a clean edge that doesn’t rumple or ripple, with stitches that feel secure to the touch.
The interior deserves attention as well. If you’ve lined the tote, you can choose to topstitch along the top edge of the lining as you would the exterior; this keeps the transition between lining and outer fabric neat once the bag is turned right side out. An alternative is to leave the lining clean and gently press the seam allowances inward at the top edge, then stitch the lining to the bag only along the upper edge, allowing the lining to float slightly inside. Either approach requires a well-executed turning technique and careful alignment so there are no misaligned seams peeking from the top opening. A neat interior contributes to a sense of quality when the bag is opened and closed, especially if you use the tote for work or school items where organization matters.
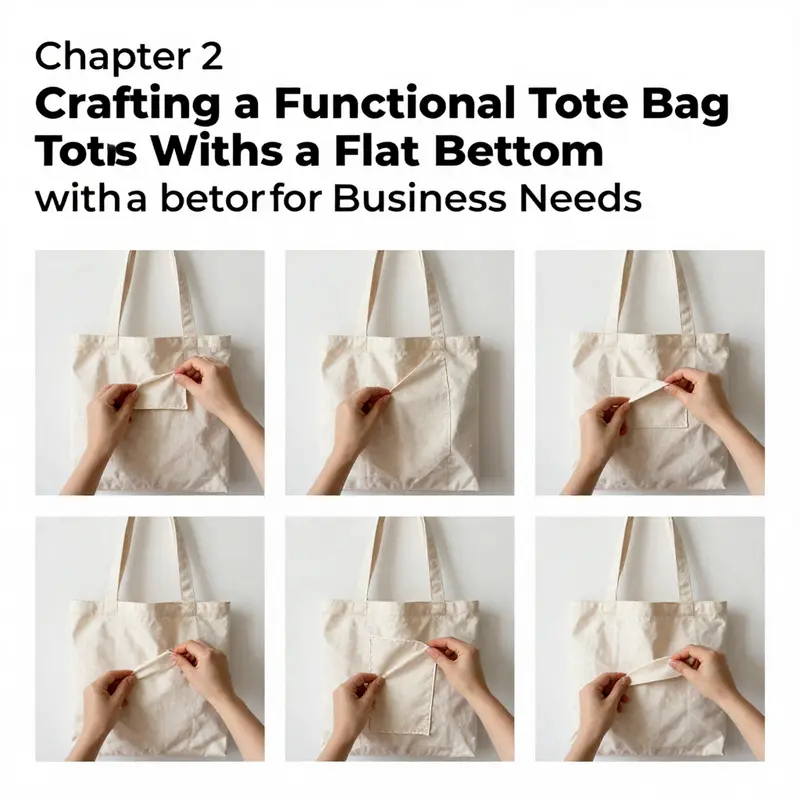
A practical addition that many makers value is a functional pocket inside the lining. A zippered pocket is the gold standard for small items that you want to secure—keys, a phone, a lip balm, or a small notebook. The pocket should be positioned toward the side or end of the lining, away from the main opening so it doesn’t interfere with loading or unloading. To install a zippered pocket, first create a compact rectangular piece of lining fabric, reinforce its edges with a narrow seam allowance to prevent stretching, and baste it in place before you sew the lining to the bag. When you install the zipper, use a zipper foot, align carefully, and stitch from one end to the other in a straight line. If you’re worried about bulk around the zipper, consider using a shorter zipper and a lightly interfaced pocket panel. The advantage of a well-placed zippered pocket is clear: it keeps everyday items organized and accessible, without tumbling to the bottom whenever the bag is tipped.
If you want to maximize the utility of the interior, think about how the lining is finished at the top edge. A clean, tucked finish around the top edge, with the raw edges neatly bound or folded away, helps the lining resist wear and keeps the bag’s interior surfaces smooth against items that might snag. Some makers opt for a fully enclosed lining where the lining is stitched to the outer fabric at the top edge and the seam is hidden within the bag’s body. Others choose a simpler approach where the lining is attached only to the top edge with hand stitching. Both methods work; the key is to ensure the top edge remains stable and the transition from exterior to interior is seamless to the touch.
As you refine the interior, consider the decorative and protective potential of exterior embellishments. Patches, embroidery, appliqué, or even a light coat of fabric paint can transform a basic tote into a personal statement. The trick with exterior adornments is to balance aesthetics with durability. If you add patches or embroidery, apply them to a stable, flat area of the bag that won’t be stressed by folding or constant abrasion. If you choose paint or dye, test color fastness on a scrap piece first and apply it in light, even layers to avoid stiff or cracked results. When leather or faux-leather accents are involved—such as a reinforced corner patch, a small decorative panel near the handles, or a leather zipper pull—trim the edges cleanly and finish with a satin stitch or a tight zigzag to secure the seams. Such accents can significantly elevate the bag’s perceived value, giving it a premium feel that still remains practical for everyday use. The careful selection of accents—whether subtle or bold—should align with how you plan to use the tote, the fabrics you’ve chosen, and your personal style.
Color, texture, and thread are not mere afterthoughts; they are design decisions that echo the bag’s overall voice. If your exterior fabric is a busy print, you may want a restrained interior color to keep the bag from feeling overwhelmed. Conversely, a solid exterior invites a contrasting lining color or a patterned accent to surprise the eye as you open the bag. When choosing thread, consider the fabric’s fiber content and the weight of the bag. A robust thread, such as a poly-cotton blend or a heavy-duty polyester, provides durability without adding bulk. For exposed topstitching, a slightly thicker or decorative thread can add dimension. If the fabric has slubs or texture, a match or near-match thread can keep the finish cohesive while still conveying that handcrafted quality.
The final polish is more than a single step; it’s a sequence of checks that ensure the tote behaves as intended. Do a thorough inspection of every seam, particularly the corners where the flat bottom meets the sides. Run your fingers along the top edge to confirm the lining and outer fabric lay flat and that there are no puckers along the seams. Test the bag’s structure by filling it with a representative load—books, a water bottle, notebooks, and a few loose items. Observe how the bottom panel sits when the bag is fully loaded. It should stand upright with minimal wobble, the corners maintaining crisp angles rather than curving inward or outward. If you notice any bulges or misaligned edges, address them with a quick press, re-sew a small section, or trim a stray thread that may be catching fabric as it moves. The aim is a bag that not only looks well-made but also feels reliable the moment you pick it up and the moment you set it down.
For makers who love to share techniques or look for a trusted, well-documented guide, a detailed, step-by-step resource can deepen understanding of these finishing details. A comprehensive tutorial that walks through the exact steps, diagrams, and tips tailored to achieving a professional finish is available at a reputable craft site. If you want a visual companion that reinforces the ideas discussed here, a visit to that external guide can be very helpful as you approach your own project. And if you’re curious about related functionality, there are several related tutorials on tote construction that explore how different pocket configurations, closures, or handle styles can influence the bag’s everyday practicality. For readers who enjoy exploring related ideas, a direct link to an insightful example focuses on zipper and pocket configurations and how they integrate with a flat-bottom design, which you can explore for a deeper understanding of interior organization.
In the spirit of connecting technique to outcome, consider the way you describe the bag to others who might use it. A well-finished tote communicates a story about the maker’s patience, attention to detail, and willingness to invest time in clean lines and durable construction. This is not vanity stitching; it is the evidence of a plan. When someone runs their fingers along the edge, sees the crisp bottom, or opens a neatly aligned lining with a tidy pocket, they encounter professionalism born from habit and care. The finishing phase is where you translate your square fragments of fabric into an enduring, personal tool for daily life. If you have followed the earlier steps to create a stable flat bottom and a comfortable, proportional silhouette, these finishing touches should feel like a natural extension of the process, not an add-on. The bag should finish with confidence—the kind that suggests it will hold up to a full day’s use without surrendering its shape or its charm.
If you’d like to see a specific example of how professionals approach finishing touches, consider exploring a targeted technique guide on zipper pockets and how they can be integrated with a flat-bottom tote. This resource offers practical tips for aligning pockets with the lining and the exterior without compromising the bag’s clean profile. The discussion accentuates how a zipper pocket, while small, can dramatically improve internal organization without adding bulk to the bag’s interior. You can follow through with a practical link that provides a concise, actionable walkthrough: tote bags with zippers.
The result of attending to these details is a tote that feels as solid as it looks. A bag that stands with authority on its flat base, a body that doesn’t sag or gape at the top edge when loaded, and a lining that keeps contents contained and easy to access. The finishing stage is where the tedium of sewing becomes artistry, and the tote you finish will carry not only items but also your craftsmanship. It is a quiet demonstration that good design, disciplined technique, and a personal touch can coexist in a single, everyday object. The flat-bottom construction provides the backbone, but it is the finishing touches that breathe life into the piece and invite frequent, joyful use.
For readers seeking a detailed, visual reference that complements these guidelines, a reputable tutorial offers diagrams, close-up photos, and step-by-step instructions designed to reinforce the principles discussed here. That external guide serves as a reliable companion to your own practice, helping you see how the same practices translate across different fabrics and weight classes. Remember that every fabric behaves differently under heat, stitch length, and tension. The ability to adapt—while maintaining a consistent, clean finish—is what separates a good tote from a great one. In the end, your tote’s finish should feel inevitable: it looks right, it wears well, and it carries with it a sense of the maker’s care and commitment.
As you close this stage, take a final moment to review how the finishing techniques align with your earlier decisions about fabric choice, the bottom construction, and handle attachment. The bottom line is that the entire project comes together when the finishing touches are purposeful, precise, and tailored to the bag’s intended use. If the tote will be a grocery companion, a work bag, or a daily carry-all, think about how each finishing choice supports that role. The alignment between structure and detail is what makes the tote resilient, functional, and personal, and that alignment is achieved through the careful sequence of pressing, topstitching, lining, pockets, embellishments, and a final, thorough inspection. The result is a tote that not only stands upright on a flat bottom but also stands up to the daily rituals that give it meaning. A well-executed finish is a signal to the world that you care about the craft, you respect the materials, and you appreciate the quiet, lasting value of a bag that’s built to perform.
External resource for deeper exploration: For a detailed, step-by-step visual guide that complements these techniques, visit The Spruce Crafts’ tutorial on making a tote bag with a flat bottom. This resource provides diagrams and practical tips that can reinforce your understanding and inspire new variations. External guide to finishing a tote with a flat bottom.
Final thoughts
In summary, creating a tote bag with a flat bottom is a worthwhile investment for any business aiming to enhance its product offerings. By understanding the materials, following the detailed instructions, and exploring customization options, you can craft tote bags that not only satisfy customer needs but also promote your brand effectively. The skills and techniques outlined in this guide will enable you to create durable and stylish bags that stand out in a crowded market, providing you with a competitive edge and encouraging customer loyalty.