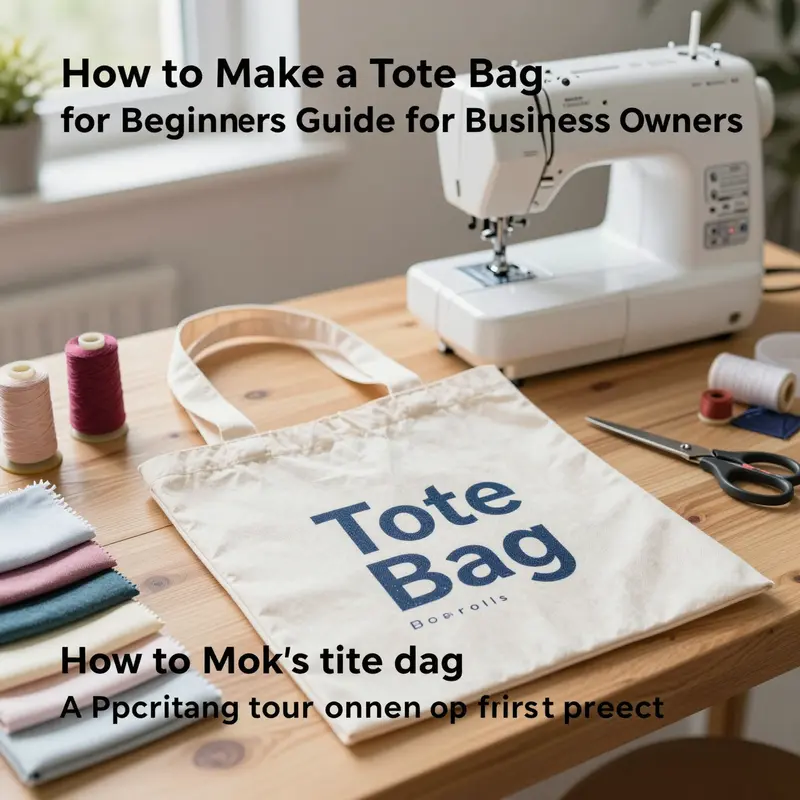
Crafting a tote bag offers business owners an excellent opportunity to expand product lines with a handmade, customizable accessory that appeals to a broad market. Understanding this accessible sewing project can help entrepreneurs tap into growing consumer demand for eco-friendly, stylish, and functional bags. This comprehensive guide unfolds in five key chapters: first, exploring all the necessary materials to set you up for success; second, breaking down the step-by-step process for clear execution; third, providing practical tips and tricks specifically for novices; fourth, unveiling creative ways to customize and personalize tote bags to increase market appeal; and finally, addressing common mistakes with effective troubleshooting strategies. Each chapter empowers business owners to confidently produce durable, attractive tote bags that reflect their brand’s unique style and meet customer expectations.
Foundations in Fabric: Essential Materials for Beginner Tote Bags
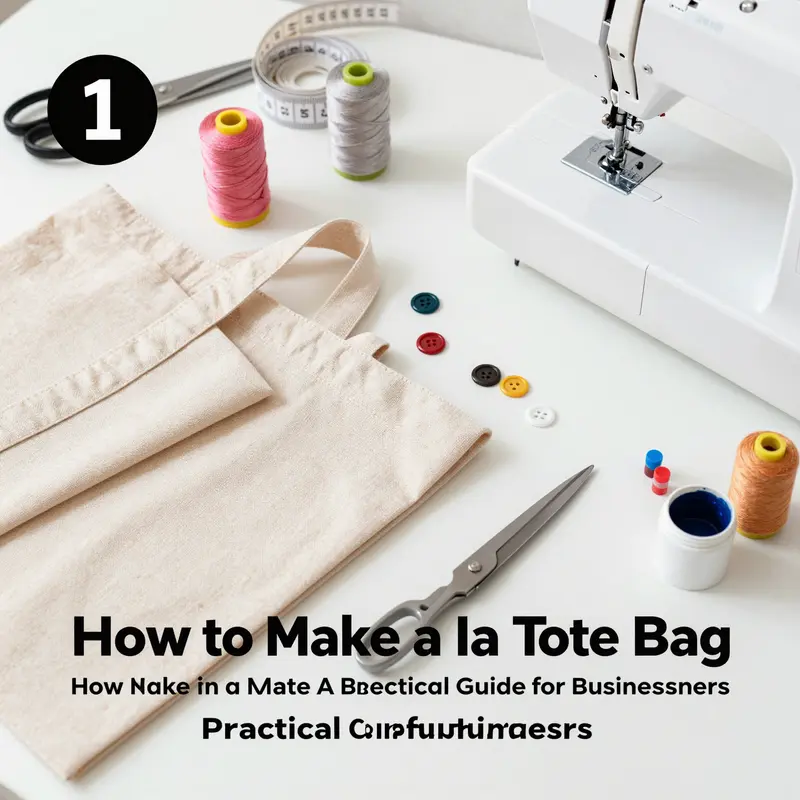
Choosing the materials to begin a tote bag project is more than a shopping list. It is the first conversation you have with the bag you want to carry every day. For beginners, this conversation is guided by three practical paths: crochet, sew-with-fabric, or a no-sew customization. Each path has its own rhythm and its own set of materials, and each choice gently shapes your confidence as a maker. The heart of a good tote is not only how it looks but how it behaves under daily use. Materials determine strength, texture, and how forgiving the bag will be as you learn to sew or to crochet. This is where the journey starts, and it is worth taking time to picture the bag you want, not merely the pattern you follow.
If you lean toward crochet, you will begin with yarn, a hook, and simple tools that stay consistent across many beginner projects. A medium-weight yarn—think a sturdy, smooth option like a 4-ply milk cotton or its analogue—will offer a balance of softness and structure. About 150 grams can yield a small to medium bag, enough to practice stitches and shaping without overwhelming your workspace or budget. The hook size should match the yarn; many beginners start with a 3.0 mm to 4.0 mm hook range. Scissors are essential for cleanly snipping yarn ends, while a thin sewing needle is handy for weaving in ends and attaching straps once the body is complete. An optional but helpful addition is polyester fiberfill or cotton batting to give the bag a little puff and shape. This approach prizes minimal equipment and immediate results: a quick confidence boost as you learn to read stitch patterns, count stitches, and manage tension. The result is a bag that drapes gently and holds its form with a forgiving, flexible fabric feel.
But the more common doorway into tote-bag making for many beginners is sewing a bag from fabric. The fabric choice matters as much as the pattern you follow. For durability and ease of handling, 100% cotton or canvas is ideal. These materials sew well, press flat, and tolerate simple topstitching, which is how most beginners finish the edges for a clean, durable look. When you’re just starting, steer away from stretchy knits or slick synthetics that slide under the needle and stretch while you sew. The next steps involve a pattern or clear instructions that help you translate a flat piece of fabric into a three-dimensional tote. A sewing machine accelerates the process and builds strength, but hand sewing remains perfectly acceptable for those who don’t have a machine or prefer slower, more deliberate stitching. Thread color can be chosen to match or to contrast for a pop of personality; the choice prompts you to think about how the bag will be used and how visible the seams should be. As you sew, pressing seams with an iron and using pins or clips to hold pieces together becomes part of the routine, a small ritual that yields a professional finish. A reliable beginner kit often includes a measuring tape to ensure accurate cutting, a good pair of fabric scissors, and a stable ironing surface.
With the fabric path, you’ll also encounter options that add stability and durability without overpowering a novice’s skill set. Interfacing or fusible webbing is commonly recommended to give the bag body a little extra support, especially if you’re using lightweight fabric. A light 60 g interfacing is typically enough to maintain a soft, structured tote that still folds neatly when empty. For a beginner, the choice of interlining is not merely about rigidity; it’s about creating a pocket of confidence: you can feel the bag holding its shape, which makes learning the technique of topstitching and seam construction more forgiving. The structural element can be subtle yet meaningful, and it often makes the difference between a bag that looks home-made and a bag that feels thoughtfully put together.
Straps are another critical element and a common early decision. They can be built from fabric strips, attached securely to the sides, or you can use pre-made handles. The length you choose will affect not only comfort but the bag’s overall proportion with your wardrobe. A typical beginner tote keeps the handles at a practical length—long enough to wear over the shoulder but not so long that the bag swallows your side profile. If you’re sewing, you’ll quickly learn how the weight of the bag and its contents behaves. For a lightweight tote, fabric handles or straps in a contrasting color can add a personal touch without complicating construction. The interior can be finished with a simple lining to hold small items in place and give the bag a polished look. Lining adds a touch of structure and keeps loose threads from snagging on keys or coins, a practical detail that makes early projects feel complete and durable.
The third path, no-sew customization, offers a flexible and wallet-friendly route. A plain tote—solid cotton or canvas—serves as a blank canvas for a spectrum of creative techniques without the need for sewing. Fabric paints, brushes, stencils, and patches become the tools of personal expression, letting you experiment with color, texture, and typography. Permanent fabric markers and embroidery floss turn a simple bag into a personal statement or a small work of art. The materials here are intentionally simple: a plain bag plus a little set of paints or a handful of patches. The key is to have a clear idea of the design you want to achieve and to choose materials that are easy to apply and durable with regular use. Each option—crochet, sewn fabric, or customization—offers its own learning curve and its own sense of accomplishment. The paths share a common philosophy: start with the basics, practice the most essential techniques, and gradually introduce more elements as your confidence grows.
For someone exploring fabric-based options, the landscape is wide and welcoming. If you’re thinking about fabrics that balance durability with beginner-friendliness, you might consider browsing the broader range of materials available to families of tote bags designed for daily use. A practical reference point is the broader category of fabric tote bags for women, which showcases how fabric choices translate into both form and function. This helps you translate a concept into a real object that fits your style and your routine: Fabric tote bags for women.
As you plan materials, a few guiding ideas surface naturally. First, align material choices with your comfort level. If you’re comfortable with a touch of crochet or sewing, you can begin with the simplest version of your chosen path and scale up later. If you’re unsure about exact stitch counts or seam allowances, err on the side of generous cutting and straightforward construction; mistakes become learning steps rather than frustrations. Second, consider how the bag will be used. A day bag that carries a book and a water bottle benefits from a sturdy canvas and reinforced seams, while a casual shopping tote can be lighter in weight and more forgiving with a breathable cotton. Third, respect the budget. The crochet route often requires fewer tools, and the customization route can be achieved with minimal expenditure, especially if you reuse materials you already own. In contrast, the sewing path occasionally demands a few specialty items that justify themselves through frequency of use and durability.
The materials you choose also offer a narrative about your relationship with making. A crocheter’s yarn carries the texture of each stitch, the way tension changes and how a bag’s softness evolves with wear. A sewer’s fabric becomes a map of patterns and decisions—where to place a seam, how much topstitching to reveal, and how a lining transforms the inner experience of the bag. A person who selects a no-sew approach curates a gallery of color and form, a small project that becomes a personal emblem. Each route teaches discipline and creativity alike, and the materials you select at this stage lay the foundation for all that follows. The materials are not merely tools; they are companions on your learning curve, inviting you to practice, adjust, and celebrate small successes as you shape your first tote.
In the end, the materials you choose should invite you to pick up a needle or a hook with intention. They should feel inviting in your workspace and respectful of your time. They should also reflect the kind of tote you want to carry—the sturdy everyday bag, the light weekend carry, or the expressive canvas you wear like a small piece of art. When you align your materials with your goals, you create a seamless bridge from concept to creation. The next chapter will guide you step by step through the actual build—whether you’re crocheting a soft, flexible tote, sewing a structured fabric bag, or decorating a plain tote with a touch of color and personality. Either way, you’ll already have a clearer sense of what you need, why you need it, and how to gather those essentials with care and focus.
From First Cut to Finished Tote: A Beginner’s Step-by-Step Journey
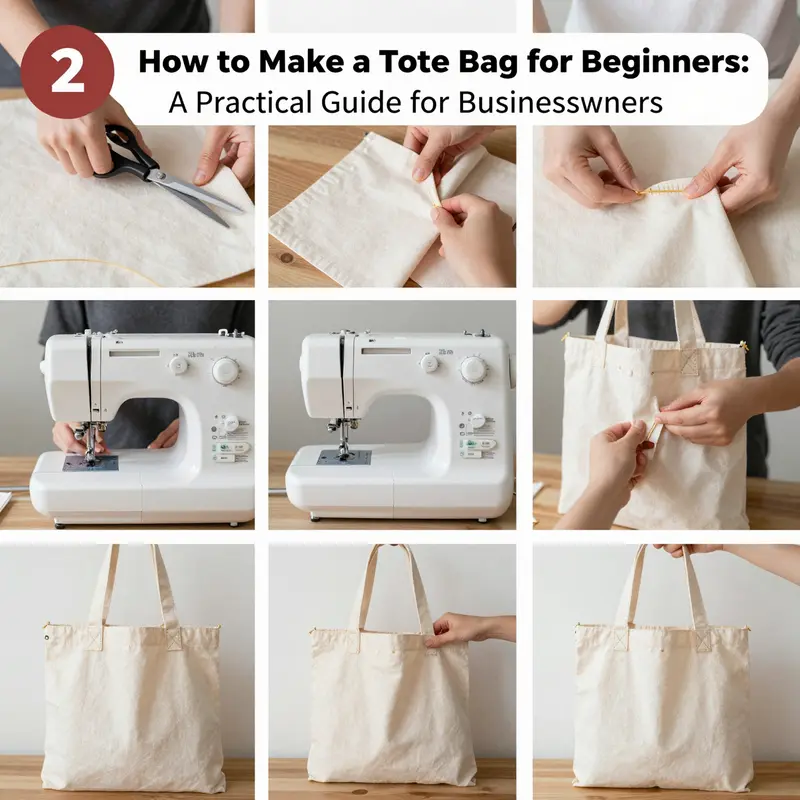
Starting a tote bag project can feel like stepping into a tiny world of possibility. It is a practical, satisfying, and surprisingly forgiving craft that welcomes beginners with open seams and clear milestones. The beauty lies in turning simple materials into a sturdy everyday companion, whether you repurpose a pair of well-worn jeans, a plain canvas, or a light-colored fabric that invites a splash of color or design. The process is straightforward, built on a few reliable techniques—cutting, sewing seams, and topstitching—that, when done with patience, yield a durable bag you’ll reach for again and again. As you plan, imagine the tote not as a fixed project but as a starting point for personal expression. You can craft it to carry groceries, books, or a collection of daily essentials, and you can tailor the size, weight, and style to suit your own routine. This chapter walks you through a clear, beginner-friendly route, anchored by practical measurements, careful preparation, and the small, satisfying habits that make sewing feel like a reliable craft rather than a rushed chore.
First, gather your materials with a steady eye for what you already have and what would serve you best. A tote can be built from a single fabric or from two pieces that form the body, plus a simple lining. If you have a pair of jeans you’ve outgrown, you can reclaim the legs for the main body and use a back pocket as a patch for a playful, patchwork look that tells a story every time you carry it. If you’re starting fresh with cotton or canvas, light-colored fabric is a practical choice because it accepts fabric paint or embroidery cleanly, letting your personality show through. Sharp fabric scissors are indispensable for clean cuts, while a needle and thread can get you started if you don’t own a sewing machine yet. A ruler or measuring tape helps you keep lines straight, and chalk or a fabric marker marks your cut lines with clarity. A simple ruler and chalk become your quiet partners, guiding every careful cut. And don’t overlook the optional decorations: embroidery floss for a simple motif, fabric paint for a bold image, or small patches for a playful accent. A gentle pre-wash of your fabric is a small step with big payoff, especially if denim or canvas is involved, as it reduces shrinkage later and stabilizes the fibers for a smoother finish.
With materials in hand, move to measuring and cutting, which is where the tote’s size begins to take shape. For a standard beginner tote, you’ll want two identical rectangles to form the main body. The recommended width is 14 inches (35.6 cm) and the height is 16 inches (40.6 cm). These dimensions strike a balance between generous capacity and ease of handling, making the project approachable yet satisfying. If you’re working with an upcycled pair of jeans, the legs themselves can become the central panels, and you might even introduce a bit of whimsical patchwork by using the back pocket or smaller jean pieces to create a front panel or a decorative stripe. The key is to preserve a reliable surface that can bear weight and withstand everyday use. Your cutting should be precise, the edges square, and the fabric checked for any threads or frays that could unravel later. If you’re new to this, don’t worry about perfection on the first go; small misalignments teach you where to adjust in the next project, and that iterative learning is part of the craft’s charm.
Sewing the side seams follows the cut. Place the two fabric pieces together with the right sides facing each other, then pin along the long edges, ensuring the edges align neatly. A straight stitch, with a ½-inch (1.3 cm) seam allowance, forms a dependable seam that can endure daily use. Backstitch at the beginning and end to anchor the thread; it’s an unassuming step that greatly increases durability. If you prefer to hand-sew, a running stitch or whip stitch can produce a rustic, cash-friendly result, but a sewing machine will typically deliver stronger seams more quickly. Either way, the goal is to have clean, even stitches that secure the fabric without puckering. The choice of thread matters too: a sturdy all-purpose thread is a reliable workhorse for beginners, especially when you’ll be carrying groceries or books.
After you’ve joined the sides, turn the bag right side out. This is where you can finally see the bag beginning to take shape. A gentle press with an iron helps the seams lie flat and gives the bag a crisp, professional appearance. Pressing is the quiet step that pays off in how the bag behaves when loaded—neat edges and a stable silhouette make the tote easier to use and more pleasant to carry. If you’re working with heavier fabrics like denim, a bit more pressing time helps set the shape and reduce bulk where the seams meet. The turning and pressing steps are often overlooked, but they’re essential for a tidy, durable finish.
Creating the bottom is your next milestone, and it’s both simple and effective. Fold the bottom edge up by 1 inch (2.5 cm), then fold again by another 1 inch to form a double hem. This simple fold reinforces the base and reduces the likelihood of fraying or tearing under weight. Stitch around the entire bottom edge to secure the hem, making sure to keep the line consistent and close to the edge. This bottom reinforcement is subtle but critical; it’s the difference between a tote that wobbles under load and one that feels reliable and solid as you walk down the street. If you’re new to sewing, this double hem is also a good place to practice control and to learn how the fabric behaves as you feed it through the machine or as you guide it by hand. The goal is a seam that lies flat, with no drag or pulling, so take your time and stop to recheck alignment if you notice any shift.
The handles—often the most expressive part of a tote—offer a chance to personalize your project while also contributing to its practicality. You can craft fabric handles from the same material, or you can repurpose sturdy items like cord, ribbon, or repurposed belt loops from old jeans for a more rugged look. If you choose fabric handles, cut two strips about 2 inches wide and 18 inches long. Fold each strip in half lengthwise, wrong sides together, and press. Sew along the long edge, then turn right side out. A topstitch along both edges not only secures the fabric more effectively but also adds a clean finish that resists stretching. Attach the handles to the inside of the bag, stitching through the top edge so the exterior shows two parallel lines where the handles meet the bag. Reinforce the stitching points where the handles join the body; this is where stress concentrates when you carry heavier items. The results are both sturdy and aesthetically pleasing, balancing function and style without requiring specialized equipment.
Personalization is where the tote becomes truly yours. Step seven invites you to bring your own touch into the design. Fabric painting with markers or paints offers a direct, expressive route to decorate the surface. You can write a favorite quote, sketch a geometric pattern, or simply add a playful motif that echoes your personality. If you prefer a quieter look, embroidery provides a tactile, durable embellishment. A simple motif stitched with a crewel needle and embroidery floss can sit proudly on the front panel, turning a basic tote into a keepsake. Patches or appliqué add a layer of texture and color, allowing you to experiment with different shapes and textures. Canvas, with its tight weave and forgiving surface, is particularly friendly for embroidery and patchwork, making it an ideal canvas for a beginner’s tote. These options make the project feel more like an extension of your own taste and less like a prepackaged template.
As you near completion, take a moment to inspect every seam and stitch. Check that the side seams are secure, the bottom hem lies flat, and the handles are firmly attached. Trim any loose threads and give the bag a final press. A crisp finish not only looks better but also contributes to the bag’s longevity. When you’re satisfied, your handmade tote is ready to accompany you on daily errands, library visits, or spontaneous adventures. The experience of making it—watching the fabric come together, measuring with care, and seeing the final shape take form—can be quietly energizing. You’ll notice that the process itself can be as therapeutic as the finished product is practical. And because you chose the materials and the design, the tote carries your personal story with every carry.
Why take on this simple project? The appeal is multi-layered. It’s an eco-conscious choice, using materials you already have or inexpensive fabrics, and it reduces reliance on disposable plastic bags. It’s cost-effective, especially for beginners who want to try their hand at sewing without a large investment. The design feels unique exactly because you made it—no two bags are exactly alike, and even variations on one theme can reflect different moods or needs. There’s value in the act of making that goes beyond the bag itself; the focused attention, the steady rhythm of cutting and stitching, and the small sense of accomplishment that comes with each seam can be deeply satisfying.
If you’re curious about expanding on this basic approach with additional features, you can explore related ideas such as adding a laptop sleeve or a zippered pocket to suit your daily gear. For a related exploration of tote extensions, see this resource: tote bag with computer sleeve. It offers a glimpse into how a simple tote can evolve into a more specialized carry-all without losing its beginner-friendly heart. The essence remains the same: start with a solid foundation, build with method, and let your creativity shape the final look and function of the bag.
Ultimately, the path from cut to carry is about practice as much as it is about product. Each tote you craft reinforces the basics—measurement, alignment, seam integrity—while inviting you to experiment with fabric choices and personal flair. Your first tote is a talisman of your growing skill, a tangible reminder that bold ideas can be realized with patient, careful work. It stands as proof that you don’t need a fully equipped studio or a long-wish list of specialized tools to begin. A simple pair of fabric scissors, a steady hand, and a little imagination are enough to set you on a journey that can blend practicality with personal expression. And as you continue sewing, you’ll accumulate experience that translates into faster, more confident work, plus an expanding sense of what you’d like to create next. The tote you finish today is not merely a bag; it’s a stepping stone to future projects that might range from a liner with pockets to a larger, more structural tote for your commute, each crafted by your own hands.
External reading enhancer: for broader inspiration on upcycling and extracting potential from existing materials, consider exploring additional perspectives on how denim and canvas can be transformed through simple techniques. External resources can offer fresh ideas for color, texture, and layout that you may later adapt to your own tote-making journey. For further reading and a different approach to the upcycling mindset, you can consult a popular guide that details turning old jeans into a tote bag: https://www.thesprucecrafts.com/turn-old-jeans-into-tote-bag-4122998
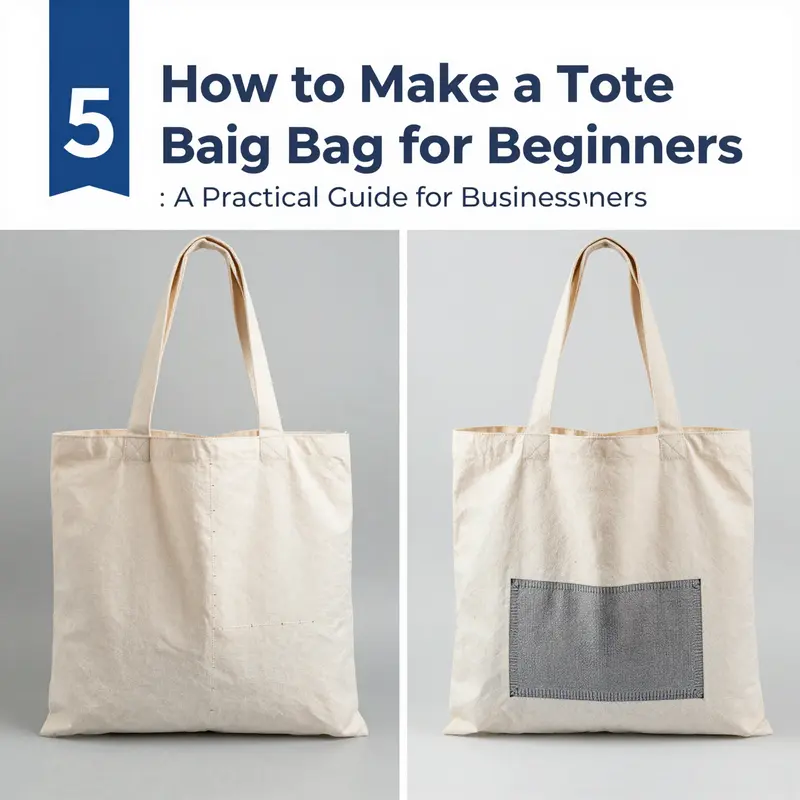
From Flat Fabric to Everyday Carry: A Gentle, Durable Tote Bag for Absolute Beginners
A tote bag is one of the most forgiving yet rewarding sewing projects a beginner can tackle. It trades complexity for practicality and gives you a tangible sense of progress with every stitch. The goal is not perfection on the first try but a sturdy, well-made bag you’ll actually use. When you approach a tote this way, you’ll find the process is less about precision alone and more about building confidence through repeated, deliberate steps. A well-made tote begins with friendly choices: a fabric that behaves, tools that cooperate, and a plan that keeps you oriented from the first cut to the final topstitch. Start with the idea that your tote is a test of consistency. Your lines may not be perfectly straight at first, but your seams will hold if you measure carefully, cut cleanly, and sew with steady rhythm. As you progress, you’ll learn to read fabric as a partner rather than an obstacle, to respect seam allowances, and to plan each move with the next one in mind. The tote you finish will be less a single object and more a small manifesto of your growing sewing skill: simple, functional, and uniquely yours.
Choosing the right materials is the first step toward that goal. For beginners, the recommended starting point is a sturdy, easy-to-work-with fabric such as canvas or cotton duck. These fabrics resist distortion as you cut and stitch, they hold their shape, and they forgive a modest amount of seam variation. Slippery or stretchy fabrics can test a beginner’s resolve, so it’s wise to hold off on those until you’re comfortable with the basics. The same logic applies to the tools you assemble. A dependable pair of scissors, a clear ruler, pins or clips, a sewing machine, and thread that matches your fabric are enough to get you going. And because even the most careful sewers make mistakes, a seam ripper should be in reach. The moment you accept that mistakes are not failures but opportunities to adjust, your confidence grows—along with your bag’s durability.
Before you even pick up a needle, embrace planning as a vital stage of the project. Decide on a tote size that feels manageable and useful in daily life. A common starting point is a width of about 12 to 14 inches (30 to 35 cm), a height of 14 to 16 inches (35 to 40 cm), and a depth of 4 to 6 inches (10 to 15 cm). This dimension set provides generous room for a book, a tablet, groceries, and everyday essentials without becoming unwieldy. With the size in mind, draft a simple pattern on paper. Use printer paper or a brown paper bag to sketch two identical front and back panels, one bottom panel, and two handle strips. This pattern becomes a test run: you can lay it over fabric, check that the proportions feel right, and adjust before the main cutting begins. The pattern step is more than a time saver; it’s a confidence booster because it bridges imagination with physical reality. When you feel ready, transfer the pattern to your fabric and cut with care, always keeping the edges aligned and the grain consistent. The bottom panel can be slightly smaller than the front and back panels—about 1 to 2 inches (2.5 to 5 cm) narrower in width. This deliberate difference helps create a clean, flat base that stabilizes the bag as you fill it.
As you stand before your fabric with the pattern in hand, the act of cutting becomes a deliberate conversation with your materials. Accurate cutting matters because it sets the stage for a smooth seam life. Secure your pattern with pins or clips, then cut with a sharp pair of scissors or a rotary cutter if you prefer. Double-check measurements to prevent a ripple at the seams. When the cut pieces lie ready, you’ll set them aside briefly to regroup, then begin the sewing with a calm, steady pace. A straight stitch is your faithful companion in this phase, and your stitches should be even in length and consistent in tension. If you’re aiming for durability, consider topstitching along the outer edges of the front and back panels. A second line of stitching, about a quarter inch (0.6 cm) from the first, adds strength and a tailored finish that many beginners find satisfying. It’s a small step that makes a surprisingly big difference in how the bag wears over time.
The construction sequence that follows is the backbone of the tote’s structure. Start by joining the front and back panels along their sides to form the bag’s hollow shell. Then attach the bottom panel to the bottom edges of the two side pieces. This step creates the primary body of the bag, a simple box-like form that you can visually confirm as you progress. If you’ve segmented your project with a mental checklist, this is where many beginners feel a real sense of forward motion. The handles come next, and they deserve careful attention. The most critical attachment is the point where the handles meet the bag. To make a sturdy handle, fold a long strip in half lengthwise with the wrong sides together and press it flat. Sew along both long edges to form a fabric tube, then turn it right side out. When you pin the raw ends to the inside corners of the bag’s top opening, make sure they’re centered and oriented correctly so the handles carry weight in the right direction. Secure them with a robust line of stitching, and reinforce the anchor points with additional stitches or a small square of backstitching. This reinforcement is where a lot of tote failures occur, so treat it as a priority.
With the main body taking shape, consider the inner possibilities that can transform your tote from a simple sack into a refined everyday companion. Lining is optional but highly recommended for a polished look and added structure. A fabric lining creates a clean finish, protects the outer fabric from wear, and can help the bag retain its shape even when it’s lightly loaded. To add lining, sew the lining pieces together in the same way you assembled the outer bag. Insert the lining into the bag and pin it at the top edge, seam allowances aligned. Sew the lining to the bag’s top edge, taking care to avoid bunching. You’ll leave a small turning opening in the lining so you can turn the bag right side out, then stitch the opening closed by hand or with a careful machine seam. The result is a tote with a neat, professional edge that feels substantial in the hand.
Throughout the process, the quality of thread matters as much as the visual finish. Choose thread that matches the fabric color and has a bit of strength to withstand daily use. Don’t underestimate the impact of a good pressing regimen either. A steady iron, used with appropriate heat settings and steam, helps your seams settle neatly, makes topstitching uniform, and reduces the need for future adjustments. After each major step, take a moment to press your seams flat. This discipline pays off when you assemble the final pieces and you see how alignment improves when edges are crisp.
As you get closer to the finish line, you’ll likely want to tailor the tote to your personal style. Patterning small pockets inside or outside, adding a magnetic snap, or choosing fabric combinations that reflect your mood are all possibilities once you’re comfortable with the core construction. A note on design choices: keep the focus on durability and utility in your first bag. It’s easy to be tempted by decorative elements, but the core audience for a beginner tote is reliability. If you crave inspiration from real-world totes while you sew, a practical reference point can be found in established examples of everyday totes, such as styles categorized under womens canvas tote bags. This resource can provide tangible ideas for proportion, pocket placement, and finish without stepping outside the beginner-friendly frame.
For further reading and practical examples, you can explore a relevant resource that emphasizes a similar approach to keeping a tote simple yet sturdy: women’s canvas tote bags. This internal reference offers a glimpse into how durable construction translates into everyday use and how beginners can adapt those principles to their own projects. The goal is not imitation but understanding the balance between form and function, so you can develop a method that fits your hands and your lifestyle. Remember, the beauty of this project is that it’s transferable. The same flow—cut, pin, sew, topstitch, finish, press—applies whether you’re making a tote for groceries, a tablet-and-books carrier, or a stylish carryall for weekend activities.
Patience remains your best ally. Rarely does a flawless bag appear the first time you stitch. More often, it emerges after a careful cycle of measuring, cutting, sewing, and adjusting. If you notice a wobble in a seam or a misaligned corner, mark the spot, fix it, and continue. Mistakes do not erase progress; they provide a chance to learn how to stay consistent with seam allowance and edge alignment in the next round. As you gain experience, you’ll notice that your stitches become uniform, your edges aligned, and your finishing touches more deliberate. The tote, once a small experiment, becomes a reliable everyday accessory and a launching pad for more complex projects.
In closing, your first tote bag is not merely a bag; it’s your introduction to the language of sewing. It tells a story about your patience, your willingness to test, and your ability to translate a simple idea into something usable. The process—selecting a sturdy fabric, crafting a precise pattern, cutting with care, sewing with consistency, and finishing with a thoughtful touch—builds a foundation you can carry forward into countless future makes. The tote you finish today can be a canvas for future experiments: different fabrics, varied handles, hidden pockets, or even a lined version with a contrasting top edge. Each choice adds a layer of confidence to your practice, and with every new project, you’ll feel more at home with your sewing machine, your measurements, and your own growing sense of creativity.
External reference for extended guidance: https://www.thesprucecrafts.com/how-to-make-a-tote-bag-4161188
From Plain to Personal: Easy Customizations for a Beginner Tote
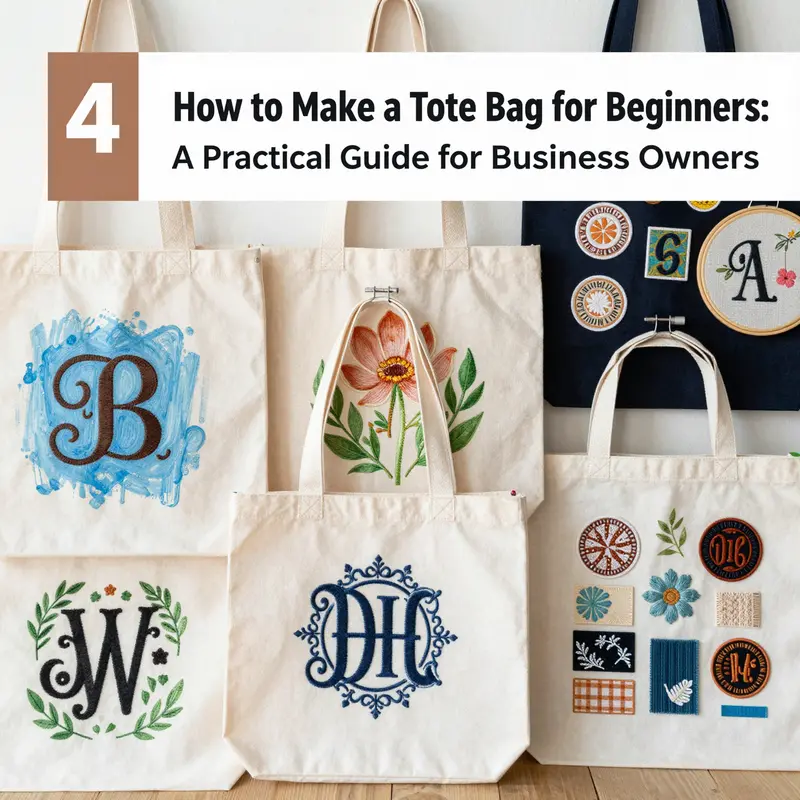
Customizing your tote bag is more than decoration; it is a gentle way to practice the basic skills you’ve learned while shaping a bag that truly speaks for you. As a beginner, you don’t need to master complex techniques all at once. The goal is to reinforce your confidence by choosing one or two simple ideas and executing them with care. When you approach customization, think about how the bag’s fabric, color, and shape can support a design that feels personal without overwhelming your sewing setup. The beauty of tote bags is their forgiving structure: wide panels, generous seams, and a surface area that invites experimentation. This chapter invites you to weave your growing skills into a bag you’ll use daily, whether you’re heading to the library, the gym, or a coffee shop with friends. The process becomes a conversation between your taste and your technique, not a race to finish. You’ll discover that customization can be both soothing and practical, letting you adapt your bag for different outfits, seasons, or moods without starting from scratch each time.
A first, accessible path is fabric painting or dyeing. This option lets you apply color and imagery directly to the bag’s exterior in a way that feels immediate and expressive. Begin with a clean, pre-washed tote to remove sizing that can hinder paint adhesion. Use fabric paints or dyes suitable for porous fabrics, and plan a simple design—perhaps a geometric motif, a short quote, or a small illustration. For motivation and clarity, choose colors you already enjoy wearing. Painting a simple border along the bottom edge, or a central medallion, can create a focal point without demanding advanced composition. Always test your chosen colors and techniques on a scrap fabric or an inconspicuous section of the bag first. This prevents surprises once you lay paint on the main surface and helps you adjust brushstrokes, layering, and drying times before you commit.
Another approachable route is iron-on transfer designs. If you love monograms, minimal text, or a favorite image, transfer sheets or heat-transfer paper can deliver crisp results with minimal sewing. The process is straightforward: print or cut your design, place it on the bag according to the paper’s instructions, and apply heat with a household iron. The result can feel surprisingly polished for a beginner project, especially when you’re aiming for a neat, graphic look. As with painting, test a scrap piece first to ensure the transfer adheres evenly and doesn’t bubble or peel. It’s a clean, quick way to introduce a personalized touch without adding seams or embroidery complexity to your current work.
Embroidery and appliqué open a tactile door to texture and character. Basic embroidery stitches, such as a running stitch or a backstitch, can outline a simple motif—perhaps a flower, a heart, a sunburst, or initials. If hand-stitching feels daunting, start with a small design on the front panel and work from center outward. The stitches don’t need to be perfect to convey charm; the softness of imperfect lines often reads as intentional, artisanal texture. Appliqué offers another friendly entry point: cut a contrasting shape from scrap fabric and sew it onto the tote with a secure straight stitch or zigzag along the edges. This approach gives you a bold, dimensional look without requiring advanced free-motion sewing. If you enjoy the effect, you can layer several shapes or switch to machine appliqué later on, gradually expanding your repertoire while keeping the project approachable.
Patches and stickers provide an excellent way to customize with minimal sewing pressure. Patches are readily available in a wide range of styles, from playful to vintage-inspired. They can be stitched or glued, though sewing adds durability and washability for a bag you’ll carry regularly. Stickers or decals designed for fabric can be a quick, non-permanent option if you’re experimenting with new color schemes or themes. Placing patches near the bottom edge or along the handles gives the bag visual interest where wear is most likely to occur, while interior patches can reinforce the lining at stress points. For a coordinated look, pick patches that share a common color family or motif; the result feels intentional rather than random, even when you’re still learning.
Beads, sequins, and trims introduce texture and a hint of sparkle without requiring advanced techniques. A careful row of seed beads along the top seam or a scatter of tiny sequins at a corner can catch the light and elevate a plain tote to something a bit special. Decorative trims—like a narrow piping or a fringe—work well along the edge or around the base if your fabric is sturdy. When attaching small decorations, secure them with a combination of a sturdy needle and strong thread, or a fabric glue designed for textiles. If you choose glue, remember to test a small area first and allow ample drying time before handling the bag to avoid migration or stiff patches that resist folding.
Reinforcement can be both practical and decorative. A patch on a high-wear area, such as the bottom or the base corners near the handles, provides extra strength. A contrasting inner lining peeking at the top edge has a twofold effect: it strengthens the opening area and creates a hidden moment of color when the bag is open. If you want to keep alterations subtle, consider a lining that reveals a color or pattern only when you turn the bag inside out. This approach preserves the clean exterior while giving you a personal touch that remains practical for daily use. In a similar vein, a small leather or faux-leather tag with initials or a short message can lend a professional touch without adding complexity to your sewing routine.
Personalized tags or labels offer another layer of customization without requiring serious sewing finesse. A metal or fabric tag with your initials, a short name, or a tiny emblem can be attached near the side seam or through a metal ring at the interior. Even a simple fabric label stitched inside the bag becomes a signature detail you can carry with you. If you’re mindful of sustainability, look for reclaimed or recycled materials for tags and patches; the combination of creativity and eco-conscious choices resonates with many beginners who want their projects to align with their values. While vents and care instructions aren’t always necessary on a simple tote, a discreet label can also help reinforce that the bag is handmade by you, which adds to your sense of ownership and pride in the project.
As you experiment, you may find it helpful to approach customization like a small design brief rather than a full overhaul. Start by choosing one technique that feels most exciting and practical for your bag’s fabric. For example, if your tote is a sturdy canvas, painting or embroidery can yield durable, bold results; if it’s a lighter cotton, iron-on designs or patches might feel lighter and more forgiving. Always consider how your design will wear over time: will it be exposed to washing, sun, or heavy use? Plan accordingly, and let your design evolve with your practice. A key reminder from experienced makers: test your method on a scrap fabric first to ensure compatibility and desired outcome. This simple step saves frustration and helps you refine your approach before committing to the bag you’ll carry.
To weave all these ideas into a cohesive project, imagine your customization as a finishing flourish that complements the bag’s original silhouette rather than fighting it. If your tote has a simple rectangular shape, a centered motif or a diagonal accent can guide the eye without overpowering the bag’s clean lines. If your tote is larger or has a more complex structure, think in terms of balance: keep the most visually dense work on one panel, while leaving other areas more understated. The goal is harmony between form and decoration, so your bag remains versatile enough to wear with many outfits while still serving as a canvas for your personal touch. In practice, you might begin with one technique—perhaps a small embroidered motif—and then, over time, layer in a second or third detail as your confidence grows. The incremental approach is what keeps customization enjoyable rather than overwhelming.
If you’re curious about hardware and construction details that can influence how your design looks once completed, you can explore related ideas about how you might incorporate closures or adapt the bag’s structure without compromising the design. For a practical example of integrating closures and hardware, see the page on tote-bags-with-zippers. This reference can help you anticipate how a zipper or other closure might affect your design decisions, such as placing a motif that won’t get caught or snagged by a zipper slider. The important thing is to think ahead about where your design lands relative to any hardware, stitching lines, or seam allowances so your final piece remains clean and functional.
With these beginner-friendly techniques, you can transform a plain tote into a one-of-a-kind accessory that reflects your creativity and individuality—no advanced skills required. The act of choosing a method, preparing your materials, and testing your approach reinforces a habit of thoughtful planning that will serve you well in future sewing projects. Allow your bag to be a portable expression of who you are, evolving as you learn and as your interests shift. The process should feel enjoyable and personal, not intimidating. When you finish, you’ll have a bag that looks distinctly yours, while reinforcing the basics you’ve already practiced: careful cutting, steady seams, and a final finish that keeps your work durable through daily use. For ongoing inspiration, you can consult broader DIY resources that focus on customization ideas and safety tips, which can help you build confidence as you try new techniques.
External resource: https://www.thesprucecrafts.com/diy-tote-bag-customization-ideas-4130789
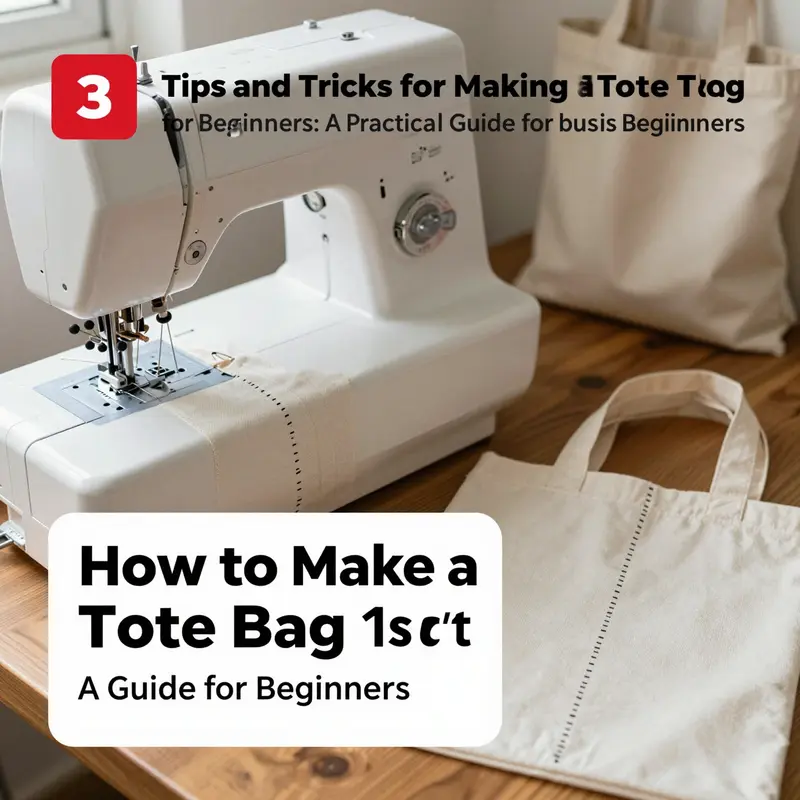
Stitch by Stitch: Navigating Common Pitfalls in Your First Tote Bag Adventure
The moment you decide to make your first tote bag, you stand at the threshold of a rewarding, utilitarian project. A tote bag is forgiving enough for a beginner to learn with, yet sturdy enough to carry daily essentials. The path from fabric to finished bag is a sequence of small, careful decisions. And while the learning curve can feel steep at first, a calm, methodical approach helps you sidestep the most common missteps that early sewers encounter. The mistakes that show up most often aren’t about inspiration or style; they are about material choices, accurate cutting, consistent stitching, practical internal design, and the habits you develop along the way. When you treat each phase with patience, the result is not only a functional bag but a growing confidence in your sewing practice that carries over to future projects.
A sturdy tote begins with the right material decision. For a beginner, the temptation to push for a luxurious or heavily textured fabric can be strong, but the reality is that materials must support weight, hold seams well, and respond predictably to needle and foot pressure. The most common misstep here is choosing fabric that is too thin or too slippery. A lightweight or delicate fabric may look lovely, but it can distort when loaded with groceries, books, or a laptop sleeve, and it can fray or rip at the seams under stress. The safer, beginner-friendly choice is a cotton canvas or a similar medium-weight woven fabric. It combines enough body to hold its shape, enough texture to grip stitching, and enough stiffness to keep the bag looking crisp after a few uses. If you’re tempted toward leather or a coated fabric, remember that these materials will require sharper needles, slower speeds, and sometimes different sewing machine settings. In any case, pre-test a small swatch by folding it under pressure to see how the fibers behave when stressed. This tiny ritual saves you from discovering a fatal weakness after the bag is already sewn.
Beyond the outer fabric, the bag’s internal construction matters as much as the exterior. A common pitfall is neglecting the lining or forgetting to include interior pockets and compartments. For new sewers, overlooking these features can transform a bag that looks good into one that feels impractical. The simplest sturdy interior is a lining piece that mirrors the outer body, with a single, softly anchored pocket for essentials like keys or a phone. The pocket should be anchored to the lining or to a reinforcing layer so it does not sag when the bag fills. If you aim for a more structured tote, consider a small zippered or Velcro-secured pocket inside for valuables. This is not just about keeping things organized; it is about understanding how weight shifts inside a bag when you carry it. Testing how items settle inside your tote while it’s empty helps you anticipate how the pockets will perform when the bag is full.
Cutting and layout are where the bulk of early bags stumble. The integrity of your final piece is shaped by how precisely you cut and how faithfully you keep your seam allowances. A tote’s silhouette is visible only when each panel aligns with its neighbors, and a tiny error in a single piece can ripple into the overall shape. The first mistake many beginners make is neglecting to mark the cut lines clearly or to measure against the pattern or template. A practical approach is to mark all cutting lines with a removable chalk or fabric marker and to double-check each measurement with a second ruler. It’s worth practicing on scrap fabric before you cut into your main material. Another frequent error is skipping or skimping on seam allowances. Beginners sometimes trim seam allowances down to half a centimeter or less, assuming it will reduce bulk. In reality, a tight seam allowance can weaken the seam and invite puckering. For a tote that will bear weight, the standard seam allowance of about 0.5 to 1 centimeter is a reliable baseline. When you sew, keep the edge of the fabric aligned with a guide or your presser foot to ensure straight, even seams. A steady rhythm—consistent feed, even pressure, and short, deliberate stitches—produces a clean line that resembles a store-bought finish rather than a hastily stitched project.
The act of stitching itself is where a lot of beginners experience the most frustration. Irregular stitches, uneven tension, or loose ends on the inside can undermine a bag’s durability and appearance. The remedy isn’t more force but more care. Start with a test seam on scrap material to dial in two crucial settings: stitch length and tension. A typical beginner’s stitch length ranges from 2 to 3 millimeters on a standard machine. If the thread skips or the fabric puckers, adjust tension slightly and re-test. If you’re hand-stitching, keep your stitches uniform by counting the number of stitches per inch and keeping your pull steady. Regardless of method, the goal is consistency. On the inside, finish threads disappear when you secure them properly. A common practice is to tuck the knot under a few stitches then snip close to the surface, using a bit of seam sealant or fabric glue only if your fabric allows it. Some projects benefit from a backstitch at the start and a lockstitch at the end—simple steps that dramatically reduce unravelling.
Even the most straightforward tote design can falter when internal structure is ignored. The shoulder straps, for example, are a point of frequent frailty. A strap that’s too narrow and too short will dig into the shoulder, and a strap that is not anchored securely can slip or detach under load. The fix is simple: choose a width that distributes weight comfortably—generally a strap at least 1.5 to 2 inches wide provides comfort for most everyday use. Attach the straps with reinforced stitches—multiple lines of stitching or a cross-stitch pattern, if your machine allows, will spread weight more evenly across the points where the straps meet the bag. If you add reinforced seams where the strap attaches to the body, you’ll notice the bag holds its shape better after repeated use. For beginners who want an extra level of durability, consider a small internal stabilizer or interfacing at the bag’s top edge or along the strap attachment area. It may add a touch of stiffness, but it helps the bag reclaim its shape after loading and unloading.
A tote that looks sound on the outside can still disappoint if it neglects maintenance and finishing. Pre-treatment and post-use care are the quiet, practical steps that extend the life of your bag. If you chose canvas, a light wash and a press with a warm iron can smooth out rough edges and help seams settle evenly. Leather or faux-leather components require conditioning and careful cleaning according to their specific needs. For a fabric tote, a water-repellent spray can be a wise addition to protect against weather and spills; for leather, a conditioner designed for the exact type of leather you’re using will keep it supple and prevent cracking. As with any craft, the finishing touches reveal your understanding of the material and your respect for the process. A bag that has been pre-treated, neatly lined, and finished with consistent stitching is more likely to endure a long life and daily wear.
As you move through these considerations, you might decide to prototype a pocket or a zipper panel to expand the tote’s functionality. If you’ve ever watched a project evolve from basic to practical, you’ll know the joy of discovering a pocket or a memory of your own adaptation—the moment you realize you can tailor a simple tote to your daily needs. To explore a practical way to enhance the tote with a zipper pocket, you can explore the concept in more depth here: tote bags with zippers. This reference illustrates how a toggle, zipper, or hidden pocket can transform a basic bag into a more secure daily companion without complicating the construction for a beginner. The goal remains the same: build confidence by adding one small, well-executed feature at a time, so the next project feels more approachable, not more daunting.
Throughout the process, mindset matters as much as technique. Beginners often confront a mental block—the fear of failure that whispers that the bag must be perfect on the first try. The reality is different. A well-made tote is born from patience, measured steps, and a willingness to rework a seam rather than force a stubborn piece through. If you notice a seam pulling or a panel slightly misaligned, pause, inspect the fabric for grain lines, realign the pieces, and re-sew with a fresh seam allowance. The ability to adjust mid-project is a sign of growing competence, not of inadequacy. With every corrected edge, you’re reinforcing muscle memory that will make future bags faster and cleaner. The joy of tote-bag making comes not from a flawless first attempt but from the small, quiet improvements you accumulate with each attempt. The slow method—the habit of marking lines, cutting carefully, testing stitches, and reinforcing stress points—builds reliability. It turns a single tote into a transferable skill: a belief that your hands can translate a drawing on paper into fabric that holds form, function, and character.
As you complete your first tote, reflect on the path you traveled—from choosing suitable fabric to refining seams, from thoughtful pocket placement to mindful pre-treatment. The lessons aren’t merely about this bag; they become a blueprint for future projects where fabric, thread, and imagination come together. When you approach your next tote with the same respect for material behavior, measurement fidelity, and stitch discipline, your second bag will feel less like a leap and more like a natural progression. The beauty of learning through making lies in the incremental gains—the moment when a new tension setting feels intuitive, or a seam line becomes perfectly straight, or a lining glides into place without a hitch. In time, the tote you once fretted over becomes a familiar tool, a personal expression, and a reliable everyday companion. And if you ever feel uncertain, you can return to the core principles: test materials, cut precisely, stitch evenly, design purposeful interiors, and care for your finished piece. These are the anchors that keep your sewing journey steady and enjoyable.
External resource: https://en.wikipedia.org/wiki/Sewing
Final thoughts
Mastering the art of making tote bags not only empowers business owners to create attractive, marketable products but also builds foundational sewing skills that can open doors to more advanced projects. By gathering the right materials, following a clear and simplified process, applying helpful beginner tips, exploring customization options, and knowing how to troubleshoot common sewing errors, entrepreneurs can confidently produce high-quality tote bags. These versatile accessories offer a unique opportunity to connect with customers seeking sustainable, personalized, and stylish bags. Commitment to honing this craft contributes to both product excellence and brand distinction, driving success in a competitive marketplace.