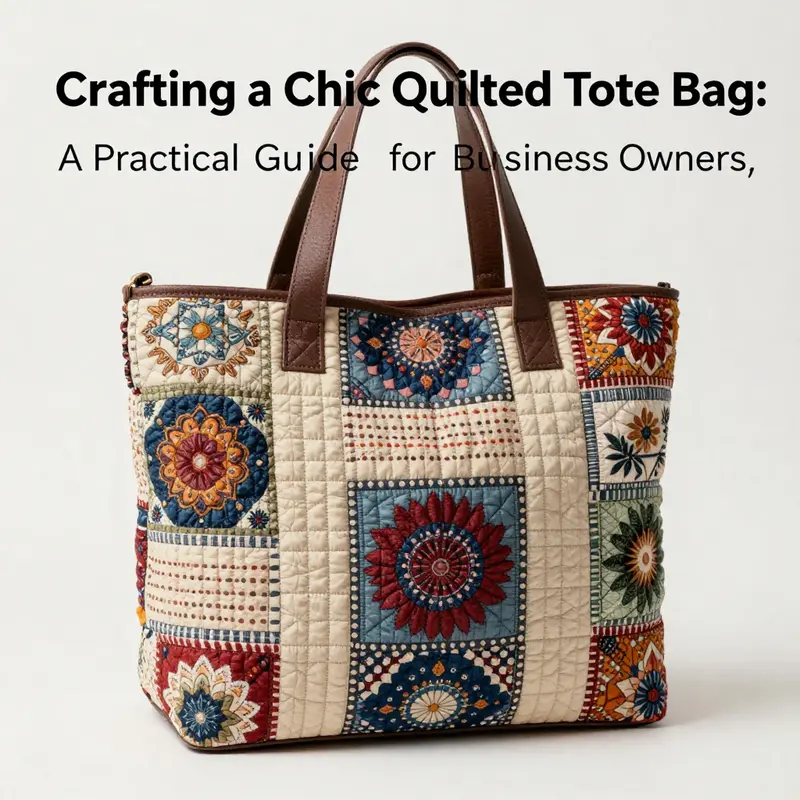
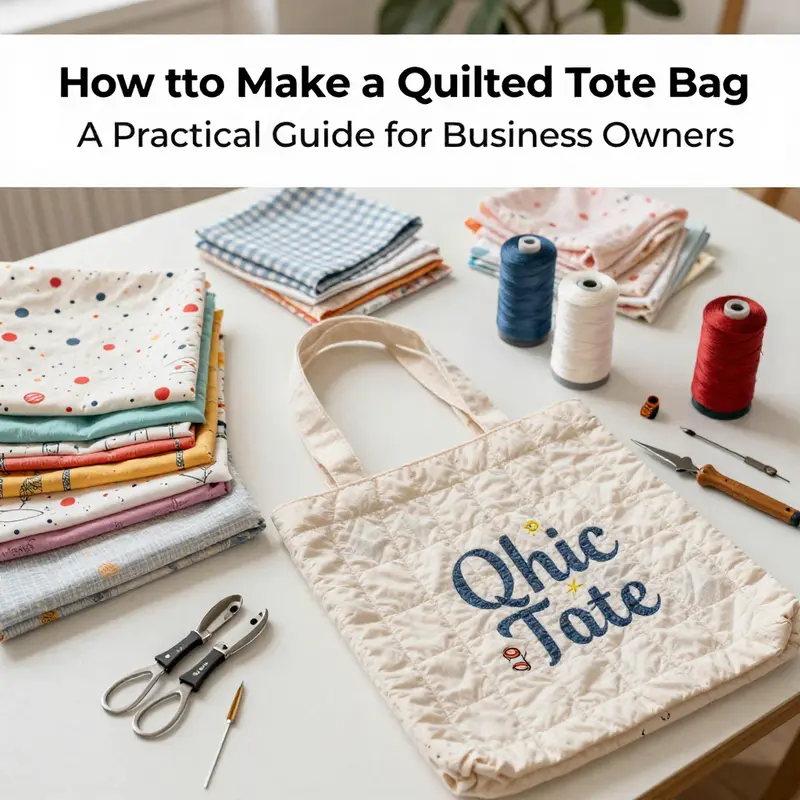
Quilted tote bags are more than just everyday accessories; they represent a fusion of functionality and design that can significantly elevate your brand’s market presence. Crafted from durable materials and featuring charming patterns, these bags not only serve practical purposes but also act as effective promotional tools. This article delves into the essential materials required for creating a quilted tote bag, provides step-by-step instructions to ensure successful crafting, shares design and styling tips to enhance aesthetic appeal, and offers insights into final assembly techniques. Each chapter aims to build upon the last, providing a comprehensive understanding of the entire quilt-making process, ultimately allowing you to create a product that resonates with your customers and stands out in the market.
Stitch by Stitch: Crafting a Durable, Stylish Quilted Tote Bag from Layered Fabric and Batting
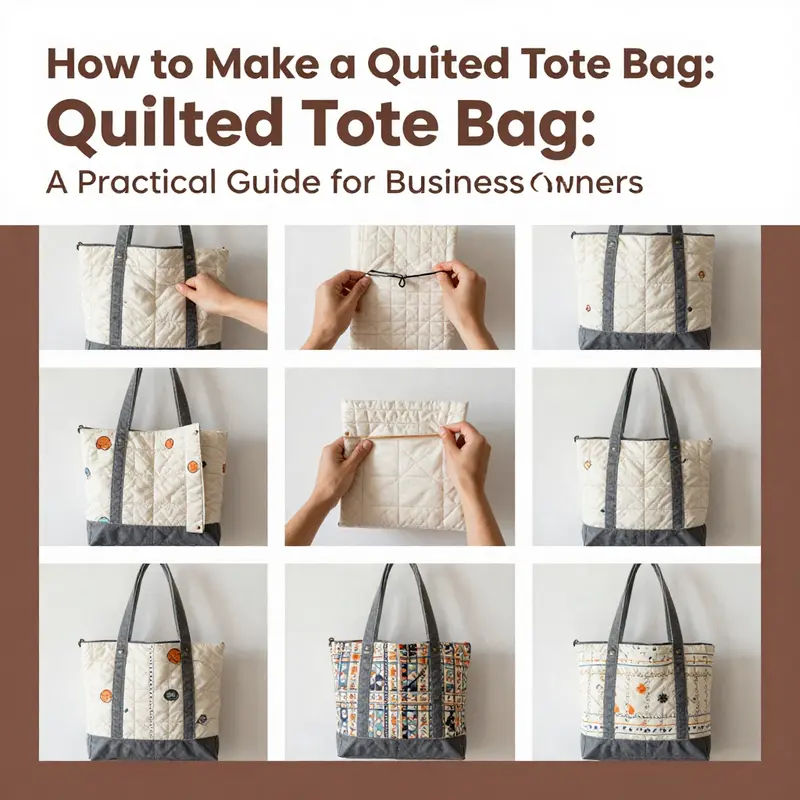
Every day carries its own small drama, and a well-made quilted tote bag can be the quiet protagonist of those moments. It is more than fabric stitched together; it is a practical canvas that holds the rhythm of your day, from a notebook and a coffee cup to a corner of a rainy commute. The appeal lies in the way the quilted layers fuse form and function: a sturdy outer shell, a soft yet protective interior, and a quilting layer that adds both texture and strength. The process invites thoughtful choices about materials, pattern, and finishing details, but it rewards precision with a bag that feels substantial yet welcoming to use. In this chapter we move through material selection, preparation, construction, and finishing in a seamless flow, so you can envision how each decision—from fabric type to stitch pattern—shapes the final result. The goal is a bag that is durable enough for daily life, stylish enough for public spaces, and personal enough to reflect your own touch as a maker. To begin, consider the core trio of fabric, batting, and lining as the backbone of a quilted tote. The outer fabric—whether cotton canvas, denim, or sturdy cotton prints—provides the exterior personality and the most visible wear. The lining offers a clean interior that won’t snag on hardware or daily grime. The quilting layer, often a batting or interfacing, acts as a cushion and a unifying layer that holds all the parts together with subtle, durable grip. The exact measurements you use can vary with the pattern you choose, but a practical starting point is to cut two outer pieces and two lining pieces of roughly the same size, with a matching quilting layer sandwiched in between. In metric terms, you might start with outer and lining pieces around 32 by 70 centimeters each, with batting cut to the same size. Some designers and tutorial sources favor a pattern of 14 by 16 inches for the outer portion, plus seam allowances, which is a fine alternative if you prefer a more compact tote. Either approach can yield a bag that sits comfortably on the shoulder or in hand and remains generous enough for everyday items. The difference between these approaches often comes down to how you plan to finish the edges and where you want to place pockets or closures. Pre-washing fabrics is a prudent first step that helps prevent later shrinkage and misalignment after the bag is in use. When textiles are washed and dried before cutting, you reduce the risk of distortion that can pull seams out of alignment once the tote is constructed. This is especially important for denser fabrics like denim or canvas, where the texture and weight can magnify any later shifts. Once fabrics are prepped, the cutting stage follows. The outer fabric pieces are cut to size, followed by the lining pieces and the quilting layer. If your pattern includes pockets, cut the pocket pieces as well, keeping track of which pocket belongs where to preserve the interior layout. The precision of your cuts matters: the pieces should align when placed together, with edges that meet cleanly to avoid bulk at seams. When you begin assembling layers, you create a quilt sandwich: outer fabric on the bottom, batting in the middle, and the second outer fabric on top, right sides facing inward. Aligning these layers with pins or rare-baste stitches keeps the three layers from shifting as you quilt. The quilting stage is where your bag starts to gain its character. Place the outer fabric face up, then lay the batting evenly over it, and top with the second outer piece face down. This sandwich becomes the quilted body of your bag. You can quilt in a straightforward grid or opt for diamonds, waves, or any motif that speaks to your design sense. The machine or needle you use should be steady and even. If you are confident with decorative stitches, a zigzag or other textured pattern can add a personal touch without complicating the construction. A helpful tip is to use contrasting thread for visible quilting lines if you enjoy a graphic effect. The batting choice matters too. Polyester battings give crisp, light weight quilting, while cotton battings offer a softer hand and a warmer drape. If you are unsure, start with a midweight polyester-batting blend that quilters often use for bags. The quilting step not only embellishes the surface but also mechanically holds the three layers together, reducing shifting in later steps. After quilting, trim the edges neatly to create a clean, square frame for assembly. Then turn to the lining. Place the two lining pieces right sides together and stitch along both long sides, leaving a turning opening at the top, typically about 10 centimeters. This space is the conduit through which the bag will later be turned right side out. Trim the seam allowances and square the corners to reduce bulk, then press the seams open. A crisp, neat lining makes the bag’s interior feel refined and reduces resistance when matching the outer and inner pieces during assembly. When you are ready to assemble the bag body, turn the quilted outer layer so that its right side is out. Place this outer layer with the quilted side facing the lining, which is still inside out, and align the edges. Pin along the top edge to hold everything in place as you sew around the entire perimeter. You will leave the turning opening from the lining unsewn so you can maneuver the pieces into their final arrangement. This staged alignment is essential; rushing this step can introduce misalignment at the corners or along the top edge. Once the outer and lining pieces are pinned, sew around the entire edge, preserving the turning opening in the lining. The next movement is turning the bag right side out through that lining opening. Gently push the corners out with a blunt tool or knitting needle, taking care not to poke through the fabric. Smooth the edges so the top seam lies flat and even. A thorough topstitch around the top edge not only reinforces the seam but also gives a clean, professional finish that can bear daily use. After completing the topstitching, close the turning opening with a neat hand stitch or a small machine seam that blends with the surrounding stitching. The bag now begins to take shape, but the finishing touches will define how it holds up under real-world wear. Handles are vital both aesthetically and functionally. Cut two sturdy strips for the handles—usually around 20 to 25 centimeters long and 5 to 6 centimeters wide, though you can adjust to achieve your preferred drop and grip. Fold each handle in half lengthwise with wrong sides together, press to crease, then sew along the long edge and turn right side out. The handles should feel substantial but not bulky; you want their weight to be comfortable when the bag is loaded. Insert the handles into the top corners of the bag, inside the lining, and secure them with strong stitches that anchor through the bag and a bit of the lining fabric. For the final finish, take a step back and consider how you want to carry or close the bag. Pockets in various configurations can add organization for keys, phones, and small notebooks. Outer pockets offer quick access, while inner pockets help keep the lining organized and tidy. If you desire a more secure closure, a zipper or snap insert is a practical upgrade. For a touch of practicality and a nod to contemporary styles, you can plan a reversible design by using different fabrics on each side of the bag. This approach requires careful alignment of the outer layers to ensure symmetry when the bag is flipped. Appliqué, embroidery, or simple decorative stitching can personalize the tote further, turning it into a wearable piece of art as well as a daily companion. When you design, you are not merely assembling parts; you are selecting surfaces, textures, and lines that interact with movement—your own and the bag’s. The choice of fabric matters. A sturdy cotton canvas or denim exterior offers durability and a confident stance against abrasion, while a lighter cotton or linen blend can temper weight and lend a carefree drape. The lining fabric matters too; a color or pattern that contrasts with the exterior helps the interior’s contents read clearly, like a practical map for everyday life. If you want a closure that stays out of the way during use, you can choose to leave the bag open or add a hidden snap or small zip at the top. For those who prefer a zipper, the option is straightforward to implement and adds security without changing the overall silhouette of the tote. To connect this project with broader sewing resources, you can explore further ideas for zipper closures and other fastenings in pages dedicated to tote bags with zippers. The link provides a practical guide to adding a zipper with minimal bulk and a clean finish even on quilted bags. tote bags with zippers. Alongside closures, pay attention to edge finishing. A narrow topstitch around the entire edge reinforces the bag and helps keep the layers aligned as you use it. The edge can also be treated with a final press to ensure the top edge lies flat and the corners meet squarely. If you want an additional layer of structure, you can incorporate interfacing as part of the outer fabric or the lining, though this may alter the drape. Interfacing provides a stiffer outer face and can help the bag hold its shape when carried with heavier items. For a well-rounded result, consider testing a small scrap first to confirm the right balance between stiffness and flexibility. Beyond the technical steps, the joy of quilting a tote comes from the way the process invites you to work with texture and color. You can play with thread color to echo or contrast your fabric surfaces, choose quilting patterns that mirror the lines of the bag’s shape, and decide whether to emphasize the grain of the fabric with straight lines or to celebrate the playful energy of curved motifs. There is a quiet magic in the moment when you pull the final thread and realize that the bag you’ve carried through weeks of thought and planning has become a tangible, durable object that carries your daily life with you. The steps are straightforward, but the craft lies in the details: cutting accurate pieces, aligning layers, choosing their order, and finishing with care. The project rewards careful measurement and disciplined sewing. It is a practical exercise in patience as much as it is a creative pursuit. If your goal is to maximize durability, you may choose heavier fabrics for the outer layer, a robust batting option, and reinforced stitching in high-stress areas like the handle attachments and the upper edge. Painting a mental map of the bag’s use helps you plan the exact balance of weight and strength you want. A well-made tote should feel like a natural extension of your movements, not a hindrance or a project you dread to carry. As you gain experience, you may experiment with pocket placement and closure types, crafting a version that is uniquely yours yet still faithful to the core craft of quilting. The sweeping satisfaction of a finished tote comes not simply from a neat seam but from the sense that the bag will accompany you through errands, meetings, walks, and spontaneous adventures. In a sense, the quilted tote is a diary of your daily life written in fabric and stitches, a portable testament to how practical craft can become personal design. For future refinements, you can consult additional resources on batting choices, seam finishes, or container-friendly handles, all of which contribute to longevity and user comfort. The foundation remains simple: two sturdy fabrics, a layer of padding, and the patient, deliberate stitching that binds them. The rest—pockets, closures, decorative touches—reflects your taste and the bag’s intended life. External resources can broaden your understanding of the craft and help you refine technique and texture as you grow more confident. For a broader primer on batting and quilting basics, see The Spruce Crafts. External resource: https://www.thesprucecrafts.com/
Stitched Journeys: Crafting a Durable, Personal Quilted Tote That Carries Your Everyday Story
The act of making a quilted tote bag is more than a craft project; it is a quiet conversation between fabric, thread, and the life you intend to carry. When you lay out two sturdy outer pieces, a soft lining, and a well-chosen quilted layer, you begin a ritual that blends practicality with personal expression. The tote is not merely a container; it is a pocket in which daily moments can gather—the notes you jot during a market run, the book you tuck between meetings, the water bottle and umbrella you always seem to need at once. The beauty of this project lies in how it rewards careful preparation with a bag that feels sturdy yet light, functional yet full of character. The first breath of creating comes with selecting materials that will support your intended use, and the second breath arrives when you start to see how those layers will cohere into a lasting, machine-stitched companion. The journey from fabric to finished tote unfolds in a rhythm that invites you to slow down, measure precisely, and sew with intention. It is a slow craftsmanship that yields something not only useful but also distinctly yours.
Begin with the materials, but view them not as a checklist alone, rather as a palette you will blend to suit your daily life. For the outer shell, you want a fabric that stands up to regular use—think cotton canvas or a sturdy denim that accepts a little wear without showing it. Two outer pieces form the shell, and the beauty of quilting emerges when you place a flattering quilted panel between them. The lining should be a lighter weight fabric, a contrast to the outer shell in texture or color, so the bag reads as a curated object rather than a single rectangle stitched together. The quilting layer—whether batting or interfacing—serves not only to secure layers but to add body and a tactile, inviting surface. How this layer feels under your fingertips matters; you want a panel that yields just enough when pressed but returns to shape after each loading. The thread you choose can be a quiet match or a deliberate accent that frames the quilting pattern; the choice will subtly alter the bag’s voice. If you enjoy a touch of personality, pockets are a thoughtful addition. An outer pocket, neatly integrated, offers quick access to keys or a small notepad, while an inner pocket keeps essentials close at hand in the lining. Even the handles deserve consideration: sturdy fabric or webbing, comfortably sized, and attached with strength so they endure daily use without stretching or tearing. The soul of your tote begins in these materials, but the real story unfolds as you bring them into alignment through careful cutting and patient stitching.
To preface the work, you will want room to lay out pieces flat and a calm workspace where fabric can breathe and slide as you cut. Accurate cutting is the quiet, decisive step that prevents misalignment later. Pattern guidance, whether you’ve drafted your own or followed a tested pattern, sets each piece in its place. The outer fabric pieces should be cut with care, and the same exacting precision should be applied to the lining. The quilting layer, matched in size to the outer pieces, becomes the backbone of the panel that will become visible in the final tote. Marking tools—chalk, fabric markers, or erasable pencils—become your helper here, guiding straight lines, grid patterns, or decorative motifs that you’ve chosen to echo your personal aesthetic. A well-cut shape reduces bulk and ensures smooth turning of corners, which, in turn, yields a cleaner, more professional finish. The goal is not to complicate the process but to establish a reliable order that respects the integrity of the fabrics and the fabric’s natural drape. You will feel a shift in momentum as you lay the three-layer sandwich: outer fabric, quilt batting or interfacing, and the second outer fabric piece. This sandwich, once secured with pins or clips, becomes an invitation to stitch with purpose. When you quilt through all three layers, keep your lines steady and even. A simple grid, a diamond, or a gentle wavy motif—whatever you choose—becomes not just a pattern but a memory of the hands that guided the needle. If you enjoy a visual pop, a contrasting thread can outline your stitching with a soft, accidental glow that highlights the texture of the quilted surface. The result is a panel with both structure and movement, a tactile statement that speaks to the readiness of daily life to be carried more gracefully.
Sewing the lining follows the quilted outer panel, and this step is about turning a two-dimensional cloth into a conscious object that breathes as you wear it. Two lining pieces are sewn together with a seam and a turning gap left at the top, enabling you to invert the bag later on. The corners must be trimmed to reduce bulk, and pressing is your friend here; flat seams that open generously create a neat, clean profile when the bag is turned right side out. The lining’s interior should feel gently soft against the outer quilted surface, but it should also be robust enough to withstand daily loading and unloading. When the lining is prepared, you place the quilted outer panel inside and align raw edges around the opening. The top edge is the frame of the bag, and it deserves attention. Pin or clip with care so the outer and inner layers meet evenly, then sew around the perimeter, leaving the turning opening in the lining as your only escape hatch. There is a quiet satisfaction in the moment when you realize the bag is no longer a collection of parts but a connected, functional form.
The turning phase is where the triangle of craft—planning, stitching, turning—converges into a tangible object. Turn the bag right side out through the opening, coaxing the corners to sharpen into neat points. If you’ve used a lining with a generous seam allowance, you’ll notice the inner structure settling into place as you push the corners outward with a gentle hand. Topstitching around the top edge reinforces the seam and lends a crisp, finished edge that betrays the bag’s durability even to the most casual observer. The turning gap is then closed with discreet stitches or a brief machine pass, leaving the exterior surfaces uninterrupted and clean. The top edge of the bag gains a quiet, architectural strength as the fabric meets itself with a consistent, even line. This moment—after the turning is closed and the bag has taken its form—is when the tote begins to prove itself as a daily companion rather than a decorative idea.
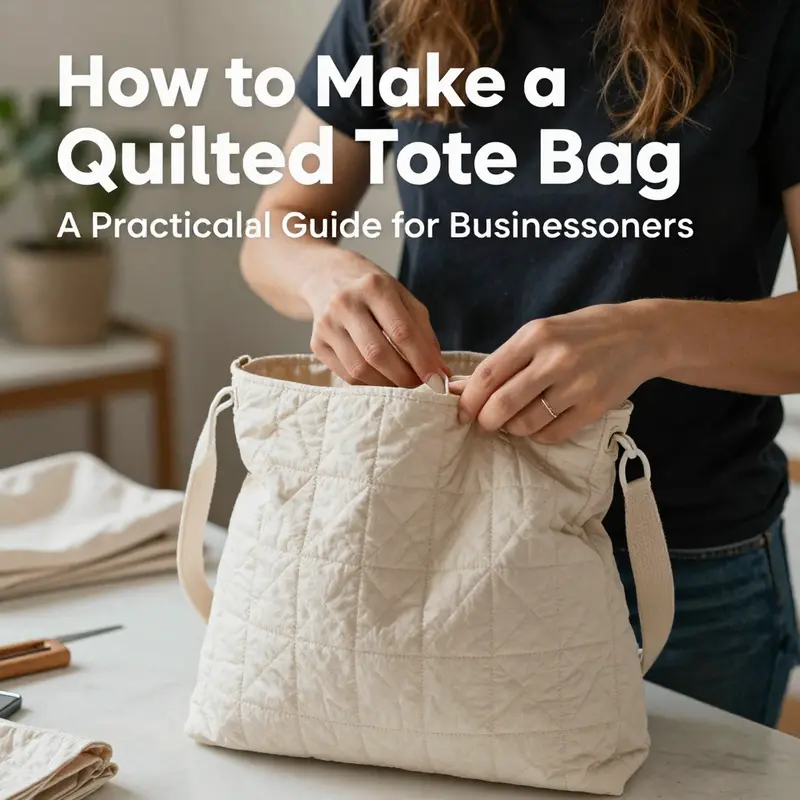
Handles are the last, often most telling, detail. Two sturdy handles are cut from fabric or a durable strap material, sized to balance comfort with the bag’s scale. A length around 20 to 25 centimeters, a width of roughly 5 to 6 centimeters, offers a practical range that can be carried by hand or slipped over a shoulder. The handles are folded, pressed, and stitched along their long edge to create a clean, durable strip. They are then inserted into the bag’s top corners or, more securely, anchored to the inside of the lining edges so that the stress of weight is distributed where the fabric meets the bag, not at the surface. You’ll want the stitching to be robust—backstitching at the start and end, and a consistent density along the seam—to prevent fraying and to ensure the handles remain steady with use. As you work, remember that this tote is designed to carry your everyday life: books, groceries, your laptop without fuss, a beach towel, or a sketchbook. The construction should whisper resilience, the sort of quiet confidence that comes from attention to detail rather than speed.
As you consider design and styling, you have choices that can transform the tote from a simple utility into a personal accessory. A reversible option, for example, lets you switch the look by flipping the bag to a different fabric on the outside. This approach makes the tote feel like two bags in one and invites you to line up contrasting textures or colors on each side. Appliqué—whether a small animal motif, a flower, or a seasonal theme—adds a decorative layer that speaks to your hobbies or interests. The quilting itself becomes a design feature; the grid or diamond pattern echoes a vintage charm while remaining modern in its clean lines. Styling advice for the finished piece comes from observing how the bag interacts with outfits. A boxy quilted tote can anchor fluid dresses, while a larger version can balance the silhouette of structured outerwear. When you consider finishing touches, you may decide to add a small interior pocket, stitched to the lining for securing small items like earbuds or a compact notepad. It is a small flourish that makes daily use feel effortless and organized.
The project also invites practical experimentation. If you want extra structure, a fusible interfacing on the top outer layer can provide a stiffer, crisper appearance that remains light to carry. For the adventurous, you might add a zipper or a snap closure at the top for extra security, though this adds a step to the process. A pocket on the outside adds accessibility, but an interior pocket ensures valuables stay tucked away. And if you crave more texture, you could select a batting that yields a slightly loftier feel in the quilting layer, creating a tactile surface you can’t resist tracing with your fingers.
To draw you toward a reliable, well-documented method, you may look for a practical, step-by-step visual guide that aligns with the approach described here. A concise, widely used reference demonstrates the three-layer sandwich and the quilting pattern that best complements a tote while allowing comfortable holding. For readers who appreciate a different pace, consider a resource that emphasizes the same principles: precise cutting, even quilting, and careful assembly. The recommendation below is a concise, reputable reference that honors the same craft ethos—durability without sacrificing style. It complements the hands-on practice you will undertake and provides an additional perspective on achieving even stitch work through grid patterns or decorative options.
If you want a concise visual reference while you work, you can consult the broader guidance available in the interior tote bag resources, which discuss the medium-size tote as a versatile template for quilts and everyday use. This internal reference helps you visualize how the components come together and how your choices in fabric, batting, and organizing pockets influence the overall silhouette and weight distribution. For a thorough external walkthrough that aligns well with the steps described here, the long-form, highly regarded tutorials on quilted totes provide clear demonstrations of layering, stitching, and finishing techniques. These resources emphasize the care needed to maintain consistent thickness across the quilting panel and the importance of walking feet for even feeding through multiple layers.
To connect this project with broader techniques, consider following the internal guide on the medium-size tote; it offers a compact, practical approach to constructing a tote that remains comfortable to carry even as you scale up or down the size of your outer pieces. The path you choose for your own tote should feel like a natural extension of your sewing chair—an invitation to experiment with textures, patterns, and finishes while preserving the bag’s everyday reliability. This balance between craft and function is what elevates a simple tote into a personal artifact that you will reach for again and again. If you would like to expand your options, a few thoughtful additions—like a zipper pocket for small valuables or an adjustable strap—provide versatility without breaking the core principles of durability and comfort.
For further reading and step-by-step visuals that complement the methods described here, you may explore the broader resources that detail quilted tote construction. The external guide provides an in-depth look at the layering process, standard quilting grids, and finishing techniques that help ensure your tote remains a trusted companion for years. By combining the careful preparation, precise stitching, and mindful finishing discussed in this chapter with these additional references, you can cultivate a practice that feels both intimate and practical. The tote you create will carry not only items but also a memory of the time you took to choose fabrics, measure accurately, and sew with care. Your finished piece will stand as a testament to how a well-made bag can elevate everyday routines into small rituals of craftsmanship.
External resource: https://www.thesprucecrafts.com/step-by-step-quilted-tote-bag-4107987
Weaving Style into Structure: Designing and Styling a Quilted Tote Bag
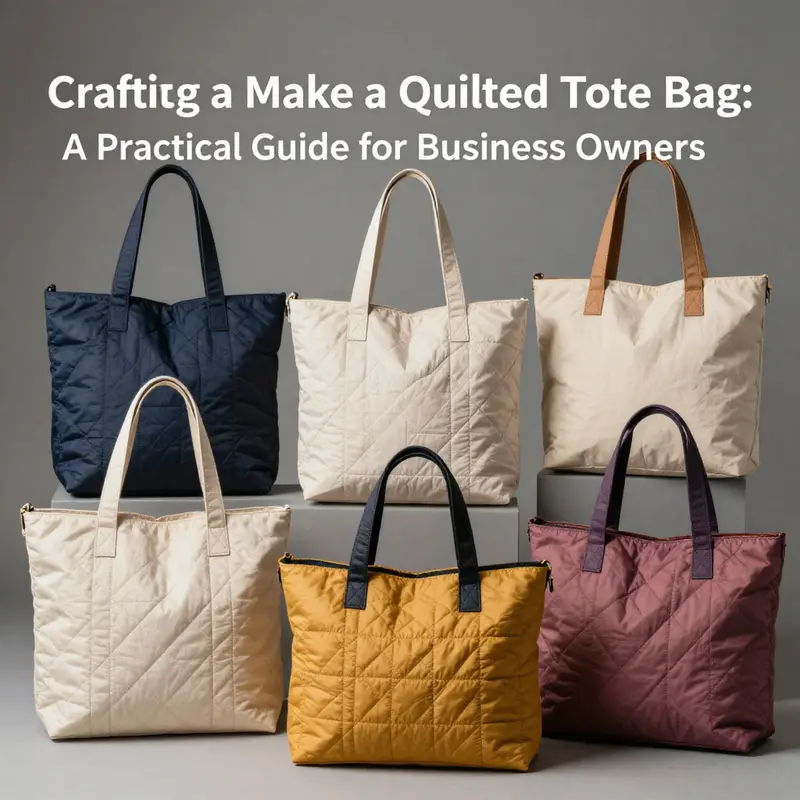
A quilted tote bag sits at the intersection of practicality and personal expression. It is not merely a container for daily essentials; it is a portable canvas that carries both function and mood. The way you design the bag—how you choose fabrics, where you place pockets, what quilting patterns you favor—shapes how it feels to use it every day. The process begins with the same careful attention you give to any sewing project, but the design choices ripple through every stitch, every seam, and every edge. When you approach a quilted tote as a design problem as much as a construction project, you unlock a freedom that makes the bag uniquely yours. The layers you select—the outer fabric, the batting or interfacing that provides loft and resilience, and the lining that gives a soft, durable finish—create a three-dimensional personality that supports the bag’s use and style. The outer fabric sets the tone: a sturdy cotton canvas with a brushed texture can feel modern and practical, while a dense denim offers structure and a touch of rugged charm. The lining, in contrast, can be a quiet, tactile counterpoint—a soft cotton twill that wears well, a brushed flannel for a cozy interior, or a contrasting color that hides little hands tracing fingerprints. Between these faces lies the quilting layer, the heart of the bag’s tactile charm. Batting or interfacing adds depth, helping the bag hold its shape when it’s filled with books, groceries, or art supplies. The choice of batting also influences the weight of the finished piece; a midweight option balances structure with flexibility, allowing the bag to drape pleasantly and stand up on its own when set down. As the layers come together, the quilting stitch becomes more than a decorative motif. It is a structural element that binds the entire sandwich of fabric into a single, cohesive unit. A grid or diamond pattern not only stabilizes the three layers but also creates a texture that catches light in a way that makes the bag look crafted rather than simply sewn. When the quilting thread contrasts with the fabric, the stitches themselves become a subtle design feature, a kind of hand-drawn line that traces the bag’s form. The aesthetic impact of quilting is intimately tied to the color story you choose. If you lean toward neutrals—navy, charcoal, beige—the bag can be endlessly versatile, pairing with almost any outfit. A pop of color, perhaps a saturated teal or a warm terracotta, can transform the tote into a statement piece that marks your bag as distinctly yours. For those who love duality, a reversible design offers two personalities in one. A tote that presents a different fabric on the reverse side doubles the styling options and invites you to rethink how you pair textures and hues with your wardrobe. The concept is simple: one outer fabric on one side, another on the other side, with the quilting layer tucked between. This approach is not just about color; it’s about texture, too. A smooth cotton on one side and a rugged canvas on the other can create a tactile dialogue that changes with every turn of the bag. If you favor this duality, you can plan your pockets to suit both sides, with an outer pocket aligned to one face and an inner pocket aligned to the lining for secure storage that stays accessible when the bag is opened. The pocket strategy is as much design as function. Outer pockets, when thoughtfully placed, add utility without interrupting the bag’s silhouette. The method of attaching them—folded edges reinforced with a simple row of stitching, then secured to the outer fabric—creates a clean, durable finish. Inside, a lining pocket welcomes small items that require quick access, such as keys or a transit card. The sizing you choose for pockets affects both the bag’s look and its daily use. A pocket 32 by 24 centimeters on the outside provides enough space for a phone, notepad, or small notebook, while an inner pocket at 20 by 13 centimeters holds cards, a lipstick, or earbuds with ease. The design options extend beyond pockets. You can add appliqué motifs or embroidery to introduce a personal narrative—a small animal, a floral motif, or geometric shapes that echo the quilting lines. The appliqué can be a deliberate focal point on the bag’s front or a playful detail tucked just inside a pocket edge. The quilting itself becomes a vehicle for expression. You might mark the outer layer with a grid of evenly spaced lines, or you might opt for a more dynamic approach with diagonal or meandering stitches that trace soft curves across the fabric. The thread choice then serves as another design element: a bold contrasting color for visible geometry, or a color-matched thread for a more subtle, refined effect. The practical details—how long the handles should be, where they attach, and how the bag respects the weight you carry—demand thoughtful planning as you map out your pattern. Handles are not afterthoughts; they are essential to the bag’s balance. A longer, sturdier handle feels comfortable across the body and distributes weight more evenly when you carry heavier items. Shorter handles create a hand-held silhouette that suits lunch totes or craft bags. Ideally, you’ll cut two handles from a robust fabric, fold them lengthwise with wrong sides together, and sew along the long edge to form a clean, durable loop. Turning the handles right side out and then feeding them into the top corners of the bag requires careful alignment to maintain symmetry. The top edge of the bag—where the two faces meet and the handle attachments anchor—gets special attention. A firm topstitch along the upper seam not only secures the handles more securely but also provides a crisp edge that holds the bag’s silhouette even when substantial items are loaded inside. When you stitch, you can consider whether to add a zipper or snap closure. A zipper offers security, especially for tote bags that travel in busy places or are used for work or school. A snap or magnetic closure can lend a quick, effortless closing for casual use. The choice of closure influences the bag’s interior layout and how the lining interacts with the outer shell. If you decide on a zipper, it can be installed in the lining to keep the exterior clean and uninterrupted by hardware. The design intent—ease of use, daily practicality, or weekend style—guides this choice. With these considerations in mind, the construction can unfold in a way that remains faithful to the design’s intent. Begin by preparing the fabric layers with care: cut each piece precisely, ensuring the outer panels align with the corresponding lining panels. The quilting happens next, with the outer bag layers sandwiched around the batting. The quilting pattern you choose will dictate the look of the finished piece; many quilters enjoy the rhythmic satisfaction of straight-line quilting, which echoes the bag’s practical, orderly spirit, while others relish a more freeform approach that mirrors daily movement and use. The next phase involves assembling the bag body. Place the quilted outer layer against the lining, right sides together, and stitch around the entire perimeter, leaving a turning opening in the lining. This opening is essential for turning the bag right side out later. It’s important to trim corners and clip seam allowances to reduce bulk and ensure the bag sits flat when you finish. When you turn the bag, push out all corners neatly and press the edges, taking care to maintain the bag’s square shape. A final topstitch around the top edge reinforces the seam and gives a clean, professional finish. If you are incorporating pockets, position them with an eye toward both aesthetics and function. Outer pockets can be placed on the front for quick access to frequently used items, while inner pockets can anchor essentials securely inside the lining. The placement should align with your pattern or template so that the bag retains its balanced silhouette. If you’re aiming for a reversible tote, you’ll want to mirror the pocket layout on both sides or plan additional loops that keep contents secure when the bag is used with either face visible. A reversible tote invites a playful dialogue between two fabrics, textures, and color stories. It also invites you to experiment with contrasting quilting lines on each side, which can accentuate the changes in design when the bag is flipped. The design process, at its best, is a dialogue between your materials and your instincts. The more you understand the role of each element—the outer fabric’s texture, the batting’s loft, the lining’s drape, the thread’s color, and the quilting pattern—the more natural it feels to make intuitive choices that elevate the final product. If you want to explore practical layouts and more complex constructions, consider a resource that walks through similar techniques in a way that supports both beginners and experienced sewists. For an extended look at how to balance fabric, batting, and stitching in a coordinated tote design, see the article linked here: tote bag with computer sleeve. This example demonstrates how thoughtfully chosen pockets and reinforced handles interact with a quilting layer to create a bag that is not only beautiful but genuinely usable in daily life. As you weave your own narrative into the fabric, you’ll notice how the design choices translate into how the bag feels and moves when you carry it. The same tote can look crisp and professional with a neutral palette and tight topstitching, or alive with color and texture if you opt for bolder choices and more animated quilting. A simple, quiet palette can be endlessly versatile; a vibrant combo can become a signature element of your wardrobe. The bag’s personality mirrors your approach to styling: it should complement the outfits you wear most often and accommodate the activities you pursue. For example, a boxy, structured tote with generous interior space harmonizes with tailored dresses or sharp outerwear, while a softer, slouchier version with a gentle curve lines up with flowy textiles or casual ensembles. The stitches themselves can become stylistic cues. Horizontal or vertical grid lines echo a sense of order. Diagonal patterns imply movement and energy. A small motif stitched across a pocket or along the edge can act like a signature flourish that makes your bag unmistakably yours without overpowering its practicality. The artistry rests in balancing visible details with hidden sturdiness. The bag must stand up to daily wear: it should resist snagging on door handles, hold heavy magazines without distorting the shape, and retain neat edges after repeated use. With careful cutting, precise piecing, and disciplined sewing, you create a tote that holds up to both a busy commute and a weekend adventure. The journey from a pile of fabric to a finished bag is, in truth, a personal workshop where every choice matters, where even the way you press seams can alter the final silhouette, and where the joy of making is found in the small decisions—the direction of your quilting lines, the contrast of your thread, the ease of the turning opening, and the way you finish the edges with a confident topstitch. As you refine your technique, you may find yourself returning to a few reliable practices: cut accurately, align pieces carefully, quilt evenly, press with intention, and stitch with consistent tension. The bag’s durability is built not just in the sewing machine’s stitch but in the care you take at each stage. If the design process feels overwhelming at first, begin with a straightforward plan: choose two fabrics for a reversible tote, add a single inner pocket for organization, and quilt a simple grid across the outer piece. Let the fabric choices guide you; the quilting should feel like a natural extension of the fabric’s character, not an imposed pattern. In time, you’ll learn to anticipate how the finished bag will behave when filled. You’ll know whether you need extra batting to maintain a rigid shape or more lining to cushion delicate contents. You’ll recognize how a longer handle shifts the bag’s balance and how a weighty closure changes the interior geometry. The beauty of this craft lies in how design and technique reinforce each other. The tote bag becomes a personal statement that travels with you, a portable reflection of your taste and your practical mind. And because the design invites experimentation, you can weave in recognizable motifs, like small appliqués or embroidered accents, that speak to your interests or to the season. The result is a bag that is not only functional but reflective of who you are when you step out the door. If you’d like to explore further guidance on complementary techniques and broader projects that echo this approach, the external resource linked here offers a comprehensive breakdown of how to structure a quilted tote bag from start to finish: https://www.thesprucecrafts.com/how-to-make-a-quilted-tote-bag-4157963. It presents clear steps, thoughtful tips, and a gallery of ideas that can inspire your next tote, whether you’re sewing for yourself, for a gift, or for a small craft project with friends. The journey from fabric to finished bag is as much about the process as the product, and the care you bring to each stage multiplies the joy you get from your finished piece.
The Finishing Touch: Mastering Final Assembly for a Durable, Beautiful Quilted Tote Bag
The finishing phase of a quilted tote bag is where precision meets everyday use. After months of fabric selection, pattern drafting, and the careful layering of batting, the bag finally begins to take its identity. This chapter walks you through the final assembly as if you were guiding a sculpture from frame to form. The aim is not merely to seal edges but to fuse strength with a clean, deliberate aesthetic. The steps that follow are not decorative frills but the functional backbone of a bag that will carry books, groceries, or a laptop with equal ease. The process hinges on organizing layers, choosing the right tools, and moving with confidence through each seam until the outer fabric, the padding, and the lining work as one. Precision today pays off in the wear and wash of tomorrow, so slow, steady progress becomes your ally rather than an obstacle to speed.
First contact with the final stage begins with rechecking the three-layer stack—the outer fabric, the batting, and the lining. Align the edges so they match from corner to corner. If you fumbled earlier, now is the moment to remedy it: use long straight pins or quilting clips to secure the trio as a single sandwich. The goal is to prevent the layers from shifting as you stitch around the perimeter. Take a moment to inspect the corners; a small misalignment there can show up as puckers along the base. Consistency in thickness helps your machine travel smoothly. When you feel confident that the stack sits evenly, you’re ready to move on to the sewing, and you begin to sense how the layers communicate with each other underfoot and under the needle.
With the stack secured, set your machine for a sturdy finish. A walking foot is essential when three layers compete for space, distributing pressure and guiding the layers together rather than letting them slip. Start with a backstitch, anchoring the end. Sew around the bag in a continuous line, keeping roughly the seam allowance decided by your pattern—typically around 1/4 inch to 3/8 inch. Let your stitches stay even as you approach the turning opening. If you’re quilting through all three layers at once, maintain a calm rhythm; rushing invites mischief with bulk and uneven tension. Backstitch at the end as well to secure the final joint. If the fabric doesn’t glide easily, pause to reposition the stack rather than forcing the machine through a stubborn section; patience here saves you from pulled threads and misaligned seams that echo later in topstitching.
After finishing the seam around the edges, leave the turning opening in the lining for turning the bag right side out. This is your opportunity to test the integrity of the perimeter seam before you close the final gap. Slide a turning tool or a chopstick into the opening to coax the corners into a crisp shape. The corners deserve attention because they often become the first places where bulk shows. Don’t push too hard and distort the seam; instead, use a gentle push to align the layers at each corner. Give the bag a quick once-over, checking that the outer fabric sits flat against the batting and that the lining has no stray threads peeking through. If you notice a small area that wants to lift, reinforce with a few hand stitches from the inside to anchor without creating a bulky transition.
With the bag turned, press the top edge flat as a preview of the finished silhouette. A light touch with the iron helps set the stitches and removes the slight pucker that can occur during turning. Use low heat or a silicone press cloth if you’re worried about scorching delicate fabric. At this stage, you may choose to baste the opening closed by hand or with a temporary stitch to ensure the lining remains aligned as you finish the top edge. Press the entire perimeter, pushing the lining seam allowances toward the inside so the final topstitch sits neat and even. A crisp edge before the final stitching reduces the chance of wobble when you sew, and it also makes the tote feel sturdier in hand as you test its balance.
Reinforcement is not optional; it is the bag’s backbone. Revisit the base area and the strap attachments with a second line of stitching or a robust topstitch to distribute weight more evenly. If your design includes a decorative topstitch or a contrasting thread, this is a good moment to realize it. The top edge deserves a full, clean line of stitching that anchors both outer fabric and lining, but keep the stitch length comfortable for the fabric you’ve chosen. The goal is a professional finish that hides the turning opening. If your bag is reversible, ensure both sides align and remain comfortable to use when flipped. Strength can also be added by catching a small piece of fabric through the seam at critical stress points, a discreet touch that pays dividends in longevity without changing the look.
Reversibility adds charm but demands discipline in finishing. Check that the inner and outer sides carry the quilting pattern consistently across both fabrics. The quilting lines should line up at the edges so that when you flip the bag, the pattern still reads as intentional rather than accidental. If you’re working with two very different fabrics, minimize bulk at the seam and keep the quilting density similar on both sides so neither feels heavier than the other. The more you plan the reverse option from the start, the smoother the final turn will feel. Remember that a well-executed reversible tote is as much about the choreography of layers as the visual impression on each side—the stitching becomes a thread of continuity that binds both faces of the bag.
Stress points—where the bag will bend or bear weight—call for extra attention. Base corners, the mouth of the bag, and, most crucially, the points where handles anchor to the body should be reinforced. A small bar tack or an extra row of stitches hidden under the top edge can dramatically extend the life of the bag. If you decide to use a zipper or another closure, align it early in the design so it complements your total width rather than complicating the turning phase. The topstitching around the edge should be even and a touch wider than your seam allowance to create a crisp, finished look that resists fraying. A subtle underlayer of stabilizer near the base can also help the tote keep its shape after repeated loading, especially if you’ve used lighter fabrics that tend to collapse under pressure.
Personalization is where your tote becomes your own. After final assembly, you can add iron-on patches, embroidered motifs, or small fabric appliqués using fusible webbing. Place them away from stress zones where the bag will be loaded with heavy items. If you prefer a more subtle approach, choose a thread color that echoes the lining or the quilting lines for a cohesive look. Remember, simplicity often reads as elegance, especially on a structured tote that aims to be both durable and stylish. If you want practical features right away, consider an interior pocket with a snap or zipper to secure smaller items, and place it in a spot that won’t interfere with the turning or topstitching. Details matter—the difference between a bag that lasts and a bag that delights comes down to planning the small moments of construction and choosing finishing touches that endure.
Before you declare victory, perform a few quick checks. Open and close the bag to gauge the ease of use, ensuring the handles aren’t twisted and that the top edge sits evenly along the mouth. Run a light pull along every seam to detect any weak points. If you find a rough edge or a thread snag, fix it now rather than later. A neat appearance isn’t just cosmetic; it signals quality and care in construction. If you added any closures, test them with a variety of items to confirm that the hardware isn’t catching or pulling the fabric. Small checks performed with calm hands save you from a frustrating repair later on. A final gentle press along the entire bag seals the work and reminds you of the pattern’s rhythm—the same careful repetition that built the piece in the first place.
For projects where you want to explore specialized closures or more robust finishing, you can look at dedicated guidance on zipper installation and handling inside tote structures. For a quick reference to zipper-equipped tote options and techniques, see tote bags with zippers.
To widen your understanding of construction techniques and to gain fresh ideas, consult a broader tutorial that walks through quilted tote concepts from layering to final finishes. A detailed external resource provides a step-by-step companion to the methods described here and can illuminate practical tips you may not yet have encountered: A detailed tutorial.
Final thoughts
Creating a quilted tote bag is not just an endeavor in craftsmanship; it’s an opportunity to innovate and share your brand’s identity with customers. By understanding the material preparation, following the structured steps for assembly, exploring design possibilities, and mastering final finishing touches, business owners can craft unique pieces that enhance their offerings. The quilted tote bag can serve as a functional item for your customer while simultaneously increasing brand visibility and loyalty.