
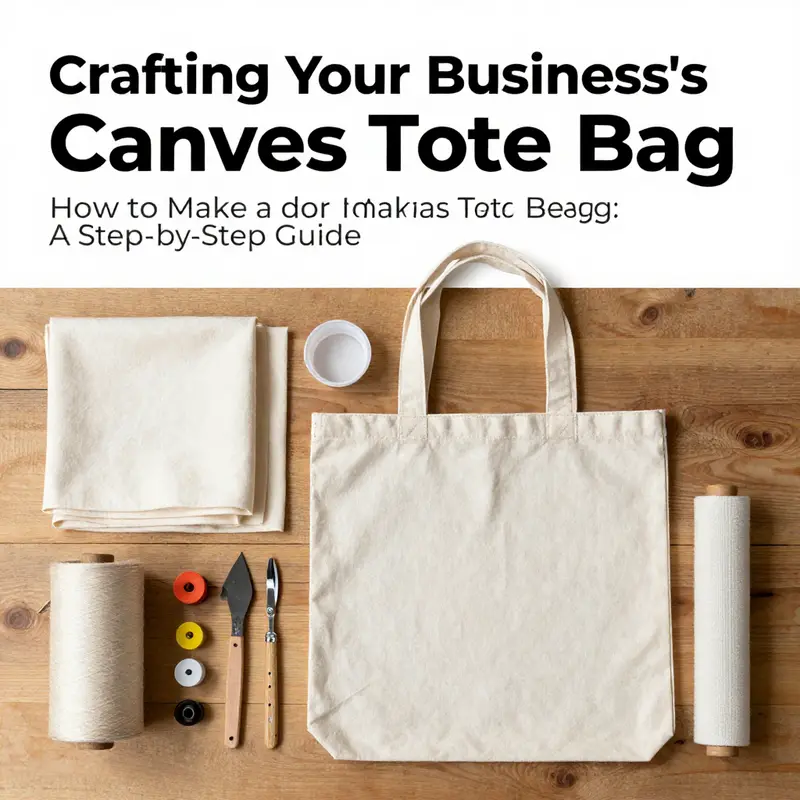
In today’s competitive market, having a distinctive brand presence is essential for business owners. A canvas tote bag not only serves as a practical accessory for customers but also elevates your brand’s visibility. This guide will walk you through the materials and detailed steps necessary to create a sturdy canvas tote bag while offering creative personalization ideas to truly make it yours. Each chapter aims to enhance your understanding, from selecting the right materials to adding unique touches that reflect your brand values.
Materials as the First Stitch: Building the Material Foundation for a Canvas Tote Bag
The canvas tote starts long before a single stitch is made. It begins with a careful choice of materials that determine how the bag will feel in your hand, how it wears over time, and how your own personality can shine through on the surface. In shaping a durable, useful tote, the material itself becomes a partner in the sewing process, guiding decisions about weight, texture, and structure. To understand this foundation, imagine walking through a quiet workshop where light falls on stacks of fabric, threads, and hardware, and every choice is met with a practical question: will this piece endure the daily life of a tote bag while staying comfortable in my hand and true to the design I envision? The answer sits in a balance between strength and flexibility, weight and washability, simplicity and customization. The journey begins with the outer fabric, then moves inward to lining and pockets, before turning outward again to the straps that will carry the bag through crowded markets, quiet libraries, and every corner of daily life. The goal is a tote that feels inevitable, a second skin that fits the user’s routines without asking for constant repair or reinforcement after every grocery run or impulsive haul of books. As you consider materials, you craft a story about the bag you want to carry, and that story starts with a careful assessment of what the outer fabric can do for you, how the lining can protect what matters most, and how the handles must bear weight without stretching into discomfort. The path toward a finished tote becomes a meditation on practical beauty, where every choice is informed by function and then refined by personality. To wed practicality with personal flair, the discussion moves gently from the obvious to the nuanced, from the feel of fabric in your palm to the way it behaves under a stitching needle and through a seam allowance. The chapters of this discussion circle back to one guiding principle: material choices should suit both the day ahead and the unique life you imagine for this bag. The materials described here are not meant to be a rigid prescription. They are a framework you can adapt to your environment, whether you are stitching at a kitchen table, in a maker space, or in a light-filled studio corner. As you read, you might notice two recurring strands—durability and personality. Durability comes from the strength of the canvas, the stability of the lining, and the careful reinforcement of stress points. Personality emerges in the texture of the fabric, the color of thread, the detail of pockets, and the options you add through painting or embroidery. The trick lies in balancing these threads so that the final piece remains faithful to the initial sketch while growing into something uniquely yours. When you start, you are selecting ingredients, as if you were cooking a dish where each element must complement the others. The outer fabric sets the tone. A sturdy canvas in a weight around ten ounces feels substantial in the hand, with a texture that invites touch. It should be thick enough to resist wear from daily use yet pliable enough to sew without fighting every seam. If you choose a double-layered canvas, you add stealth protection and a more robust silhouette. The advantage is clear when the bag slides over a shoulder or sits on a busy subway floor; the double layer helps it hold its shape and resist minor abrasions. If you favor a single layer for a lighter carry or a quicker project, you still have a durable partner in the fabric, but you may want to compensate with a simple lining and careful seam finishing to prevent edges from fraying or sagging. The material conversation also considers washing. Pre-washing the canvas before cutting is a practical ritual that reduces shrinkage after the bag is finished. It might feel like small trouble now, but it pays off later when your tote remains true to size through months of use and occasional laundering. As you approach the decision, you can think about the color story and the surface texture. A natural undyed canvas presents a soft, earthy look that echoes a handcraft tradition. A dyed canvas brings depth and a more polished finish, but it may require more diligent care to keep colorfastness intact over time. Both options respond to how you plan to personalize the bag. The outer fabric is not merely a shell; it is the canvas on which your ideas will live. Next come the lining, a choice that directly affects the bag’s long-term behavior. The lining protects the interior from wear, cushions contents, and helps the bag hold its shape when unfilled. The most straightforward approach mirrors the outer fabric in weight and texture, using the same material for the interior as for the exterior. When you choose the lining, consider how it will interact with your pockets and any structural supports. A lining of similar weight is forgiving and cohesive, creating a tidy interior that does not fight the bag’s silhouette. It also offers a clean surface for attaching pockets. Internal pockets, whether one or multiple, serve a practical purpose that becomes more evident as the tote takes shape. They organize small items such as keys, phones, or a notebook, and they reduce the search time when you need something quickly. The pocket fabric can echo the outer fabric for a united look, or it can present a contrasting texture or color to punctuate the interior with a subtle surprise. Pockets can be decorative or functional, and they can be placed in a way that balances the bag’s interior weight. The dimensions you choose for pockets depend on what you carry. A simple inside pocket might measure around 32 by 24 centimeters, two panels that create a convenient space for a phone or a wallet. The inner pocket fabric, if you decide to double up, can be a lighter weight version of the lining to prevent bulk at the top or a sturdier option if you want a more pronounced pocket edge. The outer pocket fabric, often a matching dimension to the main panels, invites thoughtful placement and a cohesive finish, especially if you plan to add a small exterior pocket for quick access. When the pocket details are finalized, you move to the straps, the element that anchors the bag to your daily movements. The strap fabric should be strong enough to bear weight without digging into your shoulder. The classic choice is a long strip built from the same canvas as the body, or from a tightly woven blend that holds up to daily tugging and carrying of heavier loads. The common dimension for the handles is about two inches in width and around twenty inches in length for each handle, yielding a proportional silhouette that sits comfortably under the arm or across a shoulder. The construction method matters as much as the material. It is possible to employ a sturdy, repeated stitch along the long edge of each handle to build thickness and resilience. TheTurning of the handles to expose the right side and crease them with heat invites a crisp, durable finish, while topstitching along both long edges seals the garment with a visual certainty that also doubles as reinforcement. In all these steps, the seam allowances and the turning edges act like tiny, patient hands that ensure nothing puckers or strains. For the handles, a small, reinforced cross-stitch at each end doubles down on strength where the weight will pull every time the bag opens and closes. Such reinforcing stitches, though small, dramatically extend the life of the bag. The attachment of handles to the main body is an art in itself, one that blends aesthetics with endurance. The handles should be placed with the top edges aligned to the top edge of the bag and with the raw ends set a small distance below the top edge to prevent fraying after frequent use. A simple single line of topstitching around the upper perimeter anchors the handles in place, but a careful sewist might add extra support by stitching a small X at each handle’s base. This X-stitch becomes a quiet safeguard against tearing where the load ends and the fabric strains under pressure. It is not merely decorative; it is a practical reinforcement. Personalization is woven into the decision about materials and construction. Hand decoration, embroidery, and painting transform a practical tool into a unique artifact that reflects your story. You can add fabric paint to create designs, quotes, or abstract motifs that fade into the linen-like surface over time, or embroidery to introduce texture and a tactile element that catches the eye as you move. The more you personalize, the more you reveal your relationship with the bag. Embroidery with colored floss adds a raised detail, while a stencil or transfer pencil lines a precise motif before paint or stitch work. When you explore personalization, you are not merely adding decoration; you are building a narrative within the fabric. The same principle applies to the notion of structure. A lining is not a mere afterthought; it is a core element that improves the bag’s behavior and longevity. It helps maintain shape, protects contents, and can even provide a quiet layer of insulation for fragile items. If you anticipate a heavy daily routine, consider adding a light cardboard or cardstock base inside the bag to stiffen the bottom. This internal support prevents the bag from sagging under the weight of groceries or textbooks. The cardboard should be thin enough to flex with the fabric, yet stiff enough to hold the form when the bag is empty or lightly filled. The layering of materials is the essence of durability. A double-layer outer fabric with a matching inner lining creates a robust envelope that resists tearing and keeps its silhouette over time. The combination with pockets, reinforced handles, and thoughtful seam finishes yields a tote that feels grounded in use rather than fragile. In practice, you might begin by cutting the main panels and handles with estimated dimensions, then test-fit the pieces together to confirm that the proportions feel balanced. As you stitch, you will notice how the fabric behaves around corners and along lengths. You may discover that a light iron touch before sewing helps to flatten seams and reduce bulk at corners, making the final turn more seamless. If you choose to add an inner pocket or two, the interior becomes more than a hidden storage space; it becomes a personal system for your everyday gear. The pocket orientation guides your daily rituals, and its placement influences how you load the bag. You might place a larger pocket toward one side to hold a notebook or tablet, with a smaller pocket for a phone, a set of keys, or a lipstick. The exact arrangement depends on your habits, yet the materials you select will support whichever system you prefer, from minimalist to richly organized. The process of choosing and assembling these materials is not a linear race but a careful conversation with fabric and thread. It asks you to visualize how the finished bag meets its daily demands and how the chosen textures and colors will wear with time. The materials become a language, and your stitches translate that language into a tangible object that is both practical and personal. As you navigate this material landscape, it helps to keep a mental tally of options for personalization and structure. The outer fabric might be reinforced with a lining of the same strength, or you might decide to stitch a contrasting inner color for a subtle reveal of character when the bag is opened. The strap selection is equally flexible. Some crafters prefer a canvas strap that echoes the body, while others choose a polyester blend for smooth handling and slight elasticity. Either choice will respond well to a careful topstitch and a robust end finish. A simple tip across the board is to pre-cut all pieces and label them clearly before you start sewing. Organizing the pieces helps you foresee how they come together and prevents last-minute changes that could compromise the bag’s proportions. This organization extends to the interior as well. If there is a pocket layout, test the placement by pinning on scrap fabric first. You can adjust the positions until you are satisfied with the balance in the bag’s interior and exterior visibility. When all elements are ready, you begin to assemble with intention. The two outer panels are aligned right sides together, and the side and bottom seams are sewn with a standard seam allowance that preserves the bag’s clean lines. After clipping corners and turning the bag right side out, you iron the seams for a crisp finish that reflects the care given to every step of the process. Then comes the moment of attachment for the handles. The earlier measurements matter here: ensure the top edges of the handles align with the top edge of the bag, and the raw ends are positioned a few centimeters below the top edge. A single topstitch around the top edge secures both handles, but if you want extra assurance, you can add a small X-stitch where each handle terminates. Personalization, which once appeared only as a decorative flourish, now becomes a structural ally, reinforcing the narrative around how the bag carries your life. In this way, the chapter returns to its core idea: materials chosen with care are not mere ingredients but the foundation of a reliable, expressive object. The tale encapsulated in the fabric is the practical poem of daily use, a poem you write with thread and texture. The practical advice here is not prescriptive to the point of rigidity; rather, it invites you to adapt these principles to your space, to your skill level, and to the cadence of your days. If you are a beginner, you might opt for straightforward materials and simpler constructions. If you want more texture and depth, you can layer tusked detailing, extra pockets, or a boldly contrasting lining. The key is to keep the core relationship intact: outer fabric that endures, a lining that protects, pockets that organize, and straps that carry. As you wrap the discussion back to the practical core of the craft, you might seek a broader view that includes related projects and communities. For readers who want to explore more canvas tote ideas, a deeper catalog of options can be found in a collection dedicated to women’s canvas tote bags. This resource offers a spectrum of styles and sizes that can inspire your own design choices while grounding them in a shared craft language. See the collection that focuses on women’s canvas tote bags for ideas about proportion, color, and finishing touches that align with real-world use. womens-canvas-tote-bags While the text here emphasizes materials, you might also explore hands-on demonstrations to visualize how your choices behave in practice. A visual tutorial can complement this material discussion, showing how fabric weight, thread type, and seam allowances translate into a durable, well-formed bag. For those who prefer a dynamic, video-driven walkthrough, there is a beginner-friendly guide that demonstrates the basic tote construction from cutting to topstitching, including the handling of bulky seams and turning the bag right side out. This kind of resource can be especially helpful when you want to see the tactile relationships between fabric, needle, and machine in real time. In the end, the materials you choose are more than a shopping list. They are a language of endurance and character, spoken through fabric and stitch. Making a tote bag becomes a dialogue with your own daily life, a chance to tailor a practical tool to your routine while allowing a canvas to reflect your taste. The result is not just a bag but a companion on countless errands, a project that confirms the value of careful selection and patient assembly. The simple act of cutting and sewing becomes a meditation on how to care for everyday things—how to respect the materials, how to invite them to tell your story, and how to finish with a sense of purpose that makes a lasting impression. External resources can enrich this journey, offering expanded techniques, variations, and inspiration beyond the core steps described here. To view a practical, visual demonstration that complements these ideas, consider a beginner-friendly video that walks through the tote making process from start to finish. This visual companion can help you relate the written guidance to real-world handling, from fabric preparation to final finishing touches. As you close the page, keep in mind that your tote is a living project. It will breathe with you, develop a patina with use, and carry the marks of your daily life. The materials chosen at the outset shape this evolving story, and your personal touches will continue to evolve with your skill and imagination. Ready to see how this theory translates into a finished piece, take the next step by gathering the materials as described, cut with care, and begin stitching with confidence. The bag you envision is within reach, awaiting the patience of your hands and the clarity of your design ideas. External link note: for a visual guide to tote bag assembly, refer to the suggested tutorial resource linked above. To complement the narrative on material choices and project outcomes, you can also explore related content on basic tote construction patterns and practical finishing techniques in the broader catalog. External resource: https://www.bilibili.com/video/BV1XK4y1c7JQ/
From Plain Canvas to Personal Statement: Crafting a Durable, Custom Canvas Tote
A canvas tote is more than a bag; it’s a portable canvas for daily life, a thing you build with your hands and carry with your own stories stitched into every seam. The beauty of a well-made tote lies not only in its durability but in the quiet possibility of customization. When you decide to sew your own bag, you choose fabric that is sturdy yet forgiving, you select threads that won’t give under pressure, and you map a plan that balances practical need with personal expression. In this chapter, we weave together the practical threads of construction with the creative threads of personalization, guiding you through a process that begins with simple measurements and ends with a bag that feels as useful as it does personal.
At the heart of a durable canvas tote is a thoughtful choice of materials. Most makers start with a yard of 10-ounce cotton canvas, ideally double-layered for strength. This weight offers enough body to stand upright when empty, enough flexibility to fold and stow, and enough resilience to weather daily wear—from crowded buses to busy grocery runs. The color and texture of the canvas set the tone for the bag, but it’s the construction that determines how long it will last. Matching all-purpose thread, whether polyester or a cotton-wrapped polyester, provides a balance of tensile strength and clarity of stitch that won’t unravel under strain. A simple straight stitch along the main seams is often all that is required, but the choice of stitch length and needle size matters when you’re working with multiple layers of fabric.
Before you even cut, take a moment to plan. The dimensions you cut for the main body set the bag’s character: a standard tote commonly measures about 14 inches wide by 16 inches tall. These proportions feel familiar, practical, and versatile for carrying books, groceries, or gym gear. Laying out the pieces on a clean, flat surface helps you visualize how the bag will come together. Consider whether you’ll add a lining, a pocket, or an interior zipper pouch later on. The more you plan, the easier the assembly becomes because you’ve already thought through how each piece will align with the others. One practical tip often overlooked by beginners is to pre-wash the canvas before cutting. Cotton, even when sturdy, can shrink a bit after first laundering. If you anticipate a finished bag that will be washed or bumped into water, pre-washing helps prevent surprises when you’re ready to use it.
Cutting follows plan, and precision in this step pays off later. You’ll cut two panels for the main body, each measuring 14 inches wide by 16 inches high, so the bag forms a neat rectangle when the pieces come together. Two straps, roughly 2 inches wide by 20 inches long, provide a comfortable carry and distribute weight evenly across the shoulders. Some makers prefer longer straps for over-the-shoulder carry, while others like a shorter, handheld strap. The important part is to cut straight along the grain of the fabric and to label pieces if you’re working with multiple fabric colors or textures. As you cut, keep the edges clean and straight. Sharp scissors are worth the effort here, and using a small rotary cutter on a clean mat can yield very precise edges.
The preparation of the handles is more than just creating a grip; it’s about building a durable anchor that won’t pull away from the bag under strain. Fold each strap in half lengthwise, with the wrong sides together, and press to create a crisp crease. This crease guides your stitching and strengthens the edge that will bear the load. Stitch along the folded edge with a ¼-inch seam allowance, then turn the strap right side out. A turning tool or a blunt implement like a chopstick helps coax the fabric into the correct orientation without distorting the seam. Once the strap is turned, press it flat again and topstitch along both long edges. This additional line of stitching locks the fold and gives the strap a clean, professional finish. If you want extra bite at the attachment points, you can reinforce with a small X-stitch at each end—this small flourish adds peace of mind when the bag is loaded with heavier items.
As the bag body comes together, the sequence of assembly helps maintain symmetry and strength. Place the two main panels right sides together, aligning the edges with precision. Pin or clip along the sides and bottom to hold the layers in place. Sew the side and bottom seams with a ¼-inch seam allowance, then clip the corners diagonally to reduce bulk. This corner trimming makes turning the bag right side out easier and smooths the interior, so the bag doesn’t resist being opened. Turn the bag through the open end and press the seams flat. A crisp finish here sets the tone for the entire piece; it’s the difference between a bag that looks handmade and a bag that looks thoughtfully crafted.
Attaching the handles is a moment where planning meets execution. Position the handles inside the bag, aligning the top edges with the bag’s top edge, and make sure the raw ends of the handles are about 2 inches below the top edge. Pin securely and topstitch around the top edge of the bag to secure both handles with a single, strong line of stitching. This approach distributes stress across the top seam instead of concentrating it at a single point. If you’re aiming for extra longevity, reinforce the handle attachment by stitching an X or a small rectangle at each end. The idea is to create a robust anchor for everyday use, whether you’re loading it with groceries or lugging books across campus. The design choices here influence how your tote behaves under real-world conditions and how it ages with you.
Personalization elevates a practical object into a personal companion. The plain canvas begs for a story to be told through color, texture, or pattern. Fabric paint is a lively option for bold designs, quotes, or abstract motifs. If you choose to paint, let the design dry completely before heat-setting it with an iron according to the paint manufacturer’s instructions. Embroidery offers a different kind of permanence; it invites the tactile rhythm of needle and floss and can produce delicate flowers, initials, or geometric motifs. An embroidery hoop helps keep tension even as you work. If you’d rather work with guides than freehand painting, stencils and transfer pens provide precise silhouettes that you can fill in with paint or thread later. The point of these creative steps is not to be flashy for its own sake but to express the bag’s eventual role in your life. A tote decorated with your own marks becomes a daily reminder of intention—an everyday object carrying more than just items.
A thoughtful designer might wonder about adding a lining or pocket to improve function without sacrificing the tote’s minimalist appearance. A lightweight cotton lining adds a second layer of durability and can help protect the fabric from wear and tear. It also offers a clean canvas for interior pockets or a small zip pouch. A pocket on the inside, perhaps a simple slit-sewn sleeve, can hold keys, a phone, or a small notebook. If you’re carrying classify items like a lunch or gym clothes, a simple pocket on the exterior side is a handy feature, too. The decision to add lining or pockets should align with how you plan to use the bag and how much weight you expect to bear. If you choose to line, you’ll cut a second pair of main panels in the lining fabric, sew it to the bag at the main seams, and finish the lining’s top edge separately. The result is a bag that feels more refined and resists abrasion from the inside out.
Care is an essential part of any handmade object’s longevity. Cotton canvas, especially when loaded with a busy print or dark pigment, benefits from gentle care. A hand wash or a cold gentle cycle in a laundry bag helps preserve the fabric’s texture and prevent color bleed. If you plan to wash the bag frequently, consider pre-washing the canvas before assembling so the fabric finishes at a stable size. After washing, reshape the bag and press with an iron while it is damp to help recover its original form. A delicate approach to care extends the bag’s life and keeps the surface free from pilling or fraying, preserving the crisp lines of the topstitching.
As a rule of thumb, the most resilient canvas totes share a few common traits: crisp seams, balanced tension, and reinforcement at stress points. When you sew, plan your stitch length to accommodate the fabric’s thickness. A standard straight stitch in medium length works well for two layers of canvas, but if you’re adding a bulky lining or multiple layers, you might switch to a longer stitch or use a walking foot to feed the fabric evenly. Always test your thread and needle combination on a scrap piece before committing to the actual bag. A simple test swatch saves you from discovering skipped stitches or pulled threads after you’ve already sewn your main panels together. And if you’re new to sewing, start with a simple bag like this one; the process teaches essential skills that form the foundation for more complex projects.
Beyond the basics, there are countless ways to tailor your tote to your lifestyle. If you love a minimalist look, keep the exterior unadorned and let the natural grain of the canvas speak for itself. If you enjoy a bolder aesthetic, consider combining two complementary canvas colors for the body and handles. A lightweight lining in a contrasting color adds a pop of surprise that remains practical. You might also add decorative topstitching in a contrasting thread color along the top edge or around the handles to draw the eye and emphasize the bag’s geometric simplicity. The key is balance: every embellishment should enhance the bag’s function or its story—not overwhelm it.
As you refine your technique, you may notice opportunities to adapt the basic plan to different needs. For a laptop-carrying tote, for instance, you can incorporate a padded sleeve inside the main body. A borrowed method from a related design is to include a slim pocket along the interior that can cradle a tablet or a small notebook. If you prefer a firm structure, you might add a lightweight interfacing between the outer canvas and the lining. This addition gives the bag a touch of rigidity for a crisper silhouette, especially if you anticipate stacked items or a heavy load. The beauty of a handmade tote is its adaptability: you can adjust dimensions, add or remove features, and experiment with finishes until you arrive at a version that feels uniquely yours.
For readers who want to explore variations that align with specific needs, a related approach is to design a tote with a laptop sleeve. This option preserves the bag’s clean exterior while providing protective housing for electronics. If you’re curious about that route, you can explore a built-to-fit variant here: tote-bag-with-computer-sleeve. The linked guide demonstrates how to customize the interior structure without compromising the bag’s exterior aesthetic, a useful reminder that function and form can grow together in a single project rather than competing for space.
In the broader context of handmade textiles, personalizing a tote becomes a small act of storytelling. A blog post by a textile artist once captured the spirit of this practice: hand-decorated textiles carry stories that mass-produced bags can never replicate. A personalized tote becomes not just functional, but meaningful. The tangibility of your own design decisions—where you place a pocket, which stitch you choose, the way you finish the top edge—embeds your daily routine into the fabric of the bag. You can see a practical balance of craft and creativity in the finished piece, a product of patience, planning, and a willingness to revise as you go. The tote stops being merely a container and becomes a companion for your routines, a portable stage for your life’s small details.
When you step back to review the finished product, you’ll notice the simple elegance of a project that rewards accuracy without demanding perfection. The body panels align cleanly, the seams lie flat, and the handles sit in a position that invites comfortable use. Even before any embellishment, the bag exudes a quiet confidence. Add a personal flourish—a monogram, a field of paint, a stitched motif—and you transform a practical object into a personal artifact. The bag’s durability will endure daily use, its top edge remains neat after repeated loading, and its shape returns after each day’s errands. That combination of practicality and personality is what makes sewing your own tote a rewarding experience.
In closing, the journey from fabric to final bag is a sequence of small decisions with outsized impact. The canvas’s weight, the seam allowances, the stitch choices, and the placement of straps all contribute to longevity and comfort. Personalization deepens your engagement with the object, making it a daily companion rather than a disposable tool. The result is a sustainable, stylish, and deeply personal accessory—one you can rely on for shopping trips, work commutes, gym runs, or thoughtful gifting. And because you built it yourself, you can show others that craftsmanship is still possible in the modern world, that a durable object can be both useful and expressive, and that careful planning and patient execution yield a tote that wears its journey with quiet pride.
Turning Plain Canvas into Personal Expression: Creative Personalization for Your Tote Bag
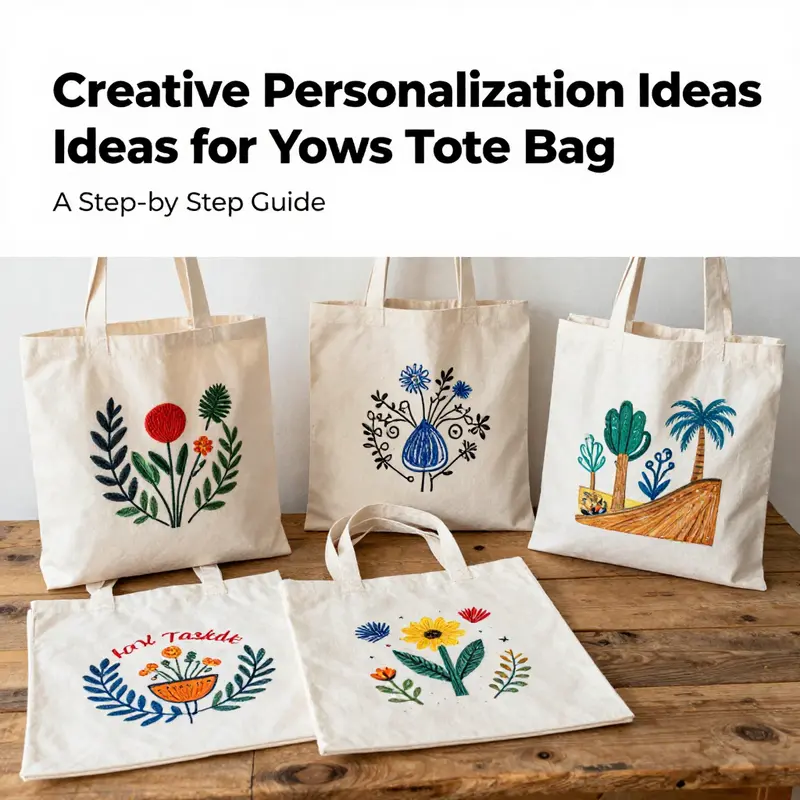
Turning a practical, well-made tote into a personal statement is a craft that honors both function and story. In this chapter, we explore how personalization transforms a canvas bag from a simple carryall into a durable, wearable canvas of your life. The same careful attention you applied to cutting, stitching, and finishing the bag can be extended to your decorative choices. The goal is not to overwhelm the bag’s utility but to elevate it with design elements that endure as you use it day by day. Personalization is a conversation you have with your own habits, values, and style—a dialogue written in color, texture, and form that remains usable, washable, and resilient. As you read, imagine your tote becoming a portable canvas for memory, meaning, and everyday practicality.
Humans instinctively want to leave a mark where they spend their time, and a canvas tote offers a soft, forgiving surface for that impulse. The first step in thoughtful personalization is recognizing what the bag will carry and where it will roam. If your tote is a daily shopper, a work companion, or a weekend library, the design should speak to those roles without compromising strength. The materials you chose—double-layered 10-ounce cotton canvas and sturdy, all-purpose thread—are already capable of withstanding repeated use. Personalization ought to ride along with that resilience, not hinder it. With that premise, you can plan designs that stay legible and intact after countless trips to the market, the farmer’s market, the library, or the gym. The objective is a balanced blend of durability, readability, and charm.
One reliable approach is to think in layers. Start with a durable base: a solid color or a restrained pattern that won’t bleed or warp with treatment. For the paint, embroidery, or transfer methods you’ll apply, test on scrap pieces or a discreet panel to anticipate how the design behaves on canvas. The beauty of canvas is its receptive surface, which holds paint, thread, and ink well, provided you respect the fabric’s texture and fibers. Before any decoration, ensure your bag is clean and fully dry from any prior wash or pre-wash. The decision to pre-wash is a small but important step that keeps future shaping and sizing consistent. Pre-washing reduces shrinkage and helps you predict how the final piece will settle after repeated use.
If you’re drawn to bold visuals, fabric painting offers an immediate, expressive channel. Begin with a plan: a central motif or a landscape-inspired scene, perhaps, or a geometric arrangement that echoes your everyday rhythm. A cardboard insert inside the bag becomes your shield against bleed-through, preserving the interior as neatly as the exterior. For optimal results, use fabric paints designed for natural fibers, and work in thin layers rather than a single heavy coat. This approach minimizes cracking or flaking and creates a smooth, durable surface you can count on through washing. Allow each layer to dry completely before applying the next, and adhere to the paint maker’s heat-setting instructions—typically a cotton-temperature iron for several minutes—to fuse color to fiber. If you’re coordinating multiple hues, label your paints with a simple sketch on the bag’s back panel. A finished piece benefits from a clear plan that keeps color relationships harmonious and legible over time.
Embroidery invites a different kind of dialogue with the bag. It creates texture and depth that paint sometimes cannot match. Hand embroidery gives you tactile dimension—the feel of thread catching light as you move. Start with a simple motif—initials, a single flower, a small emblem—that can be easily transferred or traced. Use a hoop to maintain consistent tension; otherwise, the stitches can distort the fabric as you sew. Choose embroidery threads that complement the canvas’s color and weight. Cotton embroidery floss is classic, durable, and easy to work with on natural fibers. For a bolder look, six-strand floss spun together provides a richer strand without becoming too bulky for a tote’s surface. Common stitches—backstitch, satin stitch, and French knots—offer reliability and a variety of textures. Don’t underestimate the power of white or off-white thread on a colored canvas; it can read as a crisp, contemporary accent while remaining highly legible through washing and wear. Embroidery turns a personal symbol into a woven memory, and the process itself becomes part of the bag’s story as you sew.
Iron-on transfers offer another path for those who crave photographic detail or precise imagery. They are especially handy when you want to reproduce a favorite quote, a monogram, or a small graphic with crisp edges. The critical step is to select transfer paper that adheres well to 100% cotton canvas and to follow the heat application carefully. Prepress the canvas by ironing to remove any wrinkles and to create a flat work surface. Align your transfer precisely, as transfer sheets can be unforgiving of misalignment once heat is applied. Apply even pressure with a clean press and allow the adhesive to bond fully. The transfer’s durability hinges on the quality of the transfer medium and the temperature you apply. If the bag will see repeated use and machine washing, it may be wiser to reserve iron-ons for interior accents or for pieces you plan to reapply gently after a good wash, rather than large, high-wear surfaces. Iron-ons favor monotone or limited color palettes, which reduce color bleed and grime build-up over time, keeping the design legible amid daily use.
For those who relish the promise of fine lines and subtle detail, fabric markers provide a precise, flexible means to add text, quotes, or delicate illustrations. Markers designed for fabric fibers deliver vibrant color and durable lines that resist fading after washing. When sketching with markers, work on a smooth, even surface and sketch lightly at first. You can enhance your lines with a light pass of color after the initial sketch has dried. Remember that canvas fibers take ink differently depending on how tightly the weave is set, so test first on a corner or a swatch from your cut pieces. A spare bit of fabric or a hidden seam allowance can be an ideal test ground. If you want to assemble a narrative on your tote, consider a small sequence—perhaps a quote that underscores your daily intention or a mini-map of a favorite route. The advantage of markers is that, once dry, they can be sealed with a fabric setting spray or a light iron, depending on your marker’s instructions.
In practice, the most striking totes often blend techniques. You might paint a soft background as a subtle stage for an embroidered focal point, such as a stylized flower or an emblem that holds personal meaning. Alternatively, you can center a high-detail image transferred onto the fabric and then accent it with embroidered or drawn elements that extend beyond the central image. Blending methods requires thoughtful sequencing: painting the background first, then applying transfers, and finally adding embroidery or markers for fine details. This layered approach can produce a finished look that is cohesive and more resilient to wear. Always plan your design on paper before committing to fabric. Transfer a rough layout onto the canvas with a removable fabric pencil or carbon tracing, so you can adjust the composition as you go.
The sustainable and thematic thread running through personalization is equally important. Patchwork brings a patchwork of life experiences into one bag. Use leftover fabric scraps, old clothing, or even small curtains to create a patchwork panel or decorative patches scattered across the tote. Patchwork not only adds color and texture but also tells a story about your wardrobe, your travels, and your commitments to reducing waste. When patching, reinforce the patch edges with a narrow zigzag stitch or a small satin stitch to prevent fraying. You can also attach patches with a hidden adhesive or light stitches for a mixed-media effect that remains durable with washing. The patchwork approach aligns with a broader philosophy of upcycling and mindful consumption, reminding us that a tote bag can evolve with your life rather than becoming obsolete after a season.
A personalized tote can also reflect your values through meaningful motifs or quotes. A small, carefully chosen symbol—like a leaf, a compass, or a minimalist animal—can communicate your interests without shouting. Short, heartfelt phrases work well on canvas because their legibility remains intact after use. When choosing typography for a quote or label, opt for clear, bold letters that won’t blur easily. You can draft the text in thick marker strokes and then overpaint to ensure legibility after finishing. If you prefer a monogram, choose a bold font with clean lines that sits well against the canvas’s weave. The key is to strike a balance between visual impact and readability. The wrong font or color can degrade into a blur after washing or repeated handling, so test different colorways and line weights during the planning stage.
Care and longevity should be part of your design considerations from the outset. A personalized tote’s durability depends not only on your stitching but also on how you care for the finished piece. For all paint-based decorations, wash gently by hand or in a cold, delicate cycle inside a garment bag to protect the design. Air-dry away from direct sun to prevent color fading. If your embroidery is dense or dense with color, consider a light spray sealant designed for fabric to minimize fraying and loose threads, but test it on a hidden area first to ensure it doesn’t alter the feel of the stitching. For iron-ons, avoid high-heat cycles and hot tumble dries, which can cause edges to peel or distort. If you choose patches, secure them with a few extra stitches around the perimeter, especially along bottom edges and where the handles attach. In daily use, the bag remains a practical tool; your decorative choices should enhance its function, not hamper it.
The social and stylistic context of personalization is evolving, and your tote can participate in that evolution. A well-decorated bag is not merely a surface decoration but a reflection of your daily narrative. It can celebrate a season of travel, a memory of a book you loved, or a personal motto you want to carry with you. When you plan a design, consider how it will scale as you wear and wash the bag across months or years. A design that looks spectacular on a clean studio sample might shift once the fabric has aged, the stitches have loosened slightly, or the paint has softened with use. That is not a failure; it is the bag growing into its character. A robust plan anticipates those changes and builds in a little space so the design remains legible. For instance, using bolder motifs or monograms helps maintain visual impact even if some edges fray or if the fabric softens with multiple washes.
As this chapter unfolds, the practical guidance is interwoven with an invitation to experiment. Personalization is a way to invest care in a routine object, transforming a bag into a daily reminder of who you are and what you value. The process rewards patience and experimentation. Start with small, reversible steps if you’re uncertain: test a single motif on a scrap, or apply a temporary adhesive patch to observe how it sits with your bag’s shape. Gradually, you can escalate to more elaborate work—painted backdrops, stitched details, or a complete transfer set—that feels right for the bag you made. The journey from a plain tote to a personal artifact is a path you walk with your hands, your eye for color, and your respect for the fabric’s integrity.
For readers seeking inspiration that aligns with contemporary styles and practical application, a quick look at broadly-motivated discussions on tote customization can be helpful. In addition to your own explorations, you can explore contextual ideas through curated collections that feature women’s canvas tote bags, which highlight how designers and hobbyists balance utility with personality. The aim is not to imitate a trend but to understand how shape, color, and texture translate across contexts so you can tailor your tote to your life. For more on current styles and how they translate into functional personalization, you may explore resources such as the online references focused on women’s canvas tote bags.
In the end, your canvas tote will carry more than groceries or books. It will bear the careful decisions you made about materials, the patience you invested in planning, and the artistry of your chosen techniques. It will hold your stories, and it will stand up to the wear that daily life imposes. The bag becomes a shared space where craft meets practicality, where memory meets function, and where your daily routines are woven into fabric and thread. When you reach for it, you’ll notice the small details—the way a line of embroidery catches the light, how a paint wash returns to a clean edge after a gentle wash, or how a scrap of vintage fabric peeks from a patch in just the right way. These little signals are what give your tote its personality without sacrificing the reliability that makes it useful. This is the art of making a canvas tote that truly belongs to you: a durable, stylish, consciously created object that fits into your life with ease.
As you close the project, you’ll realize that personalization is less about making something flashy and more about making something meaningful. A tote that carries your name, your favorite colors, or a symbol that embodies your values is more than a bag; it is a portable reminder of who you are. The key is to plan, test, and adapt. Use the layers approach—base design, focal motif, and supporting details—to build a composition that remains legible after daily wear. Remember, the materials you started with are sturdy, and the methods you choose should honor that sturdiness. A well-made bag with thoughtful decoration will remain functional and vibrant for years, becoming a trusted companion rather than a disposable fashion accessory.
For further practical inspiration on personalization ideas that work well in everyday contexts, you can consult additional resources that explore how to combine painting, embroidery, and transfers in cohesive, durable ways. See their guidance as a complement to your own experiments, and let the process unfold at a pace that suits your schedule and patience. If you wish to broaden your perspective beyond the studio, consider visiting online galleries and DIY communities where crafters share their tote designs and techniques. These communities often provide helpful tips on achieving balance between decorative elements and the bag’s structural integrity while offering encouragement for beginners and seasoned makers alike.
Finally, keep in mind the community of makers who value sustainability. Personalization is an opportunity to reuse and refresh an existing piece, to give a second life to fabric remnants, and to celebrate the creativity that comes from working with what you already own. Your tote can become a canvas that travels with you, carrying a trace of your creativity wherever you go. When you combine careful construction with mindful decoration, you create a durable, stylish accessory that reflects your personality and your commitment to responsible crafting. The result is not merely a tote bag; it is a portable archive of your daily choices, a companion for errands and adventures, and a testament to the pleasure of making something with your own hands.
External inspiration and practical examples can provide additional direction as you embark on your customization journey. For broader inspiration, see EcoWatch’s canvas tote bag personalization ideas.https://www.ecowatch.com/canvas-tote-bag-personalization-ideas-2708924175.html
Internal reference for further context: for design ideas that fit real-world use and everyday wear, you can explore examples of women’s canvas tote bags.
For extended reading and a gallery of related designs, consider visiting the following resource that highlights trends and practical techniques in tote customization: women’s canvas tote bags.
Final thoughts
By creating your own canvas tote bag, you not only engage in a rewarding DIY project but also craft a unique promotional tool that embodies your brand’s identity. As you move through the materials, construction process, and personalization options, you’ll discover that your tote bag can reflect the core values of your business. Embracing this creative endeavor ultimately allows you to connect with your customers on a personal level, enhancing their experience while promoting sustainability.