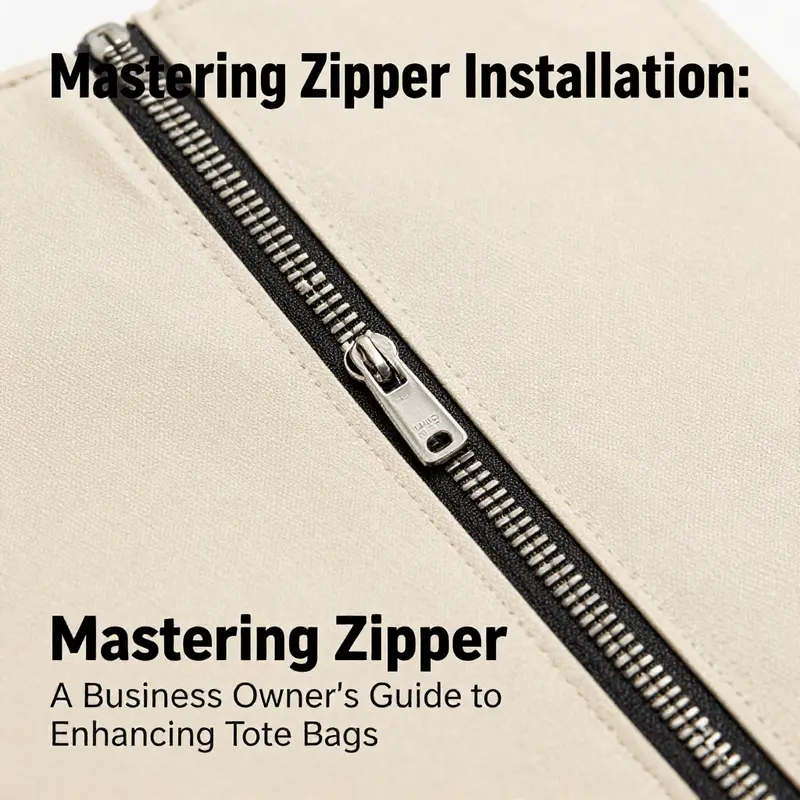
The art of inserting a zipper into tote bags is a valuable skill for business owners in the textile and accessory industry. Effective zipper installation not only enhances the functionality of the bags but also adds a competitive edge in design and quality. With proper techniques, the process becomes straightforward, allowing for consistent and professional results. This guide breaks down the process into five key chapters: an overview of materials and tools required, a detailed approach to fabric preparation, step-by-step instruction on attaching zippers using the recessed method, joining bag panels and seam finishing, followed by optional reinforcements and maintenance tips. Together, these chapters will equip you with the knowledge to succeed in offering high-quality, zipper-equipped tote bags.
Zipping into Place: Materials, Tools, and the Quiet Power of a Neat Tote Zipper

In the world of tote bags, the zipper is more than a closure. It’s a bridge between form and function, turning a simple fabric carrier into a trustworthy everyday essential. The moment you install a zipper that runs smoothly, sits neatly in its seam, and opens with a reassuring glide, you feel the work has paid off in quiet, durable leverage. This chapter threads together the practical realities of materials and tools with the craft of a clean, recessed zipper—one that hides the teeth inside the seam and leaves the exterior of the bag uninterrupted and cohesive. It rides on a careful balance of stabilization, precise alignment, and patient stitching, all of which begin long before the needle ever touches the fabric. Understanding the materials and the tools is not a merely procedural step; it is a foundation for a professional finish that will hold up to daily wear and occasional overloads.
Choosing the right zipper starts with length. For a standard tote, a zipper in the 12- to 14-inch range is the typical sweet spot. It’s long enough to enable easy access, yet compact enough to avoid bulk at the bag’s opening. If your tote design features a wider or narrower top edge, measure the finished opening and plan accordingly. The goal is a zipper that sits flush with the top edge when closed, returning the top line to a clean, uninterrupted silhouette. Once the zipper length is set, the next decision centers on stabilizing the fabric around the zipper zone. Fusible interfacing is a welcome ally here. It reinforces the fabric at the top edge, reducing fraying and giving the seam a stable foundation to grip when the zipper tape is sewn on. The interfacing should be matched to the tote’s fabric in weight and weave, so it doesn’t create a stiff, unnatural ridge at the edge. If your fabric is already sturdy—think canvas or a dense cotton—the interfacing can be lighter, serving more as a stabilizer than a rigid backbone.
Thread choice is another subtle yet important detail. A color-matched thread not only disappears visually, it helps the stitch blend with both the fabric and the zipper tape. A good rule is to thread with a sturdy, medium-weight polyester or cotton-poly blend that can handle the stress of daily use without breaking or fraying. The thread weight should be appropriate for a straight seam and for the occasional topstitch that will come later. The selection of fabric itself deserves careful thought. The tote’s primary textile sets the tone for the zipper’s behavior. A dense weave, like canvas or heavy twill, behaves differently from a lighter cotton or a knit. In either case, the aim is a fabric that will hold its shape near the zipper without puckering. Stabilizing the top edge with interfacing helps achieve this, but you can also strengthen the edge with a narrow strip of fabric binding after the zipper is in place if the bag is expected to carry heavier loads.
Materials and tools come together most visibly at the moment of installation. A modern sewing machine with a zipper foot makes the process efficient and precise, but a sturdy hand-sewn approach remains a solid fallback for those who prefer to work without a machine. A walking foot, if available, can be particularly helpful when working with multiple thick layers—such as when the bag’s outer fabric, lining, and interfacing meet at the zipper zone. Pins or clips keep everything aligned as you sew, while sharp scissors or a rotary cutter ensure clean, accurate cuts. An iron and ironing board are essential not just for pressing, but for setting the interfacing and smoothing any stray wrinkles that could misalign the zipper’s placement. The care you give to pressing early on pays off when you reveal the bag’s final, professional look.
The recessed zipper method is both elegant and practical, and it rewards the patient sewer with a seam that conceals teeth inside the bag’s edge. The first part of this method is the simplest: place the zipper face down along the top edge of one tote panel, aligning the zipper tape with the fabric edge. The goal is symmetrical placement so that the zipper sits evenly across the panel. Pin or clip along both sides to guard the alignment as you sew. Sew the zipper tape to the fabric with a straight stitch, about a quarter of an inch from the edge of the zipper tape. If your machine supports it, a walking foot helps feed thick layers evenly, reducing the risk of shifting or stretching the fabric. Repeat this step on the second panel, attaching the other side of the zipper with the same distance from the edge. When both sides are secured, trim and clip the corners of the top edge to minimize bulk and make turning the bag right side out smoother.
A simple, practical guideline runs through this step: symmetry matters. Mark the center point of both the zipper and the fabric before sewing, so both sides align perfectly as the bag comes together. The recessed technique shines because the zipper teeth stay tucked inside the seam rather than peeking through the top edge. This not only looks cleaner but also reduces snagging opportunities and gives the bag a more finished appearance. The next phase requires aligning the two panels with right sides facing, the attached zippers aligned along the top edge. Pin or clip around the entire top edge, ensuring the zipper sits within the seam line. Sew around the top edge with a half-inch seam allowance, starting and ending at the zipper ends. Backstitch at the beginning and end to lock the stitches in place. The purpose of this larger seam is to secure the zipper so it can bear daily use without gradually loosening.
Finishing the seam and turning the bag right side out flows naturally from the prior steps. Clip the seam allowances at the corners and curves to reduce bulk, especially where the fabric meets the zipper tape. Then turn the bag right side out through the top opening. A crisp press along the top edge helps set the shape and removes any minor puckers that can appear after turning. This moment—the reveal of a confidently installed zipper—often signals the first time you see how the tireless precision of preparation translates into a smooth glide when you test the pull.
Reinforcing the top edge is a small extra step with big payoff. Topstitch along the top edge, about an eighth to a quarter inch from the seam line. This single-row line of stitches anchors the zipper more firmly, discouraging wobble or pull over time. If the bag is intended for frequent use or heavier items, consider adding a fabric stabilizer or binding along the top edge. The extra layer can offset strain from repeated openings and closings, preserving alignment and preventing the edge from stretching.
As with any sewing project, practical tweaks help avoid common hiccups. Avoid pendants or heavy pulls that could strain the slider and wear the zipper faster. If teeth become bent or misaligned, a quick inspection with a small flashlight can catch issues early. A slider that detaches from the zipper is fixable with careful reattachment—though that repair deserves a dedicated, calm approach rather than a rushed repair mid-project. By maintaining a habit of gentle handling and regular checks, your tote will continue to perform reliably for years.
Beyond the mechanics lies a quiet artistry. The choice of zipper size, the stability of the top edge, and the precision of the stitch work come together to create a tote that looks polished and wears well. The recessed technique hides the hardware in plain sight, offering a silhouette that favors the fabric and the bag’s overall design. In a world of quick, throwaway fixes, this approach embodies a patient, thoughtful craft that elevates a simple tote into a dependable everyday companion.
For readers who want to see this method demonstrated in action, the detailed visuals of the recessed zipper technique can be invaluable. A structured, step-by-step video helps translate the written steps into hands-on practice, reinforcing alignment, seam accuracy, and finishing touches. If you’re seeking more examples and variations, you can explore a curated collection of tote designs that incorporate zippers and related features at this resource: tote-bags-with-zippers.
As you build confidence with this method, you’ll notice how the combination of stabilization, careful cutting, and precise stitching becomes almost second nature. The small decisions—the weight of the interfacing, the exact distance of the stitching from the zipper edge, the rate at which you feed multi-layer seams—accumulate into a finished product that looks like it came from a shop shelf rather than a home sewing bench. The habit of marking centers and aligning edges consistently pays dividends across projects, not just for this tote but for any bag you plan to zip shut with a clean, professional finish.
If you’re seeking broader visual guidance beyond the written steps, a detailed video tutorial can be an excellent companion. It offers a live demonstration of the handling, the turning, and the final topstitching that completes the look. The use of a zipper foot and the careful approach to placing the zipper tape against the fabric edge are some of the key cues that become evident in motion. Watching a well-executed tutorial can deepen understanding of how the pieces fit together and how a slightly slower pace at the start yields a more precise result in the end.
In sum, inserting a zipper into a tote bag with a recessed finish is a satisfying blend of preparation, technique, and care. The materials and tools chosen influence the ease of execution, but it’s the method—firm alignment, measured stitching, and considered finishing—that ultimately determines the tote’s durability and aesthetic. The result is not just a bag with a zipper; it is a functional object that harmonizes the fabric’s texture with the hardware’s quiet efficiency. The chapter of your sewing journey that begins with selecting the right zipper and stabilizing the top edge closes with a tote that opens smoothly, closes securely, and presents a clean, tailored edge every time you reach for your essentials. For those who value both practicality and polish, this is the seam where craft meets daily usefulness.
External resource for a complementary visual demonstration: https://www.youtube.com/watch?v=5xUq6VtL3kQ
Fabric Preparation for a Tote Bag Zipper Insertion

The fabric you start with is the foundation of a smooth zipper installation. A well‑pressed, stable surface prevents stretching, puckering, and bulk that can catch the zipper teeth. Begin by cutting your tote panels accurately and pressing them flat with the appropriate heat setting for the fabric type. If the material is lightweight or prone to stretch, apply fusible interfacing to the wrong side of the top edges; this adds stiffness without altering the bag’s appearance.
Next, mark the centre of the top edge on both the lining and outer panels. A tiny dot of chalk or a water‑soluble pen will guide you when aligning the zipper. Attach the zipper to the lining first using a zipper foot, sewing a straight line about a quarter of an inch from the tape edge. A walking foot helps feed the layers evenly, especially with thicker fabrics.
After the zipper is secured to the lining, prepare the outer panels. If you used interfacing, press it now. Pin the outer front panel to the lining‑zipper assembly with right sides together, matching the centre marks. Sew around the top edge, keeping the seam allowance around ½ inch, and backstitch at the beginning and end. Clip the seam allowances at the corners, turn the bag right‑side out, and press the top edge again.
For a finished look, topstitch close to the seam (about 1/16‑1/8 inch) to lock the layers in place and add durability. The result is a crisp, professional edge where the zipper glides effortlessly, ready to carry daily essentials.
For visual learners, a step‑by‑step video tutorial demonstrating the recessed zipper technique can be very helpful. A recommended resource is https://www.sewingwithnancy.com/2023/07/how-to-install-a-zipper-in-a-tote-bag.html, which walks through each stage with clear close‑up shots.
Recessed Zipper Technique for a Sleek Tote Bag

A recessed zipper hides its teeth inside the seam, giving a tote a clean, professional look while protecting the closure. Start by cutting the outer fabric and lining to size, adding interfacing to the lining edge if the bag will hold heavy items. Press all pieces flat.
-
Attach the zipper to the lining – Place the lining right‑side‑up, lay the zipper face‑down so the teeth align with the top edge, and sew both sides close to the teeth using a zipper foot or walking foot. This creates a pocket for the zipper.
-
Join the outer fabric – With the outer fabric right‑side‑down, align its edge with the zippered lining and sew around the top edge, maintaining a consistent seam allowance (about ½ in). The zipper becomes sandwiched between the layers, invisible from the outside.
-
Finish the bag – Turn the tote right side out through an opening, trim excess seam allowance, and press the top edge flat. Optional top‑stitching a short distance from the seam locks the zipper in place and adds durability.
Tips: Use a walking foot for thick fabrics, press frequently to keep seams flat, and check the zipper teeth with a light after each use. This method works for many tote styles and provides a subtle, high‑quality finish.
Zipping Across the Top: Mastering Panel Joins and Seam Finishes for a Durable Tote Bag

The moment you lift a tote bag to open its top and reach for your things, the quality of the zipper join becomes almost invisible. Yet it is exactly this quiet seam where durability and polish are born. In this chapter we move beyond simply attaching a zipper and into the rhythm of joining the two main panels—the front and the back—and finishing the seam so the bag wears evenly, opens smoothly, and holds its shape when loaded with groceries, books, or everyday essentials. Treat this stage as a partnership between precision and patience. When done well, the zipper is no longer a separate piece but a spine that unites outer fabric, lining, and structure into one cohesive unit. The approach you choose can influence bulk, alignment, and the final appearance—so it pays to work with intention, not speed alone. A well-executed join helps prevent sagging at the top, reduces bulk where the panels meet, and yields a crisp, professional finish that you can be proud of every time you reach for your tote.
Begin with the materials laid out as you would for any sturdy project: two outer panels, two lining panels that will live on the inside, and a zipper whose length fits the bag you’re making. The most reliable results come from centering the zipper along the top edges of both the outer fabric and the lining. You may choose a zipper with visible tape that matches your fabric or an invisible option if you want the pull to glide with a nearly seamless face. Either choice can work, but the key is consistent alignment and a clean edge where the fabric meets the zipper tape. As you position the zipper, keep the top edges parallel. A misaligned start sets the entire process off-kilter, and stubborn bulk around the teeth can make the slider reluctant to move. A quick center-mark on both the zipper and the top edge helps you maintain symmetry as you pin and stitch.
With the zipper secured to the lining, you begin the second half of the preparation: you attach the outer fabric to the zipper. The same careful alignment applies here, but you must guard against catching the zipper teeth. The best tool for this job is a zipper foot, which keeps the needle line close to the tape without pulling in the teeth themselves. Sew slowly in short, even passes, and check the feed as you go. If your fabric layers are thick, a walking foot can be a real helper, guiding the stack evenly through the feed dogs and preventing bulk from building up right at the teeth. It’s not uncommon to go back and feel the line after each pass; a tactile check often reveals a stitch that’s too close to the edge or a tiny tuck that would later show through the top edge once the bag is turned right side out. The goal is a neat, even seam that hugs the zipper tape rather than perching on top of it.
When both sides are attached, the next move is to join the two main panels around the top edge, with the zipper living between them. Place the outer panel, now with one side of the zipper attached, face up. Do the same with the lining so the zipper sits in the same plane on both pieces. Pin or clip the edges all the way around, including the zipper area, so nothing shifts as you stitch. The seam you now create should encase the raw edges of the zipper and lock the outer and lining layers into a single top edge. Use a solid straight stitch with a seam allowance that matches your pattern. A standard 1/2 inch works in many tote bags, but consult your pattern—some totes benefit from a slightly narrower or wider allowance depending on the finish you want around the top edge. Start sewing at one end of the zipper and continue to the other; the uninterrupted seam supports both weight and movement, keeping the top edge flat and even. If you find the fabric curving or buckling at corners, back up a little, readjust, and continue. A good practice is to backstitch at the beginning and end so the seam holds even when the bag is pulled from its opening.
As the seam forms, the handling of bulk becomes critical. Clip the corners of the top edge carefully to reduce bulk when you turn the bag right side out. Small snips at the curve help edges lay cleanly without distorting the zipper line. The moment you reach the turning stage is when you can feel how well the panels were aligned. If the top edge sits unevenly or the zipper pull binds, pause, inspect the line, and rework the problematic portion. The beauty of this stage lies in the small corrections: a single stitch adjusted a fraction of an inch can transform the final look and function. To ensure the process remains harmonious, take a moment to double-check that the center marks you made earlier align on both sides of the zipper. Symmetry breeds confidence in the finished product and makes the log of your work feel deliberate rather than hurried.
Now comes the finishing touch that elevates the entire construct from functional to refined. You will turn the bag right side out through the bottom opening, which might be used for turning in strap channels or other features in more complex bags. Press the top edge to establish a crisp line that follows the seam, and then assess the zipper action. A smooth slider and even teeth along the top edge are the telltale signs of a well-executed join. If you see any misalignment at the top seam, a careful, targeted re-stitch near the affected area can correct it without altering the rest of the seam. A clean press helps set the edge, so the top line stays flat when the bag is carried or filled. In this moment, friction between the lining and outer fabrics is what you want to minimize; the thinner and more even the seam you have created, the less potential there is for the lining to fold or creep with use.
Optional but highly recommended is the topstitch along the very top edge, about an eighth to a quarter inch from the seam line. This small run of stitching serves a dual purpose: it secures the zipper’s position and offers additional durability against frequent opening and closing. If your project calls for extra resilience, consider adding a fabric stabilizer or a narrow bias tape along the top edge before sewing the panels together. This adds a buffer that helps the top edge hold its shape over time, especially if the bag is loaded heavily. The result is a top edge that remains neat and straight, even after repeated use. If you want a cleaner, almost invisible finish, an invisible zipper can be substituted for the visible tape option, but the same principles apply: alignment, careful stitching, and finishing the seam to encase the raw edges.
As you reach the end of this sequence, you should feel the sum of your careful preparation—the panels hold together with a robust seam, the zipper operates smoothly, and the top edge presents a tidy, professional line. This is where the artistry of a tote bag becomes practical: the handle of usability is anchored in a seam that does not show strain when you load the bag with weight. For a broader sense of how this design approach applies to different tote configurations, explore more examples of tote designs with zippers, which offer a spectrum of top-edge treatments and zipper placements that can inspire future projects. tote bags with zippers
A final note on maintenance and care helps ensure longevity. Zippers are sturdy, but they are only as strong as the surrounding fabric and the way you treat them. Avoid pendant pulls that add weight and strain to the zipper pull, especially on heavier bags. Regularly inspect the teeth with a small flashlight to catch bent teeth early, and if a slider ever detaches, seek a guided reattachment that preserves the integrity of the track. With the seam finished and the bag pressed, you have a tote that opens smoothly, wears well, and communicates a quiet confidence through its restrained, handled finish. For those who want to see a practical demonstration of this approach, a detailed, visual tutorial offers real-time walkthroughs of each step, including how the panels are prepared, how the zipper is mounted to both layers, and how the final seam is finished to achieve a professional look.
External resource: Crafty Morning provides an in-depth, visual guide to installing a zipper in a tote bag, complementing the techniques discussed here with clear demonstrations and additional tips that can help you troubleshoot common issues and refine your technique. https://www.craftymorning.com/how-to-install-a-zipper-in-a-tote-bag/
The Quiet Power of a Seam: Mastering Zipper Insertion in a Tote Bag with Reinforcement and Care

When you reach for a tote, the zipper’s presence is as practical as it is design-driven. Inserting a zipper into a tote bag is more than a single seam; it’s a small act of engineering that determines how securely the bag holds its contents and how confidently it sits in your daily routine. The technique described here centers on a recessed zipper, a method that hides the teeth inside the seam for a clean exterior and a robust top edge. Before you begin, assemble what you need: a zipper of appropriate length, two main fabric panels, matching thread, a sewing machine or a set of hand-sewing needles, pins or clips, scissors, and an iron. If you want extra stiffness, a layer of interfacing behind the top edge can make a substantial difference, especially if you plan to pack heavier items. A calm workspace helps—the fabric aligned, the zipper centered, and the pattern marks clear so the two sides mirror each other in the final tote. The goal is not merely a functional opening but a polished edge that remains true after repeated use.
Start with fabric preparation. Cut the panels according to your tote’s pattern and press them flat to erase wrinkles that might throw off alignment. Wrinkles are not just cosmetic; they can create tiny shifts that accumulate and degrade the seam as you sew. If you opt for reinforcement, apply interfacing to the inside of the top edge. This is not a cosmetic flourish alone; it matters when the tote carries groceries, a computer charger, or a water bottle. The stabilizing layer helps the zipper sit evenly and prevents the top edge from stretching under load. As you prepare, mark the center line on both the zipper and the tote’s top edge. This simple alignment cue keeps the two sides symmetric, reducing the risk of a misaligned opening that could frustrate use later on.
With the zipper prepared, attach it to one tote panel using the recessed zipper method. Place the zipper face down on the right side of the fabric, aligning the top edge of the zipper tape with the top edge of the fabric. Pin or clip it securely along both sides. Sew the zipper tape to the fabric with a straight stitch, typically about a quarter inch from the edge of the zipper tape. If your machine has one, a walking foot can be a quiet helper here, feeding the multi-layer fabric evenly and reducing bulk as you work through the top edge. When you finish sewing one side, rotate the panel and affix the other side of the zipper to the opposite panel in the same manner. The result is two panels each bearing half the zipper, ready to be joined with the other panel. At this stage, clip the corners of the top edges to reduce bulk when turning the bag right side out. The act of clipping is small but essential; it keeps the transition from zipper to fabric smooth and neat, a sign of careful construction rather than a makeshift solution.
Joining the two panels is where precision becomes visible. Place the panels right sides together, with the attached zippers aligned. Pin or clip around the entire top edge, ensuring the zipper remains properly positioned and does not twist. Sew around the top edge with a comfortable seam allowance, commonly about half an inch, and backstitch at the beginning and end to lock in the thread. The ends of the zipper deserve special attention; if the zipper tape twists or the teeth begin to snag, you risk an imperfect closure or a misaligned edge once the bag is turned right side out.
Finishing the seam and turning the bag right side out are the moments when the design reveals itself. Clip the seam allowances at the corners and curves to reduce bulk, which helps the bag maintain a clean silhouette and makes the turning process smoother. Turn the bag right side out through the top opening, then press the top edge with a hot iron to set a crisp line that reads as intentional craftsmanship. If you choose to reinforce the top edge further, topstitch along the outer edge of the bag, roughly one-eighth to a quarter inch from the seam line. This adds durability by securing the layers and the zipper tape and contributes to a professional finish that withstands everyday wear.
Reinforcement can take several practical forms, depending on how often you expect the bag to be used and how much weight it will bear. Interfacing remains a favorite for its quiet strength; a lightweight stabilizer behind the top edge keeps the opening from sagging as items are inserted and removed. Some sewists prefer a thin binding along the top edge to conceal raw edges and create a refined, museum-like finish. Either approach adds resilience to a well-sewn opening and helps the zipper perform smoothly year after year. The key is to ensure the zipper sits flush with the edge and does not become a stress point where fabric can tear over time. In the end, the bag should feel sturdy in the hand and offer a clean exterior line that complements its overall shape.
All this careful construction supports the everyday life your tote will lead. The recessed zipper offers a discreet profile and a sturdy top edge, ensuring the bag opens and closes smoothly even when heavily loaded. By tucking the teeth inside the seam, you minimize snagging and create a surface that stays visually uncluttered, which matters as you stride through your day carrying books, groceries, or personal items. If you want to explore variations on this theme, see this collection of tote bags with zippers. The library of designs can spark ideas for different fabrics, top-edge widths, or pocket additions while preserving the core technique of a hidden, secure zipper.
The maintenance mindset that accompanies good construction pays dividends over time. After you finish, resist forcing items through the opening with brute strength. If you carry heavy loads, consider reinforcing the corners where stress concentrates. A quick post-use check of the zipper—looking for bent teeth, misaligned tracks, or a stiff slider—lets you catch issues early. If you spot a snag, a simple, gentle approach can help: clean the track with a soft brush or cloth, keep lint away, and consider a tiny amount of lubricant applied sparingly to the slider or teeth. Avoid over-lubricating or using household oils that could attract dirt. The aim is to preserve the zipper’s performance without compromising fabric integrity.
In daily use, the bag’s top edge should feel responsive and confident. A zipper that slides smoothly signals a well-made opening and a thoughtful use of materials. The fabric, zipper, and thread work in harmony, each contributing to a top opening that remains functional and aesthetically aligned with the bag’s overall design. The recessed zipper approach has the advantage of a discreet, resilient profile that supports a clean exterior line and reduces the risk of snags as the bag moves with you. That quiet efficiency—where technique supports function and form—may be the most satisfying part of any sewing project: the sense that a small, patient series of steps has transformed fabric into a reliable everyday tool.
If you’re curious about related bag styles and practical variations, you can explore other layouts and top-edge treatments that designers use when incorporating zippers. The exchange between technique and design is where sewing becomes personal and meaningful. The result is not merely a bag with a zipper but a daily companion that carries your essentials with care and confidence. For a visual, step-by-step demonstration that complements the approach described here, refer to external resources that illustrate the process and offer additional tips for reinforcement and maintenance: https://www.instructables.com/How-to-Add-a-Zipper-to-a-Tote-Bag/
Final thoughts
Successfully inserting a zipper into a tote bag not only enhances the aesthetic and functional appeal of your products but also demonstrates a commitment to quality craftsmanship. By mastering the techniques outlined in this guide, business owners can ensure their tote bags stand out in a competitive market. The relevance of proper materials, careful preparation, and a keen eye for detail cannot be overstated. As you refine your skills, your products will reflect the professionalism and dedication your customers expect, ultimately elevating your brand’s reputation.