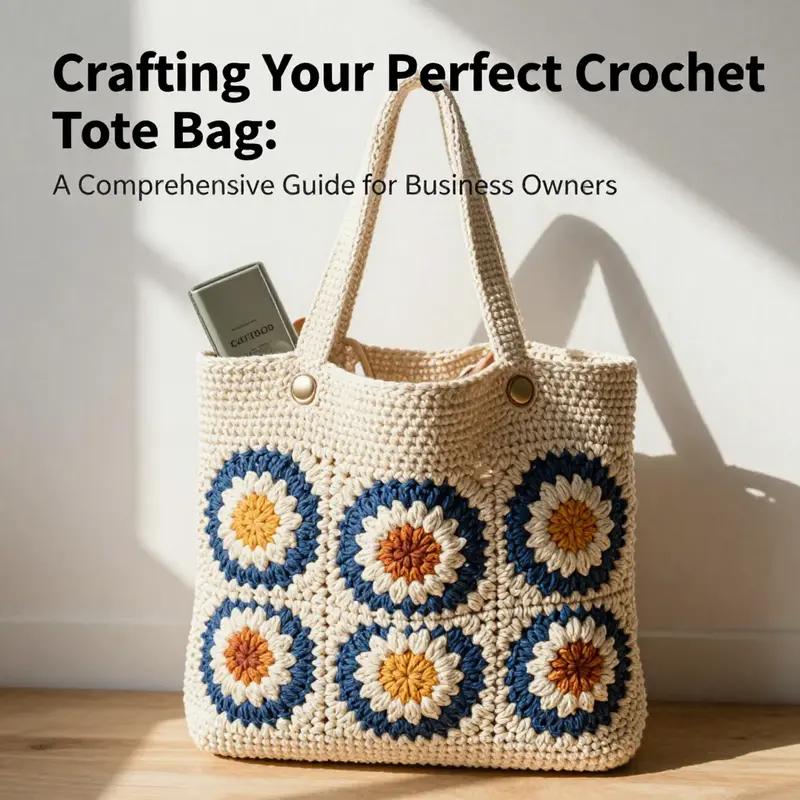
As businesses increasingly embrace unique, personalized products, crochet tote bags stand out as a worthy investment. Not only do they combine functionality with style, but they also offer opportunities for customization in a competitive market. In the following chapters, we will explore how to choose the right materials, plan effective designs, and select the appropriate stitch patterns to ensure that your crochet tote bags resonate with your brand vision and meet your customers’ expectations. Each chapter builds on the previous, providing your business with a holistic understanding of how to create durable and appealing crochet tote bags that your customers will love.
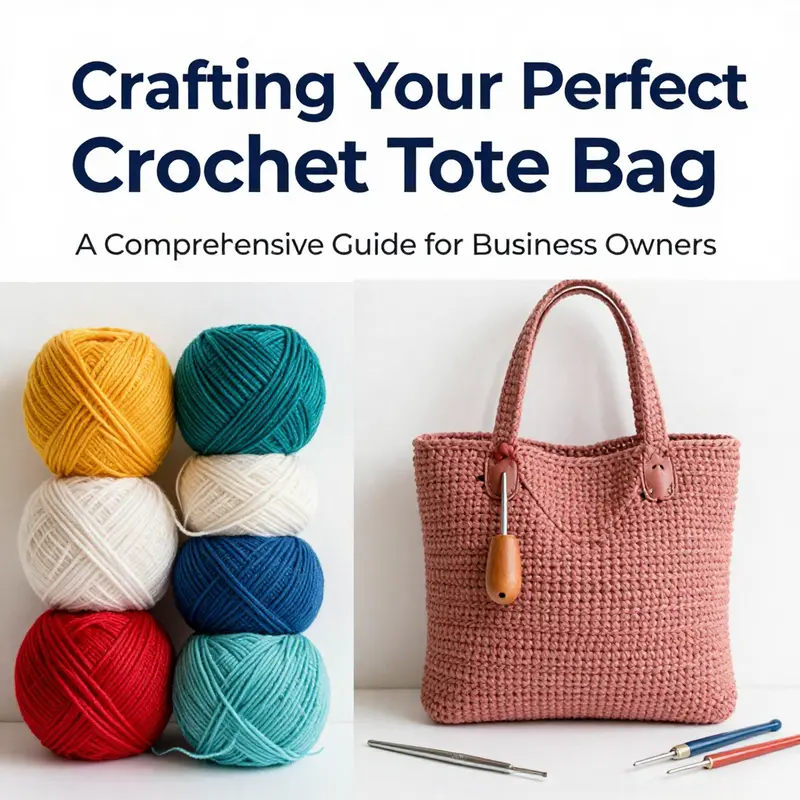
Material Matters: Choosing Yarns, Hooks, and Linings for a Durable Crochet Tote
Choosing the right materials for a crochet tote bag is more than a matter of texture and color. It is a practical decision that determines how the bag wears, how it holds its shape, and how it survives daily use. A tote sees weight, friction, and a fair share of snagging from zippers, pockets, and the occasional stray strap. The fibers you choose, the hook you use, and the reinforcement you add all work together like the strands of a braid: if one strand wanders, the whole bag can sag, stretch, or even fail under load. With that in mind, the materials you select should be guided by how you intend to use the bag, what you want it to carry, and how long you want it to last. The journey begins with yarn, then moves through the tools that shape your fabric, and finally reaches into the realm of structure and protection that keeps items secure and the bag pristine. The goal is to craft a tote that is not only beautiful but resilient, a companion for daily errands, beach trips, or weekend escapes that stands up to the test of time.
The yarn you pick is the backbone of the bag. For a tote that maintains its form, cotton or cotton blends are the most reliable classics. Cotton fibers are stiff enough to resist sagging under weight, they offer crisp stitch definition, and they handle frequent use with a level of ease that keeps your bag looking neat even after long stretches of daily wear. Mercerized cotton, in particular, adds a sheen and a tighter thread structure that further enhances durability. It tightens the fabric, helping your stitches hold their shape as the bag fills and empties. If you want a soft hand, but still crave structure, a cotton blend can balance cohesion and comfort. Acrylics or purely synthetic blends may be kinder on the budget or easier to care for in certain climates, but they can soften over time under heavy load, and their stretch characteristics are different from natural fibers. They also tend to show wear marks more quickly when used as a heavy-duty tote. If you’re drawn to an earthier vibe or prefer a rugged, thick fabric, consider variants like t-shirt yarn. Made from recycled cotton t-shirt fabric, this yarn delivers impressive thickness and strength, giving you a sturdy, chunky fabric that supports weight well. The bold texture can be studio-chic or frankly practical, depending on your fastening and lining choices.
Hook size is the second pillar of material decisions. The hook you choose has a direct influence on the fabric’s density, the tightness of each stitch, and ultimately the bag’s ability to bear weight. The general rule favors a slightly smaller hook than the yarn label suggests when you want a tighter gauge that resists sagging. For cotton and cotton blends, a standard range from 3.5 mm to 5.5 mm is common, but when you shift to thicker yarns like t-shirt yarn, you’ll often move up into the 8 mm to 10 mm territory. The 10 mm hook, in particular, is a popular choice for t-shirt yarn because it allows you to work quickly while maintaining an open, yet sturdy, fabric. The open weave can lend a contemporary, airy feel, but it requires extra reinforcement—usually a lining or a stiffening layer—to prevent small items from poking through and to maintain a clean silhouette. The hook is not just a tool; it is a partner in your bag’s performance. A well-chosen hook helps you control tension, reduces digging fatigue when you work for longer sessions, and ensures the fabric behaves the way you intend under load.
But materials are not only about the yarn and hook. Structural considerations matter just as much as aesthetics. A bag experiences constant friction along the base, sides, and handles. Over time, stress concentrates at the points where the handles attach. This is where reinforcement becomes a practical necessity. Many crocheters add an interior lining to isolate the yarn from the items carried inside. A lining protects delicate fabrics like lip balm tubes or sunglasses, and it hides the stray ends of yarn that can unravel under pressure. If a lining feels too much, you can opt for a lightweight stiffener, such as a thin sheet of interfacing or plastic canvas, placed between the lining and the outer fabric. The stiffener helps the bag hold a defined shape, reduces sagging, and prevents the base from spreading too wide under heavy loads. Think of the lining and stiffener as a system—together they convert a lush, soft crochet fabric into a dependable vessel for daily life.
The performance of a crochet tote is also influenced by how the fabric is constructed at the stitch level. For structure and stability, dense stitches are your allies. Single crochet and half-double crochet provide a compact fabric that minimizes gaps and reduces the risk of items slipping through the surface. If you gravitate toward decorative appeal, you might fall in love with openwork patterns like shell stitches or filet crochet. These patterns are visually striking, but they trade some practicality for airiness. They require a lining and a sturdy seam to ensure that the bag remains functional for carrying everyday items. Striped designs—whether horizontal, vertical, or diagonal—introduce visual rhythm. The color blocks can disguise minor irregularities in the fabric and conceal potential wear at the corners, but the underlying structure remains anchored in the choice of yarn and stitch density.
An important practical detail rests in the relationship between weight, fabric density, and the base. A round or flat base will influence how the bag deflects weight and how the sides behave as you fill it. A round base formed with careful increases can yield a tidy bottom that resists wobble when placed on a surface. A rectangular base built from a single piece can simplify construction and seam work, but you may need to add extra panels to ensure the sides meet evenly. The key is to imagine the bag in use before you begin. Lay out the largest books, a laptop, a water bottle, and any other items you expect to carry. Visualize the footprint in your mind, and translate that footprint into your base design. The goal is to keep the bag from sagging prematurely under load while preserving a clean, polished outline.
Weight distribution is a factor many beginners underestimate. A tote that accumulates weight unevenly will feel unbalanced and may strain the stitches along the longer edge. A practical approach is to distribute weight across the base and sides evenly by keeping the construction tight and the gauge consistent. A consistent gauge minimizes micro-gaps where items could slip or press unevenly on the fabric. If you notice that your fabric starts to stretch or become floppy after a few uses, you might consider reinforcing the handles or integrating a simple interior lining that provides a stable plane for the top edge to sit on. The goal is not to make the bag stiff to the point of discomfort but to create a dependable threshold where fabric fatigue is minimized and everyday items stay secure.
The material choices you make will also influence how you approach finishing touches. A fabric lining is not only decorative; it can dramatically improve durability. It acts as a shield between the yarn and the objects you carry, reducing abrasion and prolonging the life of the fibers. Lining also gives you a cleaner interior, where seams disappear from view and items glide in and out with less resistance. If you decide to skip lining, you can still achieve a tidier interior by finishing the seams carefully and sealing the yarn ends with a light coat of fabric adhesive or by weaving in ends with extra precision. Either path requires patience, but the payoff is a tote that stays neat and functional for months or even years.
In scoring the balance between aesthetics and practicality, the chosen materials should speak to your handling preferences and the bag’s intended use. For a grocery trip, a durable cotton blend teamed with a sturdy lining can tolerate weight and resist wear from rough surfaces. For a beach tote, a thicker t-shirt yarn can hold its own against sand and damp items, with a liner that keeps sun lotions and shells from snagging the yarn. For an everyday carry, a refined mercerized cotton gives you that crisp stitch definition and a refined sheen, paired with a fabric lining that folds neatly when the bag is empty. Each scenario shares a thread of common wisdom: match your materials to the task at hand, and the bag will do what you ask of it with grace.
When you begin to plan the project, you may search for guidance that aligns with your chosen materials. You will find that certain sources offer clear recommendations for beginners who want to balance ease with endurance. For instance, a simple tutorial often suggests starting with t-shirt yarn and a larger hook because that pairing emphasizes both control and strength. This approach is particularly forgiving for newcomers who are still dialing in tension. A straightforward starter project can teach you how to keep stitches uniform, how to keep edges even, and how to avoid unnecessary bulk at the seams. As your confidence grows, you can experiment with different fibers, switch to mercerized cotton for a more polished look, or add a subtle lining to elevate the final product. Your tote will evolve with your skill, and the materials will adapt with it.
The choice, however, is not made in isolation. It sits within a broader conversation about tote design and function. Material decisions influence not only how the bag looks but how it feels to use it. They affect how you move through the day with it on your shoulder or across your body, how easy it is to clean, and how the fabric responds to weather or humidity. If you are curious about a related topic that expands on practical tote design, you can explore a detailed guide on tote features and construction in a related article. This broader view helps anchor your material decisions in real-world performance, not just aesthetics. For a related read on tote features, see tote-bag-with-computer-sleeve.
In sum, the materials you choose set the tone for your crochet tote. They shape the bag’s personality—whether it reads as casual and bohemian or refined and structured. They determine how the fabric behaves under pressure, how well the base holds its shape, and how the top edge withstands constant handling. They influence your assembly choices, from the decision to add a lining to the choice of reinforcement. By prioritizing sturdy yarns, appropriate hook sizes, and thoughtful reinforcement, you build a tote that remains useful and beautiful through many seasons of daily life. The chapter you are about to read next will translate these material insights into a practical design plan, including dimensions and stitch choices that harmonize with your chosen fibers and hardware. The goal is not to overwhelm but to empower you to craft a bag that you will reach for again and again, a bag that embodies both craft and utility.
External resource: For a concise visual primer on bag making and beginner-friendly techniques, see a beginner crochet bag tutorial: Beginner crochet bag tutorial.
Design in the Stitches: Planning Dimensions, Handles, and Details for a Durable Crochet Tote
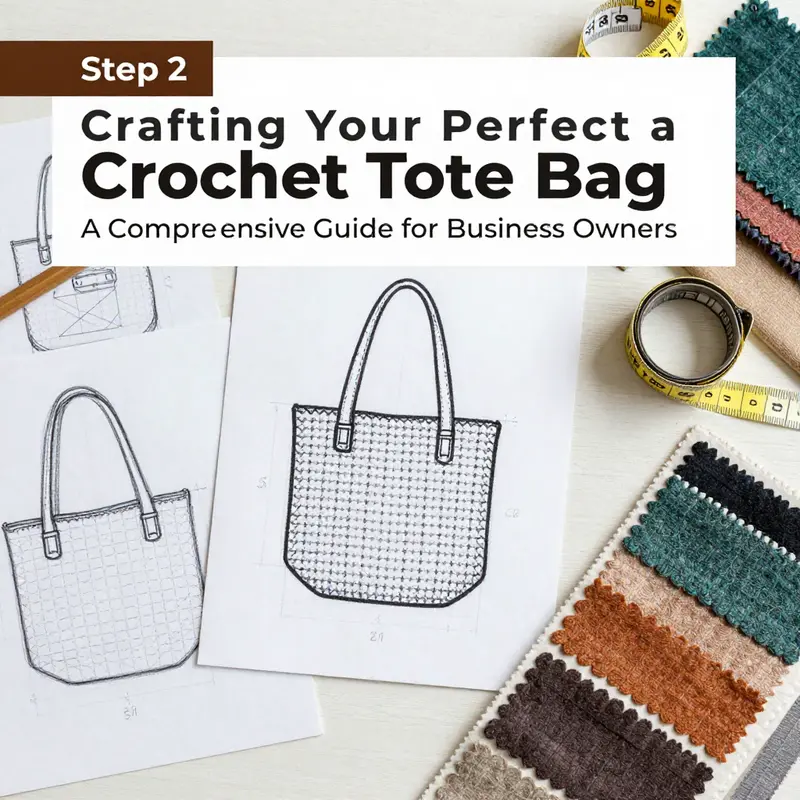
Planning a crochet tote starts long before you hook the first stitch. It is an act of imagining how the bag will meet daily needs, carry the weight of a life in motion, and still look graceful when you reach for it between meetings, markets, or a weekend at the park. The design you choose—its size, its pocket layout, its handles, and even the way its base sits on a table—will do more than hold contents. It will shape how you interact with your everyday routine, turning a simple yarn project into a reliable companion. The truth about tote bags is that form must follow function, yet function is not a dull calculus. It is a living conversation between what you carry, how you carry it, and how the bag makes every action a little easier. With that in mind, planning your tote becomes a careful, patient sketching of possibilities that will later translate into exact measurements and precise stitches. In this process, the bag’s future weight, its access points, and its balance all find their starting lines in a thoughtful design plan, one that respects both aesthetics and everyday practicality.
The heart of planning lies in sizing and proportion. Before you make any hook-clicking decision, you want a clear sense of how wide the bag should be across the opening, how deep it must extend into the body, and how long the handles should be to distribute weight comfortably. Start with the items you know you will carry most days. Picture a phone, a wallet, a set of keys, a small notebook, and perhaps a reusable water bottle. If you lay these items end to end and measure their combined footprint, you create a tangible footprint for the bag. A practical guideline emerges: if those everyday items stretch to about 18 inches in total length when laid out, aim for an internal width of roughly 16 to 18 inches. This window keeps the bag expansive enough for easy access while avoiding a gaping top that makes things jostle or slip out.
Depth is the next anchor. A tote should hold more than it looks able to contain. It should sit comfortably against your side or across your body and still close neatly. The depth you choose will depend on what you carry. If you are balancing a planner, a water bottle, and a compact umbrella, a depth of about 10 to 12 inches typically delivers enough space without the bag feeling top-heavy. In truth, the depth also interacts with the base shape you choose. A flat, rectangular base distributes weight evenly and is easier to stitch securely, while a round or oval base offers a more generous interior volume in a more compact footprint. Either choice works, but the key is to anticipate how the bottom will handle heavy loads and how the sides will expand or stay crisp under daily use. When you start sketching, you might even draw two quick outlines: a straight rectangle for a flat base and a circular or oval base for a roomier bottom. The exercise makes the eventual shaping feel deliberate rather than accidental.
Handle design is where ergonomics and style meet. The strap’s width and length determine how the bag feels when you carry it. A shoulder bag benefits from straps that are broad enough to distribute weight without digging into your shoulder. The rule of thumb here is a strap width of at least 1.5 inches. If you carry heavier loads or you want extra comfort, consider double straps. They quarter the weight and soften the pressure across both shoulders, especially when the bag is full. For a crossbody version, length becomes the critical dimension. A comfortable crossbody strap usually spans around 45 to 55 inches, depending on your height and how you prefer the bag to rest against your body. The design sketch should include the strap length in relation to your torso. You want the bag to sit at your hip or slightly lower when worn across the body, not flapping around the midsection or riding too high on the chest. The actual attachment points deserve attention too. Where you place the handles at the top opening influences how the bag sits when it’s resting on a tabletop or when you shoulder it. You want the weight to stay balanced and the top line to stay even and accessible.
To translate these dimensions into a workable crochet plan, you can work from a notional grid: a width target, a depth target, and two or more handle length options. The width and depth set the interior space; the handles define how you reach into that space. In practice, you might choose a couple of combinations to test within your gauge. If your chosen yarn and hook yield a slightly looser fabric than you planned, a minor adjustment can be made by using a hook a size smaller than recommended. Tightening the gauge adds structure and sturdiness, which matters when the tote will carry heavier items day after day. This small alteration often makes a noticeable difference in how the bag holds its shape as you continue to crochet and as you begin to test the bag with items inside.
The choice of stitch pattern becomes a conversation between texture, rigidity, and how forgiving the fabric is for daily use. Dense stitches such as single crochet or half-double crochet give you a robust, boxy silhouette that resists sagging and keeps small contents from slipping through gaps. They also help the sides and bottom hold their shape, even when the bag is loaded. On the other hand, openwork patterns like shell stitch or filet crochet offer decorative appeal and airiness, which can be appealing for lighter uses or spring and summer totes. The trade-off is that such patterns often require a lining to maintain practicality and security. When you sketch your design, plan around these realities. If the pattern you love is more open, anticipate lining or stiffening elements that preserve integrity and keep the bag from looking floppy under load.
The idea of reinforcement is more than a luxury; it is a design decision that keeps your tote practical for daily life. A lining not only protects the interior fibers but also adds a clean, finished look and helps items stay in place. If you choose to forego a lining, consider an internal stiffener such as interfacing or a lightweight plastic canvas insert. This approach preserves a slim, sleek exterior while offering the support needed to maintain the bag’s shape through repeated use. Your design sketch should include a note about reinforcement at the top edge, along the sides, and at the base where the most stress occurs. These reinforcement considerations are not afterthoughts; they are integral to achieving a tote that wears well and lasts without sagging or losing its crisp silhouette.
Another dimension to consider is closure and organization. A bag that closes securely prevents items from spilling out during a busy day, while pockets and interior dividers keep small items accessible rather than buried at the bottom. For closures, you can plan for a simple button or snap, or you might opt for a zipper in the top edge for a more secure seal. The placement of pockets—one large interior pocket for a phone and a smaller one for keys or coins, for instance—helps with quick access and keeps the interior tidy. When you map these features in your plan, you are not just decorating the bag; you are defining how it becomes a practical tool for your daily life. The weight distribution changes with each feature added, and so does the feel of the bag when worn or carried by hand.
Part of the planning process involves connecting the design with real-world use. To ensure your tote is proportionate to your needs, you can perform a tangible sizing exercise. Lay out the items you plan to carry, as mentioned earlier, and arrange them on a table. If you spread them out and measure their footprint, you can translate that footprint into an approximate internal width. For instance, if your daily items span about 18 inches across, you may want the internal width to be a bit wider to provide comfortable access. If you prefer a minimalist approach with tighter organization, you might settle for a slightly narrower width but compensate with more internal pockets. This kind of testing helps you avoid a bag that looks generous but feels cramped when you actually load it with daily essentials.
When you commit to a plan, you also commit to a process. The process involves choosing a base structure for the tote. A flat rectangular base stitched into the sides gives you a reliable foundation for a sturdy tote. A circular or oval base, started with a magic ring, can give you a different character and interior volume but calls for precise shaping to avoid wobble at the corners. The decision influences the initial measurements of the foundation and the way the rest of the bag expands upward. Your plan should reflect this foundation choice so you can maintain consistent gauge and seamless seams later in the project. The stakes are simple but significant: the bag must be stable enough to stand on its own when you place it on a surface yet flexible enough to fold slightly when you pick it up. Crafting the plan with these expectations in mind helps you approach the next steps with confidence.
In weaving together these design elements, it helps to anchor your plan with a single, memorable target. This target is not a pure number but a picture of how the bag will be used. A tote designed for daily errands may skew toward practical depth and a wide opening, with reinforced sides and a full length zipper or sturdy button closure. A beach tote might emphasize a roomy interior with a light, open fabric that breathes in the sun, paired with a broad shoulder strap to distribute weight across the body. A work tote may prioritize a laptop sleeve or a designated pocket, with precise interior compartments and a more formal, clean exterior. The point is not to lock yourself into a single outcome at the outset, but to hold a thoughtful vision that can guide your stitch choices, your internal reinforcement plan, and your finishing touches. The beauty of crochet is that your plan can evolve as you test swatches, draft the base, and begin to see how the fabric behaves as you add height and volume. The plan gives you a compass, not a rigid map.
As you refine your plan, you may decide to explore a practical example or two. Suppose you want a tote that functions as a reliable carry-all for daily life but maintains a stylish edge. You would sketch an internal width of around 16 to 18 inches to accommodate the items you typically carry. You would plan for a depth of about 10 to 12 inches, ensuring that the sides rise gracefully as you add height. You would position handles to balance comfort with accessibility, choosing shoulder straps at least 1.5 inches wide and, if needed, a double-strap arrangement for heavier loads. You would select a denser stitch pattern for structure, with a potential interior lining to guard against snagging and to keep the interior clean. You would decide on a closure, perhaps a magnetic snap or a sturdy button, and you would designate pockets in the interior for organization. All of these decisions originate from a single, carefully considered design sketch that translates your daily needs into a tangible crochet plan. When you write down these measurements and map the features in your notebook, you are not merely making a bag; you are drafting a reliable workflow for your everyday life.
For those curious about integrating modern design with practical function, consider a design scenario that blends technical detail with everyday chic. A tote designed with a laptop sleeve can be particularly appealing to people who move between work and study hubs. The sleeve adds protection and keeps the device separate from other contents, a feature that can be woven into the plan from the start. If you want to see how this concept translates into a real-world example, you can explore more on a related project noted in this guide. A tote with a computer sleeve demonstrates how your planning steps extend beyond aesthetics to address real ergonomic and protective needs. The idea is not to complicate the pattern but to anticipate the daily rhythm of your life and shape the bag accordingly. If you want to explore a practical reference for integrating features like a laptop sleeve into a crochet tote, you can look at the example linked here: tote bag with computer sleeve. This reference is not a product plug but a design reminder of how thoughtfully integrated features can elevate a tote from a simple container to a trusted companion.
As you finalize your plan, keep in mind that your gauge and your stitch choice are not separate from your dimensions. The chosen stitch will influence how large a swatch you should crochet before committing to the full bag. A quick gauge swatch gives you a gauge that informs your overall size and helps you refine the planned width, depth, and the final silhouette. By aligning the stitch pattern, gauge, and dimensions, you ensure that the final bag holds its shape under load, resists sagging, and remains easy to access. The planning process described here aims to blend precision with flexibility, ensuring your tote is not only beautiful in concept but also durable and practical in daily life. As you move from plan to execution, allow the sketch to remain a living document. Your plan should adapt to the realities of the yarn you choose, the hook you decide to use, and the way the fabric responds as you work through the rounds. This adaptability is at the heart of a successful crochet tote: a project that remains coherent as you translate numbers into stitches, and stitches into a reliable everyday tool.
In closing the planning phase, you should feel the difference between mere hopeful intentions and a concrete future product. Your design sketch acts as a contract between your intentions and your craft. It guides you through the choice of yarn weight, the tonal rhythm of color work if you add stripes, and the way you structure the interior. It also reminds you of practical contingencies: how much interior space you truly need for your daily life, how the weight will distribute across your back if you wear a crossbody style, and how the base and the sides will cooperate to resist wear. With a clear plan in hand, you can move confidently into choosing your stitch pattern, gauging your fabric, and starting to crochet the base. The plan, not the whim, keeps your tote on a path toward both function and beauty.
External resource note: for a broader perspective on planning durable crochet bags that balance style and practicality, you may find the following external guide helpful. Mastering Crochet Bags: A Step-by-Step Guide to Creating Stylish and Durable Handbags offers in-depth guidance on design principles, materials, and reinforcement strategies that can complement this planning approach. https://www.allfreecrochet.com/crochet-tote-bag-guide/
Stitch by Stitch: Crafting Structure and Style Through Tote Bag Stitch Patterns
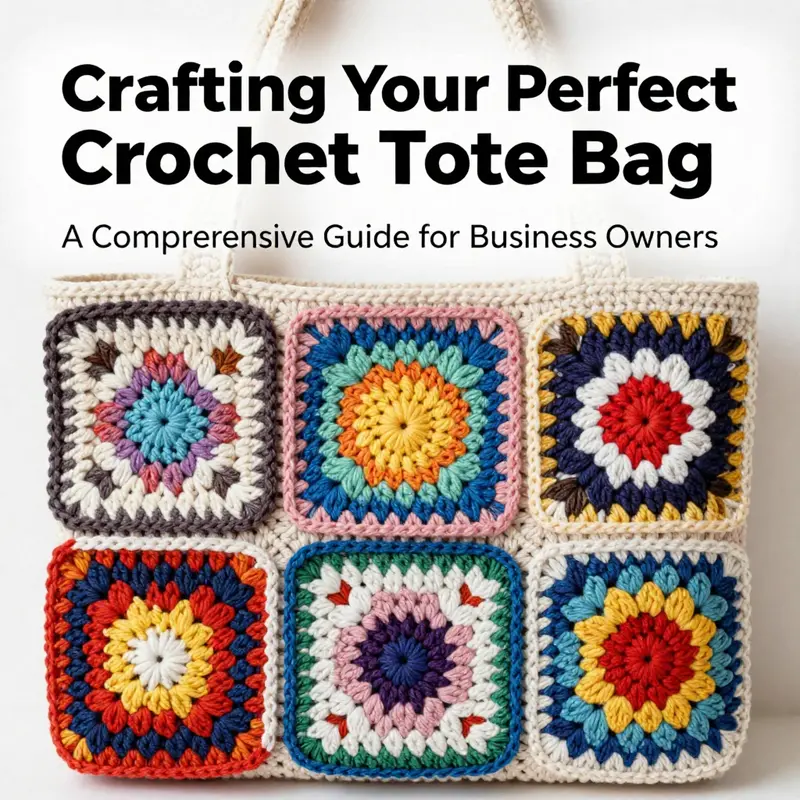
Choosing the right stitch pattern for a crochet tote bag is more than a matter of looks. It is a design decision that determines how the bag wears, how it handles weight, and how it communicates your personal style in everyday use. The stitch you pick becomes the bag’s backbone, shaping its body with density and texture, guiding how it drapes, how it stands when you set it down, and how easily you can slide items in and out without catching on loose threads. In this chapter, we move beyond the basics of yarn and size to explore how different stitch families translate into real-world performance. The goal is not to chase a single perfect pattern but to understand how to read the language of stitches and then translate that language into a tote that feels true to you: sturdy enough for daily errands, refined enough for a weekend market, or playful enough for beach days and casual outings.
As you begin the conversation with your yarn and hook, you’ll notice that the stitch choice influences the bag’s structure as surely as choosing the fabric and lining. Dense stitches like single crochet and half-double crochet create a fabric that resists sag and maintains crisp edges. They knit together a panel that stands up to weight, resists the pull of heavy contents, and minimizes gaps through which small items might slip. This is the kind of foundation that makes sense for a tote intended for books, groceries, or a laptop sleeve in a dedicated pocket. The tighter nature of these stitches also helps the bag hold its shape when you set it down or when it rests on a shoulder, as the fabric resists stretching and the sides stay straight rather than billowing outward. For beginners and seasoned crocheters alike, starting with single crochet or half-double crochet gives you a sturdy canvas that frames your design decisions rather than fighting with the fabric itself.
Openwork patterns, on the other hand, invite airiness and visual drama. Shell stitches, filet crochet, and even certain clusters of double crochet create lace-like textures that catch light and movement. They offer a light, breezy aesthetic—perfect for a summertime tote or a casual city bag meant to complement a sunlit outfit. But open patterns come with trade-offs. The fabric tends to be more pliant, with wider gaps between stitches that can allow smaller items to peek through if the bag is used heavily or carried loosely. For this reason, if you choose openwork, it’s wise to plan for lining and perhaps a light interfacing on the interior to stabilize the bag’s interior and maintain modesty of contents. The pattern’s beauty is undeniable; the practicalities, however, hinge on your willingness to add a lining or reinforce the top edges to preserve security and shape.
Color and pattern interaction also plays a powerful role. For a modern, bold look, color-blocked designs and striped totes can read as contemporary art in crochet form. Large blocks of solid color across panels or rows create crisp horizontal or vertical rhythms. Stripes—in horizontal, vertical, or diagonal orientations—offer rhythm and movement that can be tailored to your body size and carry style. Color changes should be planned with attention to tension and float management. You’ll want to decide whether to carry color changes smoothly along the row or to cut and weave in ends for a cleaner finish. Carrying a color along the back can help maintain a neat exterior, while cutting and weaving ends requires a little more finishing work but can result in a cleaner surface with less bulk. The key is to harmonize color with stitch density so that your tote’s energy isn’t overwhelmed by a single loud stripe or a crowded mosaic of hues.
A practical way to imagine your stitch strategy is to map a small scale fabric in a bag concept across the tote’s dimensions. The base and sides will determine the essential silhouette, while the top edge and handles demand a balance of comfort and durability. If your plan is a sturdy carryall that sits up well on a flat train table or a cafe corner, you’ll likely favor dense stitches that resist distortion. If the goal is a light daily tote for lighter items, you might embrace the elegance of openwork and lean into a reliable lining to prevent slippage and enhance durability. Your design should reflect both your hands’ comfort and your daily needs. It should reward the time you invest with a bag that behaves predictably, lasts through countless trips, and still feels like you when you carry it across a busy street or a quiet park trail.
To make the concept tangible, envision a plan: imagine a tote that uses a tight single crochet pattern for the body, accented with a single row of shell stitches at the top edge for a decorative finish. The shell row adds texture and a hint of elegance without sacrificing structure. If you want a more geometric look, consider a color-block pattern that uses solid panels of color joined with a simple seam, letting each panel stand on its own while the seam provides a crisp boundary. For a beachy vibe, a wide stripe of openwork at the midsection can evoke waves while still maintaining enough firmness at the base to prevent sag. Each decision influences the bag’s weight distribution; denser stitches add heft and strength, while openwork creates lightness and airiness that is ideal for warm days but calls for careful lining.
When you choose stitches, think about how the fabric will handle weight. A tote’s purpose often dictates its resilience. For a bag meant for groceries or books, density is your ally. You’ll want to work a slightly tighter gauge than you might use for a garment, and this is where adjusting hook size becomes a practical tool. By opting for a hook size that tightens the weave, you reduce gaps and make a more reliable surface for carrying items. The same logic applies when you notice a pattern’s tendency to stretch along the sides as you fill the bag. A denser fabric supports the weight more steadily, while a looser weave invites the sides to push outward under load. The small choice of hook size, then, becomes a quiet, powerful lever that makes your stitch pattern perform in real life beyond the page of a pattern chart or a tutorial video.
The design principle that stitches directly influence function is nothing new in crochet, yet it remains a guiding truth as you plan a tote. You may start with a favorite stitch or two but must be mindful of how the chosen pattern behaves when carried, how it sits on the shoulder, and how it resists the temptation to sag when loaded. You’ll likely find yourself running a quick swatch in the same yarn and hook you intend to use for the final piece. This tiny piece of fabric in miniature becomes a test lab for the real bag. It helps you understand how dense your fabric will be, how the pattern aligns from panel to panel, and whether your color changes will look crisp or soft. A swatch that behaves as you expect gives you confidence to translate the design into the full tote without surprises at the seams or along the top edge.
Another layer of consideration is how your stitch choice interacts with panel construction. If you plan a round or oval base, you may need to modify your increases so the base lays flat without bunching. Dense stitches respond differently to shaping than openwork patterns; the way you introduce increases and the rate at which you do so will determine whether your tote grows gracefully or warps. A shell-stitched front panel, for example, might require careful pairing with a solid back panel to preserve stability. Similarly, when using stripes or color blocks, you’ll want to align color changes across panels to keep color transitions visually coherent. It is the attention to these details—garnered from habit, practice, and a careful reading of your yarn’s character—that elevates a tote from a pleasant craft to a designed companion for daily life.
In pursuit of a cohesive, handcrafted look, you’ll often balance asymmetry and symmetry. A single bold stripe can become a focal point, while multiple panels with consistent stitch edges can give a formal, tailored feel. The choice of stitch also affects how you join panels. Dense stitches tend to hide seam lines, creating a nearly seamless look when joined with a careful mattress stitch-like technique for crochet. Openwork or filet patterns, by contrast, reveal seams more readily unless you work them thoughtfully and align edges with the same stitch pattern across joins. If you’re new to joining, plan ahead. Sketch a rough pattern of how panels will align—base, sides, front, back—and note where color changes occur. You’ll thank yourself later when the bag’s surface remains smooth and the seams disappear into the fabric rather than interrupting the rhythm of your chosen stitch pattern.
To synthesize these ideas into action, imagine a practical workflow for stepwise execution. Start with a decisive choice of primary stitch family: dense stitches for a sturdy core or openwork for a light, decorative accent. Then decide where to place the emphasis: a strong, dense body with a lighter, more decorative opening at the top, or a uniform texture throughout with small color accents to highlight edges and seams. Next, map your color plan. If you’re using stripes or color blocks, plan your color sequences to ensure a balanced visual weight along the bag’s height. Finally, translate the plan into the chain, rows, or rounds that form the base, the sides, and the top edge. The process is iterative. It rewards patience, swatch-testing, and honest assessment of how your yarn behaves as you work, ensuring that your final tote feels like a natural extension of your style and your daily routine.
If you’re feeling inspired by how stitch choices translate into contemporary tote aesthetics, you can explore current tote-bags-trending resources for a pulse on what’s resonating in design circles today. The essential takeaway remains straightforward: the stitch pattern you select is not merely a decorative decision; it is a practical mechanism that governs structure, load distribution, and long-term durability. A tote bag is a living piece of craft that carries your everyday life. The right stitch pattern helps that life feel integrated, dependable, and beautiful with every use.
As you move toward finalizing your stitch plan, keep the broader context in mind. The same principles that guide garment construction tension, gauge, and fabric behavior under load apply here with even greater clarity, because a bag must withstand repeated handling, friction against bodies and surfaces, and the pressure of contents. Cotton and cotton-blend yarns are often favored for tote bodies precisely because they hold shape well and provide crisp stitch definition. You may experiment with mercerized cotton for a subtle sheen, but you should also be mindful of potential stiffness if the yarn is very smooth and dense. The hook you choose, usually a touch smaller than the label suggests, becomes a subtle ally in tightening your weave and ensuring a durable fabric with minimal stretch. The goal is to create a tote that not only carries load gracefully but also adheres to the look you envisioned when you imagined it in your hands.
And so the journey through stitch patterns becomes a journey through your own design sensibility. The best totes emerge when form follows function, and function follows your daily needs and habits. A bag that feels reliable in the moment you lift it from the chair, that keeps its shape under a heavy grocery haul, and that still looks crisp when you reach for it in a crowded street, is the product of careful stitch choice, thoughtful planning, and patient execution. You’ll learn which patterns respond best to certain loads, how to adjust tension to prevent sag, and how to align color and texture to render your tote not just as an object but as a companion for life. In time, your approach to stitch selection will become second nature, and your finished tote will reflect both skill and personality in every row you complete.
External reference for broader context and deeper technical insight: https://www.crafty.com/guides/crochet-china-tote-bag-explained
Final thoughts
Creating crochet tote bags not only provides a unique product offering but also enhances brand loyalty through customization and quality craftsmanship. By choosing the right materials, planning effectively, and selecting appealing stitch patterns, your business can produce bags that speak to customer needs while reflecting your brand identity. With the insights provided, you can confidently embark on your crochet bag-making journey, transforming a simple idea into a successful product line that resonates with your market.