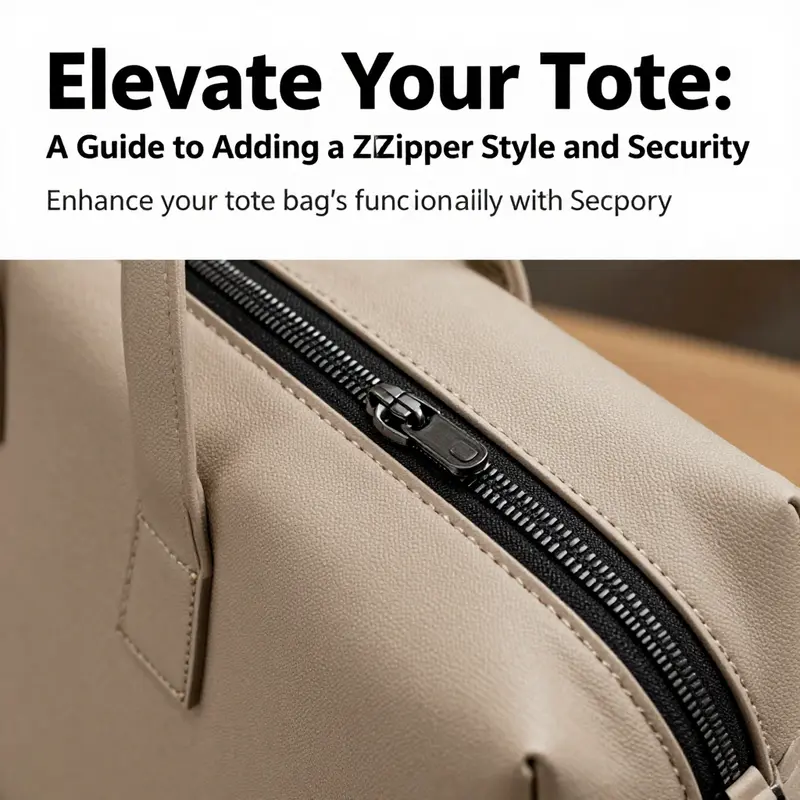
Adding a zipper to a tote bag transforms its utility and style, making it an essential upgrade for both creators and consumers. For business owners, particularly those in the fashion or crafting sector, understanding how to seamlessly integrate a zipper into a tote bag can significantly enhance product appeal. This guide will walk you through a detailed step-by-step process, delve into the necessary materials and tools, and outline common pitfalls to avoid to ensure a professional finish. By the end of this article, you will possess not just the technical know-how but also the confidence to elevate your tote offerings.
null

null
Tools First, Then Tactile Finish: A Thorough Look at Materials and Tools for a Zipper-Top Tote
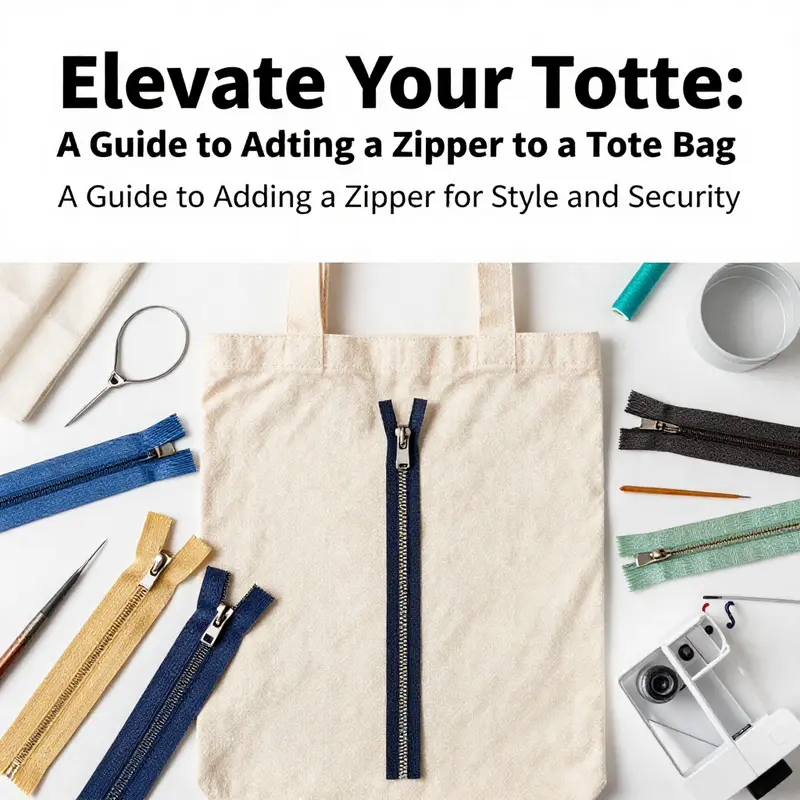
When you decide to turn a plain tote into a zipper top, you change more than the bag itself. You change how you carry, what you can secure, and how the bag feels in your hands. The zipper is the heart of that transformation, a hinge between function and form. To make the change smoothly and reliably, you need to assemble a careful lineup of materials and tools. This chapter expands on that lineup, turning a shopping list into a practical, confident plan for every stitch you will make. It is not just about what you buy, but about how the choices you make affect the bag you end up with. The goal is a tote that looks polished, wears well, and performs like a small, mobile organizer that travels with you. With the right zipper, lining, and supportive features, a tote can gain a sense of purpose that matches its size and style.\n\nFirst comes the zipper. The choice here matters as much as the color or finish of the fabric. For a tote, a flexible coil or nylon zipper is preferable to a rigid metal zipper, especially when the top opening curves around corners. A zipper that resists kinking and snagging keeps the bag neat, even when you stuff it full or when the bag is pressed in and out of a bus or car seat. The length you pick should match the opening of the tote so that you do not end up fighting with extra fabric or exposed edges. The common range for tote openings is typically 8 to 12 inches, a span wide enough to let your hand reach in easily while still keeping the interior secure. If you are unsure, choose a zipper that is a bit longer rather than shorter, then trim or adjust as you go. That extra length can be handled by folding or wrapping the end inside the pocket of the tote while finishing the seam, so you avoid compromising the top edge.\n\nThe zipper is only as good as the surrounding fabric and structure. You should plan for a lining that mirrors the outer fabric or complements it, creating a clean frame around the zipper. A sturdy outer fabric helps the bite of the zipper grip without sagging, while a well-fitted lining supports the zipper tape and provides a smooth underside for the interior. Fusible interfacing is an option worth considering when you want additional body. It acts like a lightweight bone in a garment, preventing the outer layer from collapsing toward the zipper and offering a crisp edge that holds its shape when you grip the top. If you decide to employ interfacing, apply it to the outer fabric before you begin assembling the bag, ensuring the edge where the zipper sits remains flat and stable throughout the process.\n\nThread is the silent strength behind every seam. Matching thread blends with the fabric so that the stitches disappear into the surface, giving the finish a quiet, professional look. In practice, you will often choose a thread that blends with the outer fabric for the top stitching and a slightly lighter shade for the zipper pass while sewing the lining. The thread you choose should be strong enough to endure repeated opening and closing of the zipper without fraying. If you plan to add a zipper pocket inside the tote, your thread choice can echo the pocket fabric to unify the overall look. When you stitch near the zipper, the thread will be visible along the tape side if you are using a lighter fabric, so a careful color match makes the assembly nearly invisible.\n\nThe tools you gather also shape the experience of sewing with a zipper. A good pair of scissors or a rotary cutter helps you cut fabric and zipper tape cleanly. Sharp blades matter because jagged edges will misalign the zipper or create pull points that weaken the seam. Pins or clips keep the zipper in place while you sew. It is easy to underestimate the need for secure pins or robust clips, especially when you are dealing with the two layers of fabric and the zipper tape. A compact ironing board and a hot iron make the top edges crisp, a small but powerful detail that frames the zipper neatly and helps prevent bulk. Pressing seams flat around the top edge helps to prevent any warping as you work. The goal is a zipper installation that looks integrated rather than tacked on. A clean edge makes the upper line of the bag feel deliberate, a sign of careful workmanship.\n\nWhen you work with metal zippers, you sometimes need extra precision tools. Needle nose pliers can be handy for adjusting the slider or stops if you are repositioning a broken or misaligned part. If you plan to secure the zipper ends with metal stops, you will want to have the stops and slider in the right size for your zipper. If you prefer a no metal option, the same pliers can be used to hold fabric or tape during a tight maneuver, but a flexible coil zipper is less demanding on the learning curve and is kinder to curves and corners. The zipper slider is the piece that makes the opening usable, so ensuring you have the correct slider for your zipper type is essential.\n\nMeasuring tools are deceptively simple but central to success here. A ruler or measuring tape ensures you place the zipper correctly in relation to the tote’s opening. You may mark guidelines on the fabric with chalk or a fabric pen to outline where the zipper will sit. The recommended guideline for many patterns is to mark a rectangle that is 1 inch tall and about 1.5 inches from the top of the pocket or top edge. This helps you keep the zipper alignment consistent on both sides and reduces the chance of asymmetry as you sew. The idea is to create a clear, repeatable reference that your hands can follow while sewing, especially when you move from outer fabric to the liner and back again. A simple, measured approach pays off in cleaner corners and a zipper that sits evenly along the top.\n\nThe architecture of the tote matters as much as the hardware you choose. You need the right materials in the right places, including the lining and any reinforcement. The lining should be compatible with the outer fabric in weight and drape. A lining that is too stiff can fight the zipper, creating tension that makes the top edge bulge. Conversely, a lining that is too light can shift during sewing and reveal imperfect seams. A midweight lining often yields the most forgiving results for a zipper top. If you want the interior to hold its shape even when the bag is lightly loaded, a layer of interfacing or a lightweight fusible can be applied to the outer shell before sewing. This step gives the tote a level of structure that helps the zipper sit neatly along the top edge and protect the seam lines from twisting when you carry the bag.\n\nThe methods you choose to attach the zipper are shaped by the tools at your disposal. With a sewing machine, you can create a neat, compact seam that sits just beneath the zipper teeth for a tidy finish. If you do not have a machine, or if you enjoy a hands-on approach, a no-sew option exists. Speed-Sew fabric glue is a reliable alternative in a pinch for lightweight fabrics or when you want to avoid the potential heat of an iron on delicate materials. The glue method requires careful application to avoid seepage beyond the intended seam line, and you must allow ample drying time before you handle the bag further. The glue should be compatible with both the fabric and the zipper tape, and it is wiser to test on a scrap piece first to confirm that adhesion remains strong after folding and pressing.\n\nAlong with the practicalities, the aesthetic choices deserve thoughtful attention. The color and finish of the zipper influence not just the function but the look of the bag. You can select a zipper that blends with the outer fabric for a quiet, cohesive appearance, or choose a bright zipper to introduce a pop of color and texture. A decorative zipper can become a design feature, especially when the rest of the tote remains simple. When you plan your color scheme, think of how the zipper will catch light and how the seam across the top will present once the bag is in use. A zipper that wears in the same tone as the fabric helps the edge read as a natural extension of the bag, rather than a separate piece.\n\nBeyond the zipper itself, you will need a few additional accessories to round out the project. A zipper slider and stops are standard with most zippers, but you may need to supply them separately if you are working with a specialty zipper. If you are working with metal hardware or if the zipper is longer than the opening, you might consider extra slider reinforcements at the ends to prevent snagging. A small hand sewing kit can be a lifesaver for finishing touches such as closing the lining gap after turning the bag right side out or for final topstitching along the top edge for extra reinforcement. The final topstitching line is where seam allowances are anchored and where the zipper feels secure to the touch, a moment that reveals your patience and care in the finish.\n\nWhen you consider the full setup, the materials and tools map onto a simple truth: how you begin determines how well you finish. The first step is a clean, steady workspace with good light. Lay out the outer fabric and lining, along with the zipper and any interfacing you plan to use. Mark your guidelines precisely and align the zipper tape with the edge of the outer fabric. Place pins or clips to keep the layers aligned as you sew or glue. If you choose to use a sewing machine, set the stitch length to a fine but sturdy setting. A standard length in the range of 2.0 to 2.5 millimeters often yields a seam that is durable yet not overly bulky. When you approach the zipper, keep your hands calm and steady, guiding the tape along the edge with minimal tension so the teeth remain perfectly engaged as you stitch. If you go with a no-sew approach, apply a thin line of fabric glue along the zipper tape, press the edge to the fabric, and weight the bond with a small stack of books or weight while it dries. After the glue sets, you can perform a light topstitch along the zipper edge to help the bond stay flush with the fabric and keep the top edge neat.\n\nPattern and pattern preparation matter as well. If you are constructing a tote from scratch, design your pattern to accommodate a zipper top. The top opening should be about 2 inches wider than the zipper length to allow for seam allowances and for you to slide the zipper into place without fighting the fabric. This margin gives you space to align the edges neatly and lets you test the zipper position before final stitching. The ability to test the fit matters in particular when you are new to zipper installation. It is better to check and correct on a scrap piece or a practice panel than to discover a misalignment after you have sewn the entire bag. The practice process helps you learn the feel of the tape against the fabric and how gentle pressure at the top will flatten the seam. It turns a potentially nerve wracking moment into a controlled, confident routine.\n\nIn addition to the standard outer shell and lining, you may want to add an interior pocket or a dedicated zipper pocket. The pocket can be placed along the interior lining to hold keys, coin or cards, breaking the interior into zones that help you locate items quickly. If you choose to add a pocket, you will need a small piece of fabric and a short length of zipper for the pocket opening. The pocket idea is both practical and stylish, offering a tactile moment of satisfaction when you unzip to reach something small without exposing the entire interior. It also demonstrates how the zipper becomes a framework for thoughtful design, not just a functional element.\n\nAs you gather your materials, you may find a preference for a particular workflow. Some sewers prefer to attach the outer panels first, then insert the lining, leaving a small gap for turning the bag inside out. Others build the entire exterior, finish the top edge, and then insert the lining to seal the interior. Either approach works, so long as you maintain consistent seam allowances and protect the zipper seam from shifting during assembly. Consistency matters because the moment you commit to a method, your hands will follow a familiar pattern. That pattern reduces mistakes and ensures predictable results, which is especially valuable when you are new to adding a zipper. The overall aim is a tote that feels balanced when carried and appears crisp when looked at from the outside. The zipper sits flush with the top edge, the lining edges meet neatly, and the stitches hold their line over time.\n\nTo close the loop on this materials and tools overview, reflect on how each element serves the whole. The zipper is the centerpiece, but it relies on the surrounding structure for durability and beauty. Without a sturdy outer fabric, a good zipper can sag and lose its alignment. Without a lining that supports the seam, the interior can feel flimsy and uneven. With interfacing, a zipper sits confidently along the edge, resisting distortion. Proper threading ensures the seam lasts and the finish remains clean. Choosing the right combination of coil, length, and color turns the zipper from a utilitarian component into a design feature that harmonizes with the tote. The tools you choose influence ease and precision. Sharp scissors, well-set clips, a steady iron, and the right adhesives or stitches all contribute to a reliable top edge that will perform day after day.\n\nIn the end, this materials and tools perspective is not merely a shopping list; it is a set of decisions that shape the experience of sewing a zipper into a tote. The process rewards careful preparation, thoughtful choices, and a calm approach to the work. When you begin with a clear plan and the right kit, the path from pattern to finished bag becomes a sequence you can repeat with growing confidence. The result is not only a more functional bag but a small work of crafted design you can be proud to carry. If you are curious to see more patterns and variations that instructors and makers explore when they add zippers to totes, you can find a broader range of ideas in the collection dedicated to zippered tote designs. For readers who want to broaden their toolkit, visit tote bags with zippers.\n\nAs a closing thought, keep in mind that the zipper is not a hurdle but a doorway. It invites you to rethink how your bag stores and reveals its contents. It invites you to make material choices that reflect your taste and your needs. And it invites you to practice with intention, knowing that each stitch builds a stronger, more thoughtful tote. The tools you gather and the materials you select are the first conversation you have with your future bag. Let that conversation be steady, clear, and deliberate, and your zipper top will not only perform well but also carry a quiet, enduring elegance into every day you use the bag. For additional inspiration and a deeper look at how different fabrics interact with zipper top designs, you may wish to consult a broader range of sources and examples as you plan your next tote project.\n\nExternal resource: https://www.pinterest.com/pin/1234567890/
The Seam-Savvy Guide: Avoiding Common Pitfalls When Adding a Zipper to a Tote Bag
A zipper upgrade can transform a simple tote into a secure, organized carryall. It adds both practicality and a touch of polish, turning a casual bag into something that feels finished and dependable. Yet even skilled makers run into familiar missteps when they add a zipper to a tote. The goal of this chapter isn’t to overwhelm with a long checklist, but to offer a steady, fluid understanding of the decisions that keep the project moving smoothly from start to finish. When you understand where tensions tend to appear and how fabric behaves under pressure, the moment of stitching the zipper becomes a moment of confidence rather than a puzzle. This is less about clever tricks and more about thoughtful preparation, precise alignment, and careful finishing. It’s about letting the zipper do what it’s meant to do: open wide enough to reach inside, close securely, and add structure to the bag without fighting you at every turn. As you read, picture your tote as a small architectural project—widths, curves, and seams that must cooperate for the whole to function with ease. The path to that outcome begins long before the needle touches fabric and ends only after a final press has settled the surface into a crisp, neat edge. In that spirit, we move through the decision points that commonly trip people up and propose simple, repeatable practices you can apply to any tote with a zipper at its opening.
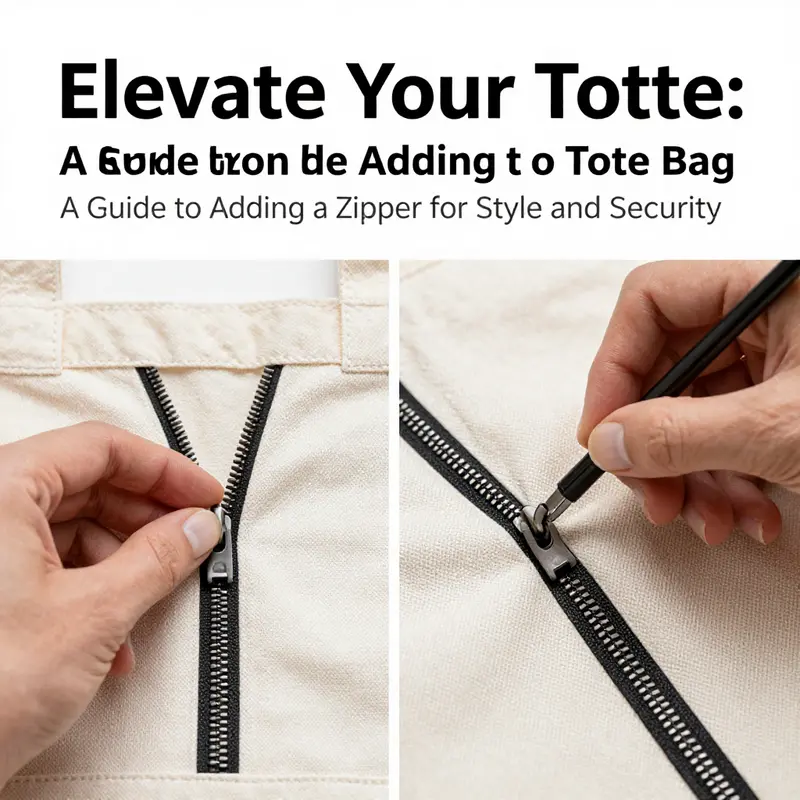
First, alignments and general geometry matter more than the choice of zipper brand or the color of the thread. The opening of the tote has a natural line—the top edge where the zipper sits. If that line isn’t perfectly straight or if the zipper isn’t centered, the slider will feel resistance even when there’s nothing in the bag. A common error is to position the zipper tape along the edge without checking that the teeth are truly parallel to the cut edge. The remedy is straightforward: sew with the zipper facing the wrong side of the outer fabric, pin or clip generously, and then recheck the alignment by closing and opening the zipper a few times before you stitch. This moment of micro-adjustment saves hours later when you discover an off-center edge after you’ve joined the outer panels. If you ever notice the zipper teeth pulling away from the edge as you stitch, stop, reclip, and resew. A single mi-nute pause now can save a cascade of tiny misalignments across the seam allowances.
Second, the size of the zipper must be chosen with the bag’s opening in mind. A zipper that’s too short will leave the bag looking incomplete and items more exposed than you’re comfortable with. A zipper that’s too long can introduce bulk into the top edge and complicate turning the bag right side out. Measure the width of the opening carefully, then select a zipper that is about 1–2 inches longer than that measurement to account for seam allowances and the time you’ll need to ease the zipper into place. For a typical tote, a 7–10 inch zipper often hits the sweet spot, but if your pattern creates a broader opening or you’re incorporating curved corners, you may opt for different lengths. When in doubt, a slightly longer zipper allows you to trim or hide extra length in the seam rather than wrestling with an enclosure that won’t close cleanly. Remember: you’re building a frame for function as much as for style, and the zipper is the hinge that makes that frame work.
Third, reinforcement at the zipper ends cannot be overemphasized. Those ends are points of stress, especially if the bag will carry heavier items or be opened and closed repeatedly. If you skip reinforcement, the fabric can begin to tear or the zipper might sag away from the opening, producing gaps that undermine security and aesthetics. Reinforcement can be achieved through extra stitching across the ends, a dab of fusible interfacing behind the zipper tape near both ends, or a small patch of sturdy fabric backing that reduces strain on the seam. The goal is simple: distribute the pull and weight away from a single thread line that could fail under load. If you’ve ever worried about the zipper popping free from the fabric at the end of a long day, you’ve felt the truth of this tip. Small, deliberate extra stitches or a thin stabilizer make a big difference over time.
Fourth, the finishing of raw edges is a quiet but critical step. It’s common to rush this part, especially if you’re eager to see the zipper take its place. Frayed edges soften the line and can create a ragged appearance at the top of the bag. Finishing edges before you even pin the zipper makes future assembly smoother and neater. You can use pinking shears to trim and seal edges, a zigzag stitch along the raw edge, or a serger if you have one. The important part is that the edge beneath the zipper and along the top remains stable and resistant to unraveling with use. When the edges are clean and aligned, the zipper sits more evenly and the final topstitching looks crisp rather than hurried.
Fifth, the choice of fabric and a touch of structure can dramatically affect the result. If the outer fabric is particularly soft or loosely woven, it may stretch as you sew, leading to a skewed zipper line. In that scenario, an element of fusible interfacing on the outer fabric where the zipper sits can provide welcome rigidity. This is not about making the bag stiff but about ensuring the top edge holds its shape long enough for the zipper to glide smoothly and for you to finish the seam with clean lines. The interfacing acts like a quiet exoskeleton that supports the zipper’s work without adding bulk at the sides where the bag curves. If you choose to use interfacing, apply it precisely where the zipper will anchor, then fuse and trim to shape so that the outer edge remains flush and even.
Sixth, the actual sewing technique matters as much as the planning. When you attach the zipper tape to the outer fabric, begin with pins or clips at regular intervals rather than placing a handful of pins at only the ends. This approach helps you keep the tape perfectly aligned with the edge as you feed the work through the machine. Sew with a straight stitch, keeping a seam allowance of about 1/8 inch from the zipper teeth. If your machine’s foot tends to skip near metal elements, it’s wise to choose a coil or nylon zipper for the top edge rather than a rigid metal zipper that can snag on curves. For curved corners, you’ll often find that the flexible teeth of a coil zipper accommodate the shape better and reduce the risk of misalignment at the turn.
Seventh, there’s a rhythm to combining the outer panels and the lining that makes or breaks the final look. After the zipper is attached to the outer front panel, you’ll join the outer panels along the side and bottom, leaving the top open. Pressing the seams flat helps the two layers sit evenly as you insert the lining. When you place the lining inside the outer bag, right sides together, you create a sandwich that can be stitched around the top perimeter. It’s tempting to rush this step, especially if you’re eager to finish, but the alignment along the top edge is what will determine how neatly the lining sits and how well the zipper sits flush. Leave a small turning gap in the lining (about 3–4 inches) so you can turn the bag right side out later. The turning gap is not a defeat; it is a bridge to the bag’s final, polished form.
Eighth, the moment you turn the bag right side out is a small ceremony in the sewing process. You’ll use a blunt tool—like a chopstick or the end of a wooden pencil—to nudge the corners cleanly into place. A well-turned bag shows the difference between a project that looks homemade and one that looks crafted. It’s easy to slip the corners and seams a little during turning, but a careful touch here can produce a clean silhouette with crisp corners. After you’ve turned the bag, you’ll close the lining gap with a neat whipstitch or machine stitch, depending on your preference. The aim is to finish invisibly from the outside while preserving intact, tidy edges inside.
Ninth, the final act of securing the zipper opening is where many people forget the gentle fold and press. You want the raw edges of the zipper opening to fold inward so the top edge stays neat and stable. Pressing helps the fabric to stay flat as you topstitch along the upper edge of both the outer and lining layers. The topstitching acts as a frame for the zipper and reinforces the seam that carries the daily load of the bag. If you’re adding a zipper pocket inside, this is a good moment to decide whether to incorporate it into the same top edge line or to place it as a discreet interior feature. Either choice has its charm, but ensure you’ve allowed for the extra seam lines and the space the pocket will require.
Tenth, the overall finish is as much about attitude as technique. The moment you test the zipper by moving the slider across its length, you’ll know whether the top edge is balanced and the fabric sits correctly. If the zipper binds or the opening feels stiff, recheck the alignment, the zipper length, and the extent of the seam allowances. A smooth glide is a signal that the whole system—fabric, zipper, and stitch length—has found its cooperative rhythm. In contrast, a stiff opening often betrays a misalignment or insufficient easing along the top edge. If you’ve encountered that stiffness, go back to the alignment stage, loosen a pinned segment, reposition, and gently re-sew. Small, patient adjustments pay off with a bag that, in daily use, feels easy in the hand and elegant on the street.
Alongside these practical steps, there are a few broader ideas that can help you avoid the most common missteps at a glance. First, treat the zipper as a design element, not a last-minute add-on. Let the top edge’s width determine how generous the zipper is and how much room there is for seam allowances. Second, think about the bag’s intended use. If it will carry heavy books or a laptop, the reinforcement and stabilizing choices become more critical. Third, don’t underestimate the power of a well-chosen zipper color or finish. A zipper that subtly echoes the bag’s fabric or lining creates a cohesive, deliberate look that signals thoughtful craft.
If you’re exploring more patterns and variations, a quick browse of tote designs with zippers can offer inspiration and practical cues for pattern adjustments. For example, a resource focused on tote bags with zippers provides a wide array of approaches to the same problem you’re solving—the balance between function and style at the bag’s opening. You can explore this idea further here: tote bags with zippers.
The journey from a plain tote to a zippered version is not merely about installing a metal fastener; it’s about shaping a controlled, repeatable process that preserves the tote’s clean lines and its usability. Each step—from aligning the zipper to reinforcing the ends, from finishing the raw edges to the final topstitch—contributes to a finished piece that looks and behaves like a design object as much as a practical carrier. The best results come from pausing at key thresholds: before you sew, you check the geometry; before you cut, you measure with care; before you finish, you test the glide. When you treat this as a small but exacting project, the act of adding a zipper becomes a satisfying, almost meditative practice rather than a rushed chore.
As you gain familiarity, you’ll notice how the same principles apply to variations you might choose later: a longer zipper for a tote with deeper depth, a curved zipper that highlights a rounded top edge, or an internal zip pocket that creates a secure nook for keys and cards. None of these changes requires abandoning the careful approach you’ve learned here. They simply extend it, by applying the same insistence on alignment, reinforcement, and clean finishing to new shapes and purposes. The result is a tote that feels sturdy in hand, balanced in line, and confident in use—a bag that not only carries items but carries the promise of careful craftsmanship.
For further guidance that expands on these fundamentals, you may find it helpful to consult additional step-by-step demonstrations that emphasize the tactile, real-time aspects of zipper installation. A well-regarded external resource offers an in-depth, visual walk-through that complements the strategy outlined here, providing a broader set of techniques for different tote shapes and zipper types. External reference: https://www.sincerelyshantelle.com/2021/07/add-a-zipper-to-any-tote-bag.html
Final thoughts
Incorporating a zipper into a tote bag not only adds a layer of security but also elevates its aesthetic appeal, making your products more marketable. By following the step-by-step guide provided, gathering the right materials, and avoiding common mistakes, you can ensure a smoother integration process. This vital skill can enhance your product lines and satisfy customer desires for functional and fashionable carry-alls. By mastering this technique, business owners can effectively differentiate their offerings while meeting evolving consumer demands.