
As a business owner, the ability to create functional and visually appealing tote bags can significantly enhance your brand identity. Lined tote bags are not only practical but also offer a stylish solution for customers, making them an excellent promotional tool. This comprehensive guide will cover everything from sourcing the right materials to providing a step-by-step process for sewing your tote bags. Lastly, discover tips and customizations that can make your bags stand out in the competitive market, ensuring both utility and uniqueness that resonates with your customers.
From Fiber to Finish: The Essential Materials Blueprint for Sewing a Durable, Lined Tote Bag
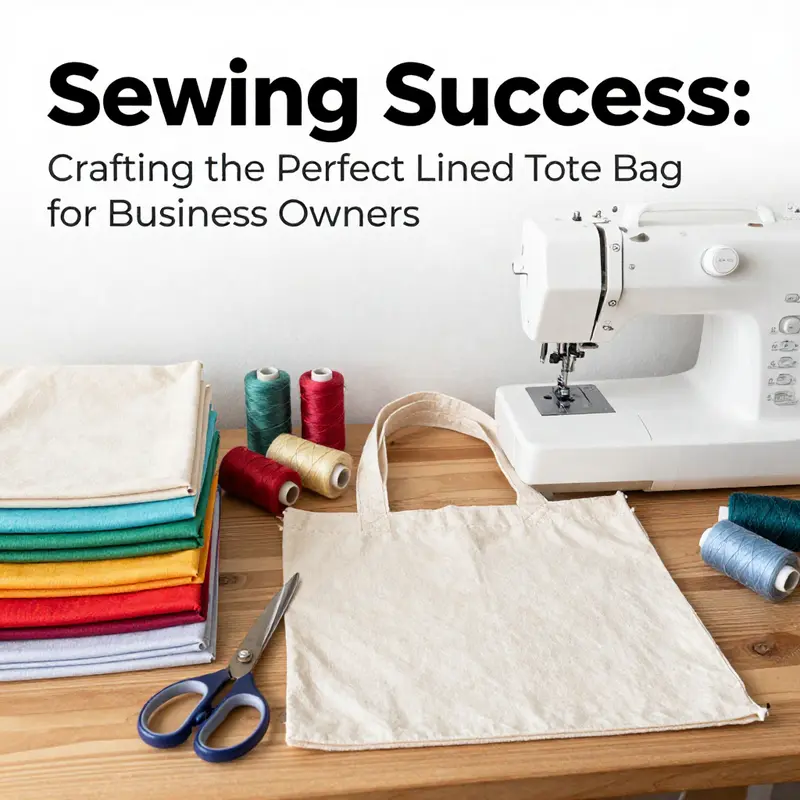
Choosing the right materials is not merely a preliminary step; it is the backbone of a tote that lasts, feels good in the hand, and accommodates the everyday rhythm of daily life. When you sew a lined tote bag, you’re not just stitching fabric; you’re shaping a dependable companion for groceries, books, laptops, water bottles, and the countless small items that travel with you. The materials you select—outer fabric, lining, interfacing, threads, and hardware—set the tone for durability, drape, weight, and even the ease with which you can clean and reuse the bag. A thoughtful approach to materials also helps you tailor the bag to your own needs and style. If you want a tote that wears well over time and still looks fresh, begin with a plan that treats fabric weight, fiber content, and finish as integrally as the seams themselves. In this steady, methodical process, you’ll discover that the hardware of sewing—scissor sharpness, the bite of a good needle, the glide of an iron—becomes as crucial as the design lines themselves. The aim is not merely to assemble fabric into a bag; it is to craft a sturdy, expressive container that adapts to what you carry and how you carry it, season to season, year to year.
The outer fabric is the first impression of your tote. It endures the rough-and-tumble of daily life, the occasional spill, the shoulder-strap tug, and the occasional rain shower. So weight and weave matter. Durable options like canvas, heavy cotton, and sturdy denim have a natural resilience that suits a tote designed for frequent use. They tend to hold their shape, resist pilling, and accept a bit of hard-wearing wear without losing their character. If you choose to repurpose old jeans, which can be an environmentally friendly and creatively satisfying option, inspect the fabric for clean seams, recovered patches that won’t catch, and an even color and weight across the panels. Reclaimed denim adds a tactile texture and a casual, robust aesthetic that many sewists love. Before you cut, consider pre-washing your outer fabric. A gentle presoak helps minimize future shrinkage and reduces the risk of color transfer onto the lining. It also gives you a clearer sense of how the fabric will behave once the bag takes shape—and it helps you plan for any slight color transfer or finish changes that might occur after the first wash. When you choose the outer fabric, think about how its color and texture will harmonize with the lining and with any decorative details you want to add later. A smooth, lighter inner surface can brighten the inside of a large bag, but if the lining is too slippery, items may slide around. A tougher, more structured lining fabric can help the tote maintain its shape even when it’s loaded to the brim.
The lining, which forms the interior envelope of the bag, is equally central to the final feel of your project. The lining’s weight and drape influence how the bag opens, how easily it fills, and how neat the interior looks when you reach inside. Lightweight to mid-weight fabrics such as quilting cotton or polyester blends are popular for linings because they glide against the outer fabric, don’t cling excessively, and are easy to press flat along seams. A lining that is too stiff can make the tote feel boxy and awkward to use, while a lining that is too soft may not hold the bag’s structure well. If you’re working with a plush or heavy outer fabric, an intermediate-weight lining can balance the overall heft and help the bag hold its shape as you load it.
To further define the structure, many sewists opt for interfacing, especially for a softer lining or a more supple exterior that still needs to stand up to daily use. Interfacing, whether fusible or sew-in, supplies the extra body that helps the bag resist sagging. It’s a quiet, effective partner to the pocket and seam lines, giving you a crisp top edge and a sturdy form when the bag is standing upright. Deciding whether to interface is often a matter of how the bag will be used. A market tote, meant to carry heavier items, might benefit from a light layer of interfacing along the bottom panels and side seams to preserve its silhouette. If your lining fabric is already of a reliable weight, you may choose to skip interfacing for a softer, more flexible bag that folds neatly into a tote in a larger purse or backpack.
Thread and needle choices are the invisible choreography that keeps your seams secure through wear and washing. Matching thread to your fabrics is a basic guideline, but there are nuances worth noting. A sturdy, mid- to heavy-weight thread works well with denim and canvas; it holds up to stress along the bottom seam where the bag bears weight. If you’re pairing light lining with a heavy outer, try a thread color that blends beautifully with both fabrics so the stitch line remains quiet and unobtrusive. The needle size should align with fabric thickness and the number of layers you’re stitching through. A heavy-duty needle, in the range of size 90/14 to 100/16, is often ideal when working with denser materials or multiple layers. When you switch fabrics, test a scrap piece to confirm that the needle doesn’t leave deep perforations or cause skipped stitches. This is where the ritual of a well-tuned sewing station—an iron, a good pair of scissors, a sharp blade, and a steady hand—becomes more than habit; it’s a guarantee of a clean, durable seam.
Tools, while seemingly mundane, deserve mention for the quiet confidence they lend you as you sew. Sharp fabric scissors are essential for clean edge finishes, while a smaller pair of snips helps tame threads and trim thread tails with precision. A rotary cutter can be a friend when you are cutting multiple layers or long strips, especially if you treat the fabric with care to avoid shifting. Pins or clips keep the layers perfectly aligned as you stitch; interchangeable clips can reduce the chance of fabric distortion along curved edges. A reliable ruler or measuring tape helps you mark cut lines with accuracy, reducing misalignment in the final top edge. An iron and ironing board are not mere pleasantries; they are the difference between a bag that looks rushed and a bag with professional polish. Pressing seams flat, pressing corners of the outer bag and lining, and giving the entire finished piece a final press before topstitching create a crisp, neat look that endures.
The straps, perhaps the most visible part of the tote’s personality, deserve careful planning. Straps can be made from the same fabric as the outer bag or chosen from the lining or a contrasting material. A typical tote strap length is around 24 inches, but this is a personal consideration that often depends on your height, how you intend to wear the bag (shoulder or crook of the elbow), and the bag’s overall width. Wider straps distribute weight more comfortably on the shoulder, but they also alter the silhouette of the bag. If you choose fabric straps, you’ll be folding them longways and sewing along the long edge for strength. Turning them right side out and pressing the fold line before topstitching along both long edges adds a polished finish. Some makers prefer to insert a small amount of interfacing into the strap channels to preserve shape and prevent stretching over time. If you’re using a separate strap material such as webbing, you’ll also need to consider the hardware that anchors the straps and the stitch density that will hold up to heavier loads.
Cutting and assembling the bag become a dance of measurements and mindfully prepared layers. Start by deciding your bag size—an everyday medium tote commonly measures about 12 inches wide and 14 inches tall, with a 1-inch seam allowance to account for finishing. For the outer fabric, cut two rectangles with the width increased by 2 inches to accommodate the top hem and the bottom, and for the height, likewise add room for the top edge and the bottom. The lining follows the same dimensions, ensuring that when the outer bag is turned right side out, the lining sits neatly inside. The straps are cut separately to your chosen length and width. A small but essential tip is to mark the fabric and pattern with a fabric pencil or chalk so you can trace the lines precisely. Pattern use or template copying is a small but powerful step that prevents miscuts and ensures symmetry between the front and back panels. As you cut, stay mindful of grain direction and pattern matching, particularly at seams that may face the bag’s exterior or visible areas. Align the grain so the bag wears evenly and does not skew or twist over time.
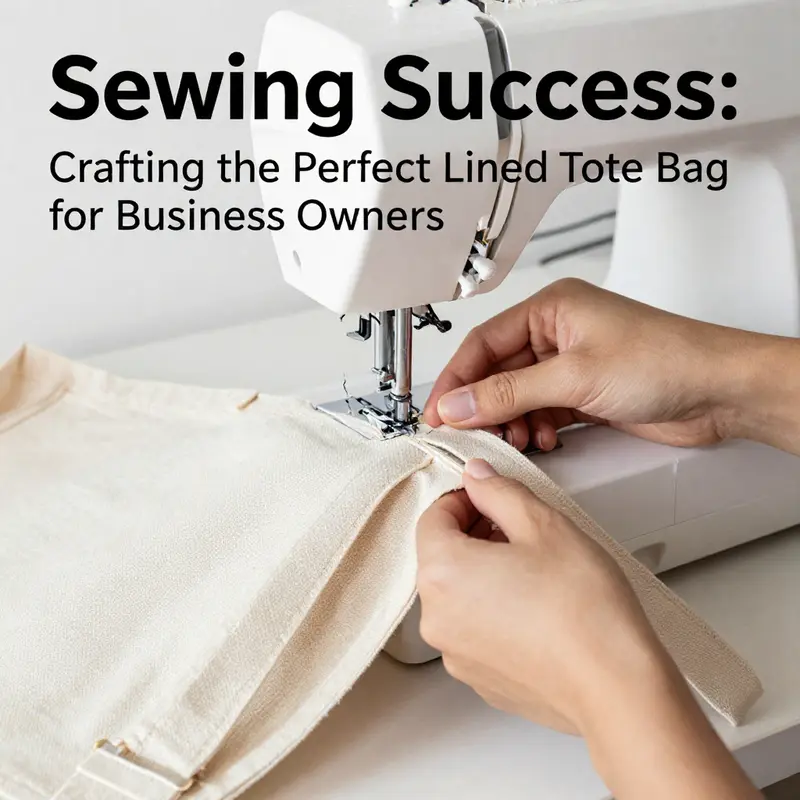
With the pieces cut, the next phase is to prepare the straps and commence the assembly. If you’re making fabric straps, fold each strap in half lengthwise with right sides together, then press the fold to lock the line. Sew along the long edge with a narrow seam allowance—about 1/4 inch (6 mm)—to secure the tube. Turn the strap right side out using a turning tool or a slender pin and gently push the fabrics through to connect the edges. A final press followed by topstitching along both long edges gives the strap a crisp, durable finish. If you’re working with leather or webbing for the straps, you’ll adapt the technique accordingly, ensuring the ends are reinforced and securely anchored into the bag’s top edge. The outer bag body then progresses from its two right-sides-facing pieces to a boxed, finished form. Clip or pin the sides and bottom edges, then sew with a 1/4-inch (6 mm) seam allowance. The corners—where the base folds into the side seams—are often clipped diagonally to minimize bulk when turning the bag right side out. After stitching, turn the outer bag right side out and press the seams flat. A neat finish here sets the tone for how the entire bag will feel when in use.
The lining mirrors this process. Sew the two lining pieces together at the sides and bottom, then turn the lining right side out and press. This parallel journey—outer and lining—helps you appreciate how the two fabrics will interact once the bag is assembled. When the top edges are prepared, you’ll align the two bags in a heartening symmetry: outer and lining wrong sides facing, top raw edges aligned, and the entire circumference clipped around the edge. Sewing around the top edge with a 1/4-inch seam creates the essential joint that unites the two layers while preserving the interior’s clean finish. After you’ve sewn the top edge, trim the seam if necessary; a little trim reduces bulk and helps the layers lie flat when you turn the bag right side out.
Attaching the straps introduces a small but meaningful moment of craftsmanship. Position one strap at the upper corner of the front piece, where the side seam meets the top edge. Align the strap’s raw edge with the top edge and pin firmly. Repeat for the opposite side. The stitch here should pass through all layers—the outer fabric, the strap, and the lining—so you gain strength without sacrificing a clean appearance. A backstitch at the beginning and end of this step reinforces the seam. Some patterns place straps only on the outer bag before joining it to the lining; others sew around the entire top edge, then close the bag by turning the lining to the outer side. Whichever method you choose, the key is consistency and balance, ensuring straps lie flat and evenly spaced for comfortable carrying. The next phase—joining the outer bag and the lining—appears technical, but it is a quiet exercise in alignment. Place the outer bag and lining inside out, so their wrong sides face each other. Align the top raw edges around the entire circumference and pin. Sew around this top edge with a 1/4-inch seam allowance, creating a unified shell with the outer material now visible on the outside when turned right side out. If there is excess fabric near the seam, trim it carefully to reduce bulk and avoid a lumpy finish.
Turning and pressing bring the bag to life. Gently pull the entire assembly through the opening you have sewn, so the outer bag sits on the outside while the lining tucks neatly inside. The key moment here is to push the fabric until the bag sits correctly and the lining is fully contained. A decisive press along the top edge yields a crisp, professional look and helps the top edge sit evenly when you eventually topstitch. If you’re keeping the top edge exposed without a zipper, a neat topstitch around the entire circumference reinforces the structure and emphasizes the clean alignment of the exterior and interior layers. A zipper option, when chosen, adds a security feature and a different visual rhythm. If you decide to add a zipper, insert the zipper into the top opening with right sides together, pin the zipper tape to the top edges, and sew with a zipper foot. Close the zipper and press the area flat. The decision to include a zipper changes the line of the bag slightly and requires precise alignment of the zipper teeth with the top edge so that the finish remains smooth and functional. The resulting interior reveals a tidy seam allowance while the exterior glows with the chosen fabric’s texture and color.
Final touches bring the entire project from functional to refined. Topstitching along the outer and lining top edges not only strengthens the seam but also produces a subtle, decorative finish. A contrasting thread can draw the eye to the top edge and highlight the bag’s construction, or you can keep to a tonal thread for a quieter, more cohesive appearance. Trim any loose threads, check that all seams are flat, and ensure there are no fabric distortions along the top edge. If you included a zipper, ensure the zipper pull glides smoothly and is aligned with the bag’s center when closed. The final responsibility of craftsmanship lies in the small, steady details: even spacing, consistent seam allowances, and careful pressing. These choices influence how the bag behaves under load and how well it holds its shape after repeated use. As you consider embellishments or internal organization, you might add a simple pocket to the lining for keys or a phone, or you may inset a small patch pocket to keep loose items in place. Such modifications are optional but they demonstrate how materials and structure can be adapted to fit personal needs and style preferences.
The discussion of materials is not a lonely one; it connects directly to how you intend to use the tote day after day. If you carry a laptop or a heavy notebook, you may want a more structured base or reinforced corners, which you achieve with careful interfacing and a slightly heavier outer fabric. If you travel light, a softer, more flexible tote can feel welcoming and easy to maneuver. In any case, the choice of fabrics, weights, and finishes will shape the bag’s behavior—the way it expands with content, how it sits in your hand when you carry it, and how it washes and wears over time. A well-chosen combination of outer fabric, lining material, and interface, together with thoughtful construction, yields a tote that remains faithful to its form through daily adventures and occasional rough handling.
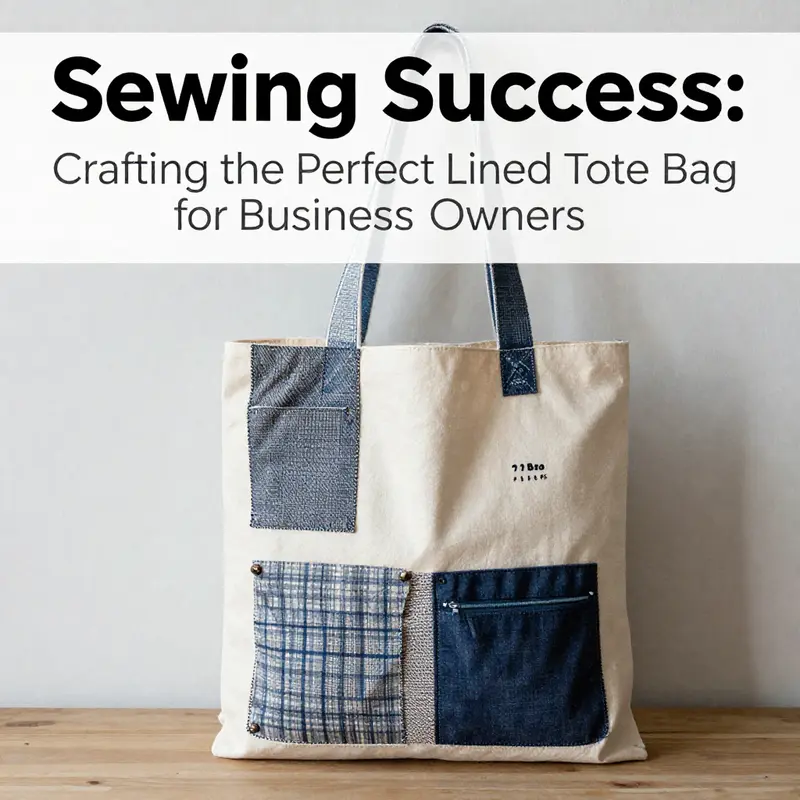
To see how flexible and resourceful this approach can be, imagine the tote worn as part of a casual outfit, with denim panels on the outside and a lighter lining that catches the light as you reach inside. The tote’s silhouette stays true because the materials were chosen for their compatibility and resilience. If you have a passion for customizing or upcycling, you can adapt this blueprint to a variety of fabrics and textures, from a rugged canvas to a soft, light-weight quilted lining, always aiming for balance between weight, durability, and practicality. For those who enjoy a sense of continuity across projects, keeping a small notebook of fabric weights, fiber contents, and care instructions helps you repeat successes and avoid common mismatches in future projects.
In the spirit of practical learning, this discussion nods toward a broader spectrum of resources that can deepen your understanding. If you’re inclined toward understanding how a tote evolves from an idea in a sketch to a finished piece, you may explore patterns and techniques that emphasize the relationship between fabric weight, stitch density, and final appearance. The journey from selecting a sturdy outer fabric to finishing the top edge with precision is a journey in careful planning and disciplined execution, one that becomes more intuitive with experience. As you practice the sequence—from cutting to finishing—the process becomes less about following a rigid recipe and more about forming a personal language with fabric, thread, and seam. The result is a durable, stylish tote that not only carries your items but also carries your craftsmanship forward into every next project.
For those who want a deeper dive into material choice and practical variations, a related resource on tote construction and fabric choices offers detailed perspectives on how different fabrics behave in tote designs and how to tailor the pairings to specific use cases. This can be a helpful companion to the material-focused approach outlined here and can broaden your options when you decide how your next tote should feel and perform.
If you’d like to explore a related pattern that discusses combining patterns and practical variations in tote construction, consider looking into hands-on guidance that aligns with the themes of this chapter. tote bags with zippers provides a sense of how a zipper closure can alter the bag’s utility and appearance, offering another layer of choice when you plan your project.
As you close the fabric door on this materials-focused chapter, hold on to the idea that the bag is more than a container. It is an instrument of daily life that reflects your choices about weight, texture, function, and finish. The decisions you make at the outset—outer fabric weight, lining compatibility, interfacing, and the type of closure—will echo in every seam and every topstitch. Your tote becomes a mirror of your habits: how you organize, how you carry, and how you care for it. With the materials chosen thoughtfully, you set the stage for a long, satisfying relationship with your sewing projects, a relationship that grows more confident with each completed bag.
External reference for further study: How To Repurpose Old Jeans Into A Functional Tote Bag Step By Step.
From Thread to Tote: A Cohesive, Step-by-Step Journey to Sewing a Lined Tote Bag
Sewing a lined tote bag is more than assembling fabric and thread; it is a small, deliberate journey from planning to a finished, functional object that can become a daily companion. The beauty of a lined tote lies in the balance between simple construction and careful finishing. When you learn to read the process as a sequence of deliberate actions rather than a list of tasks, the project becomes less intimidating and more enjoyable. This chapter unfolds in a steady, continuous flow, inviting you to feel the fabric breathe as you press, stitch, and shape it into a sturdy carrier that can carry groceries, books, or a farmer’s market haul with equal grace. The heart of the method rests on solid preparation, thoughtful design choices, and attention to finish that elevates a basic tote into a polished, durable piece of work you’ll be proud to reuse again and again.
Begin with a clear image of the bag you want to sew. A standard medium tote provides a versatile starting point: a width of around 12 inches (30 cm) and a height of about 14 inches (35 cm), plus a comfortable seam allowance and a top hem. This frame gives you enough volume for daily essentials while staying manageable for a beginner and forgiving for a sewing enthusiast who loves tidy results. The outer fabric and the lining should be of the same weight family so as to wear evenly over time. Durable fabrics such as cotton canvas, denim, or linen stand up to daily use and are easy to work with on a home sewing machine. Gather your outer fabric, your lining fabric, and, depending on your preferences, a zipper for a secure top closure. The zipper is optional; many tote shoppers prefer the clean, open top for easy access and a lighter finish, especially if the outer fabric is sturdy and the bag will be carried by hand or slung over a shoulder.
To begin, lay out your materials in a clean workspace where you can cut confidently. You will cut two outer fabric pieces and two lining pieces of the same dimensions. The exact measurements depend on the bag size you choose, but a practical approach is to add a 2 inch (about 5 cm) allowance to the width and height to accommodate the top hem and the bottom shaping. If you are aiming for a standard bag, cut two outer rectangles and two lining rectangles with a finished width of the bag plus 2 inches and a finished height of the bag plus 2 inches. The straps or handles also need two long strips. Straps can be 2 to 3 inches wide (about 5 to 7.5 cm) and as long as you desire; commonly 24 inches (60 cm) works well for shoulder wear. The strap construction can follow your preferred approach—either fabric straps that are folded and stitched or prepared straps made from a separate strap material. If you choose fabric straps, you will want to press the edges and finish with a top stitch along the long sides to create a crisp, durable strap. The act of preparing straps is a moment of visual reassurance, a quiet ritual that sets the tone for the entire project: a strap that feels firm and smooth in your hands.
With your pieces cut, turn your attention to the handles. If you are making fabric straps, fold each strap in half lengthwise, wrong sides together, and press the fold flat. Sew along the long edge with a narrow seam allowance, typically around 1/4 inch (6 mm). Then turn the strap right side out, using a turning tool or a small safety pin to guide the fabric through. Press the strap flat again and topstitch along both long edges to ensure a professional finish. The strap quality often dictates how sturdy the bag feels when carried; a well-made strap will transmit load evenly to the bag without digging into your shoulder. While you are at it, consider whether you want decorative or functional topstitching. A small contrast of thread color can add a refined touch, especially if the outer fabric has a subtle texture.
Next, you assemble the outer bag body. Place the two outer fabric pieces together with right sides facing. Pin or clip the sides and bottom edges, being precise with the alignment so that corner points meet cleanly. Sew along the pinned edges with a 1/4 inch (6 mm) seam allowance. After sewing, clip the corners diagonally; clipping reduces bulk and makes turning the bag right side out easier and neater. Turn the outer bag so that it is right side out, and press the seams flat. A crisp seam line at the sides and bottom immediately signals the quality you are aiming for. The same care you apply here will carry through the lining and the final assembly, reinforcing the sense of craftsmanship in the finished piece.
The lining deserves the same careful treatment as the outer fabric. Repeat the process with the two lining pieces: place them right sides together, sew along the sides and bottom, clip the corners, and press the seams. A practical tip is to press the lining seams in the direction that reduces bulk and creates a neat, compact core for the bag. Some sewists like to topstitch along the top edge of the lining, about a 0.2 cm from the edge; this step creates a clean, defined edge and adds a subtle amount of strength to the top. If you plan to add pockets to the lining, this is the moment to position them and stitch them in place. A simple interior pocket can hold keys or a phone, and a zippered interior pocket offers secure storage for small items that you do not want to lose in the bag.
With both the outer and the lining pieces prepared, you now decide how you want to attach the handles and then join the two bodies. The conventional approach is to attach the handles to the outer bag first. Place the outer bag face down, and position one strap at the top corner of the front piece where the side seam meets the top edge. Align the strap’s raw edge with the top edge of the bag and pin it in place. Repeat for the other side. Then sew through all layers—the outer fabric, the strap, and the lining—at the top edge using a strong straight stitch. Reinforce by backstitching at the beginning and end of the seam to prevent pull-out under load. Some patterns prefer attaching the straps to the outer bag before assembling it with the lining, and the choice depends on your own workflow and how you prefer to manage bulk during sewing. There is merit in either approach; what matters is that the attachment is secure and the strap sits evenly so the bag hangs correctly when worn.
After the handles are secured, you move to the moment when the outer bag and the lining come together. A seamless, sturdy join is essential to the overall structure. Place the outer bag and lining inside out, so their wrong sides face one another. Align the top edges, ensuring that the raw edges line up in a neat circle. Pin or clip around the entire top edge to stabilize the layers. Then sew around the top edge with a 1/4 inch (6 mm) seam allowance. This seam is the backbone of the tote, linking the two fabrics while allowing the bag to maintain a pleasing, rigid silhouette. If your pattern calls for a more traditional finish, trim any excess fabric near the seam, being careful not to cut into the stitching. The act of joining the outer and lining is not merely a mechanical step; it is where the bag begins to reveal its final shape and purpose, and where your fabric choice will start to influence the bag’s character, whether that be a crisp, minimalist tote or a more relaxed, slouchy silhouette.
Turning the bag right side out marks a pivotal transition. Gently pull the entire assembly through the opening you just created, so the outer bag now sits outside while the lining rests inside. A sharp, clean iron will help set the shape and flatten the seams. At this stage, if you left a turning opening in the lining, you would close it with a careful hand stitch, ideally a ladder stitch for a nearly invisible finish. If you chose to leave no turning gap, you will instead perform a final seam around the top edge to close the bag fully and rely on topstitching to enhance durability. Either approach is valid; the key is a neat, unobtrusive finish that preserves the bag’s smooth line and professional look. The decision to use a zipper at the top introduces a practical variation. If a zipper is chosen, you insert the zipper into the top opening with right sides together, pin or clip the zipper tape to the top edges of both outer and lining fabrics, and sew with a zipper foot for accuracy. The result is a structured, secure top that keeps contents from spilling out and adds a touch of refinement to the overall design.
If you plan to add pockets, now is a convenient moment to place them where they will be most useful. Internal pockets are straightforward to sew into the lining while it is still flat. You can craft a small zippered pocket to hold small valuables or a simple open pocket for items you want quick access to. External pockets are sewn onto the outer fabric before assembling the main body, allowing them to present on the outside of the bag for easy reach. The pocket placement can become a personal signature for your tote, reflecting how you intend to use the bag most often. Whatever pocket choice you make, ensure that the stitching is secure and that the pocket openings are finished cleanly to prevent fraying or distortion over time.
As you near completion, finishing touches begin to matter as much as the main construction. Topstitch along the top edge of the bag on both the outer fabric and lining. A contrasting thread can accentuate the bag’s design or simply reinforce the seam and keep the top edge from rolling in on itself during use. This step is not merely cosmetic; it adds structural reinforcement and helps the bag hold its shape under load. Trim any loose threads, and tidy the interior with a quick press to ensure all seams lie flat and true. The final stage is a moment of satisfaction, when you admire the symmetry of the bag—the straight top line, the clean corners, and the confidence of a project completed by your own hands.
Throughout this process, the importance of pressing cannot be overstated. Press every seam as you go, allowing the fabric to settle and the fibers to align. A well-pressed bag reads as neat and intentional, while neglecting pressing can leave the bag looking wrinkled and uneven, undermining the time you invested in careful stitching. The needle and thread choice should align with your fabric’s weight. A sturdy fabric like canvas or denim benefits from a stronger needle and a thread with a slightly heavier weight to prevent snagging or skipped stitches. Test your stitch length on a scrap of your fabric, adjusting as needed to accommodate thickness and fabric type. Small adjustments here can save you from a surprising amount of frustration later.
If you want to customize further, you can incorporate a small external feature such as a decorative patch or embroidery that mirrors your personal style. You can also experiment with strap finishes—leather or webbing can provide a different tactile feel and improve load distribution when the bag carries heavier objects. The key with customization is to keep the underlying construction robust; decorative flourishes should always complement the structure rather than compromise it. In practice, a lined tote bag is an excellent canvas for stylistic expression while remaining fundamentally practical and reliable for daily use. It is a project that teaches you the discipline of consistent seam allowances, precise cutting, precise stitching, and patient, thorough finishing. When you approach the bag as a cohesive system—a shell of outer fabric, a lining that supports the interior, and straps that shoulder the load—you begin to notice how each step reinforces the next, creating a durable, practical artifact that serves as a reliable companion in everyday life.
If you are seeking additional guidance on zipper options or alternative closure methods, you can explore more on tote bag closures and features. For example, you can explore a range of zipper variations and how they interact with a lined tote at this resource: tote bags with zippers. This reference can help you visualize how a zipper integrates with the top edge, how the zipper foot guides the stitching, and how to align the zipper tape with both outer and lining fabrics for a clean finish. It is a useful complement to the hands-on steps described here, offering a broader sense of how different closure systems influence the bag’s overall silhouette and use case.
The finished tote should be sturdy enough to withstand daily use, yet flexible enough to fold or nest into a larger bag when needed. The interior lining should move smoothly with the outer fabric, and the top edge should present a crisp line that signals attention to detail. A well-constructed lining, when pressed and stitched with care, reduces bulk at the top and makes the bag feel comfortable in the hand. The completed project is a practical piece of craft, a testament to the idea that a good tote is built from a handful of reliable techniques executed with patience and a calm, methodical rhythm. The experience of sewing a lined tote bag is itself a lesson in how small, consistent actions—careful cutting, accurate seam allowances, precise pressing, and steady stitching—accumulate into a durable, beautiful object that can accompany you through countless days and tasks.
If you are curious about expanding this project, consider experimenting with different fabric pairings for the outer and lining to achieve new textures and weights. Heavier outer fabrics like canvas or denim pair nicely with a lighter lining to reduce bulk at the seams, while a softer outer fabric such as linen can be balanced with a sturdier lining to preserve shape. You might also play with strap finishes—chain or webbing, leather, or fabric—each bringing a distinct tactile feel and visual language to the bag. The joy of sewing lies not only in the finished product but in exploring variations that align with your lifestyle and aesthetic goals. A lined tote bag, properly executed, becomes a reliable, reusable item with a personal signature and a story you created stitch by stitch, seam by seam. In embracing the method, you embrace a tradition of patient craftsmanship that values function, form, and the quiet confidence that comes from a project well done.
For further inspiration and a broader view of tote bag construction, you can consult additional process-oriented guides and tutorials. The steps outlined here are designed to be cohesive and durable, ensuring that your tote remains a pleasure to use. The combination of simple geometry, practical materials, and careful execution makes this project accessible to beginners while still offering opportunities for refinement for more experienced sewists. As you continue to sew, you will recognize how each decision—fabric choice, seam allowance, pocket placement, closure type, and finishing technique—shapes the bag’s character and usefulness. The journey from fabric to tote is a small but meaningful example of how thoughtful craft can translate into daily practicality, turning a simple rectangle of cloth into a trusted companion for errands, library trips, and everyday adventures.
External resource reference for further study should you wish to broaden your understanding beyond this chapter: https://www.youtube.com/watch?v=example
Stitched Confidence: A Cohesive Guide to Sewing a Lined Tote Bag with Personal Touches
Sewing a lined tote bag is more than a practical project; it’s a chance to translate your everyday needs into a durable, inviting accessory. The joy comes not only from the finished bag but from the quiet mastery of technique that makes every seam crisp and every edge neat. A lined tote offers structure, pockets, and a clean finish that simply cannot be achieved with a single-layer bag. It starts with choosing materials that balance sturdiness with drape, and it ends with small, thoughtful details that reflect your style. As you read through this guided, integrated narrative, imagine the bag growing from a flat pattern into a portable, everyday companion. The core idea is straightforward: two fabric panels form the outer shell, two panels form the lining, and a pair of straps connect the two into one cohesive unit. Getting this right hinges on a few steady steps, a willingness to press frequently, and a mindset that views each seam as a promise of durability and polish.
Choosing the right fabrics is the first order of business. The outer fabric should be resilient—think cotton, canvas, or linen—materials that stand up to daily use while still accommodating straightforward sewing. The lining fabric mirrors the outer fabric in weight, or it can be slightly lighter to reduce bulk. This pairing creates a balanced bag that wears well and holds its shape. The amount of fabric you cut for both the outer and the lining is practical: a standard tote in a medium size typically uses about 1.5 meters of each, with seam allowances accounted for in the pattern. The seam allowance is often set at roughly 1 inch, a comfortable width that keeps edges secure without crowding the interior. When you begin, it helps to cut your pieces with a pattern or template. A tracing line on the fabric can prevent mistakes and simplify the alignment later on, especially when you’re handling multiple panels that must align with precision.
Straps are a crucial detail that anchors comfort and carry capability. They can be fabric or ribbon, but they should be substantial enough to distribute weight without digging into the shoulder. A typical strap length runs around 24 inches (60 cm) and has a width in the 2 to 3 inch range (about 5 to 7.5 cm). If you’re using the same fabric as the outer, you’ll want to create a strap that’s both sturdy and smooth against the skin. If you’d like a cleaner finish, you can finish the strap edges with a fold-and-stitch method: fold lengthwise, press firmly, sew along the long edge, turn right side out, and then topstitch along both long edges for a crisp, durable edge. Straps do more than carry the bag; they set the vibe. Narrow straps read as casual and delicate, while wider straps read as sturdy and utilitarian. The choice can steer the overall look of the tote and influence how you accessorize it later.
As you prepare to assemble the outer bag, the process hinges on careful alignment and consistent seam allowances. Place the two outer fabric pieces together with right sides facing, a simple but powerful arrangement because it ensures that what you stitch at first will become the visible interior once you turn the bag right side out. Pin or clip the sides and bottom edges, then sew with a 1/4 inch seam allowance. The small seam allowance keeps the bag nimble while still strong enough to endure daily use. Corner clipping is a simple trick to reduce bulk where the sides meet the bottom; this makes turning the bag inside out later much smoother and helps the final shape stay neat. After stitching, turn the outer bag right side out and press the seams flat. The crispness you achieve here is what helps the entire project look finished, even before you add linings or hardware.
The lining is constructed in the same way as the outer fabric, but it sits inside the bag and remains unseen until you turn the bag inside out at the very end. Cut two lining pieces with the same dimensions as the outer pieces, then sew the sides and bottom just as you did with the outer shell. When you turn the lining right side out, give it a thorough press. The lining’s presence matters because it shapes the bag’s interior and hides any irregularities you may have encountered along the way. A well-constructed lining also protects the contents, making the tote feel more substantial and professional. Pressing the seams as you go between each step is essential; this is a recurring theme because it’s the single most effective habit you can form to elevate the finish of any sewing project. Dana Reyes, a seasoned sewing instructor, emphasizes that pressing between steps isn’t optional. She notes, “Beginners often underestimate pressing, but ironing between steps makes seams crisp and alignment easier.” This simple practice can dramatically alter how straight the top edge sits and how reliably the pieces align as you join them later.
With the outer bag and the lining prepared, you turn to straps and their secure attachment. Placing the bag face down, position one strap at the top corner of the front piece, exactly where the side seam meets the top edge. Align the strap’s raw edge with the top edge of the bag, then pin or clip it in place. Repeat on the opposite side. The stitching you apply here acts as a load-bearing anchor; you’ll stitch through all layers—outer fabric, strap, and lining—at the top edge using a straight stitch, backstitching at the beginning and end to reinforce the seam. You’ll notice that some patterns prefer attaching the straps to the outer bag before you assemble the lining, because it can help with alignment when you sew the top edge. Either method works, but the key is to secure the straps firmly so they don’t shift during the final assembly.
Joining the outer bag and the lining is a pivotal moment. You’ll place the outer bag and lining inside out, so their wrong sides face each other. Align the top raw edges, then pin around the entire perimeter. Sew around the top edge with a 1/4 inch seam allowance, paying attention to any bulk at the corners and making sure the straps stay aligned as you sew. After stitching, trim any excess fabric near the seam if needed, but do so sparingly to avoid weakening the seam. This join is more than a technical step; it’s the hinge that allows the bag to reveal its final form when you turn it right side out. Turn the whole assembly through the opening you just created, so the outer bag sits on the outside and the lining folds to the inside. A well-executed turn is a small triumph; it’s where your hard work starts to resemble a finished bag with clean lines and a neat silhouette.
Once your bag is right side out, give the top edge a sharp press to set the shape. This is the moment when the bag begins to look polished. If you’ve chosen to include a zipper closure, you’ll insert it now. A zipper closure adds security and versatility, turning a simple everyday tote into a bag you can carry in casual or more formal settings. Attach the zipper to the top opening with the zipper tape aligned to the raw edges of both the outer fabric and the lining. A zipper foot makes this step more precise, guiding the needle along the teeth evenly and helping you keep a consistent seam on both sides. After stitching the zipper in place, you can close the zipper and press the top area flat. The zipper isn’t just a functional feature; it becomes another opportunity to refine the bag’s silhouette and durability. If you’d rather avoid a zipper, you can leave the top edge unstitched or use a magnetic snap or button as a simpler finishing option, maintaining the clean lines of the tote while preserving ease of access.
The final touches elevate the tote from a finished project to a personal item. Topstitch along the top edge on both the outer fabric and the lining. This reinforces the structure and creates a neat, professional look. Consider using a contrasting thread for the topstitching to add a visual detail that catches the eye. A decorative stitch or a subtle crosshatch can transform a straightforward tote into a distinctive piece. If you want to boost organization inside the bag, you can add a simple interior pocket to the lining. A small pocket for keys, a phone, or cards makes the bag significantly more functional and reduces the chance of rummaging through the tote to locate essential items.
Customization is where the project truly comes alive. The route you take depends on your goals and your confidence with different techniques. A classic approach is to use contrasting thread for the topstitching. This detail draws attention to the seams and gives the bag a controlled, designed look. Another popular option is to add exterior embroidery—your initials, a meaningful date, or a short quote—carefully placed to complement the bag’s shape and color. If you’re aiming for sustainability, consider repurposing materials—old jeans, denim scraps, or other sturdy fabrics—into the tote’s exterior. Denim offers durability and a casual edge that pairs well with natural linings. Preparing denim requires a slightly heavier needle and a bit more sewing muscle, but the payoff is sturdy, characterful results that resist daily wear.
You can also experiment with decorative elements like repurposed neckties. A well-cut necktie fabric can be attached to the bag’s surface in an A-style or B-style arrangement, creating a vintage-inspired, one-of-a-kind design. When you incorporate such materials, ensure the fabric is properly aligned during cutting and securely stitched to prevent fraying. An important practical tip when working with heavier or thicker fabrics is to choose the right needle. For thicker materials like denim or a denim-inspired necktie, a heavy-duty needle (for example, a larger size) helps prevent skipped stitches and needle breaks, ensuring your lines stay straight and your seams hold up under strain. Equally important is testing your fabric weight and stitch length on a scrap piece before you sew the final project. This test run provides a quick check that your thread tension, needle size, and stitch density are harmonious with the fabric you’re using.
If you’re seeking additional ways to tailor the tote to your lifestyle, consider the interior layout. A simple pocket inside the lining can transform the tote into a practical everyday companion for work, school, or travel. The pocket serves as a small, organized space for keys, cards, and coins, reducing the rummage through the larger interior. You can place the pocket on the lining’s side seam or near the center for quick access. For those who like a more tactile, hand-crafted feel, try topstitching with a decorative stitch, or add a small label or a stitched symbol to mark ownership. The openness of the lining offers a canvas for personalization that doesn’t compromise the bag’s structure. The key is to keep the interior robust while allowing the outer aesthetic to shine—your unique touch should be visible but not overpowering.
The guidance from the broader sewing community supports a few universal habits that help you get consistent results, especially if you’re balancing this tote with a busy schedule. Pressing remains the cardinal rule. Wielding the iron after every major seam helps the fabric settle into position, aligns edges more accurately, and simplifies subsequent steps. The right needle and thread pairing for your chosen fabric matters as well. Weight and weave dictate needle size and thread thickness, so testing a sample swatch on scraps is worth the few minutes it costs. Finally, stitch length is a quiet but decisive factor. Adjusting your machine to the fabric thickness prevents loose or bulky seams that ruin the tote’s line and strength. The interplay between these factors—the fabric, the seam, and the press—creates a finished product that not only maximizes function but also carries the care you put into it.
If you’d like to explore a practical, visual guide to complements such as closures and lining assembly, consider the explored resource that provides a step-by-step walkthrough for sewing a lined tote bag. It can offer a complementary perspective on the same core techniques described here, extending your confidence with a broader toolkit. For those who want to expand their repertoire even further, a quick look at a dedicated resource focused on zipper options and closure styles can be a worthwhile addition to your sewing library. In this chapter you’ve seen how the basic framework—two panels for the outer bag, two for the lining, and a pair of straps—becomes a flexible platform for creativity. The final tote you carry out of the studio will reflect not only the construction but the choices you made along the way, from fabric pairing to the tiny decisions about finish and detail. The clean lines, the secure seams, and the thoughtful touches all echo a simple but powerful truth: a well-made tote is a testament to patience, precision, and personal expression.
For a targeted, practical jump-off point on zipper closures and related hardware, you can explore further here: tote-bags-with-zippers. This reference can help you compare how different closure options influence the final silhouette and the ease of use in daily life. If you’re more visually inclined, you might find a step-by-step video tutorial helpful. A detailed, beginner-friendly guide lays out the full process of sewing a tote bag with lining, and it’s especially useful for seeing how the layers interact in real time. Watch and then return to your project with new insight and renewed confidence.
External resource for a visual walkthrough: https://www.youtube.com/watch?v=5XkLjOZl7dU
Final thoughts
Creating a lined tote bag allows business owners to showcase their brand while providing a practical product for customers. By understanding the materials needed, following the step-by-step sewing process, and incorporating customized features, you not only enhance your product offerings but also strengthen customer loyalty. Offering well-crafted tote bags can lead to increased brand visibility and customer engagement. Empower your business today by mastering the art of sewing lined tote bags!