
Tote bags have transcended their utilitarian purpose to become a canvas for personal expression and brand identity. As a business owner, crafting your own tote bag not only allows for unique branding opportunities but also showcases your skills in design and craftsmanship. This guide will walk you through the intricate steps of creating a tote bag with lining, providing insights on the materials required, detailed sewing instructions, and tips on adding functional elements like pockets. Each chapter builds upon the last, ensuring you acquire a holistic understanding of the process, positioning your business to stand out in a competitive market.
Layered Craft: The Complete Path to a Durable Tote Bag with Lining

A tote bag with a lining feels like a small victory of practical design: a simple daily carry that uses a hidden interior to protect the fabric and keep items organized. The lining is more than a cosmetic finish; it adds structure, conceals raw edges, and prevents items from poking through fabric fibers that might wear over time. This chapter follows a direct, hands-on path to that end, weaving together material choices, precise cutting, careful seamwork, and thoughtful finishing into a single, coherent process. Start with the idea of durability in mind, but let the workflow guide you. The outer fabric should be sturdy enough to bear weight and daily abrasion—canvas, heavyweight cotton, denim, or even faux leather for a modern edge. The lining can be a lighter cotton or a smooth polyester, chosen to complement the outer shade and texture. Optional interfacing can be added between the outer layer and the lining to give extra body, especially if the outer fabric is on the lighter side. When you pair heavy outer materials with a lighter interior, you create a bag that both looks substantial and feels comfortable to carry. The thread you choose should match the fiber of the fabric but lean toward a polyester or cotton-wrapped polyester with a bit of give. Durable thread resists fraying as you sew through several stacked layers, and it helps the finished bag survive repeated use. Pins or clips hold layers securely while you sew, and a ruler or measuring tape keeps everything aligned. A chalk marker helps you transfer straight cutting lines and fabric guidelines with confidence, and an iron becomes a trusted ally for crisp seams and neat edges. The overall aim is a clean, professional finish that remains practical for daily use.
Begin by translating the pattern into precise cuts. For a standard tote, two outer panels and two lining panels are cut to the same dimensions. In this guide, the size you’ll work from is 32 cm by 70 cm for each piece. Keeping the edges square and the raw cuts neat matters more than it might seem at first. Small inaccuracies can compound as you assemble the bag, especially when you turn the pieces right side out and begin to align the interior with the exterior. If you choose to add a pocket, allocate one fabric piece for it and plan its placement on the lining with intention. A compact interior pocket can transform how you use the bag, helping you secure keys, a phone, or a small notebook without disturbing the interior layout.
Moving into assembly feels like watching a small, solvable puzzle come together. Start by fusing the outer bag pieces with right sides facing each other and do the same with the lining pieces. Sew along the two long sides, using a seam allowance of about 1 cm. The bottom edge is where the turning opening will live, so leave a gap—roughly 10 cm—unstitched at the bottom. This turning opening is essential; it lets you flip the bag right side out once the fabric is sewn, and it’s the moment when all the layers finally reveal their intended structure. During this stage, remember that the right sides must remain facing outward as you work through each seam, so you don’t trap fabric in a reversed orientation.
With the pieces sewn, the turning begins. Carefully turn both the outer and the lining through the opening, then push out the corners to shape the bag’s base. A gentle press with a warm iron helps set these corners and crisp the seams. The next step sits at the boundary where exterior and interior meet: you insert the lining inside the outer bag, as if stacking two containers that share a common edge. Align the top edges so the right sides touch, and pin the raw edges together along the entire top circumference. Sew around this top edge with a 1 cm seam allowance, closing up the turning opening as you go. This is where the bag truly starts to take form, because the seam you just created holds the two layers in place and makes the finished top edge behave smoothly when you handle the bag later.
Finishing the outer edge comes next. Fold the outer fabric’s top edge inward by about 1 cm and press. This creates a neat, self-contained hem that hides the raw edge and gives the bag a refined silhouette. If you wish, you can repeat this same fold and stitch for the lining edge as well, though many makers prefer to leave the lining’s top edge a touch looser to aid in future cleaning or interior access.
Handles are the final structural element that transform a simple sack into a usable tote. If you’re using fabric handles, fold each strip in half lengthwise with right sides together, then sew along the long edge with a 1 cm seam allowance. Turn the handles right side out, using a turning tool or a thin rod to push the fabric through fully. A firm press keeps the handle flat and comfortable to grip. Attach the handles at the top corners, one handle at each side. Sew securely through both layers of the bag and the ends of the handles, employing a double stitch for extra strength. If your project uses pre-made handles, align them with your preferred spacing and secure them in the same manner so they support weight without pulling out or twisting.
As you near completion, perform a final inspection of every seam. Check the corners inside and out, because those points endure the most stress when you carry a loaded bag. Reinforce any seam that looks thin or brittle, and trim any thread tails cleanly. The result should be a tote that stands on its own, with a tidy interior that hides raw edges and a sturdy exterior that can bear daily use. A suggested finish touch is a decorative topstitch along the outer edge or a contrasting thread color that adds a subtle accent without compromising the bag’s clean lines. You might even add a small decorative motif or a light fabric paint accent for a personalized touch, as long as you keep the interior free of heavy textures that could snag.
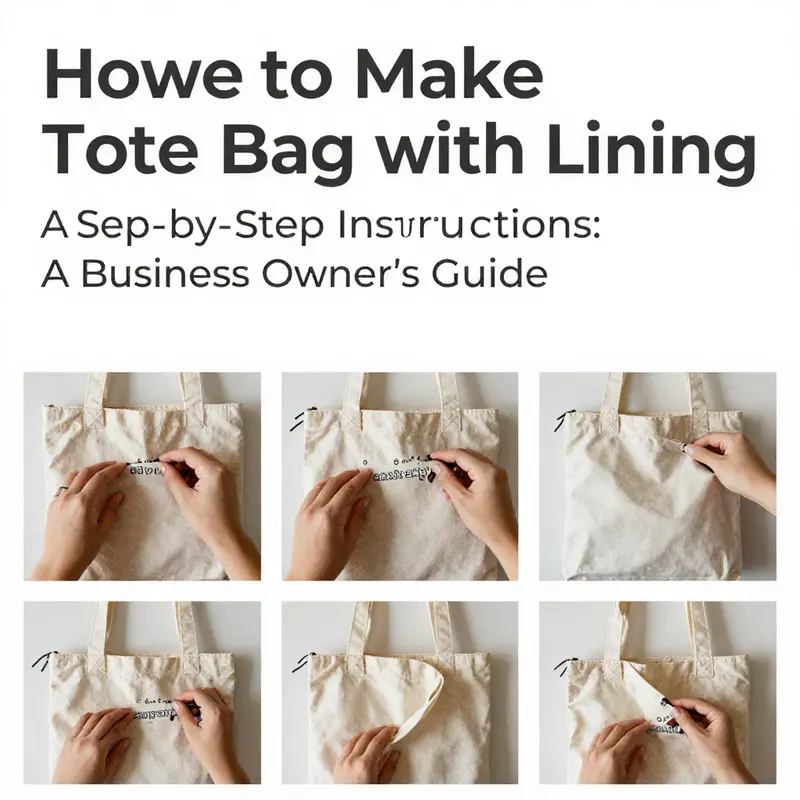
For those who learn best through visuals, a video guide can be a valuable companion. Visual tutorials provide step-by-step demonstrations of turning the bag and aligning the lining with the outer fabric, helping you see how the layers interact during the turning process. If you’d like a model of reference that aligns closely with the steps described here, consider checking a detailed, beginner-friendly video on tote construction that mirrors this exact approach. As you explore, you’ll notice how small adjustments—such as using a longer turning opening or choosing a slightly wider seam allowance—can tailor the project to your fabric type and bag size. The core ideas remain constant: precise cutting, careful alignment, and thoughtful finishing yield a durable, polished tote with a lining that you’ll be proud to use.
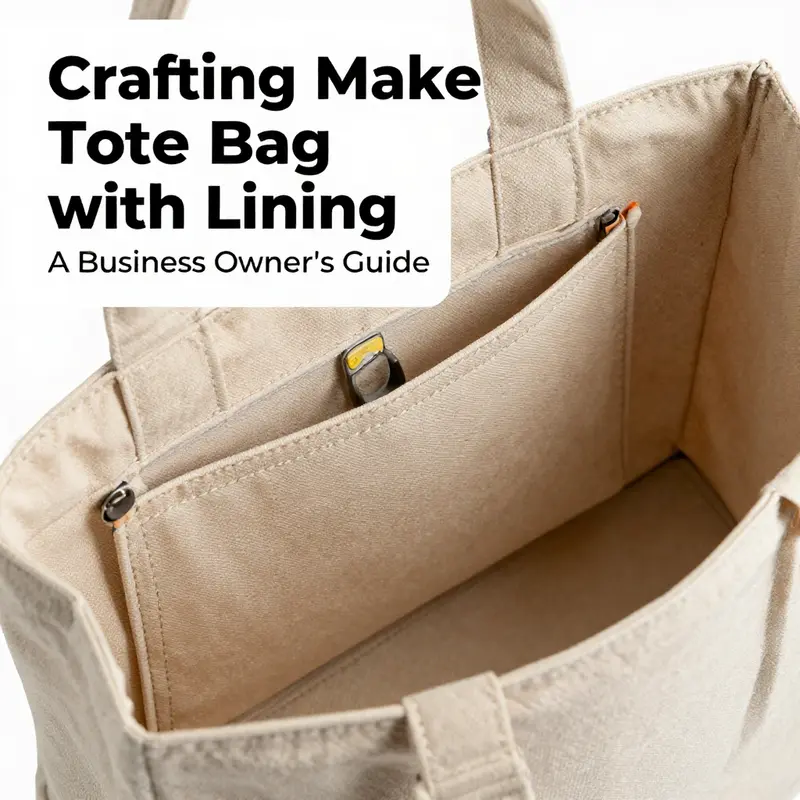
To see a concrete example that aligns with these principles, explore the concept of functional interior organization through an example like a tote with a designed pocket. The pocket placement on the lining offers a practical internal room for small items and keeps them from shifting around when the bag is carried. This internal feature is a small but meaningful upgrade that enhances daily usability without compromising the overall clean look. For a broader sense of how lined totes fit into everyday wardrobes, you can consult a range of related guides that discuss different fabric choices, handle configurations, and finishing options. The underlying method remains accessible: thoughtful patterning, careful seam work, and deliberate finishing keep your tote durable and stylish over the long haul.
As you reflect on this process, you may find yourself revisiting the materials list and adjusting based on what you have on hand. The choice of outer fabric, the inclusion of interfacing, and the exact dimensions can evolve, but the core technique stays stable. This approach balances practicality with a touch of personal style, allowing you to adapt the project to your fabric stash and your intended use, whether it’s daily errands, a work commute, or a weekend carryall. If you want to deepen your understanding of this workflow through additional examples, you can consult related guidance on tote projects and see how different fabrics behave under the same construction sequence. The fundamental rhythm—cut, sew, turn, align, finish—remains the backbone of a well-made tote with a lining. For further inspiration and visual reinforcement, you can consult a full tutorial that mirrors these steps and offers additional tips on finishing, topstitching, and pocket customization. The journey from pattern to polished bag is precise but simple, and the result is a dependable tote ready for everyday adventures.
Internal reference for further exploration: tote bag with computer sleeve. This page provides a related example of how a lined tote can be adapted to include dedicated storage, without sacrificing the clean lines of the finished product. For readers who prefer a visual guide, an external resource can offer a complementary perspective on the turning technique and top edge finishing. External resource: https://www.youtube.com/watch?v=9RcJdNlQZ6w
Lined for Life: Crafting a Durable Tote Bag with a Clean, Hidden Interior
A tote bag with a lining is more than a simple receptacle for belongings; it becomes a functional partner in daily life, offering structure, protection, and a hint of personal style. The lining acts as both a shield for the outer fabric and a clean, organized space for the items you carry. When you approach the project with calm precision, the result is a bag that feels substantial in the hand and graceful on the inside. The journey begins with thoughtful material choices and ends with a finish so neat that the bag looks professionally made, even if you’re sewing at home for the first time. The structure you establish in the early steps—the way you cut, align, and stitch—will determine how well the bag holds its shape, how the interior seams behave over time, and how easy it is to use every day.
Begin with the materials, not the method, because the foundation you lay will guide every seam you sew. For the outer fabric, a sturdy canvas or similar fabric is ideal; two pieces of 32 cm by 70 cm form a reliable, balanced body. The lining fabric—cotton or a lightweight alternative—must be the same size to ensure the bag’s interior is full and evenly shaped. If you want a pocket or two for organization, a small pocket fabric, around 20 cm by 13 cm, can be tucked into the lining with ease. Handles are essential; two strips of fabric, roughly 64 cm by 3.7 cm, work well, or you can repurpose a waistband from a pair of jeans for a more rugged, thrifted look. A zipper or magnetic snap is optional, but many makers find a simple interior pocket and a clean top edge enough to keep things tidy. Thread should be all-purpose polyester or cotton-wrapped polyester to resist wear and washing. A basic sewing machine speeds things up, while hand-sewn details—like carefully finished topstitches—offer a touch of craft. A reliable iron helps to press seams flat, giving the finished bag a crisp silhouette that looks deliberate rather than hurried.
With material choices in mind, proceed to the cutting and pocket planning. Cut the outer fabric and the lining fabric to the same two-panel arrangement—two pieces each at 32 cm by 70 cm. If you’re adding a pocket, cut a single piece around 20 cm by 13 cm. The pocket becomes a quiet rendezvous for keys, a phone, or a wallet, tucked neatly inside the bag away from the main compartment. When you place pockets on the lining or outer fabric, align edges carefully so the stitch line sits evenly. If you’re new to pocket building, remember that folding the short edge of the pocket fabric in half and pressing creates a neat finish on the pocket’s top edge, and sewing along that fold helps secure the pocket in place with minimal bulk in the interior.
The core of the project comprises two main assemblies: the outer bag and the lining. Begin by sewing the outer pieces right sides together and the lining pieces right sides together. Then stitch along the long sides, leaving the bottom edges for a moment. The turning opening is your doorway back to a clean, fully formed bag; a practical width to allow turning is around 10 cm. This space will vanish once the bag is turned and pressed, yet it is the essential gap that makes a neat interior possible. As you sew, keep the right sides facing outward so you maintain consistency in the final look. After sewing the side seams, you’ll move to the bottom seam but remember to leave that turning opening intact. The inner lining, created separately, mirrors the outer bag for symmetry and balance.
Turning the bags inside out is a moment of satisfaction. Gently pull the outer bag through the turning opening and coax the corners into neat points. This is where a blunt tool or a slender turning stick can help re-shape corners without poking through fabric. Pressing now is not merely cosmetic; it locks in the lines and gives the bag its initial structure. When you press, do so with care, guiding the seams into crisp lines that will translate into a cleaner top edge later. The interior edges, hidden from view when the bag is complete, deserve equal attention. A well-pressed interior makes every subsequent stitch sit evenly against the bag’s form, reducing bulk and preventing misalignment during assembly.
With the lining inside the outer bag, the next step is to secure the two layers at the top edge. Pin the raw edges together along the opening, ensuring the outer bag’s top edge aligns with the lining’s top edge. A single line of stitching around the top edge binds the two layers into a single, integrated shell, and it also closes the turning opening you left for turning the bag right side out. Reinforcement at the beginning and end of this seam prevents pull and wear where the bag experiences the most stress—exactly where your hands grip the tote and where the handles attach.
The top edge requires a clean finish. Fold the outer bag’s raw edge inward by about 1 cm and press. This step creates a tidy hem that defines the bag’s silhouette and prevents fraying at the most visible boundary. You can opt to mirror this finish for the lining as well, or leave the lining’s edge clean and flush for a more minimal look. Either choice should end with a smooth, uniform line that runs the full length of the bag. The moment you set the top edge, the bag begins to take on a professional look, and the interior future you’ve planned for—the pocket, the lining seam, the no-slip interior—starts to reveal itself.
Handle attachment is where practicality meets aesthetics. If you’re sewing fabric handles, fold each strip lengthwise with the right sides together, sew along the long edge with a 1 cm seam allowance, and turn right side out. A gentle press makes the handles firm and comfortable in the hand. Position each handle at a corner at the top edge, where the bag’s sides meet. Secure the handles with multiple lines of stitching through all layers, ensuring that their attachment points bear the weight of daily use. If your fabric is sturdy enough, you may double-stitch the ends for added security. The way you attach handles influences how comfortable the bag feels when loaded—whether you’re carrying groceries, books, or a laptop for a compact daily commute.
There are additional touches that can elevate the finished piece without complicating the build. The lining offers a natural place for a discreet interior pocket; you can optionally fuse a small interfacing piece behind the pocket to keep its opening rigid and easy to access. Interfacing is a quiet ally, adding structure to the lining without altering the bag’s overall drape. If you’re fond of color and contrast, consider topstitching in a thread color that pops against either the outer fabric or the lining. A different thread color is a simple way to introduce personal flair without needing extra embellishments. You might also pursue a minimal decorative element, such as a short line of hand stitching around the top edge, to emphasize the bag’s shape and lend a handmade finish that catches the eye in a quiet, thoughtful way.
As you bring the project toward completion, review the seams for durability. Reinforce any weak points, especially where the handles attach or where fabric layers meet the turning opening. Trim stray threads and press once more for a crisp, retained shape. The result is a tote bag that sits well in hand, holds its form when filled, and presents a neat interior that protects and hides the busy life you carry inside.
If you are seeking guidance for broader inspiration or a visual demonstration of a similar process, you can explore a detailed, step-by-step video tutorial that walks through the full method of making a tote bag with a lining. For a broader range of fabric tote ideas, you might enjoy exploring a collection focused on women’s canvas tote bags, which can offer ideas on how to pair fabrics and colorways for a balanced look that suits daily use. For more on that, see women’s canvas tote bags.
Finally, if you want to supplement this narrative with an external, dynamic demonstration, consider viewing a trusted, comprehensive tutorial that guides you through the same lining technique with visuals and pacing that can help reinforce your confidence as you sew. External resource: How to Make a Tote Bag with Lining – Step-by-Step Sewing Guide. https://www.youtube.com/watch?v=9RcJdNlQZ6w
null
null
Lining the Way: Finishing Touches that Elevate a DIY Tote Bag
A tote bag with a lining is more than just a simple container; it is a finely finished project that blends practicality with a touch of tailored polish. When the outer fabric meets the smooth interior, the bag gains structure, protects its contents, and presents a neat, professional edge that remains visible long after the first use. In this chapter, we move beyond the basic construction to explore finishing touches that transform a straightforward tote into a durable, stylish everyday companion. The core idea is simple: everything you see on the outside should be supported by a clean, secure interior, and every seam should serve both function and form. With the right approach, the lining does its job quietly, while the overall silhouette remains crisp and dependable.
Begin with the material setup. The standard pattern uses two outer fabric pieces and two lining pieces, each measuring 32 cm by 70 cm. The numbers matter not for their scale alone but for ensuring the lining can glide into the bag and sit just right against the outer fabric. The lining is typically a lighter cotton or similar fabric, chosen for its ease of folding, pressing, and finishing. If you choose to add an internal pocket, a piece around 20 cm by 13 cm gives you a dedicated space for keys or a phone, while the pocket’s top edge remains accessible from the interior. For handles, two strips about 64 cm long and 3.7 cm wide work well, though you might repurpose a waistband from a pair of jeans for a more rugged, upcycled look. As you cut, precision matters; align edges carefully and keep grainlines consistent so the bag wears evenly over time.
The optional interior pocket serves a dual purpose. It adds organization and sets a rhythm for lining construction. If you decide to include it, fold the short edge of the pocket fabric (the 13 cm side) in half and press. This forms the top hem that will be visible inside the bag. Sew along this folded edge to secure it, then position the pocket on the lining piece with one long edge aligned to the top edge of the lining. Stitch around three sides—left, right, and bottom—leaving the top open. This creates a neat pocket that stays hidden and stable when the bag is turned right side out. The pocket’s interior finish can be reinforced with a light topstitch to keep it from catching on items slipped inside.
Sewing the outer and lining pieces begins the true construction. Place the outer fabric pieces right sides together and do the same with the lining. Sew along the two 70 cm side edges with a 1 cm seam allowance, then leave a turning opening of about 10 cm along the bottom edge. This opening gives you a way to turn the bag right side out once the side seams are complete. Throughout this stage, keep the right sides facing outward, even as you stitch, so the final reveal on both the exterior and interior remains clean and true. When you finish the side seams, you’ll have two bags—an outer shell and an interior lining with its own seam structure—waiting to be introduced to each other.
Turning the bags inside out is a small moment that pays big dividends. Gently push the corners out and press the entire assembly so edges lie flat and true. A crisp edge on both the outer shell and the lining immediately communicates care and attention. This is where the work of alignment pays off; the top edges will later meet in a smooth, seamless finish rather than a jagged seam line.
With the lining still inside the outer bag, insert the lining so that the right sides face each other again. Align the raw edges at the top and pin or baste to secure the positioning. Sew around the top edge with a 1 cm seam allowance, carefully closing the turning opening you left in the bottom of the outer shell. The joint becomes invisible once you turn the bag again and the pieces sit flush against each other. Backstitch at the beginning and end to reinforce the seam, especially where the lining and outer fabric meet. This stage is where precision becomes a promise of durability; a small misalignment can translate into wobble at the top edge or a sloppy interior finish.
Next comes the finishing of the top edge itself. Turn the raw edge of the outer bag inward by about 1 cm, then press to establish a clean, inward-facing fold. Sew along the fold to secure the outer top edge, then repeat on the lining if desired. This creates a neat, professional cap that hides raw fabric and stabilizes the bag’s opening. If you want to maximize durability, consider stitching just inside the top edge of the lining as well, ensuring both layers maintain their shape through daily use. The goal is a look that hints at careful construction without adding unnecessary bulk.
Handles are the final major element, and their attachment deserves attention. If you’re using fabric handles, fold each strip lengthwise with right sides together, then sew along the long edge with a 1 cm seam allowance. Turn right side out—an easy trick is to use a turning tool or a blunt chopstick to push the fabric gently through the narrow opening. Press flat so the handle has a crisp, even surface. Position each handle at opposite corners along the top edge, then sew securely through both the outer bag and the handle ends. Use double stitching where the fabric and handle meet to ensure weight-bearing strength. If you’re repurposing a waistband from jeans, you’ll likely trim and finish the edges so they sit comfortably and securely at the corners. Both options benefit from a small zigzag or edge stitch along the seam line to prevent fraying at the attachment point.
At this stage, you may opt for small finishing touches that elevate the bag’s silhouette. A thoughtful topstitch around the very top edge can define the opening and give the tote a tailored look. If you choose decorative thread, select a color that complements both outer and lining fabrics and run a single row of stitching at a comfortable density. Embellishments, such as subtle fabric paint or a contrasting thread line, can personalize the bag without compromising its integrity. The aim is not to overwhelm the design but to introduce a refined detail that speaks to craft and care.
Reinforcement is a quiet but essential consideration. Check the bottom corners and the base seam of both the outer bag and the lining. Add a touch more stitching in high-stress areas to prevent wear from carrying heavier loads. The interior’s clean finish helps items sit steadily and reduces bulk at the bottom where the lining folds over into the main bag. Remember that the lining’s purpose is to shield the outer fabric from abrasion and to preserve the bag’s shape, particularly when loaded with books, groceries, or a laptop. Durable seams, stable edges, and a balanced weight distribution all contribute to a tote that feels sturdy every time you reach for it.
A practical tip for the finishing phase is to test a simple load in the bag before trimming threads and declaring victory. Place a few common items inside and move the bag around as you would in daily life. If anything catches, recheck seam allowances and the top-edge alignment. Small adjustments here prevent larger disappointments after long-term use. Pro tip: if you want to explore alternative finishing methods, such as bias binding or a serged edge at the lining top, you can adapt the approach to your skill level and available equipment. The key is to preserve the clean lines and comfortable interior access that make a lined tote so practical.
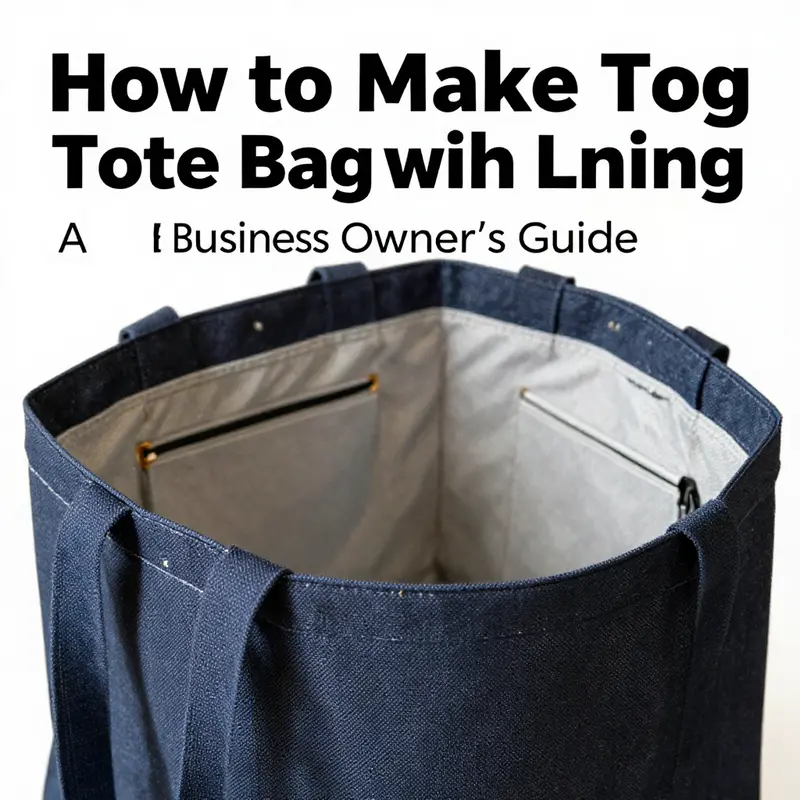
For readers seeking a visual reference, a similar project demonstrates these steps with clear, step-by-step visuals. The linked tutorial offers a cohesive blueprint that mirrors the rhythm of this method and reinforces the importance of lining as a finishing agent rather than a mere inner layer. tote bag with computer sleeve provides a helpful example of how interior construction supports the overall form, especially when additional features like pockets or laptop sleeves are included.
As you wrap up, remember the goal: a bag that carries weight gracefully, looks finished on both sides, and feels satisfying to use. The lining protects the outer fabric, glides smoothly as you load and unload, and keeps interior seams tucked away from everyday wear. This approach, combining careful cutting, precise sewing, thoughtful turning, and purposeful finishing, yields a tote bag that is not just functional but genuinely well-made. If you’ve followed the steps with patience and a steady hand, you’ve achieved a professional finish without needing specialized equipment. Your future bags can build on this foundation, adding pockets, closures, or decorative touches as your skills grow.
External resource for further guidance: https://www.alltheknots.com/how-to-make-a-tote-bag-with-lining/
Lined for Strength: Crafting a Durable, Polished Tote Bag with a Hidden Shield

A tote bag with a lining is more than a shell of fabric; it is a carefully balanced system that merges practicality with craft. The lining acts as a shield for the outer fabric, a shape keeper that helps the bag stand up to daily use, and a clean, tidy interior that hides seams and bulk. When you approach this project, you are not simply stitching two fabrics together; you are orchestrating a small, portable workspace that carries your day with grace. The beauty of lining lies in its quiet efficiency. It takes the rough edges of construction and flattens them into a neat, professional interior. It also allows you to separate the bag’s structural elements from its decorative surface, which makes a sturdy finish accessible to both beginners and seasoned sewists. The method described here is straightforward, repeatable, and forgiving enough to accommodate subtle mistakes without sacrificing overall strength. It rests on a simple philosophy: build the outer shell and the lining as independent units, then join them at the top edge for a clean, reinforced finish. This approach distributes weight more evenly, protects the outer fabric from abrasion, and creates a bag that maintains its shape even when laden with books, groceries, or a laptop. In practice, you will start with the right-sized pieces for both outer and lining fabrics, then decide whether you want an interior pocket to organize small items. If you choose to include a pocket, it becomes a practical focal point for the lining and a quick win for organization. The pocket also demonstrates a core sewing principle: small additions should be self-contained within the lining to preserve clean exterior lines. The dimensions given—two outer pieces and two lining pieces each at 32 cm by 70 cm—provide a comfortable, standard tote that reads as sturdy and approachable. The pocket, if added, typically measures about 20 cm by 13 cm, a size that fits smartphones, notepads, or other essentials without crowding the bag’s interior. The handle material relies on two long strips, about 64 cm by 3.7 cm each, or you can repurpose a waistband from durable jeans for a rustic, upcycled look. Materials can be adjusted to taste, but the underlying construction principles remain constant: precise cutting, careful alignment, and a patient, methodical mindset.
From a design standpoint, the lining’s role extends beyond mere concealment. It provides the structure that helps the tote resist sagging and edge curl, particularly around the top opening where stress concentrates. When you sew the outer pieces together first, right sides facing, you set the stage for a clean exterior. The same principle applies to the lining; sew its sides in the same way, then leave a turning opening at the bottom of the bag to reveal the lining’s neat interior after turning. The turning opening, typically around 10 cm, serves as your gateway from construction to finished tote. It is a small concession that yields a large payoff in final appearance. Turn the bags carefully so each corner shows crisp lines, then press flat to set the seams. The next move is to align the outer bag with the lining, right sides together, and to pin the raw top edges. A single, confident seam around the top edge, using a 1 cm seam allowance, closes the turning hole and achieves a professional, built-in finish. As you stitch, maintain even tension and smooth any puckers with gentle finger-pressing to ensure the top edge remains flat and even. The moment you finish this seam is when the bag begins to take its final shape. The joy of this method lies in the moment when the lining and outer bag come together yet retain their separate identities inside. When you turn the assembled piece right side out through the turning opening, you reveal the hidden work—the lining’s interior, with its own seams neatly tucked away from sight. A good press at this stage is essential; crisp edges reflect precision and care. One advantage of this approach is that it makes the transition between the lining and outer fabric at the top edge almost seamless. With the two layers joined, you now have a single, cohesive structure that distributes stress from the handles through both layers, reducing the risk of seam failure under heavy loads. This distribution is not merely practical; it also enhances aesthetics. A lined tote looks finished, no matter the fabric choice for the exterior. The inner color or pattern becomes a design detail that can complement or contrast with the outer fabric to create visual interest without compromising durability. If you decide to add a pocket, you do so on the lining before the final assembly. Fold and press the pocket’s short edge, stitch the folded edge to secure it, and position the pocket along the lining’s top edge. Sewing around three sides creates a secure pocket that stays in place as you carry your belongings. This small feature adds function and teaches an essential skill—how to integrate functional details without disturbing the bag’s clean lines. For those who enjoy personalization, contrasting thread colors for topstitching can highlight the bag’s structure while keeping the finish robust. You might opt for a visible line of stitching along the top edge or a row at each side seam to emphasize the bag’s geometry. The method also invites creative experimentation: a lighter lining can reveal a playful interior when the bag is opened, while a darker lining can hide everyday wear and small stains more effectively. The process is, at its heart, about establishing a framework that supports everyday use while still inviting personal expression. As you become more comfortable with the steps, you can explore subtle variations—pocket configurations, different handle styles, or even multiple interior compartments. The key is to preserve the core logic: cut accurately, assemble outer and lining pieces separately, join at the top, finish the edges, and attach handles in a way that distributes load across both layers. When you attach the handles, place them at opposite corners of the top edge and sew through all layers with reinforced stitching. Double stitching is a simple, reliable choice that guards against loosening over time. The handles should sit comfortably and securely, not so close to the edge that they cut into the seam. A gentle test lift of the bag before final trimming can reveal any stress points that need a bit more reinforcement. If you are new to sewing, remember that patience, precise alignment, and consistent seam allowances are your best guides. It is easy to rush the process, but the quality of a lined tote is born from careful, deliberate steps rather than speed. The result is a bag that carries itself with confidence, its lining quietly supporting every item inside and its exterior presenting a neat, polished surface. For further inspiration and a practical, visual walkthrough, consider this related project that expands on the same principle of a lined tote, offering a built-in sleeve option: tote bag with computer sleeve. This example demonstrates how a functional pocket or sleeve can be integrated without sacrificing the core strengths of a lined construction.
In summary, a lined tote bag achieves a balance between durability and elegance. The lining protects the fabric, shapes the bag, and delivers a pristine interior. It also distributes weight through the structure so that handles and seams endure daily use. The method encourages a transparent, repeatable process: cut with care, sew sides, leave a turning opening, turn and press, join the edges, finish the top, and add handles. This sequence produces a tote that stands up to life in transit while looking quietly refined. If you ever feel uncertain, remember that a good press at each stage makes the next step easier and yields a crisper final result. For beginners, following a structured guide—like the one summarized here—can build confidence and skill step by step. The knowledge you gain from this project translates to a wide range of fabric bags, from simplistic everyday totes to more complex carries with multiple pockets and features. The lining is not a decorative afterthought; it is the backbone that holds the entire design together and ensures your tote serves you well for years to come. External resources can illuminate the path further, offering visuals and additional tips to complement the written steps and reinforce learning. For a clear, beginner-friendly visual guide, you can consult the following external resource: https://www.sewingwithnancy.com/tutorials/how-to-make-a-tote-bag-with-lining
Final thoughts
Creating a tote bag with lining is not only a practical skill but an effective way to promote your business brand. By mastering the materials, sewing techniques, and finishing touches, you can produce high-quality, functional bags that captivate your audience. The insights shared in this guide can empower you to take your crafting capabilities to the next level, ensuring your creations reflect your brand’s commitment to quality and style. Now it’s time to innovate and personalize your designs to leave a lasting impression.