Creating a zippered tote bag is not only a rewarding DIY project but also offers business owners a unique opportunity to enhance their branding and provide customers with functional, stylish products. In this comprehensive guide, we will explore the key steps to successfully craft a zippered tote bag—from gathering your materials to assembling the finished product. Each chapter will take you deeper into the process, ensuring that your tote is not only practical but also reflective of your brand’s identity.
Gathering the Essentials: Materials and Tools for a Sturdy Zippered Tote Bag
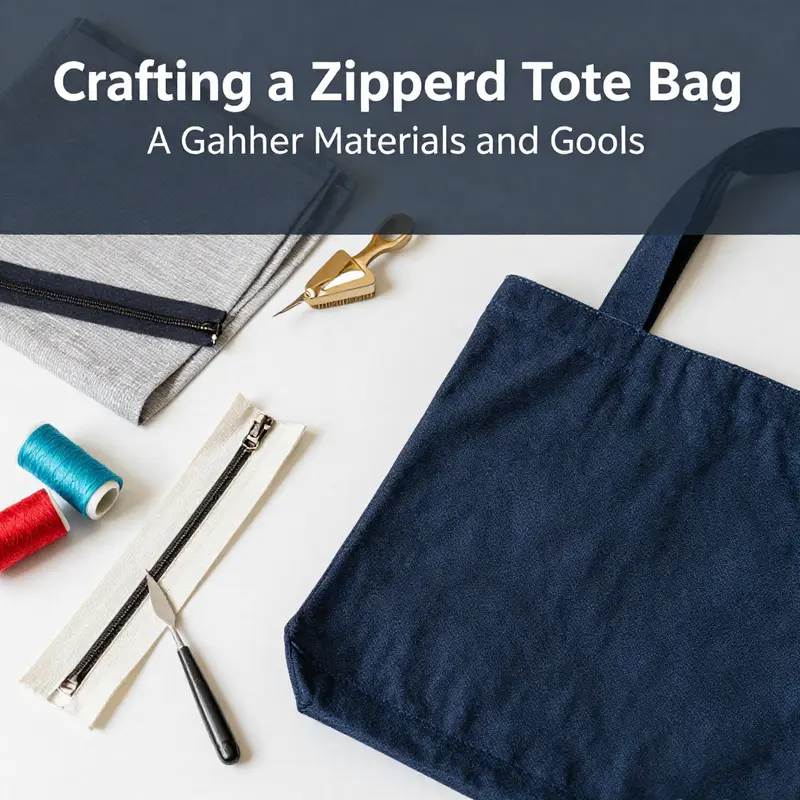
Starting any sewing project, especially a zippered tote, begins long before the first stitch. It begins with gathering the right materials and tools, choosing fabrics that balance appearance, durability, and ease of handling. The goal is to assemble a compact kit that keeps you focused, saves time, and raises the chances of a clean, professional result. The planning invested here pays off when the zipper glides smoothly and the bag holds up to daily use. As you curate your list, think about how each choice affects weight, structure, and comfort. With the right foundation, you’ll glide through later steps with calm certainty rather than last‑minute improvisation.
Exterior fabric choices set the tone for the bag’s personality and resilience. Durable cotton canvas, sturdy denim, or a weighty polyester provide a dependable face that can withstand daily wear and repeated loading. The exterior will bear the most contact—abrasion, friction against pockets, and the occasional snag—so weight, weave, and finish matter. For the lining, opt for something softer that won’t snag delicate items while still offering a touch of luxury to the interior. A brushed polyester, a light flannel, or a smooth cotton sateen can transform the experience of opening and closing the bag. If your project calls for a crisp silhouette, consider using interfacing to add stability; if you prefer a drapier, more relaxed feel, you can skip this step or choose a lighter touch. Interfacing, when used, should be matched to fabric weight to avoid stiffness that fights the fabric’s drape. In all cases, pre-washing both exterior and lining fabrics before cutting is essential. This simple step minimizes unexpected shrinkage and color migration later on, and it helps ensure that seams stay aligned after weeks of use.
The zipper is the hinge of the whole design. A typical tote benefits from a zipper in the 12‑inch to 18‑inch range, depending on the final bag dimensions. Shorter zippers can create a compact, handbag‑like opening, while longer zippers offer generous access and a more contemporary look. When choosing between coil (nylon) and metal zippers, consider both function and style. Coil zippers glide smoothly, resist catching on woven fibers, and come in a wide range of colors that can blend with or accent the fabric. Metal zippers, by contrast, give a rugged, tactile feel and can be a design feature in their own right. Whichever you choose, verify that the zipper length matches your cut pieces with allowance for seam allowances, typically about 1 centimeter. A zipper with a strong slider and sturdy tape will endure daily use, so test the zipper’s operation before you finalize the cut pieces and stitching, ensuring it opens fully and lies flat when the bag is unzipped.
Thread is the invisible workhorse that ties everything together. The color choice should harmonize with or intentionally contrast the fabric for a tailored look. For sturdy canvas or denim, a heavy polyester thread or a robust all‑purpose thread helps carry the weight of the bag without breaking. If your design calls for visible topstitching, a contrasting thread can become a deliberate design element, echoing the hardware or piping you plan to add. Check that the thread weight and needle size align with the fabric’s thickness and the zipper teeth. If you’re sewing with a modern machine, selecting a slightly stronger needle type for thick layers can prevent skipped stitches and bent needles during the zipper insertion.
Lining materials and interior details deserve careful attention, not only for comfort but for organization. A smooth lining fabric makes items glide in and out of the bag, while a darker lining can mask everyday scuffs from keys and coins. If a pocket or card slots are part of your plan, choose a lining material that holds its shape when stitched and remains quiet under plastic and metal hardware. Some makers prefer a contrasting lining to reveal a hidden bonus pocket when the bag is opened. When you design the interior, consider how you’ll organize items: a simple single pocket, a divider, or multiple small slots can dramatically improve usability. The lining placement, understood early in the process, also affects how you approach the zipper’s finish and the seam alignment along the bag’s mouth.
Interfacing, though optional, is a crucial lever for structure. A light fusible interfacing can add crisp edges to the main panels, helping the tote hold its shape even when lightly loaded. A medium weight interfacing delivers a more defined silhouette suitable for stiffer fabrics. If you’re new to interfacings, begin with a modest weight on a scrap patch to observe how it affects drape, weight, and ease of stitching. The key is balance: too much interfacing can make the bag feel stiff and bulky, while too little might result in a floppy appearance that doesn’t flatter the fabric’s best attributes. When you choose interfacing, check that it adheres well at the seams and doesn’t gum up the feed dogs of your machine during the zipper work.
Tools are the scaffolding that supports every step, from cutting to turning to finishing. A dependable sewing machine is essential, along with a sturdy zipper foot or a specialized zipper attachment to keep stitches close to the teeth. Sharp fabric scissors are worth their weight in gold; a separate pair for denim or canvas can help maintain edge precision. Pins or clips lace the pieces firmly in place during the critical zipper phase, ensuring the teeth align and the fabric won’t shift under pressure. A tape measure provides accurate dimensions, while a seam ripper is your safety net for early mistakes. An iron and ironing board are non‑negotiable allies, delivering crisp seams and clean topstitching that elevate the bag’s overall presence. A small turning tool or even a straightforward chopstick makes the delicate work of turning handles and the bag mouth neat and efficient. Don’t overlook a reliable ruler with clear marks for seam allowances and edge placement; precise measurement underpins everything from zipper alignment to handle attachment.
Beyond the basics, a handful of optional finishes can push your tote from functional to professional. Bias tape or a neat facing can selectively cover raw edges, especially in the zipper area or along the bag mouth, giving a refined edge and easing the transition between fabrics. Finishing touches like a light interior pocket, a hidden card slot, or a magnetic snap can transform a simple tote into a versatile carrier for papers, groceries, or gifts. When you plan these details, sketch a quick interior layout and note where each feature will live. This foresight saves time and prevents rework once the fabric pieces are cut and the zipper is installed. A pattern or simple paper template acts as a compass here, helping you cut accurately and label each piece to avoid confusion in later steps.
Preparation is more than a checklist; it is a mental rehearsal for the work ahead. Pre-washing fabrics is a practical courtesy to the final user, reducing shrinkage and preventing color migration after steady use. A clear pattern or template keeps pieces organized, protecting you from miscuts and misalignments. If you’re working with slippery fabrics or heavy materials, a light spray of starch or a chalk line can help you keep edges straight as you cut. As you gather, you’ll start to see how the pieces will nest together, how the zipper will anchor the opening, and how the lining will translate into a clean interior. This stage is the quiet moment before the sewing storm, when you build the confidence that sustains you through the more complex parts of construction.
Finally, a practical note on design scope and linking ideas. For a broader look at designs that feature zippers, explore our guide on tote bags with zippers. This reference can inspire you to consider how zipper placement affects usability, aesthetics, and depth. It’s not a constraint but a doorway to experimentation with pockets, closures, and exterior styling that aligns with your chosen fabric and color palette. The goal of gathering is not just to assemble parts; it is to assemble possibilities. When you finally lay out the pieces, you’ll feel that quiet readiness that comes from knowing you have every necessary tool and material at hand, that you have prepped for smooth zipper work, and that you’re about to translate a design idea into a durable, everyday companion.
For a visual walkthrough that reinforces these principles, you can consult an external, step‑by‑step video: https://www.youtube.com/watch?v=6sXQj4eZ0uA. This resource illustrates how the planned components come together, including tips for boxed corners and a more polished finish. It won’t replace your actual practice, but it can reinforce your approach as you begin cutting and assembling. In the end, the act of gathering becomes a quiet commitment to care, consistency, and craft. Your tote bag will not only carry belongings; it will carry the confidence that comes with thoughtful preparation and precise execution.
null

null
Cutting the Blueprint: Precision Fabric Cuts for a Zippered Tote
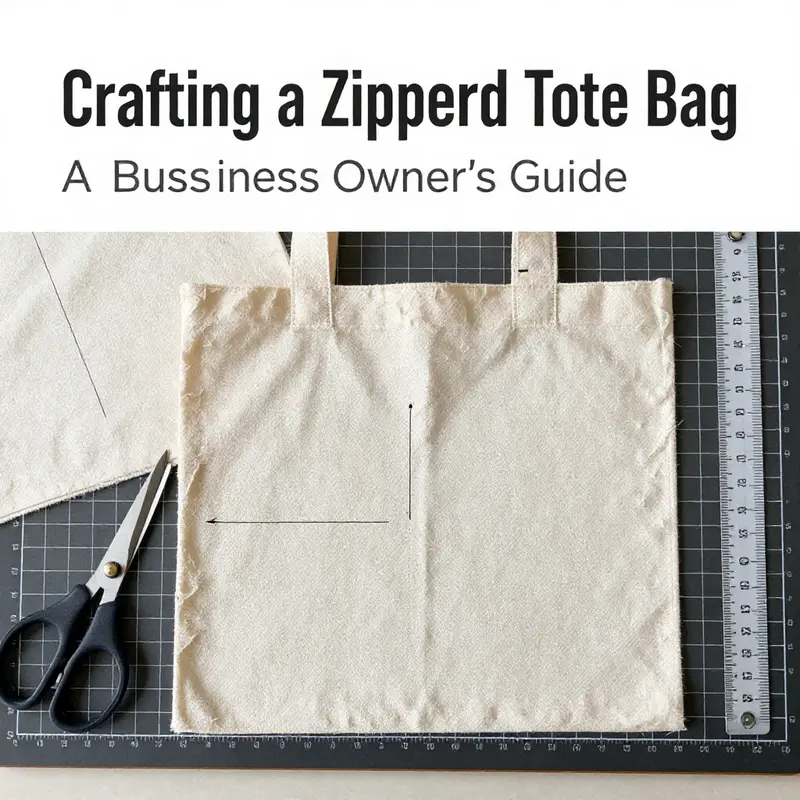
Cutting the fabric is where the tote begins to take shape, translating a sketch into a map of panels that will be stitched into a sturdy bag. Start by deciding your finished size, then add seam allowances—commonly 1/2 inch (1.27 cm)—to every piece. For a tote around 12 inches wide and 14 inches tall, cut main panels about 13 by 15 inches to account for the seams. If you want a contrasting bottom, cut an extra base piece with the same dimensions for balance. Label each piece (front, back, lining, bottom, straps) to keep the puzzle organized as you sew. Plan the zipper placement early and cut a zipper pocket panel and a reinforcing backing if desired. Consider whether you’ll interline for structure or keep the fabric soft for a drapier look. When cutting, ensure grain direction runs along the length to keep the bag square and resist stretching. Use pattern weights, a sharp rotary cutter, and a clear ruler to maintain accuracy. The result of precise cutting is a smoother assembly, cleaner seams, and a bag that holds its shape when carried.
Zipping It Right: Mastering Zipper Attachment for a Sturdy, Sleek Tote

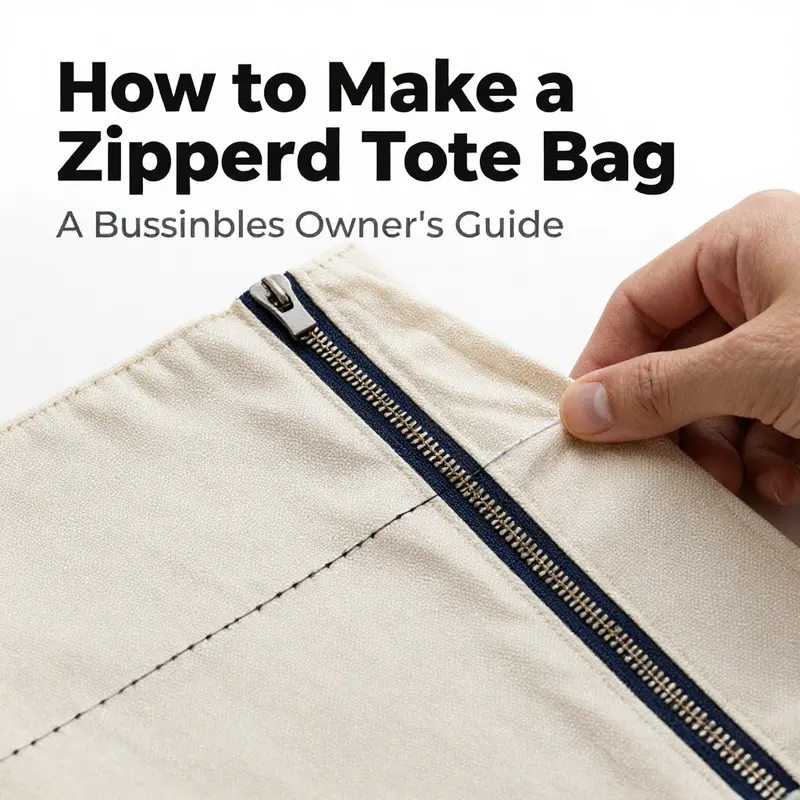
The zipper is more than a closure on a zippered tote bag; it is the hinge that determines the bag’s silhouette, wear, and everyday reliability. When a zipper is attached with care, the tote behaves like a well-made garment: it opens smoothly, closes with confidence, and holds its shape through use. The moment you decide how you attach that zipper, you set the tone for the entire project. Designing for function and style begins here, at the edge of the fabric where the teeth meet the tape, where precision becomes permanence. In the spirit of practical sewing, the most forgiving path for beginners is to attach the zipper early in the process. Doing so gives you control over alignment and tape tension before the layers grow bulky with lining and interfacing. It also makes the final steps—stitching the bag body and turning it right side out—cleaner and more predictable. If you’re aiming for a clean, professional look, this approach pays off, especially when you plan to reuse or gift the tote, where durability matters as much as appearance.
Start by choosing your path: attach the zipper to the outer fabric and the lining separately, or mount the zipper to the outer piece first and then to the lining. The method I recommend for most beginners is to attach the zipper to both outer and lining pieces before assembling the main body. This method keeps the zipper alignment consistent across layers and minimizes shifting when you sew the sides and bottom. Position the zipper face down along the edge of the outer fabric, aligning the zipper’s top stop with the fabric’s edge. Pin or baste the zipper in place, ensuring the teeth run straight and true. A zipper foot is invaluable here; it allows you to stitch very close to the teeth without the fabric wandering. If you don’t have a zipper foot, you can still manage with careful positioning and a regular foot, but take small test stitches first to check that the fabric doesn’t slip.
The moment of truth arrives as you sew. Stitch along the zipper tape about a quarter inch (roughly 6 millimeters) from the edge. This distance creates a secure seam while leaving enough room for the zipper to operate freely. Repeat the same process for the lining, placing it on the opposite side so that, once closed, the two pieces sandwich the zipper in the middle. After stitching, gently open the zipper and press the fabric flat. Pressing at this stage is not merely cosmetic: it sets the seam line, reduces bulk, and guides the next layers into alignment. A crisp edge helps the outer and lining pieces meet squarely when you sew them together later.
With the zipper attached to both outer and lining pieces, turn your attention to joining the bag’s main body. Place the outer and lining right sides together, with the zipper sandwiched between. It helps to align the edges at the zipper’s ends first, then work toward the sides and bottom, easing any fullness along the seam. If you’ve chosen a boxed-corner design, this is the moment to mark and sew the corners, allowing for the extra depth that will shape the tote. Sew along both sides and the bottom, leaving the top edge free to encourage the zipper’s full range of motion. When you finish, backstitch securely at the beginning and end to reinforce the seam—weights of daily use demand a stitch that won’t yield under pressure.
Press the seams as you go. A hot iron, used with steady, even pressure, helps the fabric lie flat and the seams disappear into the bag’s body. After you’ve closed the main seams, turn the bag right side out through the open top, using a turning tool or a blunt object to push corners into their proper shape. Give the bag a final press along the sides and bottom to accentuate its structure. This is not merely about looks; a well-pressed tote holds its form when used to carry books, groceries, or a laptop, and it reduces the risk of catching fabric on the zipper during use.
The next phase is where the zipper’s finish quality becomes visible. If you want a refined edge, a topstitch along the top edge can secure the zipper ends and reinforce the area where stress concentrates—near the zipper stops. Topstitching also adds a subtle, professional detail. Choose a thread color that either blends with the bag or provides a deliberate contrast for a decorative touch. Ensure the zipper lies flat and lies within its tracks when you run the machine. A quick test open-and-close across its length will reveal any snagging, misalignment, or uneven spacing. If you encounter snagging, lift the foot, reposition, and take smaller stitches. The goal is to glide smoothly across the entire length without catching fabric in the zipper teeth.
Weight-bearing considerations begin the moment the handles are attached. Handles that are stitched directly into the top edge or into the sides near the edges must be secured with reinforced stitching. Double stitching at the handle bases or bar-tack style reinforcement distributes weight evenly and minimizes the risk of tearing. The attachment points become a critical part of the bag’s durability; think of them as anchor points that keep your tote functional after repeated use. If you’re adding a removable strap, the attachment hardware should also be tested with a modest load before you rely on it for daily use. The aesthetic of the zipper—whether you choose a coin of color along the top stitch or a subtle invisible finish—should harmonize with the bag’s overall design so that the zipper feels like a natural element of the tote, not an afterthought.
The design context matters, too. A tote that functions as a document carrier may benefit from a more rigid top edge, possibly with a thin strip of interfacing near the zipper to prevent curling. A casual shopping tote might lean toward a relaxed top edge that gently drifts with the fabric’s grain while still performing reliably. The balance between structure and flexibility is what transforms a sewing project into a durable everyday item. In practice, the easiest path to that balance is to pre-press and stabilize your chosen outer fabric with a light interfacing if you’re using a lighter-weight material. This foundation helps the zipper sit neatly and reduces the risk of the fabric bunching along the seam when the bag is opened and closed repeatedly.
As you near the final phases, consider the bearers of daily use—the contents you intend to carry. The zipper’s operation should feel effortless, with a slider that moves smoothly from one end to the other. If you notice resistance, test the slider for proper alignment or inspect the zipper tape for mistracked threads. Sometimes a slider is simply a touch loose and can be gently nudged back into place or replaced if it has endured significant wear. Reinforcing the stops with a few extra stitches can prevent the slider from popping off under stress, a common failure point in improvised bags. A well-executed zipper assembly does more than close the bag; it provides confidence in every lift and motion, a quiet assurance that the tote is ready for everyday life.
To connect this technique with the broader article, remember that the zipper is the heart of the tote’s design language. Getting it right influences not just function but also the bag’s silhouette, weight distribution, and long-term wear. When shared with others, a tote that reliably zips and unzips becomes a practical gift or a dependable work companion. A link to a detailed resource on zipper-tote construction can offer further guidance for those who want to refine their method or explore variations, such as different zipper lengths, finishes, or decorative topstitching options. If you’re curious to see a practical, visually guided example, you can explore a related guide that focuses on tote designs with zippers for everyday use and gifting purposes.
For readers who want to see a visual walkthrough alongside this narrative, a reliable step-by-step video demonstrates how the zipper is mounted on both outer and lining pieces and how the bag is ultimately assembled. This can be a helpful complement to the written instructions and a way to observe consistent technique in real time. In practice, having a tangible example can reinforce the rhythm of the steps and the precision required to keep edges straight and seams clean. If you’re seeking a quick reference during a live project, revisiting the mental image of the zipper as a unifying seam can remind you to take your time with alignment and to test the mechanism at multiple stages rather than waiting until the end.
To further enhance your learning, consider consulting an internal resource that focuses on broader tote-bag design and construction. A comprehensive guide on tote-bag projects with zippers provides additional context for choosing hardware, lining materials, and interfacings that impact how your zipper performs under real-world use. You can find related discussions here: tote bags with zippers.
In the end, attaching the zipper well is not just about a neat seam; it’s about setting expectations—of how the bag will feel in your hand, how it will carry weight, and how its design will age with you. A sturdy zipper that moves smoothly through daily routines can become a small but telling emblem of your craft: a reminder that good details, patiently applied, yield reliable performance. As you continue through the chapter sequence of this article, the next steps will build on this secure foundation—adding the finishing touches, refining the interior organization, and testing the tote in real-use scenarios. The zipper’s successful integration becomes a touchstone for everything that follows, encouraging you to approach each stitch with intentionality and care.
External reference for further guidance: visual demonstrations and detailed techniques can be found in a broader how-to video resource that walks through attaching a zipper to a tote bag with lined construction and optional boxed corners. This illustrated approach complements the written guidance by showing the exact hand movements and fabric handling required for consistent results: https://www.youtube.com/watch?v=examplevideoid.
Crafting the Core: Assembling a Zippered Tote Bag for a Clean, Durable Body
The bag body is where precision pays off and the project truly starts to take shape. This is the stage where the outer fabric meets the lining in a way that sets the tote up for durability, neatness, and balance. Before this moment, you chose fabrics, pre-washed them to prevent later shrinkage, and selected a zipper that’s sturdy enough for daily use. Now the focus is on making the two main components work together as one solid shell. A well-assembled bag body feels effortless in hand, yet it hides a careful sequence of moves that, when done right, reduces bulk, keeps edges aligned, and produces a professional finish that lasts. The decisions made here ripple through the entire bag, influencing how the handles feel, how the bag holds its shape, and how smoothly it opens and closes when in use.
Start with the main panels, the outer fabric and the lining, cut to pattern and prepared for assembly. If you labeled each piece during cutting, you already have a map for the next steps. The outer panel pair forms the visible face of the tote, while the lining panel pair creates the interior structure that protects contents and gives a clean interior finish. When the pieces are lined up, it becomes clear how the zipper will anchor the two halves. The zipper is not just a closure; it is the hinge that connects the outer surface to the interior and helps define the bag’s opening and usability. The choice of a zipper foot during sewing helps keep the stitching just beside the teeth, which is essential for a tidy, durable seam that lies flat when the bag is opened. For many crafters, a zipper foot is the quiet workhorse that makes the rest of the steps glide more smoothly. If you want a visual guide to the basic zipper technique used in tote projects, you can explore tote-bags-with-zippers.
With the pieces prepared, the critical moment arrives: attaching the zipper in a way that keeps both sides even and aligned. Open the zipper fully, then place one outer panel face down on the work surface. Align the zipper teeth with the raw edge of the fabric, and pin it in place so it cannot shift. Take the second outer panel and position it right sides together with the first, so the zipper is sandwiched between the two outer layers. The right sides of the fabric should be facing each other, with the zipper teeth tucked inside. Sew along each side of the zipper, using the zipper foot and a stitch line close to the teeth. This technique locks the zipper to the outer shell firmly and minimizes fabric creep at the teeth. When you finish sewing both sides, carefully unzip the zipper and press the seam to set it. The same process is then repeated with the lining panel, creating a matched inner edge that will eventually align with the outer edge when the bag is assembled.
At this point the outer fabric is effectively a single piece with the zipper running along its top edge. The next move is to create the side and bottom seams that will form the bag’s depth. Treat the two outer panels as one unit now that the zipper is in place. Sew the side seams from the bottom up toward the zipper, using a standard seam allowance of about 1/2 inch (1.5 cm). Press the seam open to reduce bulk and ensure a crisp line along the sides. This step locks in the bag’s silhouette and helps the subsequent assembly to lie flat and square. The same approach applies to the lining: sew the two lining panels together along their side seams, then press those seams as well. A neat lining that lies flat inside the bag is the hallmark of careful construction and contributes to a polished overall appearance.
With both outer and lining bodies formed, the next phase brings them together into a single, usable shell. Place the completed outer bag body with the zipper in place and the lining body beside it, then align them at the top edges. Right sides should be together, and you want the zipper to be incorporated into this seam so that it becomes an integrated part of the bag’s opening. Pin around the entire top edge, including the area where the zipper runs, making sure the corners match and the zipper remains flat. Sew around the full perimeter, leaving a turning gap in the center of the bottom seam large enough to pull the bag right side out once the stitching is complete. This gap is essential for flipping the bag so the outer fabric ends up on the outside and the lining on the inside, with a clean, finished edge visible at the top. After stitching, trim the bottom seam allowances and corners to reduce bulk, and clip into the seam allowances at the corner points so the bag can turn neatly without hesitation when you pull it through the gap.
Turning the bag right side out is a satisfying transition from construction to finished form. Gently push the outer corners out with a turning tool or a blunt implement to maintain the bag’s square shape. The act of turning also reveals how the zipper, once a simple closure, now anchors the entire construct into a coherent, usable form. Once the bag is right side out, you hand-stitch the turning gap closed with a ladder stitch. This invisible seam ensures the exterior remains uninterrupted and the interior seam remains neat. The ladder stitch is a quiet craft technique that, when done well, disappears from view and leaves only a clean line along the bottom. The result is a bag body that looks like a single, continuous surface, a hallmark of thoughtful assembly rather than mere fabric concatenation.
Throughout this process, maintaining consistency in seam allowances and pressing between steps is key. Pressing is not a decorative flourish; it is a structural step that makes the seams easier to align and the finished edges crisper. A well-pressed tote body shows up in subtle ways: the zipper lies flat and smooth, the side seams respond to careful pressing, and the interior lining slides into place with minimal bulk. The design choice to sew the lining and outer panels separately and then join them at the top edge gives the tote a balanced weight distribution and a professional finish. It also simplifies future additions, should you want to add pockets, dividers, or magnetic closures after the fact. The techniques here are fundamental to keeping the tote sturdy through daily use and countless openings and closings.
As you prepare to complete the project, consider how the core you have just assembled supports the remaining elements—handles, interior pockets, and any closures you may add later. The handles will bear the weight of the bag’s contents, so reinforcing the attachment points and selecting handle lengths that suit your intended use are the natural next considerations. But the integrity of the bag body you have just built is what will endow the tote with longevity and dependable performance. With the body finished, you now have a ready platform for customization, whether your aim is a minimalist carrier, a stylish document bag, or a thoughtful gift tote. The next steps will expand on handles, internal organization, and optional closures while remaining grounded in the sturdy, clean construction you have established. For additional guidance on connecting zipper techniques with broader tote designs, refer to the linked resource above and continue to build on the solid foundation you have created. If you prefer a guided, visual walkthrough, you can also consult an external step-by-step video tutorial that demonstrates the turning and closing process in action: https://www.youtube.com/watch?v=examplevideoid.
Final thoughts
The creation of a zippered tote bag goes beyond mere craftsmanship; it serves as an embodiment of your business’s ethos while providing a functional item that customers appreciate. By following the detailed steps outlined in this guide, you can produce a product that stands out, promotes sustainability, and aligns with your brand identity. Start crafting your zippered tote bag today and watch it become a staple for your customers.