
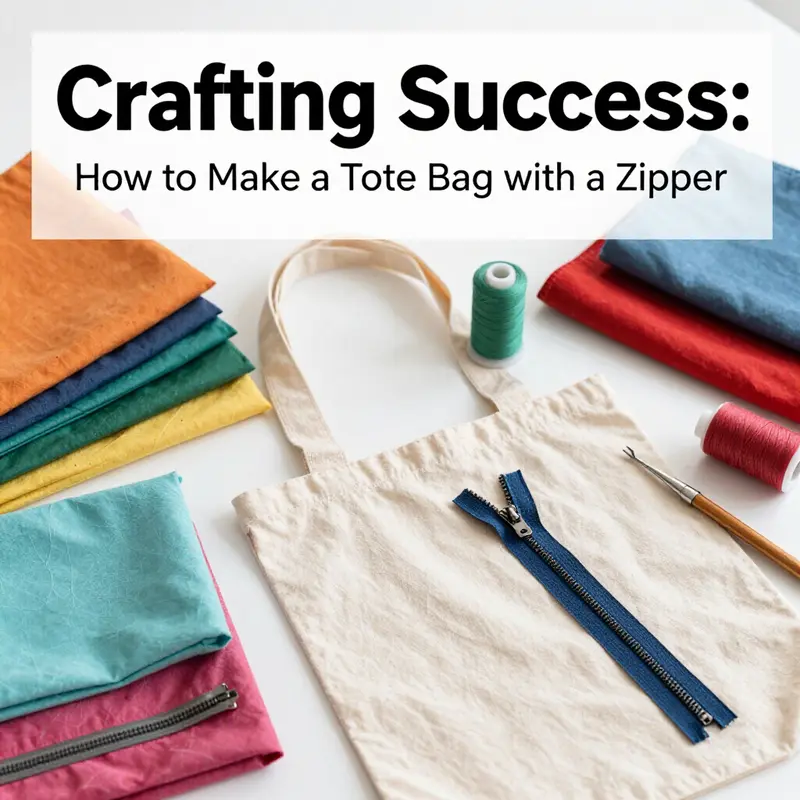
In today’s competitive marketplace, unique branding evolves beyond standard advertising; it encompasses merchandise that resonates with your audience. Tote bags, especially those with zippers, seamlessly blend style and utility. For business owners, creating tote bags can serve various purposes: from promotional items to practical accessories for customers. This guide will walk you through three essential chapters—gathering materials, step-by-step crafting, and final touches—to ensure your tote bags represent your business flawlessly.
Gearing Up for a Zippered Tote: Material Choices, Planning, and Preparation
Choosing the right materials for a tote bag with a zipper is more than picking pretty fabrics. It is about balancing durability, weight, and feel with the shaping and function you want in daily use. The materials you select set the tone for every seam, every fold, and every finish you will craft. When you begin, the goal is to create a bag that not only looks good but holds up under the kind of everyday wear a tote inevitably endures—reaching into a crowded bag, sliding across a desk, or squeezing under a seat on a commute. With that in mind, material selection becomes a thoughtful, almost tactile conversation between fabric, zipper, and interfacing, guided by the size you have in mind for the bag and the kind of life you expect it to lead. Consider, first, the exterior fabric. For a tote designed to be sturdy and reliable, many sewists turn to fabrics that offer a bit of weight and bite in the hand: canvas, duck cloth, denim, or waxed cotton. These fabrics bring structure and resilience, allowing the bag to stand up on its own when set on a surface. They also respond well to ironing and topstitching, a factor that becomes important once the zipper is in place and the bag starts to take shape. The exact choice among these options often comes down to how you want the bag to read visually. A canvas tote with a natural, unbleached look offers a casual, sturdy vibe; a waxed canvas carries a rugged sheen and water resistance that adds practicality for city use; denim offers a familiar, everyday carry feel with a touch of casual shine. If you prefer a lighter touch or a bag meant to be carried as an accessory rather than a workhorse, lighter cottons or linen blends can be used, but you will want to compensate with a reliable lining and a bit of interfacing to preserve shape. The outer fabric’s weight and drape also influence zipper choice; a heavier fabric might require a slightly stronger zipper to maintain the bag’s clean silhouette without sagging around the zipper line. Either way, plan for about 1 yard (0.9 meters) of outer fabric for a standard tote, though you may need more if you want generous side gussets or a taller profile. The lining fabric is equally important. The inner layer is what your items meet every time you reach for the bag, and it should feel pleasant against your skin while resisting wear. A smooth cotton or cotton blend lining is usually a good match for most exteriors; it’s easy to sew, takes prints well, and cleans up with a quick wipe or a machine wash when needed. Just as with the outer fabric, the amount you cut for the lining depends on the bag’s dimensions. For a standard tote roughly 28 centimeters wide and 14 centimeters high, you’ll typically cut a couple of lining pieces of similar proportion—enough to enclose the body and still allow the zipper to sit comfortably inside the seam allowances. If you like a bag that unfurls a bit for easy access, consider slightly longer lining panels to create a more generous interior. When you begin to map out the zipper, you’ll find that the size of the zipper is intimately tied to both the width of the bag and the way you want the closure to read. For a small to medium tote, a zipper in the 7- to 10-inch (18–25 centimeter) range is common. The exact length should be a touch shorter than the width of the bag you’re constructing because you want the zipper to sit neatly without dipping into the fabric on either end. The zipper’s strength matters too. A zipper that feels rigid in your hands will be easier to work with and will hold up to repeated openings and closings, but a zipper that is too stiff can hinder smooth operation. A balanced choice is key. You’ll notice many sewists prefer a coil zipper with a fabric tape for bags. It glides well and is often less prone to snagging than metal alternatives, which can be kinder to lighter fabrics. The zipper’s color is another decision that affects the bag’s final look. A zipper that matches or subtly contrasts with the exterior can either blend in for a minimal, cohesive appearance or provide a deliberate pop of color that becomes a design feature. If the bag’s lining is a light hue, a darker zipper can anchor the pocket into visibility and provide a sense of depth, while a light zipper on a dark exterior can create a crisp, contemporary edge. If you are making a bag with a flap and a snap closure, the hardware becomes part of the design story. A small zipper pull is often enough to satisfy functional needs without stealing attention from the fabric’s texture. A separate snap button to secure the flap completes the closure system and has to be chosen with a bit of care. It should be sized in harmony with the flap’s width and weight so that it doesn’t feel flimsy when you press the bag shut. In addition to fabrics and zipper, a modest amount of interfacing dramatically influences the bag’s performance. Interfacing is optional but highly recommended, especially when the outer fabric is on the lighter side. A fusible interfacing—commonly a lightweight bodice or a midweight 60 gram weight—adds structure to the bag without making it too stiff. The right interfacing helps the bag stand up when it’s set on a table, prevents sagging along the zipper line, and gives you a crisp edge that buffers the interior from fraying. When you choose to add interfacing, the key is to apply it to the wrong side of the outer fabric before cutting. This ensures the interfacing adheres to the fabric evenly and doesn’t peel away from the surface during handling. In summary, the materials are the palette from which your tote’s character emerges. Outer fabric conveys the bag’s mood and durability; lining fabric defines comfort and practicality; the zipper provides secure closure and a smooth user experience; interfacing anchors structure and balance. The sum of these choices translates into a bag that not only looks right but feels right and performs well under daily use. With the materials chosen, you’re ready to translate this plan into a tangible object. You’ll find the zipper’s size and the fabric’s weight guiding your numbers for cutting and sewing, with the aim of stitching a tote that opens wide enough for easy access while staying compact enough to be portable. A practical reference you might consult as you plan your build is a focused guide on tote bags with zippers, which walks through how the zipper integrates with the bag’s body and lining. The guide can provide visual cues for how the zipper sits between layers and how to press the fabric to achieve clean, professional edges. For those who want a broader view of related designs and finishes, several comprehensive examples across different styles are available via the linked resource that showcases a range of tote configurations and closures. As you evaluate materials, it helps to keep a mental catalog of how each choice will affect the bag’s eventual use. If you’re assembling this project with a friend, you can each test different fabrics and see how they pair with the same zipper length. The process becomes a small experiment—one you can repeat with varied textiles to suit wardrobes or particular personalities. The internal conversation you have with the materials is part of the craft. It’s a conversation that grows with experience: you learn which fabrics hold their shape after a few passes with the iron; you learn how different interfacing weights respond to topstitching; you learn how the combination of zipper length, fabric width, and seam allowances influence the turning method and edge finishes. And once you’ve settled on a plan, you’ll notice a quiet confidence. The bag’s body begins to take form in your mind before you cut, and that mental image guides your hands as you lay out pattern pieces, align grainlines, and pin pieces together with a calm, practiced rhythm. As you prepare to gather your materials, a few practical reminders help keep the process smooth. Take stock of every item before you start. Lay out outer fabric, lining fabric, interfacing, zipper, zipper pull, and hardware in a single workspace so you can see the flow from the exterior to the interior. Double-check your measurements against your pattern or your envisioned tote size. If you’re new to sewing, a pattern or template will act as your anchor, ensuring you don’t accidentally cut pieces that don’t align when you begin to stitch. If you’re reusing fabric from a previous project, inspect for defects—tears, frays, or discoloration—that could compromise the bag’s long-term durability. It’s often worth reinforcing corners and stress points with a bit more interfacing, especially near the zipper line where the fabric tends to flex the most. The preparation phase can feel meticulous, but it pays off in the bag’s final appearance. The exterior will look crisp, the lining will glide smoothly around the interior, and the zipper will operate with a steady, confident pull. This careful preparation is not merely about aesthetics; it’s about function. A well-chosen zipper of appropriate length resists popping open when the bag is carried, and the fabric’s weight distribution remains balanced so the bag sits comfortably in the hand or against the shoulder. The correct interfacing ensures that the bag retains its shape after frequent use. A beige canvas bag with a dark zipper, for instance, will present a timeless look that works in many settings, while a waxed canvas exterior paired with a neutral lining offers a practical, enduring aesthetic. If you prefer a more polished finish, a slightly stiffer bag with a minimal drape can be achieved through a heavier interfacing and careful pressing. The key is to test your plan in small steps: cut a scrap piece, fuse interfacing to a test swatch, run a zipper along a sample seam, and check how the pieces align before committing to the full bag. This approach saves time and avoids the frustration of discovering misaligned edges after heavy stitching and turning. The materials you choose also shape your finishing choices. The thread you select should match or lightly contrast with the fabric for a clean look. A midweight polyester or cotton-wrapped polyester thread often provides reliable strength for tote seams without excessive bulk. The needle size you use will depend on fabric weight and interfacing; a universal needle in the 90/14 to 100/16 range tends to work well for most midweight fabrics with light interfacing. If you’re using very heavy fabric or multiple interfaced layers, you might step up to a heavier needle to prevent skipped stitches and thread breaks. The overall preparation phase, while practical, is also a space for creativity. It’s where you translate a concept into a tactile object. The leather or fabric tag you might attach to the exterior, the decorative topstitching you plan along the edges, or a contrasting zipper color all begin here as potential design ideas. In practice, you’ll likely run through the steps of preparing the lining and outer fabric, applying interfacing where needed, assembling the zipper with the lining, and then attaching the outer fabric to the zipper line with careful stitching. The goal is to create a process that feels intuitive, almost like a dance you’ve practiced many times. As you move from planning to execution, one subtle but important consideration arises: how the turning method will affect your material choices. You want to ensure the outer and inner layers meet neatly at the turning point, so you might choose fabrics that press cleanly and don’t resist turning. You’ll test the turning port and practice a turning step on scrap fabric to confirm that the seam allowances lie flat and the corners emerge square rather than rounded or puckered. With all of these considerations in mind, you’re ready to translate the theoretical plan into a concrete, well-prepared kit of materials. The flow from fabric choice to zipper selection to interfacing weight is not a mere checklist; it is a cohesive design conversation that ensures your final tote will be as practical as it is pleasing to the eye. When you’re documenting your process, you may find it helpful to keep a short record of what you used and why. Note the exact yardage of outer and lining fabrics, the zipper length, the interfacing weight, and your thread choice. In time, those notes become a personal guide you can reuse for future projects, helping you rebuild successful combinations rather than reinventing them with every bag. If you’d like to see a broader reference for fits and closures, consider exploring a focused guide on tote bags with zippers, which can provide additional perspectives on how designers balance form and function in zippered totes. For readers who want to explore related bag styles and features, here is a curated resource that showcases how different bags integrate hardware and closures while maintaining versatility across settings. External resources can deepen understanding of how the zipper interacts with multiple fabrics, and they offer insights into alternative finishing techniques that still respect the core principles of this chapter. To broaden your knowledge, you can consult the external reference linked here, which provides detailed guidance on tote construction with zipper closures and related techniques. External reference: https://www.allaboutsewing.com/how-to-make-a-tote-bag-with-a-zipper/. The journey from material selection to a finished, functional tote is an invitation to practice, observe, and refine. Each bag you prepare strengthens your understanding of how the components behave under stress, how the fabric folds at the seams, and how the zipper integrates with the structure to provide reliable closure. By approaching your materials with curiosity and care, you’ll cultivate a confident sewing practice that translates into consistent results across projects. The next chapter will guide you through the actual assembly, starting with how to prepare the lining and outer pieces, align the zipper, and ensure a neat, professional finish that stands up to daily use. For readers seeking a broader context or examples of stitch quality and finishing touches, the general principles outlined here are reinforced in numerous tutorials that emphasize precision, patience, and consistency as the hallmarks of successful zippered tote construction. If you want to see practical demonstrations of how these material choices translate into a real bag, you can refer to the external guide mentioned above to compare different approaches and outcomes across a range of fabrics and zipper configurations. The preparation phase, though lengthy, is a foundation you will rely on as you move forward in the project and into deeper customization, such as adding pockets, reinforcing corners, or experimenting with contrasting topstitching. It’s this attention to materials and planning that ensures the tote will not only look correct but feel and perform correctly in the long run. As you carry your materials to the cutting area or workspace, you’re setting the stage for a process that rewards careful preparation with confident execution, clean lines, and a sturdy closure. The rhythm of measuring, cutting, fusing, and pinning becomes a familiar cadence that signals you’re ready to bring your tote to life. In sum, the materials—their type, weight, color, and interaction with the zipper—are not just a starting point. They are the architectural bones of the project. The selection you make now determines how the bag behaves after you finish, how it wears over time, and how satisfying it is to use every day. Embrace the planning phase, and your zippered tote will emerge with a balance of practicality and style that echoes your own preferences and needs. As you proceed, keep in mind the suggestion to explore further through the linked guide on zipper-equipped totes; it can offer additional angles on how to optimize material choices for different aesthetics and uses. The topic of materials is broad, but the core idea remains simple: pick fabrics that feel right to you, pair them with a zipper that works with the bag’s width, reinforce with appropriate interfacing, and finish with hardware and thread that support both function and beauty. This thoughtful pairing of components will give you a tote that not only serves a daily purpose but also carries a personal touch that makes it uniquely yours. The chapter closes with the conviction that preparation is not a step in a list but a philosophy—one that honors the craft and respects the materials. Now, with a clear sense of what to gather and why, you’re ready to move into the practical sequence of assembling the bag’s components, starting with attaching the zipper to the lining and outer layers in a way that ensures a clean, secure, and durable result.
Stitching Security and Style: A Seamless Path to a Zippered Tote Bag
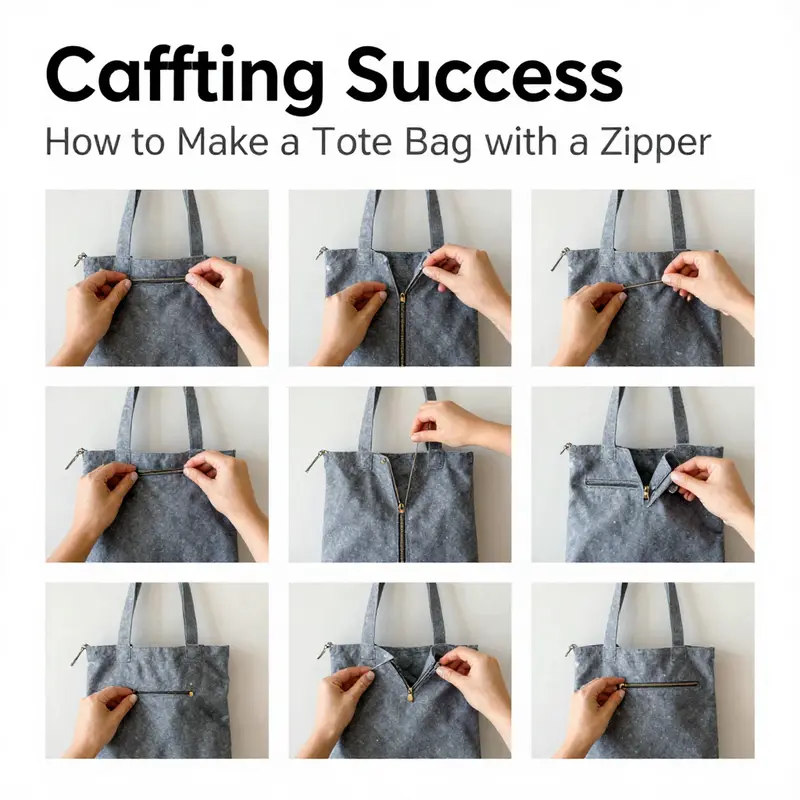
The tote bag you carry every day is more than a container; it is a compact statement of order, precision, and personal taste. When a zipper closes the opening, the bag gains security for keys, phone, and the little essentials you carry. Designing and sewing a zippered tote invites a balance between straightforward technique and thoughtful detail. Consider fabric texture, weight, and how the zipper interacts with the outer fabric and lining to create a finished piece that feels intentional. Start by selecting a fabric with enough body to hold its shape, and choose a zipper length that leaves room to maneuver the slider. The process unfolds in stages: cut two main pieces for the body plus a lining, attach the zipper to the lining, then to the outer fabric, seam the bag, turn it right side out, and finish with a neat topstitch. The result is a durable, stylish tote that can be used daily and tailored to your taste with a contrasting lining, a decorative zipper pull, or a simple flap. For variation, you can adapt the size, try different zipper types, or add pockets inside or outside. The key is to maintain alignment and neat edges to achieve a professional finish.
The Finishing Flourish: Mastering Structure, Care, and Closure in a Zipper Tote

The finishing phase of a zipper tote is where all the work you did to shape and sew the bag comes to life. It is not decoration alone but the moment when durability and daily use are cemented in place. With the body and lining aligned, the focus shifts to edges seams and the smooth operation of the zipper. A tote should feel solid in hand, hold its shape when loaded, and open and close without snagging or pulling. Each touch point from the mouth to the handles and the turning port adds to the bag confidence and longevity. The goal is a clean professional look achieved through careful precise steps rather than quick fixes.
Pressing and getting the silhouette right is the first priority. Return the bag to a flat smooth surface and apply a light, even press with a cloth between the iron and the fabric. Use low to medium heat and avoid scorching. Start at the corners and work toward the center, paying extra attention to the junctions where the handles attach. A steady press helps the seams settle and reduces visible wrinkling, giving the tote a crisp profile that reads as ready for daily use.
The mouth of the bag deserves attention because it is highly visible and subject to wear. A subtle edge finish along the inner edge helps stabilize the opening and keeps the lining in place as the bag is opened and closed. A narrow line of topstitching a few millimeters from the seam can guide the fabric and create a clean boundary. If the fabric tends to fray, this reinforcement also adds to appearance and durability and prevents the lining from shifting during use.
Zippers are the heart of the closure system. Check that the zipper moves smoothly at corners and turns. If you used a metal zipper test it at every bend to ensure it does not catch on bulk at the seams. A nylon or hidden zipper head usually glides more quietly, especially when the bag is loaded. If desired install small end stops to prevent the pull tab from moving past the edges and to stop the zipper from separating when the bag is opened wide. During installation keep the pull in a consistent position and smooth the zipper tape to avoid folds inside the bag.
Reinforce the handles where they meet the body. A sturdy handle should be stitched securely and reinforced with extra backstitches or a small bar tack at the base. If your design uses a wide flat handle consider a small cross stitch or reinforcing stitch near the attachment point to distribute load more evenly and reduce the risk of tearing. The extra reinforcement pays off after a day of daily use when the bag carries heavier items.
Turning and final topstitching seal the construction. When turning the bag right side out smooth out any bulk at the corners and press again. Finish with a close even row of topstitching around the perimeter, keeping the stitches near the edge. This final step locks multiple layers together and gives the bag a professional finished edge that behaves as a single unit when carried or set down.
The turning port should disappear into the seam as much as possible. Hand stitch the opening closed with a ladder or whip stitch that matches the fabric. Use small even stitches and a thread color that blends with the bag. The seam should be nearly invisible so the eye moves along the bag line rather than stopping at a seam.
Finally check the entire bag by running your hands along every seam and testing the zipper in both directions. Open and close several times, load a few items, and inspect for bulk or misalignment. If something feels off address it now before the bag goes into daily use. A well finished tote is not just attractive it is reliable day after day. If you want more ideas look to broader tote projects that explore edge control, zipper types, and additional stabilizers to suit different fabrics and weights.
For readers who want a broader frame of reference consider a short tour of related zipper finishes and durable tote designs. External resources can provide examples of reinforced gussets, decorative topstitching, and hardware choices that complement the finishing steps outlined here. Use these references as a guide to adapt the finishing sequence to your own styles and fabrics.
Final thoughts
Assimilating the principles of crafting a tote bag with a zipper equips business owners with not just a product but a promotional piece representing their brand. As you perfect each stage—material preparation, creation, and finishing—consider how this tote bag can serve customer needs and enhance your brand recognition. Invest your time and creativity into this project, as the outcome is a functional and stylish accessory that can leave a lasting impression.