As businesses increasingly focus on sustainability, creative upcycling has become a popular avenue for environmentally conscious entrepreneurs. Making tote bags from feed bags is not only a cost-effective solution but also an innovative way to repurpose materials while showcasing uniqueness and style. This guide will take you through each essential step, starting from choosing the right feed bag, preparing it for crafting, sewing and assembling the bag, and finally adding the finishing touches that make your tote bag stand out. Businesses can leverage these attractive and functional bags to promote brand awareness while contributing to eco-friendly efforts in their communities.
Choosing the Right Feed Bag for a Durable, Upcycled Tote: Material Matters, Shape Strategies, and Practical Judgment

Choosing the right feed bag sets the foundation for a tote that not only carries your groceries or books but also carries a story of resourcefulness. The decision rests on more than a superficial appeal of color or logo; it hinges on material quality, structural integrity, and the practical realities of daily use. Feed bags are typically crafted from high-density polyethylene (HDPE) or heavy-duty woven polypropylene. Each material has its own strengths, and understanding those strengths helps you pick a bag that will last, wash cleanly, and resist the occasional dribble of rain or spill in the kitchen. HDPE, with its smooth, slick surface, often feels like a sturdy rind around the contents. It’s waterproof, resistant to tearing, and surprisingly pliable for molding into a tote with just a few careful cuts and seams. Woven polypropylene, meanwhile, brings a fabric-like strength to the table. Its woven threads create a rugged texture that behaves like fabric when you sew, yet keeps a level of rigidity that helps the tote stand up when you set it down on a curbside or a station seat. When you begin the selection process, you don’t need to be an expert in polymer chemistry, but you do need a trained eye for signs of long-term endurance. Start by scanning for bags that feel solid in hand and show minimal wear around the handles and seams. A sturdy bag will often have a slightly glossy finish on the HDPE variety, a sign of thickness and a tight weave that won’t fray easily at the edges. A woven polypropylene bag will feel heavier than a thin, flexible film and will exhibit a dense texture that hints at the density of the fabric inside. Either choice can become a dependable base for a project that makes waste useful rather than wandering into the trash, but the best pick is the one that holds its shape under load and remains intact under repeated use. As you inspect, pay attention to the bag’s closure type and structural design. Some feed bags come with simple push closures or even integrated zippers or drawstrings at the top. These features deserve consideration because they can be repurposed to add convenience, security, or style to the finished tote. A bag with a secure closure can translate into a tote that protects groceries from spilling, or a bag that doubles as a weekend tote with a more compact interior. If you prefer a clean, simple silhouette, a bag that closes by folding over and tucking may offer less complication during construction, but you’ll want to ensure the top edge can be finished neatly and reinforced so the closure isn’t strained by weight. The shape itself matters as much as the material. Rectangular feed bags, especially those that keep a consistent width from top to base, translate well into an aesthetically pleasing and functional tote with minimal waste. A bag that is wider at the base, with reinforced seams along the sides, provides natural stowage space and stability when you set the tote down. You’ll find that many commercial feed bags are designed with such a base to prevent wear in high-stress zones; those are the bags worth prioritizing because they already align with the structural logic you want in your tote. Shape and size also influence portability and the capacity you can plan for. If you aim for an A4-sized interior, you’ll cut two identical panels from the bag, matching the natural rectangle of the material to the intended product. For a larger tote, you can scale up with proportionally larger panels, always keeping the top edge open for easy access. The key is to choose a bag that gives you enough fabric to work with after you account for seams and potential reinforcement. The condition of the bag is the third pillar of a smart selection. A bag that shows signs of punctures, persistent fraying at the edges, or compromised seams should be avoided. The mission is not to rescue a bag that’s already telling you it’s tired; the aim is to source a resilient material that will take a reliable stitching line and still look clean after days of use. This is where the workshop mindset meets thrift-store sensibility: you’re not just selecting fabric; you’re selecting evidence of durability. A bag with clear logo printing and branding can add character to the finished tote. The logo, when kept intact, becomes part of the bag’s identity rather than a distraction. It’s a subtle homage to the upcycling ethos—taking something manufactured for one purpose and transforming it into a personalized, reusable everyday companion. If you’re curious about broader design trends and how to align your project with current tote aesthetics, it can be helpful to explore general tote trends. For a quick glimpse of what’s popular, you can check the tote-trends perspective, which gives insight into how shapes, colors, and finishes are resonating with modern buyers. tote-bags-trending. This kind of resource can spark ideas about color blocking with printed logos or choosing a clean, monochrome surface that you’ll later accent with stitching or patches. The aim is not to chase fashion for its own sake but to borrow a sense of contemporary presence that aligns with your sustainable craft moment. Before you lay hands on the fabric, you’ll want to envision the final form in your mind. Picture the two main panels as a front and back in the finished tote, each with its right side facing you during the sewing process. The inside-out approach is not merely a technique; it is a practical safeguard that preserves the integrity of the surface and reduces the risk of snagging or rough seams on the visible exterior. When you turn the bag inside out, you expose the raw edges in a controlled way, making it easier to stitch with a clean, enclosed seam later on. The construction becomes a quiet, methodical process rather than a rushed transformation. It’s worth noting that several reputable DIY guides advocate for a more durable finish, such as a French seam. A French seam—where you sew a narrow seam first, then encase it with a second seam along the same line—hides raw edges and provides an extra layer of reinforcement. This technique is particularly beneficial for plastic-based materials, which can be slick and prone to rolling at the edges. If you want to see a practical demonstration of how that process looks in a real project, there are detailed step-by-step tutorials available that show precisely how to transform feed bags into sturdy totes, including the careful handling of edges and corners. Turning to the practicalities of cutting, measure twice, cut once, and align the two main panels so their edges match as closely as possible. Because feed bags tend to be rectangular, this alignment is straightforward, but it’s still worth taking a moment to lay the pieces flat and confirm that the long edges will meet cleanly when you sew. If you want a little extra structure, you can add a bottom panel cut from the same bag material but slightly smaller than the main panels. The bottom panel functions as a platform for heavier loads and helps the tote maintain its shape when it’s placed on the ground. As you secure the panels, start with the long edges, using a straight stitch or a sturdy overlocker if you have one. A nylon or polyester thread provides the extra bite you want when you’re working with plastic composites; it resists shredding and holds up to abrasion when the tote is carried by its handles for long stretches. After sewing the front and back panels together along the sides, you’ll come to the top edge, which remains open initially. This is the moment to reflect on finish options. If you’re aiming for a clean, professional look, you can press the seams flat with an iron suitable for plastic or use a seam roller to tame the seam allowances. For added durability, a zigzag or overcast stitch along the top edge helps prevent fraying and creates a tidy hem. If you want to go the extra mile to seal the edges, heat-sealing tape can be a practical, low-profile solution for plastic bags. The heat-seal approach melts the edge slightly, creating a sealed, polished edge that won’t snag or unravel. It’s an option worth considering if you’re aiming for a minimal-seam aesthetic or if you’re working with particularly slick HDPE. The handle construction deserves its own careful attention because it’s the live hinge that bears the weight of each load. Cut two strips from the bag’s side seams or from leftover fabric, each about 1.5 to 2 inches wide and 20 to 24 inches long. Fold each strip in half lengthwise and press flat. Sew along both long edges to form a sturdy tube. Attach the handles to the inside of the bag by sewing through the top edge of both the front and back panels, securing firmly at the top corners. This interior attachment gives the tote a clean exterior line while still providing the strength needed to lift heavy loads. When you turn the bag right side out, give the top edge a final professional touch by hemming or binding the edge. A zigzag stitch across the top keeps the seam from curling and adds a subtle decorative finish. If you’re feeling experimental, you can add a simple decorative element—perhaps a small patch or a line of stitching in a contrasting color—to give the tote a bit of personality without undermining its utility. In terms of care and maintenance, the tote benefits from simple, practical cleaning rather than aggressive washing. A damp cloth can remove surface dirt, and air-drying helps preserve the integrity of the plastic and stitching. Avoid high-heat exposure that could warp or weaken the plastic over time. The goal is a tote that ages gracefully and remains ready for the next grocery run or book-laden trip to the library. The broader narrative here is one of practical judgment guided by a respect for material behavior. HDPE’s waterproof, wipe-clean surface makes it an ideal choice for a quick wipe-down after a rainy market visit. Woven polypropylene, while perhaps a bit heavier, offers a tactile richness that can be beneficial if you plan to add embellishments or patchwork elements. Either path supports a sustainable practice: turning a used bag into a durable, reusable tote that displaces disposable plastic shopping bags. The process is not simply a craft project; it is a statement about how small choices, like selecting a sturdy feed bag, can contribute to a more resilient everyday ecosystem. As you contemplate your next steps, remember that the best decision is the one that aligns with your skills, your intended use, and the bag’s condition. If the condition is robust, you’re likely to enjoy a tote that lasts many seasons. If the bag shows minor wear, consider reinforcing stressed areas with extra stitching or a small fabric patch in a discrete, functional color. The joy of upcycling lies in transforming what would otherwise be waste into something practical and personalized. For many makers, that blend of utility and personality is precisely what keeps the process engaging week after week. If you’re seeking broader inspiration related to tote design trends, you can explore current patterns and silhouettes through a dedicated trends page that keeps fashion-forward details within reach while still honoring sustainable practice. tote-bags-trending. This kind of context can help you decide whether you want a minimalist look or a tote that carries a narrative in its fabrics and silhouettes. Finally, for hands-on guidance and a complementary perspective on transforming feed bags into functional totes, you can consult a well-regarded, step-by-step tutorial. It walks through material preparation, seam finishes, and practical tips for handling plastic-based fabrics, offering a concrete reference that many DIY crafters find invaluable. External resource: Tote Bags Made From Feed Bags on Instructables.
From Feed Bag to Fashion-Ready Material: The Essential Prep for a Durable Tote
Preparing the material for a tote bag rescued from a feed bag is more than a preliminary step; it is the quiet work that determines the bag’s longevity, look, and daily usefulness. The moment you choose a sturdy feed or fertilizer bag, you are choosing a bit of industrial resilience that, with the right prep, can become a reliable companion for groceries, books, gym gear, or a casual city outing. The material itself—HDPE or woven polyethylene—has built-in strengths: waterproofing, tear resistance, and a rugged character that can endure the bumps of everyday life. But those strengths mean little if the bag arrives at your worktable with residue, weakness in the seams, or hidden dampness. Preparation, then, becomes both a practical and a creative act, a ritual that respects the material while setting the stage for sustainable design. It is where upcycling becomes mindful craft, a bridge between waste reduction and personal expression, and it is the gateway to a tote that feels as sturdy as it looks.
The first step in this preparation is understanding what you are working with. Feed bags are designed to survive a long voyage from farm to storage, and that durability translates into a material that is waterproof, resistant to tearing, and capable of supporting substantial weight. Yet this very durability can mask flaws that only reveal themselves once the bag is in use as a tote. The logo, the color printing, and the overall heft of the bag contribute to its personality, but they can also introduce challenges if the print contains oils, adhesives, or dyes that could transfer or degrade during cutting and sewing. A crucial mindset emerges here: treat the bag as a partner to your project, not a disposable raw material. A thorough cleanse and a careful assessment can reveal the bag’s hidden strengths and any weak points that must be reinforced before you begin shaping.
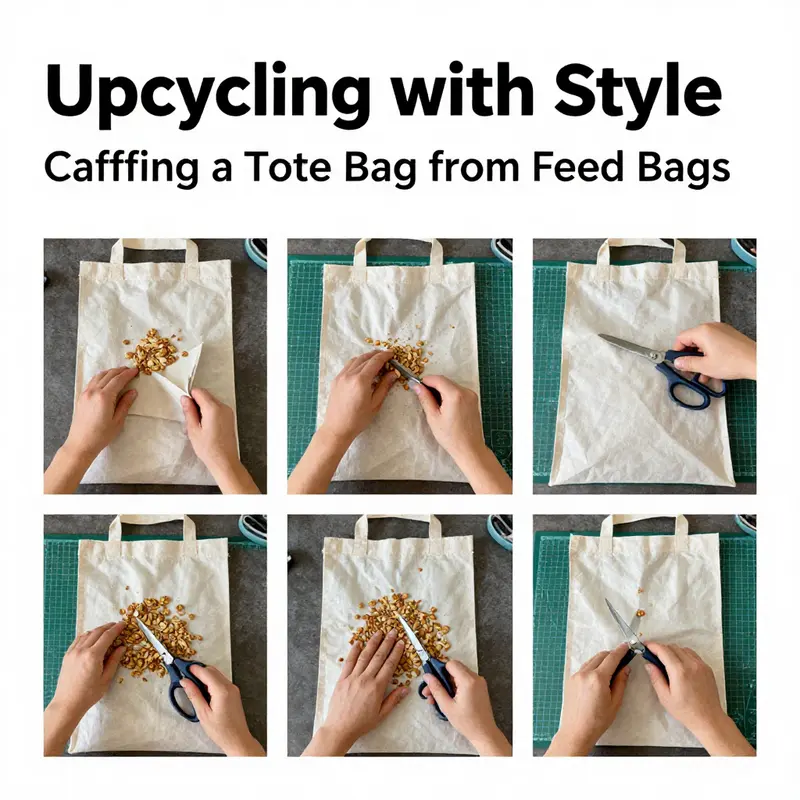
Cleaning the feed bag is both sensory and practical. Start by emptying any residual feed, which, although unlikely to be harmful in a home workshop, can carry dust, seed particles, or small debris that you do not want to trap inside the tote or transfer to its contents. A simple approach works well. Shake out large bits, then wipe the interior and exterior with a damp, wrung-out cloth. The cloth should be just slightly moist, not sopping, to avoid introducing excess moisture into any seams or folds. If stubborn grime clings to surface prints or logos, you can use a mild, non-abrasive detergent diluted in water, applying it sparingly with a soft cloth and then wiping clean with a fresh damp cloth. The goal is to remove dust and lingering particles without saturating the fabric or degrading the print. If you notice a strong odor, which sometimes accompanies recycled plastics or polymer prints, a light airing in a well-ventilated space can help. In some cases, a brief wipe with a solution of baking soda and water can neutralize odors without affecting the material’s integrity. While you cleanse, keep a vigilant eye on the seams and edges, because what you see on the surface may hide tensions along the stitching that could become issues later.
As you finish cleaning, you shift into an inspection mindset. The durability of the bag hinges on seams and stitching, and this is where the chapter’s practical advice becomes a predictor of success. Inspect every seam you can access for signs of wear, loose threads, or small rips that could propagate once you start cutting and sewing. In many cases, the original bag’s stitching is robust enough for reuse, but it’s wise to be prepared to reinforce or replace weak areas. If the handles feel flimsy or show any signs of thinning, plan to reinforce them with additional strips of sturdy material, ideally from the same bag or from a compatible scrap. Reinforcement can mean doubling the stitching on the top edges, or adding a backing strip along the handle’s base where it connects to the bag; this is not merely a functional fix but a way to preserve the bag’s long-term usefulness and safety for daily use. While you assess, consider the bag’s logo and printing as part of the bag’s narrative. The print adds character and a story to your tote, and if the graphic is well-integrated with the bag’s shape, it can become a recognizable signature. If the logo is in good condition, you may want to preserve it as a deliberate design choice rather than attempting to remove or obscure it. For those who wish to explore further or find inspiration on how others thread fabric into fashion while keeping durability at the forefront, a quick exploration of fabric tote ideas can be enlightening, such as exploring resources like Fabric tote bags for women, which highlights how textiles and prints shape a practical yet stylish silhouette.
Drying the bag completely after cleaning is not a mere afterthought; it is a safeguard against mold, mildew, and hidden moisture that could compromise the bag’s construction. HDPE and woven plastics hold water differently than natural fibers. To ensure a thorough dry, lay the bag flat or hang it in a well-ventilated area away from direct heat sources. Direct sunlight can cause some prints to fade over time, and high heat can warp plastic components or alter the bag’s shape. A slow, even dry is best, allowing any moisture that clings to the interior corners or layers to escape. If the bag showed signs of condensation inside after washing, give it extra time to dry with the top open so air can circulate through the interior. This step might seem mundane, but it directly affects how clean and stable the bag will be when you cut and sew.
Beyond moisture, it is worth addressing odors and surface residues that might linger from storage or transport. A gentle air-out, followed by a light wipe, can restore a fresher baseline. If you detect sticky residues from prints or adhesives, a mild solvent-free approach—such as a damp cloth with a touch of mild soap, then a final rinse with a clean, damp cloth—usually suffices. Avoid strong solvents that could interact with the polymer’s surface or cause discoloration. The aim is to preserve the bag’s original integrity while ensuring the surface is uniform and ready for cutting. If the bag carries a strong, persistent odor, airing along with a slight baking soda treatment can help neutralize smells without leaving a residue that might transfer to the finished tote.
With the bag clean and dry, the path to cutting and shaping becomes clearer. The standard approach—turning the bag inside out and opening along the existing seams—has every practical purpose: it respects the bag’s original construction, preserves the logo and colorful printing, and uses the preexisting lines as guides for where to cut. This technique minimizes waste and helps maintain a clean edge that is easier to finish later. When you turn the bag inside out, you reveal the interior seam lines that were designed to withstand stress during transport. Cutting along these lines with a sharp pair of scissors or a utility knife yields clean edges and helps to reduce fraying. Preserving the logo or brand label becomes a design feature rather than a compromise. The printing and branding lend the tote a sense of character, making it uniquely yours while nodding to its agricultural origin. The resulting panels—two almost identical rectangles—form the front and back of the bag and provide the basic spatial geometry you will carry forward into the sewing phase.
What follows the clean, careful cutting is a consideration of how the handle will be attached and how the top edge will be finished. The prep phase is a perfect opportunity to map out that plan, ensuring you do not disrupt the bag’s printed elements or weaken the structure. If you decide to add a bottom panel for more shape, you can lay out your cut pieces and check that the bottom piece aligns with the bag’s planned proportions. The reinforced handles that will anchor your tote are not a trivial detail; they are the lifelines that allow the bag to bear weight day after day. To fashion robust handles, you can cut strips from the sides of the original bag—typically about 1.5 to 2 inches wide and 20 to 24 inches long. Fold these strips in half along their length, press them flat, and sew along both long edges to create sturdy, double-layered handles. Attaching the handles is a moment to think about stress distribution. Sew them to the inside of the front and back panels at the top corners, ensuring each attachment point receives a secure, reinforced stitch. This not only strengthens the bag but also adds a tactile, almost craftsman-like finish that elevates the final piece beyond a simple reuse.
Throughout this process, the practical and aesthetic considerations are interwoven. The bag’s material—HDPE or woven polyethylene—ends up performing in concert with your cutting plan, your seam choices, and your finishing touches. The decision to preserve the logo becomes a deliberate design choice, turning an upcycled item into a recognizable symbol of sustainable fashion. It is this synergy between function and form that makes prep so essential: it respects the bag’s origin while revealing its potential to be both practical and stylish in daily life. For those who want to explore broader textile-inspired approaches to tote design or to see how different fabrics influence a tote’s silhouette, you can explore options at Fabric tote bags for women, which discusses how texture, print, and weight contribute to a tote’s overall personality.
In the broader arc of upcycling and sustainable design, preparation is a quiet act of intention. It signals to the bag and to the user that preparation and care matter, even in steps that seem routine. The goal is not simply to transform a feed bag into a tote; it is to demonstrate a process that respects materials, reduces waste, and results in a durable, enduring object that can accompany daily life for years. When you approach prep with patience and attention to detail, you set a tone for the subsequent steps—cutting, assembling, and finishing—that makes the final product feel cohesive, well-made, and worthy of daily use. And in the end, the tote becomes more than a carrying vessel; it becomes a small, tangible statement about practicality meeting creativity, about making what is already around us work a little harder in service of both style and responsibility. For a more visual, step-by-step reference, you may consult a detailed external resource that walks through the full project from start to finish: https://www.instructables.com/How-to-Make-a-Tote-Bag-from-an-Old-Feed-Bag/.
Weaving Utility and Style: Sewing a Tote Bag from a Feed Bag
A feed bag is more than a sack; it is a compact bundle of potential waiting to be repurposed. The material, usually a sturdy high-density polyethylene woven into a tight weave, carries a quiet promise of resilience. When you decide to turn that bag into a tote, you are not just saving waste; you are choosing a practical companion for daily errands, weekend markets, or a library visit. The process rewards patience and precision, but it is also forgiving for beginners who approach it with curiosity and care. The first lesson is selection. Look for a bag that feels solid in hand, with a dependable seam along the edge and no hidden holes or weak spots. A visible logo or color print can be kept as a design quirk, a small signature of the bag’s origin that gives your tote character. The goal is to work with material that can handle weight and wet weather—HDPE in particular resists moisture and tears, and its smooth surface is easier to clean than it looks at first glance. With the right bag, you have a durable foundation that can take on groceries, books, or effortless daily use, all while cutting down on single-use plastic waste.
Preparation is the quiet art of setting up for success. Begin by turning the bag inside out and carefully cutting along the original stitching to lay the fabric flat. A utility knife or sharp scissors will do the job, but you need to work slowly to avoid snagging the edges. Preserve the logo and any colorful printing you like; the printed details become the bag’s personality rather than something to hide. This is not a project that needs to erase the bag’s past. Rather, it invites you to honor it by reimagining its shape and purpose. Once open, you will see two main panels that form the front and back of your future tote. Decide the size you want—A4-sized panels work well for everyday errands, but you can scale up if you need more capacity. The rectangular geometry of feed bags remains a practical guide: cut two identical panels, then consider a bottom panel to lend structure. If you do add a bottom panel, cut it slightly smaller than the main panels to preserve a clean, comfortable footprint when the bag stands on its own.
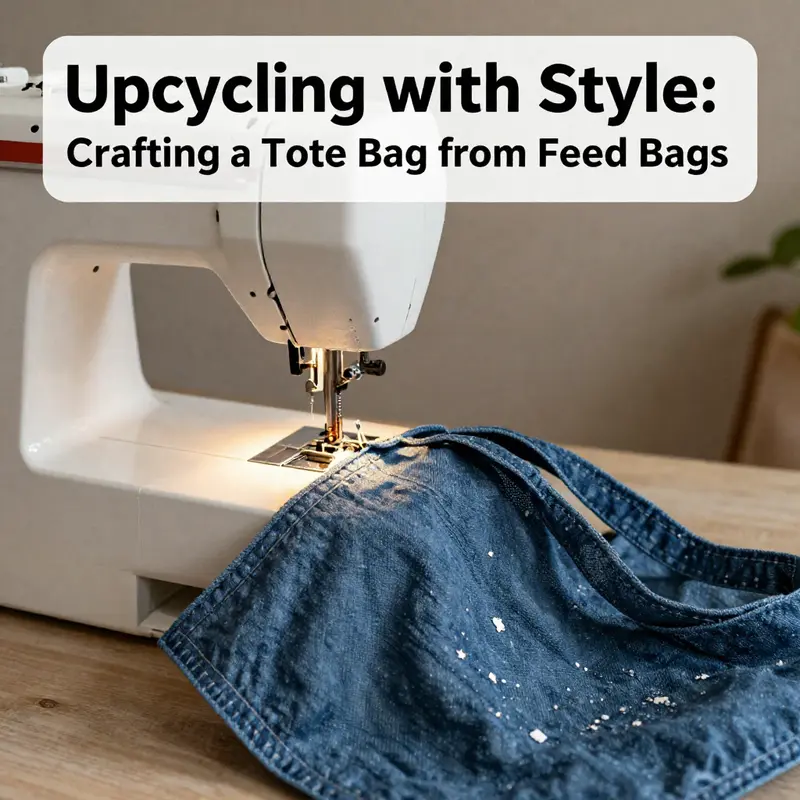
As the fabric comes together, think of the bag as a simple container whose job is to endure weight and resist the weather. Place the two main panels with the right sides facing one another and begin sewing along the two long edges. A sewing machine makes quick work of this, but by hand with strong nylon or polyester thread you can still achieve a sturdy seam. Leave the top edge open for now, because you will later fold and finish it to prevent fraying. Pressing the seams flat helps them stay neat and distributes stress evenly. If you have access to a heat source compatible with plastic materials, a gentle pass with a seam roller or heat-freeze elements can help the edges settle. The goal is smooth, even lines that won’t pull apart under load.
With the main body formed, you can decide whether to add a bottom panel. If you prefer a more structured tote, attach the bottom by sewing around the edges where the panel meets the main body. Alternatively, a simple technique is to fold the bottom corners inward and sew a straight line across the base; this creates a flat floor that won’t sag under weight. Either method strengthens the bag’s balance and steadies its stance on a table, shelf, or the curb while you fill it. Now you are ready to craft the handles. Cut two strips from the bag’s side seams or from leftover fabric, each about 1.5 to 2 inches wide and 20 to 24 inches long. Fold each strip in half lengthwise and press flat. Sew along both long edges to form a reinforced loop that can bear weight. Attach the handles to the inside of the bag by sewing through the top edge of the front and back panels, securing at the top corners with multiple passes to ensure resilience. The choice to sew handles inside rather than outside keeps the lines clean and reduces snag points when you carry the tote.
Turning the bag right-side out reveals the clean, disciplined silhouette you have created. To protect the edges and give the top a finished look, consider a simple zigzag hem along the top edge or, if you have heat-sealing tape designed for plastic, apply a thin strip to seal the edge gently without melting the whole bag. For a crisper finish, you can also opt for a light adhesive sealant to smooth the inner edge and reduce fraying. The goal is a tidy finish that looks deliberate rather than improvised. As you inspect, check every seam and the attachment points of the handles. Tug gently at the corners and along the top to reveal any weak spots; if you find a thread pulling or a seam that feels loose, reinforce it with a quick pass of stitching or a dab of clear adhesive where appropriate. A well-made tote should invite daily use, not require delicate treatment.
Some makers like the option to line the tote for extra structure or to extend its lifespan. Lining provides a quiet defense against wear and tear, especially if the bag will carry sharp-edged items or heavier loads. If you choose to line, use a fabric such as a durable canvas or denim that suits your style. Cut a lining piece that mirrors the main panel shape, minus the top edge allowances, and assemble it separately before attaching it to the bag’s interior. The lining can be sewn to the inner seams or anchored at the top via discreet stitches. A lining also creates a handy pocket or two, which help separate items—perhaps a small notebook, a lunch, or a portable charger—from heavier goods. The lining adds weight and structure, but it also gives you more creative room. Embellishments, like a small patch, embroidery thread, or even a reinforced inner pocket, let you personalize the piece while keeping the exterior minimalist.
Personalization is a natural extension of this project. The external look can be as restrained as a single color band along the top edge or as expressive as patches and stitching that echo your style. You can carry the signature of the bag’s origin while still signaling your own taste. If you choose to embellish, do it with materials that stay bonded to plastic or to the lining: embroidery yarn adapted with a water-based stabilizer, fabric patches applied with a lightweight adhesive, or even a stitched geometric motif along the seam line. The craft is less about perfection and more about thoughtful choices that respect the material’s properties. The resulting bag becomes not only a practical carrier but a small canvas that communicates your approach to sustainability and creativity. A subtle way to connect with broader trends is to consider how the tote fits into current design conversations. For design inspiration and trends, see the Tote Bags Trending page.
The usefulness of a feed-bag tote extends beyond its aesthetic. It is lightweight, water-resistant, and surprisingly resilient. The exterior can shrug off minor rain bursts and light splashes, and the interior remains comfortable to touch even when the bag is wet. The texture of the material is forgiving for everyday handling, whether you are loading groceries, books, or gym gear. Its shape holds firmly, thanks to the careful cutting and the bottom treatment, and the reinforced handles make it comfortable to lift and carry without digging into your palms. This practical performance is what makes upcycling so compelling: it is not only about reusing what would otherwise go to waste, but about creating everyday props that can stand in for store-bought alternatives. The simple act of turning a feed bag into a tote is a small, repeatable ritual of resourcefulness that adds up across a lifetime of errands.
Beyond the mechanics, there is a gentle discipline to pace and care. Work with clean, dry hands and a calm workspace so threads, adhesives, and seams stay tidy. If you encounter a stubborn edge, use a seam roller or a gentle press with a warm iron as appropriate to flatten out any warping from the cutting. Wipe the exterior with a damp cloth when necessary and avoid harsh solvents that could degrade the plastic surface. The care routine for the bag is straightforward: a quick wipe after use, a light air-dry to prevent moisture from lingering, and a mindful approach to loading weight until you know the bag’s limits. With a modest amount of attention, your tote will mature into a reliable companion that earns its keep on trips to the market, the library, or the post office.
The social and environmental angle of this project matters as well. Reuse of feed or fertilizer bags reduces waste and demonstrates how sturdy materials can be given new life without compromising performance. It aligns with a broader ethic of mindful consumption, where long-lasting, repairable goods are valued over disposable alternatives. The tote you create can travel through seasons, accompany you on countless trips, and become a small, tactile reminder that everyday items can be redesigned with care. In a world that often favors newness over durability, a well-made feed-bag tote stands as a quiet argument for slower, more intentional making. And because the process invites experimentation, you can adjust thickness, height, and capacity as your skills grow, iterating toward a bag that perfectly suits your routines.
The practical steps you’ve followed—selecting a sturdy bag, preparing it, cutting two main panels, optionally adding a bottom, sewing strong handles, finishing the top edge, and optionally adding a lining—form a cohesive approach that works with minimal tools and a reasonable amount of time. It is a method that respects the material’s strengths, and it rewards careful planning with a result that feels sturdy in your hands and steady on your shoulder. If you wish to explore further ways to expand the project, you could add a small interior pocket for keys and cards or integrate a sash of contrasting fabric along the top edge to signal a personal signature. The core technique remains the same: work with the natural rectangle, build the sides, anchor the handles, and finish with a simple, durable edge. The goal is not to overcomplicate the design but to refine it, letting the feed bag’s inherent durability support a bag that is both practical and aesthetically pleasing.
For those who want a visual guide to accompany these steps, an instructional video offers a clear walk-through that complements the written method. It shows how to prepare the bag, cut the panels, and sew the pieces together, step by step, with close-up demonstrations of sewing techniques and edge-finishing options. This multi-media approach can help absolute beginners feel confident as they begin—and can also serve as a quick refresher for seasoned crafters who want to revisit the basics before adding their own twists. If you’re curious to explore more about the broader world of tote design, you might also browse related topics on the same site that hosts practical guides and inspiration for upcycling and handmade bags. The journey from bag to tote is not just a technical exercise; it is an invitation to participate in a community of makers who value ingenuity and stewardship in equal measure.
In sum, turning a feed bag into a durable, practical tote is a disciplined, creative act. It teaches respect for material and discipline in technique, while inviting you to add your own personal stamp through lining choices, pockets, or decorative touches. It is enough to transform a simple rectangle of HDPE into a steadfast companion for daily life. And because the process is grounded in straightforward steps, it remains accessible to anyone who is willing to invest a little time and a bit of patience. The tote that emerges from this sequence is not merely a tool; it is a testament to upcycling’s promise—that with care, even the most common waste can be reshaped into something useful, reliable, and stylish. For those who want a visual walk-through, an instructional video offers a clear demonstration: Instructional video.
From Rough to Refined: Finishing Touches that Turn a Feed-Bag Tote into Everyday Durable Style
The finishing phase of a tote bag crafted from a feed bag is where practicality meets personality. It is the moment when a material that started life on a farm or in a warehouse is reimagined as a reliable everyday companion. The HDPE surface, once simply rugged and utilitarian, can be guided into a shape that carries not only groceries or books but also a sense of environmental responsibility. Finishing touches do more than improve appearance; they protect the bag under real-life use, distribute weight more evenly, and extend the bag’s lifespan. As you work through these final steps, think of the tote as a garment for your daily errands—designed to move with you, age gracefully, and refuse to give up when loaded. The goal is a bag that looks purposeful yet feels effortless to carry, a sturdy piece that can be washed, wiped, and tucked under a seat without a sigh of wear.
First comes reinforcement. After sewing the main panels and, if included, the bottom panel, the bag gains its backbone through a careful second pass of stitching along every seam. This is not merely cosmetic; it is the difference between a bag that gives way at a corner and one that maintains its shape under pressure. If you used a straight stitch for the main assembly, now is the time to reinforce with a heavier, denser stitch. Start with the long seams where the front and back panels meet—the ones that bear most of the weight when you fill the bag. Backstitch at the beginning and end of each seam, then add a second, parallel line of stitching about a millimeter away from the first. For a more rugged finish, consider a small zigzag or a triple stitch on the outermost edge where the fabric meets the top edge or the base. In HDPE, where edges can be prone to curling, this extra security serves as a belt-and-suspenders approach: it keeps threads from loosening under strain and minimizes the risk of fraying over time.
As with any fabric that will rub and carry heavy loads, the edges deserve careful attention. Neatening the raw edges dramatically improves both durability and finish. Pinking shears are a quick, traditional option, creating a zigzag edge that resists unraveling. If you own a serger, a trim and overlock along the raw edges can produce a clean, professional look in a single pass. The choice between pinking shears and a serger often depends on the tools you have at hand and how much you anticipate washing the bag. For a more casual project, pinking shears provide a neat effect that still reads as handmade. If you plan to machine wash the bag, a light serger finish around the interior seam can prevent stray threads from catching on fabrics in your washing machine. Either method helps you avoid loose threads, which can snag and cause wear in busy pockets and along the top edge.
The handles, as the widest-stressed feature of the tote, deserve targeted reinforcement. The weight of a loaded bag tends to transfer through the handles, concentrating strain at their attachment points. A thoughtful reinforcement piece—a small fabric patch, cut from leftover feed-bag or any sturdy scrap—can be stitched inside where the handles attach to the body of the bag. Place the patch on the interior side at the top edge where each handle meets the outer panel and the lining, if you added one. The patch should be large enough to distribute load across a broader area but not so large that it interferes with the bag’s opening. Sew the patch to both layers at the top corners, creating a durable anchor that reduces the risk of tearing. If you have access to a rivet tool or strong metal eyelets, you might also consider additional hardware for a fully industrial look, but only if your materials can accommodate them without creating sharp edges or protrusions that could wear on the fingers during use. The aim is quiet strength—the kind of reinforcement you can feel when you heft the bag and know it won’t collapse under pressure.
Lining is another potent finishing touch that can elevate a feed-bag tote from rugged to refined. The feed bag fabric itself can serve as an outer shell, but adding a lining not only protects the bag from wear but also creates a cleaner interior that’s easier to wipe down. A canvas lining delivers a sturdy, breathable, and relatively easy-care interior; it accepts topstitching well and wears gracefully with repeated use. Old jeans or sturdy cottons can serve as economical lining options; they bring color and texture while keeping the project affordable. When attaching a lining, align the lining pieces to the outer panels at the top edge and stitch in a way that hides the raw edges between the two layers. A common approach is to sew the lining to the outer fabric at the top edge, leaving the bottom seam free, then turn the bag right-side-out through the top opening and press. The result is a bag with a crisp interior that makes pockets and items easier to locate and manage. Internal pockets—one larger slip pocket for a notebook or phone and a smaller one for keys or a coin purse—can be added to the lining for organization. If you’ve included a bottom panel in the design, the lining should extend to the base, maintaining a continuous pocket structure that doesn’t sag or twist when the bag stands on its own.
A polished finish is not complete without a careful press that sets the shape you’ve created. A warm, evenly distributed press helps flatten seams, secure topstitching, and erase the slight waviness that can occur after handling. Use a pressing cloth to protect the HDPE if you’re applying heat directly; a gentle touch with a clean cotton towel between the iron and the bag can prevent unwanted melting or warping. If your iron settings are too hot for plastic, consider using a steam-free setting or a seam roller for pressing along the outer seams. In some cases, a light mist of water can help set creases and folds when followed by pressing. The goal is not a stiff, rigid tote but a bag that holds its shape while remaining flexible enough to fold into a tote or larger bag without creasing the surface.
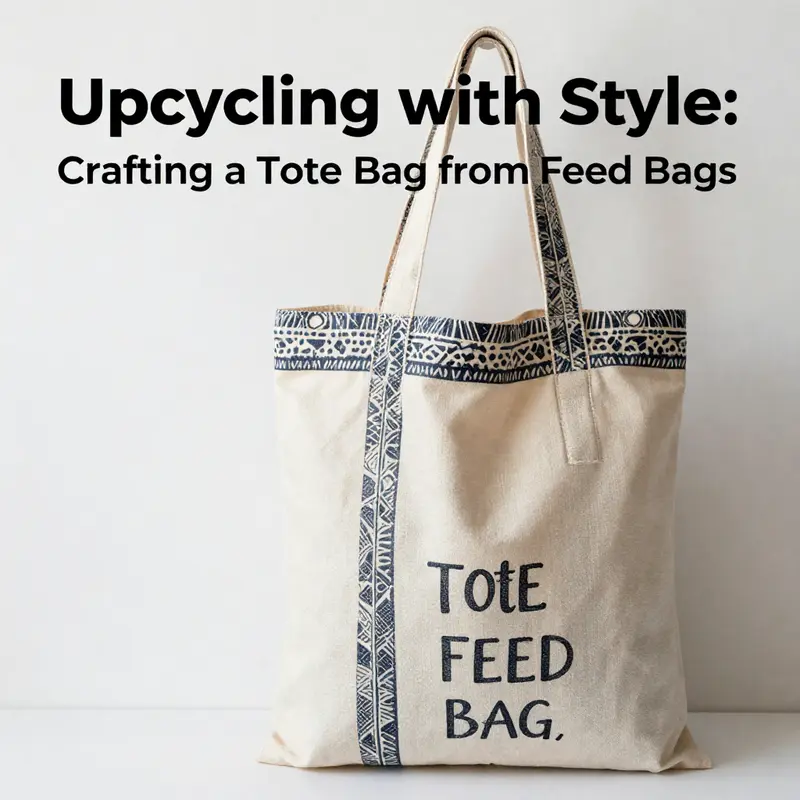
Beyond the structural basics, finishing touches can weave personal style into the tote. A simple decorative element—like a contrast top stitch in a bold color or a narrow binding along the top edge—can transform a humble feed-bag tote into a fashion-forward companion. If you kept the original logo intact on the bag, you’ve already preserved the story of the bag’s origin; now you can decide whether to echo that identity with subtle design cues or to minimize branding for a more minimalist look. Remember, the goal is balance between function and form. The bag should feel like it belongs to you while remaining adaptable for different settings: a quick grocery trip, a stroll at the farmers’ market, or a casual workday carry-all.
Hardware and closures provide a practical punctuation mark to your finishing work. Depending on how you intend to use the tote, a zipper or magnetic snap can be a welcome addition. If you opt for a zipper, you might attach a zipper tape along the top edge or one that runs only partway for a wide, open mouth. Magnetic clasps can offer quick access while maintaining a clean exterior. When integrating closures, ensure that the attachment points are reinforced, and consider fabric shields to prevent wear at the closing edge. If you’d rather keep the bag entirely simple and focused on its upcycled charm, top-stitching and a well-hemmed edge can be more than enough to convey a crafted look. In either case, the finishing touches should feel intentional—like a tailored piece rather than a rough rebuild.
Another practical refinement is the option to add a water-resistant treatment to the exterior. Feed bags are inherently water-resistant, but a light application of a silicone-based spray, carefully used and allowed to dry completely, can offer improved protection against rain and splashes. Ensure the spray is compatible with HDPE and used in a well-ventilated area. Test the treatment on a small, inconspicuous patch first to verify that the color and texture don’t alter unexpectedly. If you prefer to avoid chemical sprays, a natural wax finish can also provide a similar protective layer; rub a small amount along the surface, then buff with a soft cloth to even out the sheen. Either approach helps keep the tote looking new longer, especially when it encounters damp surfaces or outdoor use.
Of course, the finishing phase invites experimentation and personalization. If you’re using leftover fabrics, you can create a two-tone effect by applying a contrasting inner panel or pocket fabric. The choice of lining color, stitch color, and even the texture of the bottom panel can add depth to the finished piece. When you step back to assess your bag, look for balance: the top edge should align neatly with the front and back panels, the bottom should sit flat, and the handles should lie comfortably against the body without twisting. The bag’s silhouette should be purposeful—rectangular enough to palm a book and deep enough to carry the day’s groceries—yet flexible enough to collapse slightly for storage when not in use.
If you wish to extend this project into a broader learning experience, consider the hardware and acceleration of your maker’s journey by exploring options for closures and accessories. For readers curious about expanding their tote project into more complex designs, you can explore resources on hardware options such as zippers, buttons, and magnetic clasps in the context of tote construction. For example, you can explore this resource about zipper options and closures in tote designs: tote bags with zippers.
As you finish, do a thorough test of every seam and attachment. Empty the bag, give it a gentle shake, and apply a modest load to simulate real use. Check the weight distribution, the resilience of the corners, and the firmness of the base. If any area shows signs of strain—perhaps a seam pulling or a corner bowing—address it with an extra stitch, a patch, or an additional layer of reinforcement. The aim is a bag that you trust to carry a day’s worth of groceries, a stack of books, or a laptop in a protective sleeve. But the last thing you want is to overdo it with the hardware or fabric choices, making the tote stiff or uncomfortable to carry. The finishing touches should harmonize with the bag’s function and your own everyday life, not overwhelm the simple joy of repurposed material crafted into something useful and chic.
In sum, finishing touches transform a feed-bag tote from a rough utilitarian object into a reliable companion that can travel with you through a crowded market, a library aisle, or a casual coffee stop. The steps—seam reinforcement, edge finishing, interior lining, handle strengthening, careful pressing, thoughtful detailing, and prudent hardware choices—are a sequence of small acts that culminate in a big improvement. This is the art of upcycling with intention: recognizing that the seed of durability and style was always present in the material, and then coaxing it forward through careful craftsmanship. The result is a bag that honors the original bag’s sturdy spirit while embracing new life as a sustainable everyday essential.
External resource for further inspiration and visual guidance: https://www.pinterest.com/pin/780739697642971552/
Final thoughts
Creating a tote bag from a feed bag is an inspiring way to embrace sustainability while offering practical and stylish products. By selecting the right materials, preparing them effectively, and assembling them with care, businesses can produce unique items that resonate with eco-conscious customers. This initiative not only reduces waste but also amplifies your brand’s commitment to sustainability. As you embark on this crafting journey, remember that small steps like these can make a significant impact in promoting environmental responsibility and creativity in your business.