Tote bags have become essential accessories for consumers, offering a perfect blend of style and utility. For business owners, creating your own tote bags not only provides a unique branding opportunity but also showcases your commitment to sustainability and customer engagement. This guide will walk you through the essentials of choosing materials, the step-by-step process for making tote bags, and effective customization techniques. Each chapter focuses on key aspects crucial to producing functional and aesthetically pleasing tote bags that resonate with your brand’s image.
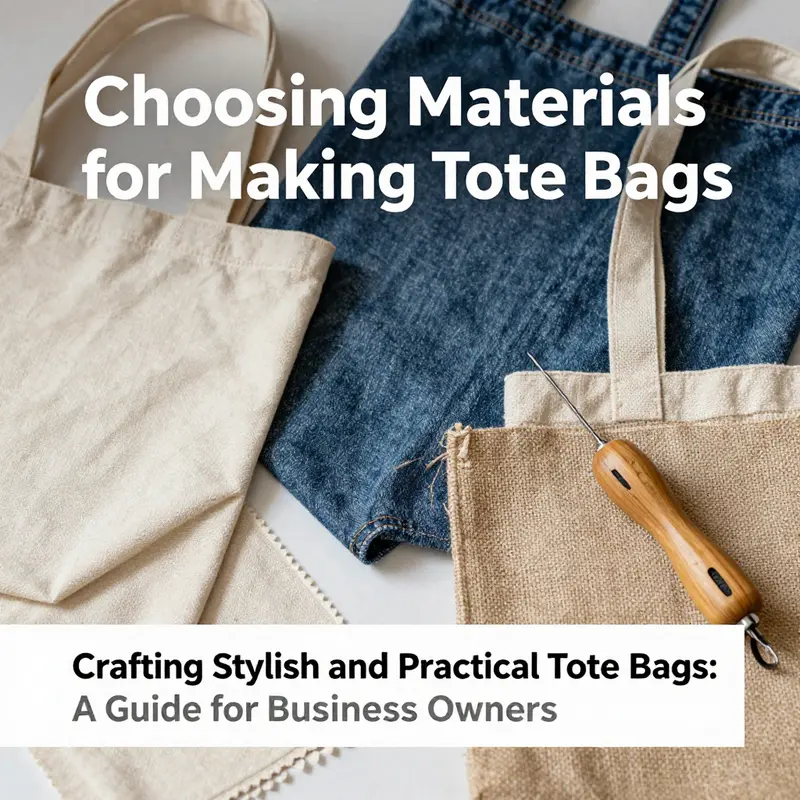
Choosing Materials: Selecting Durable, Sustainable Fabrics and Components for Your Tote Bag
Material Choices and Practical Trade-offs
Choosing the right materials shapes every stage of making a tote bag. The fabric you pick decides the bag’s strength, feel, and how it wears. It also determines how easy the bag is to sew, how it behaves when washed, and how it will age. Think beyond appearance. Balance durability, sustainability, and function. Consider weight, water resistance, maintenance, and the final look you want. This chapter guides you through the common options and helps you match a material to a use case.
Start by asking a few simple questions. What will you carry? Will the bag hold groceries, books, or a laptop? Will it face rain and rough handling, or will it be a light carry-all for errands? How important is eco-friendly sourcing to you? How much structure do you want? Answers to these questions narrow the choices and make the sewing work more predictable.
Cotton canvas is a reliable starting point. Dense, tightly woven canvas in the 10-ounce range or heavier gives a strong base. It resists tearing and holds shape well when paired with interfacing. Canvas is breathable and easy to sew with standard household machines. It accepts dye, paint, and printing, so it is perfect for personalization. Canvas is not inherently water-resistant, though some varieties are coated or can be treated. For everyday carry, a heavy cotton canvas offers the best mix of workability and longevity. Choose selvedge or tightly woven bolts to minimize fraying when you cut.
Waxed canvas raises practicality further. The fabric gains water resistance from a wax coating. That coating also adds weight and a distinctive finish. Waxed canvas will develop a patina with use. It resists light rain and splashes, making it a great choice for commuters. Sewing waxed canvas requires a heavier needle and a longer stitch length. The wax will build up on machine parts, so protect your equipment and clean the needle area when finished. Test seam strength on scraps before cutting the main pieces. Waxed canvas can be harder to press, and repeated ironing can melt the finish, so use low heat and a barrier cloth.
Leather delivers elegance and exceptional durability. Full-grain leather is the most durable and develops a rich luster over time. It resists scratches and keeps structural shape. Top-grain leather offers similar durability but is slightly thinner. Both demand different tools and techniques than fabric. Use heavy-duty needles, polyester thread, and consider hand-stitching for decorative or reinforced areas. Leather is heavy, so use it selectively for bottoms, base panels, straps, or trim rather than as the entire body, unless you want a very sturdy and formal tote. Bonded leather is cheaper, but it tends to peel and flake. Avoid it for a long-lasting project.
Recycled polyester, often labeled rPET, combines sustainability and performance. It is made from post-consumer plastic bottles. The fiber is weather-resistant and dries quickly. It is lightweight and holds prints reasonably well. rPET is less breathable than natural fibers, but it resists mildew and stains. If environmental impact matters, rPET reduces landfill waste and lowers the carbon footprint versus virgin polyester. It may not offer the same natural aesthetic as cotton or leather, but it performs well for travel and outdoor-oriented totes.
Cotton-blend fabrics and lighter-weight options suit casual, decorative, or lined bags. Blends are easy to clean and often come in attractive prints. They work best when you want a soft, flexible tote. These fabrics lack the structure of canvas, so add interfacing or a lining to prevent sag. Lightweight fabrics work best for market bags, beach totes, or promotional items. Remember that thin cottons will show wear faster if you carry heavy loads often.
Interfacing and stabilizers are the unsung heroes of a well-made tote. Fusible interfacing adds stiffness and body. Use medium- or heavyweight fusible interfacing on panels that need shape. A buried or sewn-in stiffener such as canvas or buckram creates a strong base. For laptop or work totes, include foam-backed interfacing or a quilted layer for padding. Quilting can add both structure and visual interest, but it increases the number of layers to stitch. Pick interfacing appropriate to your fabric’s weight. Too stiff an interfacing can make seams bulky. Too soft one won’t help with structure.
Handles deserve special attention. They see the most stress. Choose sturdy webbing, leather straps, or fabric-wrapped handles sewn with reinforced stitching. Webbing made from cotton or polyester resists wear and is easy to attach. For a refined look, make handles from folded and stitched fabric tubes with a core of interfacing or light foam. If you sew handles yourself, fold edges inward and stitch several rows for durability. Place handle ends 4 to 6 centimeters from the bag’s center on each side to balance load. Reinforce attachment points with a box-and-cross stitch, bartack, or a small square of fabric placed behind the seam.
Think about linings and interior pockets. Linings hide seams and add longevity. They also prevent fine items from snagging on raw edges. Use a durable lining for heavy-use bags. Nylon or rPET lining fabrics resist abrasion and liquids. For a more natural feel, choose cotton or cotton blends. Add an interior pocket for quick access to keys, phone, or small items. A zippered pocket increases security. Make pocket pieces slightly smaller than the bag panels so seams and topstitching fit neatly.
Hardware choices influence both function and aesthetics. Metal grommets, rivets, magnetic snaps, and zippers offer different benefits. Heavy-duty zippers are ideal for secure closures. Magnetic snaps give easy access but less security. Grommets and rivets reinforce areas where handles meet the bag or where drawstrings pass. Use hardware that matches your fabric’s weight; light grommets on a heavy canvas can look out of proportion and stress the material, while very heavy hardware on a lightweight fabric can pull and tear.
Cutting and preparing materials is critical. Use a rotary cutter and cutting mat for straight, clean lines. Mark patterns with chalk or a fabric marker that fades or washes away. When cutting fabrics prone to fraying, add a half-centimeter to a centimeter for seam allowances and consider pinking shears or a serger finish. For leather, make pattern adjustments to account for thickness. Avoid pins on leather; use clips instead to prevent permanent holes. Test sewing settings on scrap pieces, particularly when working with coated, waxed, or synthetic fabrics.
Stitching techniques vary with material. Use polyester thread for general strength and flexibility. For leather or heavy canvas, consider bonded polyester or upholstery thread for reinforcement. Adjust stitch length to suit the fabric: longer stitches for thick materials, shorter for delicate ones. Topstitching not only strengthens seams but also gives a polished look. Stitch slowly through multiple layers to avoid skipped stitches. Use a walking foot or non-stick presser foot when sewing bulky or sticky textiles. When handling many layers, reduce bulk at seams by trimming allowances or grading seams where possible.
Care and maintenance affect material choice too. If you want a low-maintenance bag, pick durable synthetics or waxed canvas. These handle spills and require less special care. Natural cotton and leather require more attention. Cotton can be machine-washed if cut properly, but heavy canvas may shrink. Always test a scrap for wash behavior. Leather must be conditioned and kept away from prolonged moisture. For longevity, design your tote so that parts most exposed to wear are replaceable. Sew handles in a manner that allows them to be restitched or replaced over time.
Aesthetic considerations should not be underestimated. The right fabric can communicate the bag’s purpose. Canvas suggests utility and simplicity. Waxed canvas implies rugged durability. Leather feels upscale and timeless. Bright cotton prints convey a casual, playful mood. Mixing materials lets you balance function and style. A canvas body with leather trim adds strength and a premium look. Use contrasting fabrics for pockets and linings to create visual interest, while keeping the bag coherent and purposeful.
Sustainability is increasingly important when choosing materials. Prioritize recycled fibers, responsibly sourced cotton, and vegetable-tanned leather when possible. Recycled polyester reduces reliance on virgin petrochemicals and gives a second life to plastics. Organic cotton avoids pesticides in farming. Leather that is certified or tanned with minimal chemical usage has a smaller environmental footprint. If environmental impact matters, list your priorities and check materials against them. Small choices add up: selecting recycled interfacing or using scraps for small pockets reduces waste.
Practical tips help avoid common pitfalls. If using multiple materials, pre-wash and pre-shrink cotton fabrics before cutting. This step reduces distortion and future warping. Match thread color to your main fabric for inconspicuous seams, or choose contrasting thread for decorative topstitching. Reinforce the base with a removable or sewn-in panel to keep the shape under heavy loads. When attaching heavy handles, add an internal reinforcement patch. When you need water resistance, consider a spray-on fabric proofing product rather than altering the sewing method.
Finally, plan for the bag’s life. Think about how it will be used five years from now. Choose materials that you can repair and maintain. Design seams and attachments so they can be restitched if they fail. Keep extra lengths of webbing or matching fabric scraps to replace worn handles later. A thoughtfully chosen material palette makes the tote easier to care for. It also extends the bag’s useful life and reduces the need to replace it.
For inspiration and reference, explore examples of canvas tote designs and practical variations at this resource on women’s canvas tote bags. For a deeper look at sustainable materials and their environmental considerations, consult this external guide: https://www.britishcouncil.org/learning/eco-friendly-fashion-materials
From Raw Fabric to Everyday Utility: A Thoughtful Guide to Crafting Your Own Tote Bag
A tote bag is more than a simple carryall. It is a portable canvas for personal expression, a practical companion for errands, and, when you make it yourself, a small achievement you can see every time you lift it from the rack or pull it from the car hatch. The beauty of making a tote bag lies in its accessibility. It welcomes beginners with straightforward measurements, sturdy construction, and room for experimentation. You can lean into durable materials for daily use, or opt for lighter fabrics when the bag is meant as a quick accessory. The project rewards method and patience, but it also rewards curiosity. When you begin, treat the process as a conversation between fabric and hand, between plan and impulse, and you will end with a bag that feels both reliable and personal.
To start, assemble a practical wardrobe of materials. The exterior usually uses a durable fabric such as cotton canvas or denim, chosen not only for its look but for its resilience to daily wear and tear. A typical starter size uses two main pieces, each about 32 centimeters by 70 centimeters. If you want a double-sided bag with a contrasting interior, you can cut two identical outer panels and two lining panels. Interfacing is optional but worth considering if you want extra structure, especially along the top edge and the main panels that bear the weight of groceries or books. For handles, flexible webbing works beautifully, though cut fabric strips or denim can also be turned into strong straps with careful folding and stitching. A width of about 5 centimeters for the handles is comfortable, and length around 32 centimeters to 90 centimeters gives you options for hand carry or shoulder wear. When you choose thread, use a sturdy polyester or a cotton-wrapped polyester that can handle a little strain without snapping. You will also need a few simple tools: scissors or a rotary cutter for clean edges, a measuring tape, pins or clips to keep pieces aligned, a sewing machine for efficiency or a needle for hand-stitching, and an iron with a board for crisp edges. A chalk marker or fabric marker helps you translate measurements onto fabric with precision. With these supplies in front of you, the project begins to unfold like a small architecture of fabric.
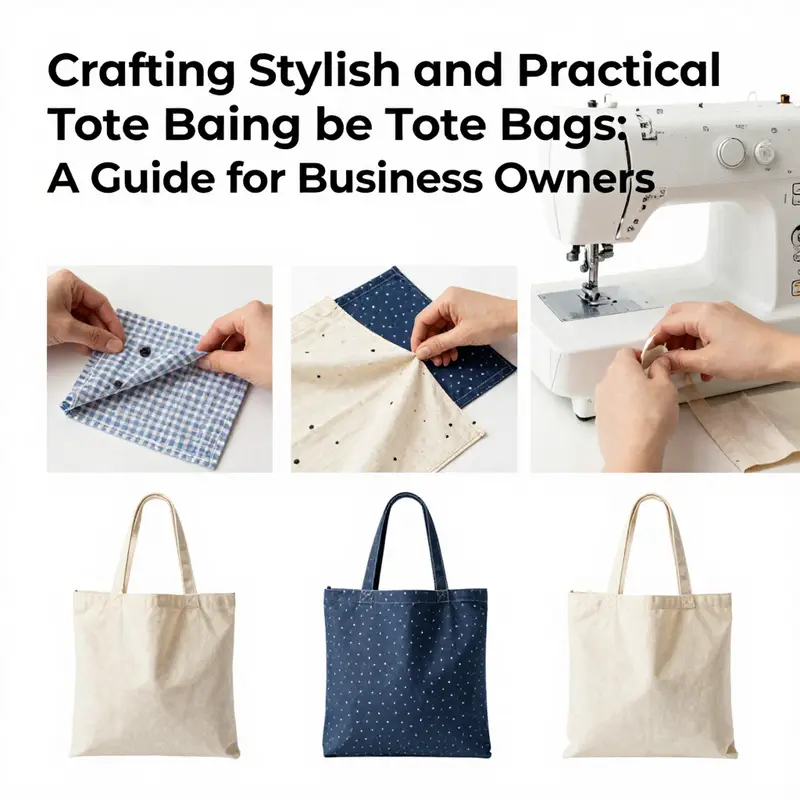
In the first actual steps, you focus on cutting and preparing. Cut the main body pieces according to your chosen size. If you are following a traditional starter pattern, this means two outer panels of the same dimensions. If the plan includes a lining, you will also cut two inner panels with the same sizes. The handles come next; you want two strips of fabric about 32 centimeters long and roughly 5 centimeters wide, though you can adjust based on your torso length or desired carry style. For fabric handles, you fold each strip in half lengthwise with the right sides together, then sew along the folded edge with a seam allowance of about 1 centimeter. The purpose of this simple seam is not just to close the edge but to create a clean, sturdy strap that won’t unravel at the corners. After sewing, turn the strap right side out and press it flat so the edge finishes are crisp and the strap feels comfortable in your hands. If you are using webbing, you can skip this folding step, as webbing is designed to hold its shape; in that case, you may simply attach the ends to the bag with reinforced stitches.
Optional pockets can add organization without complicating the design. A small interior pocket, for instance, may be cut as a piece around 20 by 13 centimeters, folded along the top edge to form a neat, finished opening, and then sewn along the sides. When you place pockets, align them with the center of the outer panel to keep the bag balanced. Pockets are an opportunity to play with color, texture, or pattern. If you are sewing a cabin-friendly tote, perhaps your pocket fabric is a linen with a little structure, or a contrasting cotton that makes the interior easy to scan when you reach for your keys or phone. The pocket piece can be pre-pressed into a neat rectangle, then pinned to the inside of one main piece before you begin assembling the outer bag. As with all steps, test fit and alignment by laying the pieces flat before you stitch.
With the pieces prepared, the outer body comes together next. Place the two main outer pieces right sides together, then pin or clip them along the sides and bottom to hold the fabric steady. A 1 centimeter seam allowance is a reliable standard for beginners; it gives strength while keeping the seams clean. Sew along the sides and bottom, then consider a decorative topstitch along the seam line. A 0.2 centimeter topstitch line can add subtle reinforcement and a finished look. If you are using the double-sided technique, there is a special method. You offset the top edges by roughly 8 centimeters so that, when folded, you create two narrow side pockets with a shared base. This requires a careful alignment and the patience to sew three parallel lines to form the pockets. When you reach the bottom corner, turning the corner to create a flat base is essential. The method forms a practical rectangular bottom that keeps the bag stable when loaded. It is a small geometric trick that yields a bag that sits well on a table and carries items without sagging awkwardly.
Attaching the handles is a moment of both practicality and aesthetics. With the bag still wrong side out, place each handle end onto the top edge of the bag with the ends positioned about 5 centimeters from the center point on each side. The exact distance is not a hard rule, but this spacing helps distribute weight evenly across the bag when it is full. Sew the handles securely in place, using reinforced stitches such as a square or an X pattern at the anchor points. This reinforcement is vital because handles carry the load of groceries, books, and occasionally a laptop or hydration bottle. The stitching needs to be robust yet tidy, so consider backstitching at the start and finish of each anchor line. As you become more confident, you can experiment with bar tacks or extra stitching for added durability, especially if you plan to use the tote in a busy urban environment or for frequent shopping trips.
Finishing the bag involves turning the assembly right side out and giving the bag a precise press. If you used the double-sided method, the opening will be located at the bottom and must be handled with equal care. The whole bag is turned so the outer fabric faces outward and the lining is hidden inside. A thorough press is your best friend here; use a hot iron with a steady, even motion to smooth the seams, corners, and any topstitch lines. Pressing does more than flatten; it helps the fabric assume its final shape and reduces the chance of fabric peeking through at the corners. If you wish for a more polished finish, a final topstitch around the top edge can serve as both a reinforcement and a visual accent. It is a quiet, confident line that communicates readiness and care.
One of the great advantages of tote bag making is the room for customization. You can choose different fabric textures to suit the bag’s intended use. Cotton canvas is an excellent base for painting or embroidery, which makes your bag a canvas for personal expression. Denim adds a rugged, everyday vibe; linen can bring a lighter, breezier feel. When using burlap or jute, handle with a gentler touch to avoid excessive fraying, and consider finishing with a light interfacing or a sturdy lining to maintain structure. Inside, the lining can be as simple or as elaborate as you like. A second layer of fabric not only hides the bag’s raw edges but also provides extra durability, particularly if your bag is intended to hold heavy items. If you decide to add a zipper pocket or small interior zipper compartment, the construction principles remain the same but require careful alignment to ensure smooth opening and closing.
To bring another dimension to the project, consider sourcing a little color drama through the handles or top edge. You might choose a contrasting handle fabric or a bold topstitch thread to punctuate the bag’s silhouette. The beauty of a tote lies in its silhouette: clean lines, a generous opening, and enough space to breathe. When working with heavier fabrics, you might choose to forgo the lining for a true raw-edge aesthetic, or you may opt for a light lining to keep the interior tidy and to protect belongings from snagging. Either approach is valid; the choice should reflect your daily needs and your tolerance for maintenance.
If you want to explore practical design inspirations, consider the category women’s canvas tote bags. This internal link offers ideas for color pairing, pocket configurations, and the way different fabrics respond to embellishment. It serves as a reference for how the same basic construction can yield very different looks, from minimalist to bold. Remember that the core technique remains consistent across these variations: you cut, you sew, you turn, you finish, then you reflect on what works best for your body, your routine, and your sense of style. The thrill of making your own tote comes from understanding that you are the designer of your everyday carry. Your choices determine how it stands on a shelf, how it wears on your shoulder, and how long it lasts under a busy weekly schedule.
As you grow more comfortable with the basics, you may begin to think about maintenance. A tote bag is a daily tool; it is advisable to think about care and cleaning from the start. Cotton canvas and denim often respond well to a gentle wash and a quick tumble dry, followed by a light press to restore their shape. If you choose a lighter fabric for the exterior, you may want to avoid overly heavy loads or sharp objects that could snag or stretch the fibers. A lightly interfaced top edge helps the bag maintain its opening, which makes it easier to reach inside and place objects. For decorative purposes, consider adding paint or embroidery before you assemble the bag. If you embroider or paint on the outer fabric, finish the back to minimize fraying and ensure the artwork remains intact after washing. The real point is to treat the bag as a workspace that carries your daily life, not as a project that ends at the moment you stitch the final seam. When you approach your tote with this mindset, you are more likely to enjoy both the process and the result.
In weaving together these steps, you are not just following a routine; you are building a habit of careful measurement, steady stitching, and thoughtful finishing. The materials, while simple, become a means to express personality. The transformations from rough fabric to a ready-to-use tote happen through a rhythm: cut with intention, align with care, sew with patience, turn with purpose, and press with confidence. The result is not merely a bag; it is a vessel tailored to your life. Whether you walk to the market, carry books to a quiet cafe, or stash gym gear for a post-work session, your tote becomes a testament to what you can accomplish with a little fabric, a steady hand, and a clear vision of what you want to carry through your days.
External resource: https://www.thesprucecrafts.com/how-to-sew-a-tote-bag-691641
null

null
Final thoughts
Creating tote bags is not just about sewing fabric; it’s a powerful means of extending your brand’s reach and making a memorable impression on customers. By choosing the right materials, following structured steps, and incorporating unique customizations, your tote bags can be both functional and stylish while reinforcing your brand identity. Whether used for promotional activities, gifts, or retail purposes, the investment in tote bag creation can yield significant returns in customer loyalty and brand recognition.